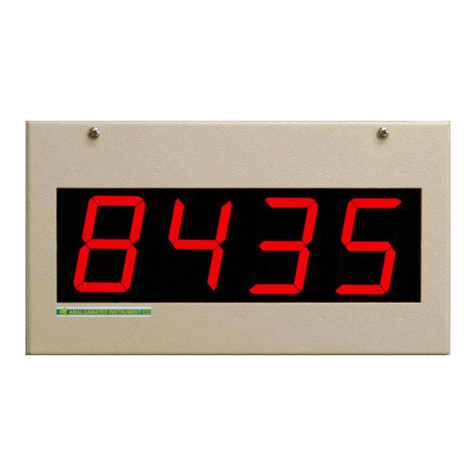
AMALGAMATED INSTRUMENT LD5-RS Guide

LD5-RS and LE5-RS
Large Digit Displays
Operation and Instruction Manual
AMALGAMATED INSTRUMENT CO ABN: 80 619 963 692
NSW 2077 Australia Facsimile: +61 2 9476 2902 Internet: www.aicpl.com.au

1 Introduction
General description
This manual contains information for the installation and operation of the LD5-RS and LE5-RS display.
The LD5-RS can be supplied with either RS485 or RS232 inputs. The LE5-RS version has the same input
options but also adds Ethernet communications. The display has several modes of operation choices are:
Direct display of input. The display is sent an ASCII or Modbus RTU (function 6 or 16) string and
displays the characters. To operate in this mode the POLL INPt function must be set to OFF. To
operate in this mode the COdE function must be set to ASCI,UAL,diSP or M.buS.
Device sends
serial data
LD5 displays
received data
CodE function set
to ASCI, UAL,
diSP or M.buS
6 2 # 4
POLL mode. The display sends a poll command of up to 8 characters to request data. To operate in this
mode the POLL INPt function must be set to on and the COdE function must be set to ASCI or
UAL.
Device polled
for
serial data
LD5 polls external device and
displays received data.
Up to 8 polling characters can
be sent allowing connection
to a wide variety of devices.
POLL INPt set to on.
Code set to
UAL or ASCI
6 2 # 4
SCAN mode with arithmetic capability. The display sends a poll command of up to 8 separate instru-
ments and displays the results. The address of each device or channel, the display value required etc. must
be set, these setting can be found in the CH1 to CH8 section of software. When this mode is selected the
channel number will ash followed by the value for that channel e.g. CH2 followed by the value returned
for channel 2. The results can be simply displayed as the individual channels or an arithmetic operation
can be set for the channels polled. To operate in this mode the COdE function must be set to SCAN. To
perform an arithmetic operation on the scanned channels (e.g. adding all channels together to form a total)
a calculated channel can be allocated. The calculation channel (CC1 to CC8) display can be selected to
show one of various mathematical results e.g. display the highest of the inputs or the difference between
inputs or the average of the inputs etc.
e.g. setting CC 1 Func function to Add will cause all of the polled channels to be added together and
displayed as the CC 1 calculated channel display value.
LD5RSMAN-2.0-0 3 of 72

Device or
channel 2
Device or
channel 1
Further
devices
or channels
(up to 8 total)
LD5 polls external
devices ^ & v can be
used to display each
input or the display
can scroll automatically.
Polled devices must
of the same manufacture
as the LD5.
Communications must
be RS485 or RS232 if
more than one device
is polled.
CodE function set
to SCAN
LD Series
A1
A2PFA4
A3
Kilograms
2%4
Wind speed and direction (NMEA). This mode is used only with instruments using NMEA (National
Marine Electronics Association) serial code wind speed and direction sensor. To operate in this mode the
COdE function must be set to NMEA.
LD5 receives wind speed
& direction information.
Use ^ or v to toggle
between speed &
direction display.
Operates with
NMEA output
sensors only.
CodE function set
to NMEA
LD Series
A1
A2PFA4
A3
Kilograms
2%4
Connection to Mettler Toledo IND131/331 module. (i 131)- this special mode reads data sent from
a Mettler Toledo IND131/331 weighing module.
1.1 Selecting and altering access levels
This subsection details the use ”access levels”. Access levels can be used to obtain easy access to functions
which are regularly required and to limit access to functions which are not required or which restricted
access is required. These access level settings can be ignored if no restrictions to access are required and
no easy access to selected functions is required.
Each setup function has a default access level allocated to it, for example the ascending alarm 1 function
AL.A1 is allocated a default level of 2. There is a facility for the user to change the access levels for a
limited number of functions to make them either easier to access or harder to access as required, see the
Fn.1 CodE function.
There are different ways of accessing setup functions, these are explained in the following section. Each
mode allows a selection of access levels i.e. allows some choice of which functions are accessible.
4of72 LD5RSMAN-2.0-0

The access levels available are:
None - no access to functions
1- access to functions allocated to level 1
2- access to functions allocated to level 2
3- access to functions allocated to level 3
4- access to functions allocated to level 4
5- access to functions allocated to level 5
6- access to functions allocated to level 6
CAL - access to all normal operation functions
1.2 Accessing setup functions
The setup functions allow adjustment of the instruments operation functions. There are five different ways
of accessing setup functions. Each mode allows a selection of access levels i.e. allows some choice of
which functions are accessible.
As as summary the methods available are:
•Easy mode - this is the easiest access mode simply requiring the Fbutton to be pressed for 3
seconds. This mode would normally be used to gain access to functions which require frequent
adjustment.
•Remote input mode - this uses the Easy method of access but also requires the use of a remote
input switch.
•PIN 1 mode - this method allows a PIN to be set with access via PIN entry.
•PIN 2 mode - this method also requires a PIN and would generally be use to allow a higher access
level than the first PIN.
•Super Cal mode - this method requires a power up procedure and will allow access to all functions.
These modes are explained in more detail below.
•Easy mode - Allows access to the level set by the EASY LEUL function in the ACCS menu. By
default the Easy access is set to NONE level i.e. no access.
The Easy mode simply requires that the Fbutton is held pressed until the message FUNC is seen
followed by the first function message, this should take approximately 3 seconds. If the message
FUNC End or no response is seen at this point it means that the access level has been set to NONE.
The default access for this level is NONE so the access level will need to be changed if access via
this method is required.
P F
Press and
hold F for
approx.
3 seconds
Easy mode
•Remote input mode - Allows access to the level set by the R.INP LEUL function in the ACCS
menu. By default the Remote input access is set to CAL level allowing access to all setup functions.
LD5RSMAN-2.0-0 5 of 72

The remote input mode uses the same access method as the Easy mode but also requires that one of
the available remote inputs is set to ACCS and that the selected remote input is activated i.e. shorted
to GND. The default access for this level is NONE so the access level will need to be changed if
access via this method is required.
P F
Press and
hold F for
approx.
3 seconds
Also requires that the selected
remote input is set to ACCSS
and is activated.
Remote input
mode
•PIN 1 mode - Allows access to the level set by the USr.1 LEUL function in the ACCS menu.
The PIN 1 mode requires the Fbutton is pressed and released then within 2 seconds press the ^
and vbuttons at the same time. The PIN can be set via the Pin.1 CodE function in the ACCS
menu. A USr.1 LEUL setting of 0disables the PIN which means that there is no need to enter
the PIN. If the USr.1 LEUL function has been set to a number other than NONE then the first
function seen when entering via PIN 1 mode will be the function CodE. When this function is
seen the PIN value set at the USr.1 LEUL function must be entered via the ^or vpushbuttons
followed by pressing Fto accept the PIN before the user can progress to the setup functions.
P
P
F
F
Press and
release F then:
If a PIN has been set the
message Code will be seen.
Use ^ or v to enter the PIN
then press F to accept the PIN.
Press and
release Up
and Down
simultaneously
PIN 1
and
PIN 2
mode
•PIN 2 mode - Allows access to the level set by the USr.2 LEUL function in the ACCS menu.
This method uses the same access method as PIN 1 mode above. A Pin.2 CodE setting of NonE
disables the PIN. If the USr.1 LEUL or a USr.2 LEUL function has been set to a number other
than NonE then the first function seen when entering via PIN 1/PIN2 mode will be the function
CodE. When this function is seen the PIN value set at the USr.1 LEUL function can be entered
for access to the level set at the Pin.1 ACCS function or enter the USr.2 LEUL PIN to gain
access to the level set at the Pin.2 ACCS function. A correct code will allow access to the
functions at the selected level. An incorrect code will result in the FUNC End message being
seen indicating that access to setup functions has been refused and the display will return to normal
measurement mode.
•Super Cal mode - This method can be used to gain access to all functions. If a PIN has been set and
forgotten use this method to access the PIN functions to check the settings. To access via Super Cal
mode with the instrument switched off hold in the Fbutton whilst the instrument powers up. Keep
the button pressed until the S.CAL message is seen, you can then release the Fbutton. Next press
and release Fthen within 2 seconds press and release the ^and vpushbuttons simultaneously.
6of72 LD5RSMAN-2.0-0
The setup functions are organised in blocks or sections e.g. all the settings for channel 1 alarms are in
the AL1 section. Once access to setup functions has been gained use the ^and vbuttons to select
the section required then press Fto enter this section and again us the ^and vbuttons to select the
required function for alteration and press Fto allow alteration of this function.
Typical sections for a basic instrument are illustrated below. In any particular instrument additional sec-
tions may appear depending on the part number and any optional outputs fitted.
Alarm setup
functions
e.g. AL1
Alarm configure
functions
AL.CF
Relay setup
functions
e.g. RL 1
Use ^ or v to move to
the section required then
press F to access the
functions in that section.
Press P to escape the
section you are in or
press F at the End
function in the section.
Display setup
functions
diSP
Input configure
functions
IN1
Remote input
functions e.g.
R.INP
8of72 LD5RSMAN-2.0-0

The example in the flowchart (for 4 digit display) below shows the method using alarm relay 1 setup
function.
Use ^ or v to adjust
to any setting or press
^ and v together to disable
and set to OFF. Press F to
accept the change.
Use ^ or v to adjust
to any setting or press
^ and v together to disable
and set to OFF.
accept the change.
Press F to
Use ^ or v to adjust,
range 0 to 50000. Press F to
accept the change.
Use ^ or v to adjust,
range 0.0 to 6553.5. Press
F to accept the change.
Use ^ or v to adjust,
range 0.0 to 6553.5. Press
F to accept the change.
Use ^ or v to choose the
required relay then use
F to select or
Use or to until is seen.
Press F to accept the change.
On OFF.
^ v End
Use ^ or v to choose
Hi.Lo or CtrI or FREQ.
Press F to accept the change.
Use ^ or v to choose the
channel e.g. CH 1.
Press F to accept the change.
Use ^ or v to choose
Latch or Auto
Press F to accept the change.
Use ^ or v to choose
OFF or ON
Press F to accept the change.
Use ^ or
v to move
between the
alarm relay 1
settings
Press F
to go to
To go to
back to
measurement
display
press P
or use ^
or v
to go to
End then
press F
To scroll
through
to other main
sections
press ^
or v
Alarm 2
setting section
Settings for
alarm 2
Press F to
go to setting
Press F to
go to setting
Press F to
go to setting
Followed by
the setting
Followed by
the setting
Followed by
the setting
Followed by
the setting
Followed by
the setting
Followed by
the setting
Followed by
the setting
Followed by
the setting
Followed by
the setting
Followed by
the setting
Press F to
go to setting
Press F to
go to setting
Press F to
go to setting
Press F to
go to setting
Press F to
go to setting
Press F to
go to setting
Press F to
go to setting
Press F or P to return to
the beginning of the section
AL 2 HiGh
Lo
HySt
triP
RSt
RLYS
OPER
Ch
LAtch
End
t.out
Use ^ or v to choose
SEt.P or relay to trail.
Press F to accept the change.
Followed by
the setting
Press F to
go to setting
tRAIL
LD5RSMAN-2.0-0 9 of 72

2 Mechanical installation
2.1 20mm, 38mm, 45mm, 57mm and 58mm LED
An optional panel mount kit is available for these size displays. Panel cut out size is 240 x 130mm
(-0.0mm / +0.5mm). Weight: All types 1.6kg approx.
2.2 100mm 4 digit LED
Weight 10kg (LED)
155mm
Viewing window
120 x 332mm
450mm
250mm
2.3 100mm 6 digit LED
Weight 14kg (LED)
155mm
Viewing window
120 x 500mm
650mm
250mm
10 of 72 LD5RSMAN-2.0-0

2.4 200mm 4 digit LED
Weight 14kg.
155mm
Display window
230 x 720mm
850mm
360mm
4 8 @ 5
2.5 Cable entry and Mounting brackets
For 20 to 58mm displays no holes are pre drilled. For all 100mm and 200mm displays 3 off 20mm holes
are drilled at the bottom of the case, these are fitted with 2 x IP65 grommets and 1 x air vent which
allows moisture to exit the case but not enter. Four mounting brackets and four blind grommets are
supplied for use with all metal case large digit displays. Diagrams below illustrate vertical and horizontal
installation for mounting brackets. If mounting without the brackets is preferred then the 9mm dia. case
holes provided for the brackets can be used as alternative mounting holes. Any rear holes not used for
mounting should be sealed.
Horizontal orientation
viewed from rear
Vertical orientation
Viewed from rear
Use these 9mm dia. holes
for mounting if brackets are
not used. 20mm in from case
edges at all 4 corners. Seal these
holes if they are not being used.
24mm
9mm
14mm
20mm
20mm
24mm
LD5RSMAN-2.0-0 11 of 72

3 Electrical Installation
The display is designed for continuous operation and therefore no mains/power switch is fitted to the
unit. It is recommended that an external switch and fuse be provided to allow the unit to be removed
for servicing. To install cables remove six front panel retaining screws. Remove front panel taking care
not to damage the ribbon cable (ribbon cable joins the front display circuit board to the main circuit
board). Connect power and input cables to the plug in terminal blocks located within the enclosure. The
terminals are clearly labeled and unplug for ease of installation, please take care to connect them correctly.
The terminal blocks allow for wires of up to 2.5mm2to be fitted (relays and power) and 1.5mm2for
remote inputs. When power is applied the instrument will cycle through a display sequence, indicating
the software version and other status information, this indicates that the instrument is functioning.
See the “LD5 Series 8 Channel Scanning Monitor Output Addendum” booklet for wiring details of any
optional outputs not covered in this instruction manual.
Input board layout
Isolated supply
input connector
Signal input
connectors
Plug in
circuit board Relay
connectors
Display
connector
Non isolated
24 VDC supply
input connector
Ethernet
connector
(optional)
Remote
inputs
connector
P9
P7 ETHERNET
DISPLAY
P10 P11
POWER
IN
110V A
A
N
N
+
-
E
E
E
240V
DC
RELAY 1
REL 2
REL 3
REL 4
NO
NO
NO
NO NC
COM
COM
COM
COM
P6
IN4
IN3
IN2IN1
GND P4
+24
DC IN
GND
SSI PWR OUT
DB
TX GND
GND 24VDA
RX
AB
RS232
RS485
5V TM
CAN BUS
GND
CH CL
12 of 72 LD5RSMAN-2.0-0

3.1 Power supply connections
The power supply for the instrument is factory fitted and is of a fixed type. Check power supply type
before connecting. Non isolated 24VDC supply instruments use the DC IN connector P4 shown on the
diagram above. AC supply and isolated DC supply instruments use connector P11.
3.2 AC supply or isolated DC supply - for displays digits less than 100mm
P11
POWER
IN
POWER
IN
POWER
IN
Supply connections
for 240 VAC
Supply connections
for 110 VAC
Supply connections
for isolated DC and low
voltage AC
240 VAC
when transformer
is fitted
110 VAC
when transformer
is fitted
12 to 48 VDC or 24 to 48 VAC.
The DC and low voltage AC require
the isolated supply pcb to be fitted.
(Example above shows polarity for
DC input, input uses
the same terminals (not polarised))
24 to 48 VAC
Wire
link
Wire links
110V 110V 110V
AAA
AAA
AA
-
NNN
NNN
NN+
EEE
EEE
EEE
+++
---
EEE
240V 240V 240V
DC DC DC
Plug in
connector
Plug in
connector
Plug in
connector
Plug in
after
wiring
Plug in
after
wiring
Plug in
after
wiring
3.3 Non isolated DC supply - for displays digits less than 100mm
24VDC ±10% non isolated DC supply connections.
P4
DC IN
GND +24V
Non isolated
24 VDC supply
-
+
Plug in
connector
Plug in
after
wiring
LD5RSMAN-2.0-0 13 of 72

3.4 100mm and 200mm display power supplies
Optional isolated DC supply - 100mm and 200mm displays
Isolated DC supplies (12 to 24VDC) connect to the isolated supply pcb on the base board. AC supplies
connect to the transformer primary on the base board inside the case. Supply type is factory configured.
EIN
- -
++
Optional isolated dc board
(for use with 100mm & 200mm led
displays and 100mm
electromagnetic displays only)
++
--
CASE
EARTH
Input DC 12-24V
Output DC to
display board
14 of 72 LD5RSMAN-2.0-0

AC supplies - 100mm and 200mm displays. AC supplies connect to the transformer primary on the base
board inside the case. Supply type is factory configured.
1 2 3 4 5 6 7
BRN RED ORG BLK GRY WHT GRN/YEL
48VAC
42VAC
32/36VAC
24VAC
AN
EARTH
A
A
A
N
N
N
LINK
LINK
LINK
LINK LINK
1
1
1
2
2
2
3
3
3
4
4
4
BLU
BLU
BLU
WHT
WHT
WHT
BRN
BRN
BRN
GRN/YEL
GRN/YEL
GRN/YEL
1
1
1
1
2
2
2
2
3
3
3
3
4
4
4
4
5
5
5
5
6
6
6
6
7
7
7
7
BRN
BRN
BRN
BRN
RED
RED
RED
RED
ORG
ORG
ORG
ORG
BLK
BLK
BLK
BLK
GRY
GRY
GRY
GRY
WHT
WHT
WHT
WHT
GRN/YEL
GRN/YEL
GRN/YEL
GRN/YEL
48VAC
240VAC
Important note: the 240V & 110V supplies use the
same transformer, low voltage instruments use a
different transformer. Do not use a low voltage
transformer for 240V or 110V or vice versa.
110VAC
42VAC
32 TO
36VAC
24VAC
ACTIVE
ACTIVE
ACTIVE
ACTIVE
ACTIVE
ACTIVE
NEUTRAL
NEUTRAL
NEUTRAL
NEUTRAL
NEUTRAL
NEUTRAL
EARTH
EARTH
EARTH
EARTH
EARTH
EARTH
LINK
LINK
LINK
LINK
LINK
Black
Black RedRed
To display boardTo display board
Wiring examples 240VAC & 110VAC Wiring examples low voltage AC
240 & 110VAC supplies.
For 100mm/200mm LED or 100mm
electromagnetic display types only.
Low voltage AC supplies.
For 100mm/200mm LED or 100mm
electromagnetic display types only.
110VAC
110VAC
110VAC
N
N
N
N
N
N
A
A
A
A
A
A
EARTH
EARTH
EARTH
EARTH
EARTH
EARTH
240VAC
240VAC
240VAC
3.5 RS232
The RS232 connections are on a small pcb on top of the main pcb.
LD5RSMAN-2.0-0 15 of 72

SSI PWR OUT
DB
TX GND
GND 24VDA
RX
AB
RS232
RS485
5V TM
CAN BUS
GND
CH CL
Rx (in)
Tx (out)
GND
Not fitted
The optional ethernet connection is via the RJ45 connector P7 on the main board.
3.5.1 RS485 input
The RS485 connections are on a small pcb on top of the main pcb.
SSI PWR OUT
DB
TX GND
GND 24VDA
RX
AB
RS232
RS485
5V TM
CAN BUS
GND
CH CL
A or + Use twisted pair
shielded cable
Not fitted
B or -
16 of 72 LD5RSMAN-2.0-0

3.5.2 Remote/Digital inputs
The digital inputs will accept voltage free contact closure inputs or up to 24VDC signal. The electrical
configuration for these inputs is configured by digital input functions, see the d.in section functions. The
operation mode of the digital inputs are controlled by separate functions for each input, see the R.INP
section functions. The electrical configuration for these inputs is configured by digital input functions,
see the d.in section functions. Wiring example showing voltage free contacts below.
P9
IN1 IN2 IN3 IN4
GND
Remote input
connector
LED for each input lights
when input is active
used depending on the function selected.
Latching or momentary switches can be
Plug in
after wiring
3.5.3 Relays 1 to 4
Relays 1 to 4 are rated at 240VAC 5A into a resistive road. Relay 1 is form C type. Relays 2,3 and 4 are
form A type. These relays are fitted onto the main board when supplied. See the “LD5 Series 8 Channel
Scanning Monitor Output Addendum” for wiring details of optional relays 5 to 8.
RELAY 1
REL 2
REL 3
REL 4
NO
NO
NO
NO NC
COM
COM
COM
COM
P6
Relay 1
Relay 2
Relay 3
Relay 4
COM
N.O
N.O
N.O
N.O
N.C
COM
COM
COM
LD5RSMAN-2.0-0 17 of 72

4 Function tables - summary of setup functions
Note: the order in which the functions appear on the display may not be exactly as shown below. The
availability and order of functions is determined by choice of function settings and options fitted.
Display messages shown are those which would appear on a 4 digit display, these display messages may
in some cases vary slightly for other display types.
4.1 Alarm relay function table
Display Function Range Default Your
record Ref/Page
AL 1 to
AL 8
High
High setpoint value for designated
alarm relay Any display value
or OFF
OFF See
4.14 5.1 /30
AL 1 to
AL 8
Lo
Low setpoint value for designated
alarm relay. Any display value
or OFF
OFF See
4.14 5.2 /31
AL 1 to
AL 8
HYSt
Alarm relay hysteresis (deadband) 0to 65535 10 See
4.14 5.3 /31
AL 1 to
AL 8
triP
Trip time delay for the designated
alarm relay
0to 6553.5
secs
0.0 See
4.14 5.4 /32
AL 1 to
AL 8
RSt
Reset time delay for the designated
alarm relay
0to 6553.5
secs
0.0 See
4.14 5.5 /32
AL 1 to
AL 8
RLYS
Relay selection On or OFF On or OFF OFF See
4.14 5.15 /35
AL 1 to
AL 8
tRL
Alarm trailing or setpoint mode SEt.P,tL 1,
tL 2,tL 3,tL
4,tL 5,tL 6,
tL 7
SEt.P See
4.14 5.16 /35
AL 1 to
AL 8
OPEr
Alarm relay operating mode Hi.Lo,CtrI,
FREq
Hi.Lo See
4.14 5.17 /36
AL 1 to
AL 8
Ch
Alarm relay operation input selection Varies with
settings
CH 1 See
4.14 5.18 /36
AL 1 to
AL 8
Ltch
Alarm relay latching operation Auto,Ltch,
A.b,L.b
Auto See
4.14 5.19 /36
AL 1 to
AL 8
tout
Serial input timeout alarm OFF or ON OFF See
4.14 5.20 /37
18 of 72 LD5RSMAN-2.0-0

4.2 Relay PI function table. See separate Addendum booklet
Display Function Range Default Your
record Ref/Page
AL 1 to
AL 8
SPAN
Relay PI control span Any display value 1000 See
4.14 Addendum
AL 1 to
AL 8
SEtP
Relay PI control setpoint Any display value 1000 See
4.14 Addendum
AL 1 to
AL 8
P.g
Relay PI control proportional gain
value Any display value 0.010 See
4.14 Addendum
AL 1 to
AL 8
I.g
Relay PI control integral gain value Any display value 0.000 See
4.14 Addendum
AL 1 to
AL 8
I.H
Relay PI control integral high limit
value
0to 100.0 %0.000 See
4.14 Addendum
AL 1 to
AL 8
I.L
Relay PI control integral low limit
value
0to 100.0 %100.0 See
4.14 Addendum
AL 1 to
AL 8
biAS
Relay PI control bias 0to 100.0 %50.0 See
4.14 Addendum
AL 1 to
AL 8
dutY
SECS
Relay PI control duty cycle 0to 6553.5
secs
10.0 See
4.14 Addendum
AL 1 to
AL 8
on
SECS
Relay PI frequency control “on” time 0to 6553.5
secs
1.0 See
4.14 Addendum
4.3 Relay function table.
Display Function Range Default Your
record Ref/Page
RL 1 to
RL 8
RLY
Alarm relay xaction to normally open
(de-energised) or normally closed
(energised)
n.o,n.c n.o See
4.14 5.31 /39
RL 1 to
RL 8
Ack
Relay acknowledge OFF or ON OFF See
4.14 5.32 /39
RL 1 to
RL 8
booI
Alarm relay Boolean logic operation Or,And Or See
4.14 5.33 /40
LD5RSMAN-2.0-0 19 of 72

4.4 Configuration setup table.
Display Function Range Default Your
record Ref/Page
CONF
CodE
Serial input operation mode diSP,ASCI,
UAL,M.buS,
SCAN,NMEA,
i131
ASCI 5.34 /40
CONF
E.NEt
Ethernet input OFF or ON OFF 5.35 /42
CONF
bAud
Baud rate 300,600,
1200,2400,
4800,9600,
19.2,38.4
9600 5.36 /42
CONF
dAtA
Serial input data bits and parity 8.NON,8.odd,
8.Eun,7.odd,
7.Eun,7.NON
8.NON 5.37 /42
CONF
CHAN
Cnt
Select number of channels to scan 1,2,3,4,5,6,
7,8
15.38 /42
CONF
CALC
Cnt
Select number of calculation channels 0,1,2,3,4,5,
6,7,8
05.39 /43
CONF
AL Cnt
Select number of alarms 0,1,2,3,4,5,
6,7,8
25.40 /43
CONF
SCAN
dLY
Select scan delay time 0to 200 secs 10 5.41 /43
CC 1 to
CC 8
Arth
SCLE
Calculation channel multiplication
scale Any display value n/a 5.89 /59
CC 1 to
CC 8
Arth
OFSt
Calculation channel offset value Any display value n/a 5.90 /59
CC 1 to
CC 8
Arth
diu
Calculation channel division Any display value n/a 5.91 /59
4.5 Analog output function table. See separate Addendum booklet
Display Function Range Default Your
record Ref/Page
RO 1 to
RO 2
OutP
Analog retransmission outputs
(∗Optional)
4-20,0-1.0,
0-10
4-20 Addendum
20 of 72 LD5RSMAN-2.0-0
This manual suits for next models
1
Table of contents
Other AMALGAMATED INSTRUMENT Monitor manuals

AMALGAMATED INSTRUMENT
AMALGAMATED INSTRUMENT LD5-TMR Guide

AMALGAMATED INSTRUMENT
AMALGAMATED INSTRUMENT PM4-SSI Guide

AMALGAMATED INSTRUMENT
AMALGAMATED INSTRUMENT PM4-IV2 Guide

AMALGAMATED INSTRUMENT
AMALGAMATED INSTRUMENT PM4-TMR Guide

AMALGAMATED INSTRUMENT
AMALGAMATED INSTRUMENT PM4-TCR Guide

AMALGAMATED INSTRUMENT
AMALGAMATED INSTRUMENT LD5-TR Guide