REV. D Page 2
Glass Windshields
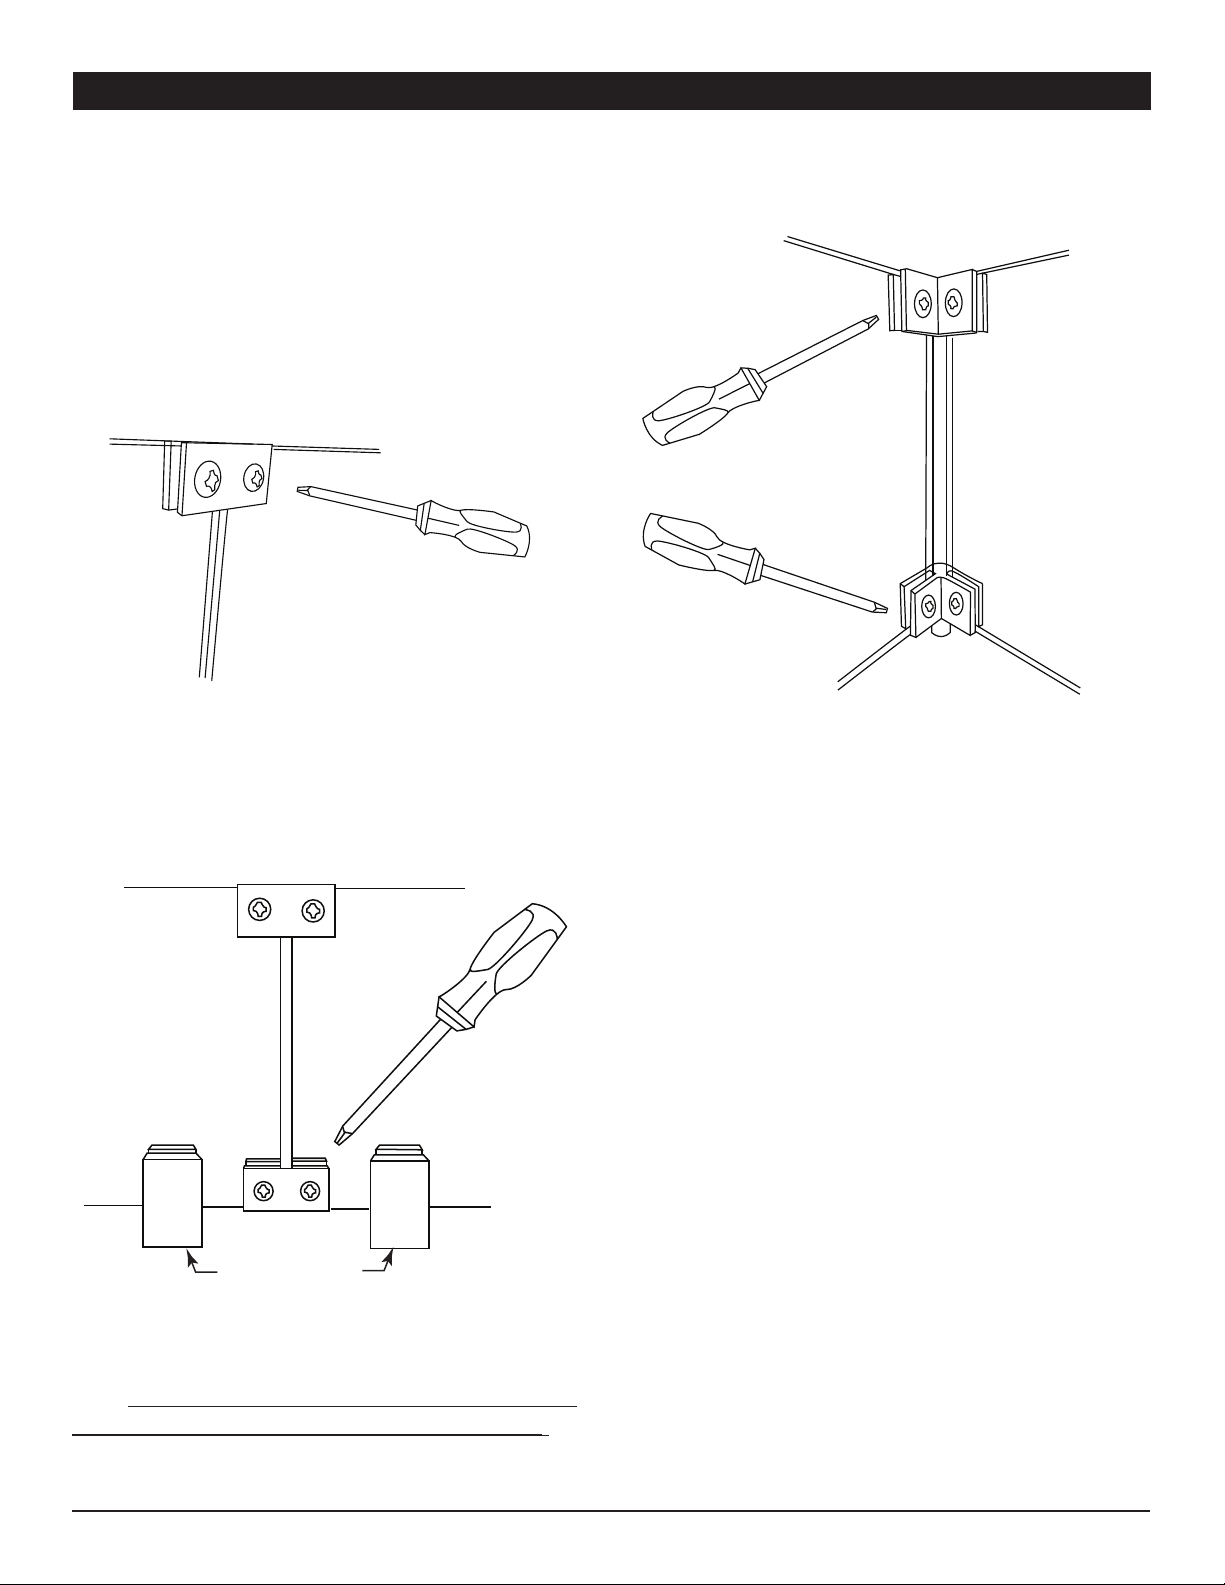
INSTALLATION FOR RECTANGULAR/SQUARE WINDSHIELDS
(Qty. 4)
STRAIGHT
BRACKETS
(Qty. 4)
U-SHAPED
BRACKETS
(Qty.8)
Flat Screws
(Qty.8)
Silicone Plugs
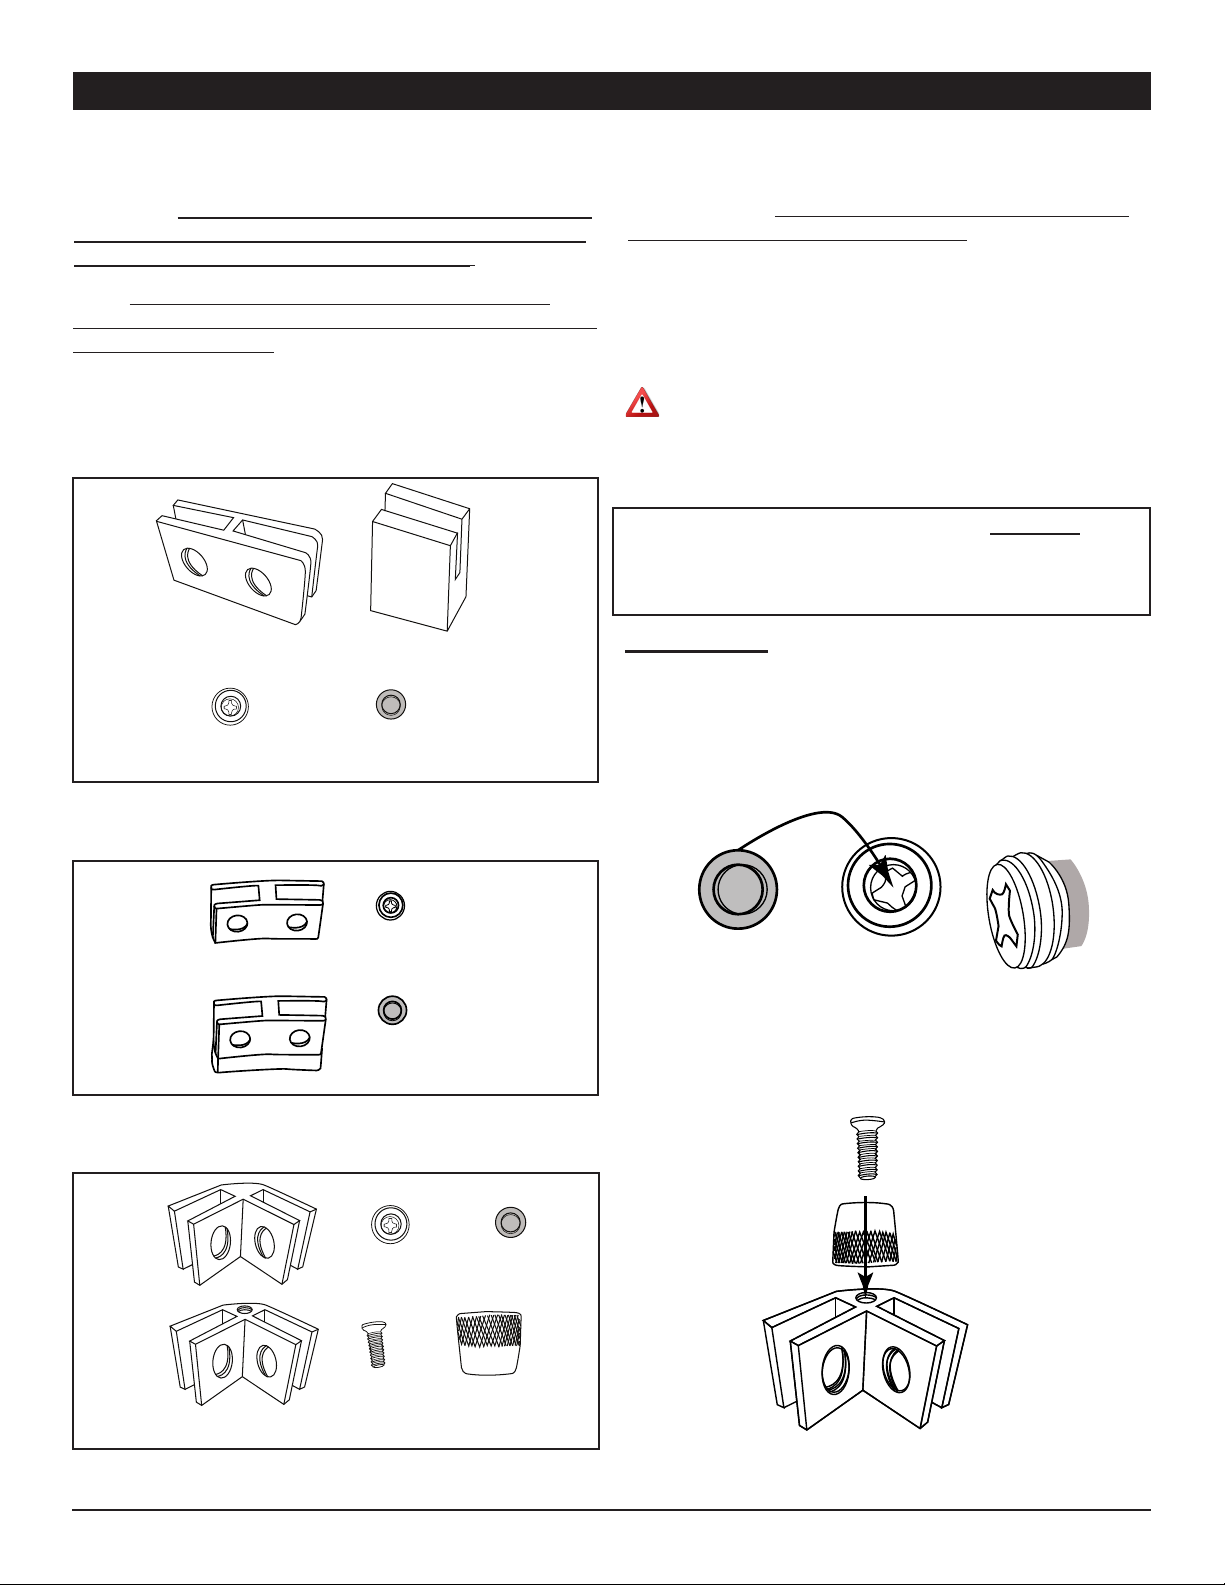
Fig. 1 GWS-STRAIGHT BRACKET KIT - Used with
rectangle and square windshields.
(Qty. 4)
Top
(Qty. 4)
Bottom
(Qty.16)
Flat Screws
(Qty.16)
Silicone Plugs
Fig. 2 GWS-CURVED BRACKET KIT - Used with round
windshields.
(Qty. 4)
Top
(Qty. 4)
Bottom (Qty. 4)
Feet
(Qty. 4)
Screws
(Qty.16)
Flat Screws
(Qty.16)
Silicone Plugs
Fig. 3 GWS-BRACKET-S KIT - Used with rectangle and
square windshields.
Tools Needed: Phillips screwdriver, soft leather gloves for
handling glass, dry at smooth surface large enough to
accommodate the windshield for assembly.
CAUTION: It is recommended for two people to assemble
the glass windshield. Lay the glass panels on a soft non-
abrasive at surface to keep windshield level.
Note: Each GWS kit is designed for a specic type of
windshield. Ensure you read and understand how each kit
assembles and installs.
PREPARATION: Each kit requires partial assembly before
installing with the glass panels. You must press the
silicone plugs into the back of the at screws, then thread
the screws partially into the brackets and install the screws
and feet into the bottom brackets to ready them to secure
the glass panels. See Figs. 4 and 5.
WARNING:
Carefully secure the screws into position but do not
over-tighten. Warranty does not cover glass
breakage during the assembly process.
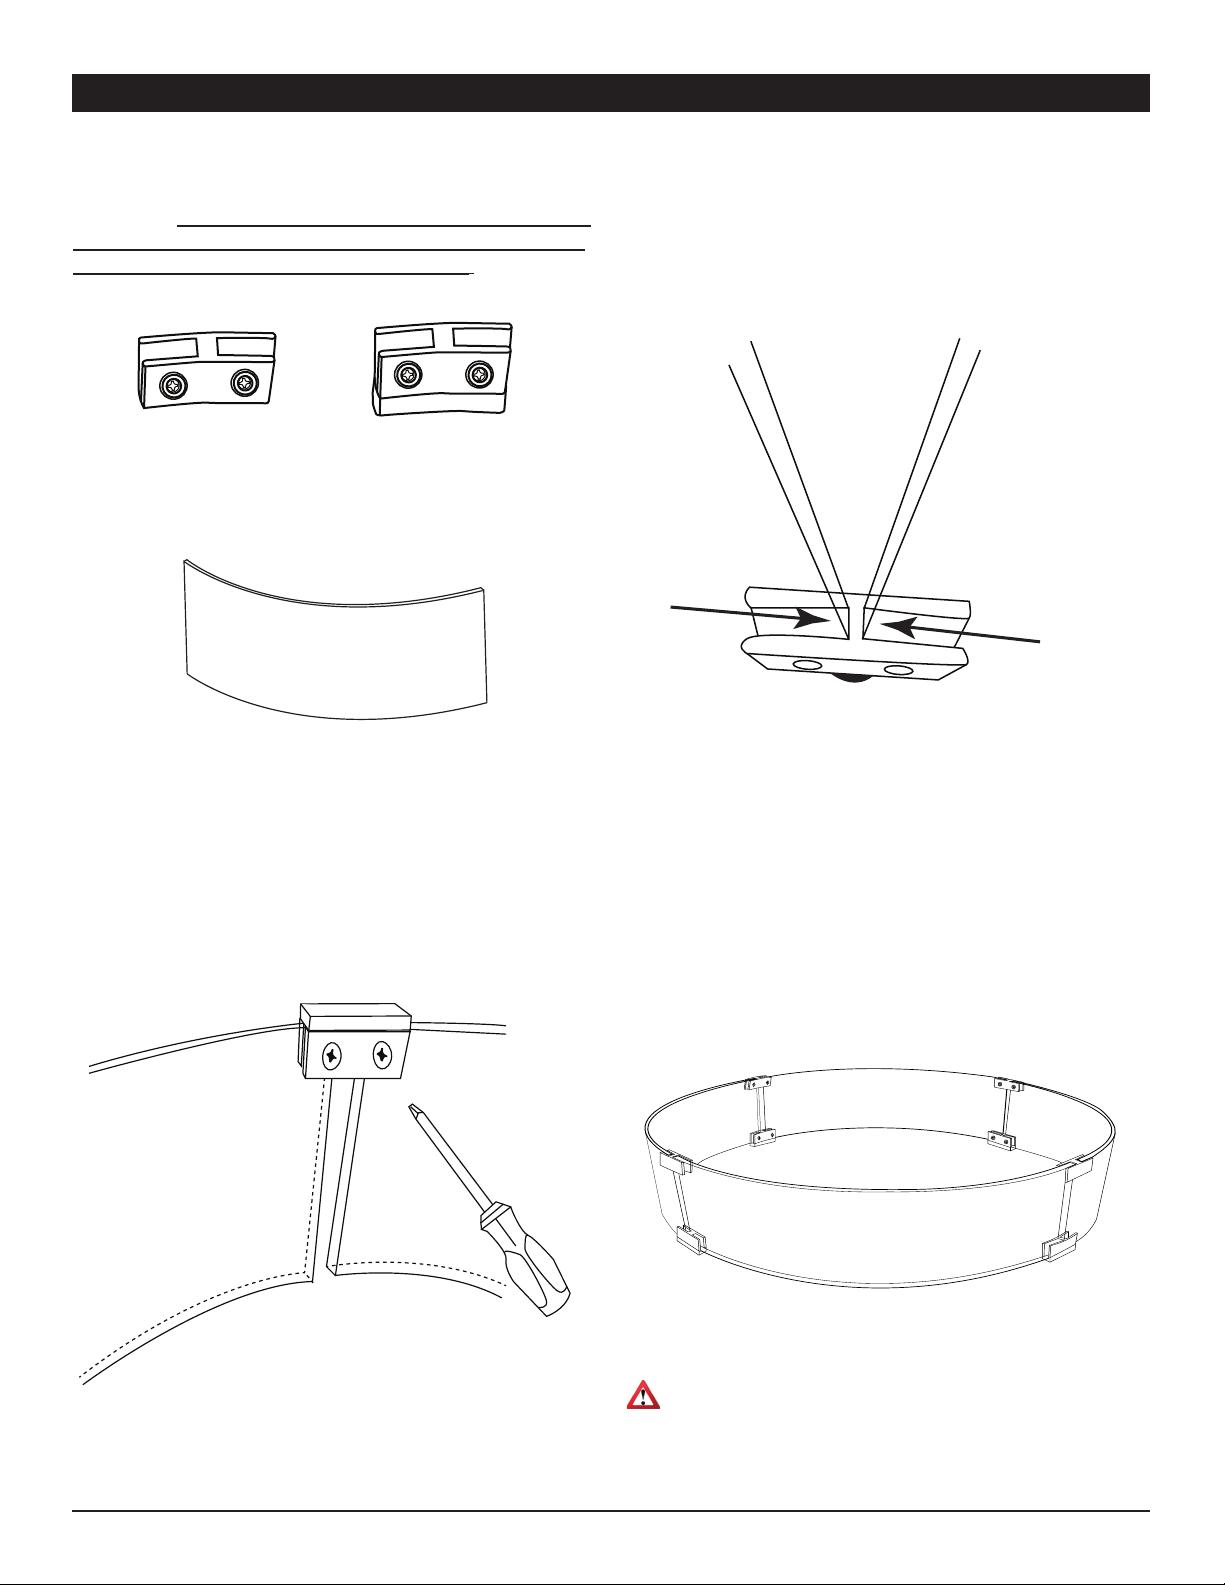
Each bracket uses a silicone plug on the opposite side of
the set-screw to secure the glass in place and to prevent
glass breakage. Loosen the set screws in all brackets to
allow glass to slip inside each bracket.
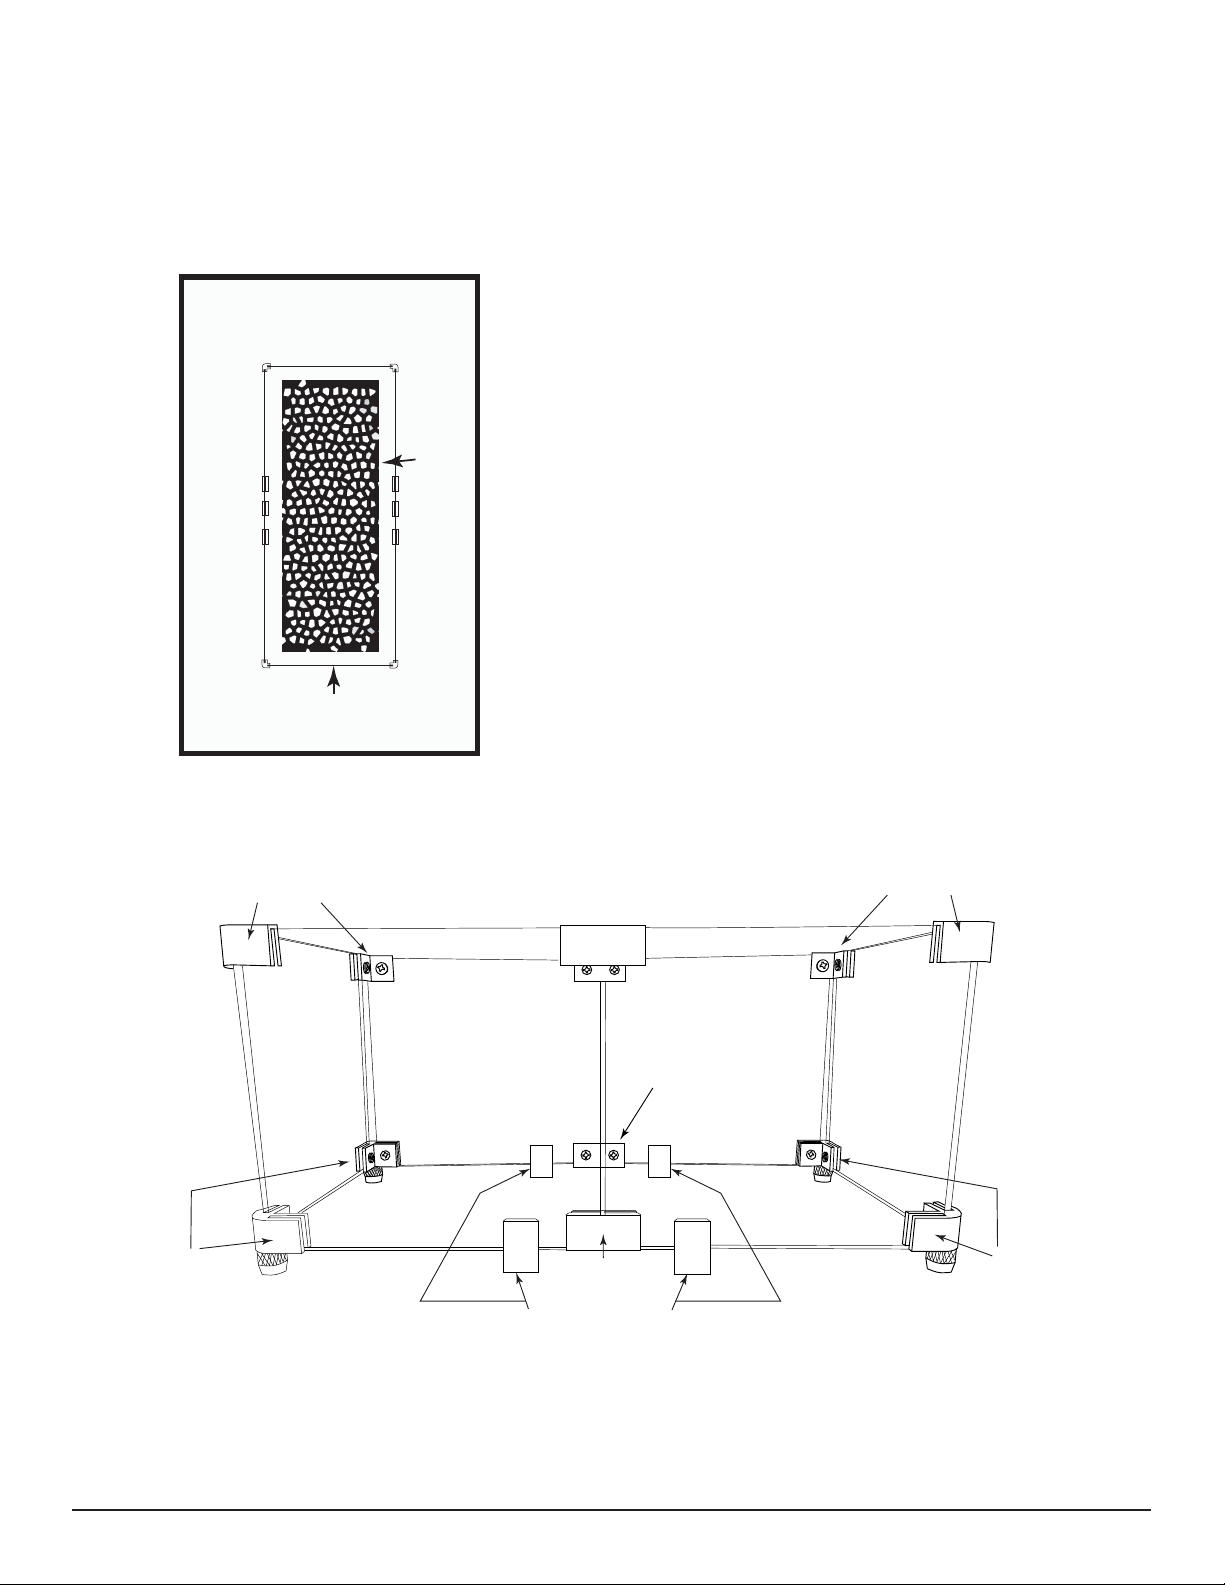
In most cases, assembly of the windshield will require more
than one person to assist. This is because the windshield
should be assembled upside down then inverted right side
up for installation around the re pit.
BEFORE YOU BEGIN
CAUTION: THESE WINDSHIELDS ARE NOT
DESIGNED FOR WOOD BURNING FIRE PITS.
POTENTIAL GLASS BREAKAGE AND DAMAGE WILL
OCCUR IF USED WITH A WOOD FIRE.
Press Silicone Plug
into Back of Screw
Fig. 4 Installing plug into at screw.
Fig. 5 Installing feet to bottom brackets.
THE KITS LISTED IN FIGURES 1-3 ARE AVAILABLE TO
ORDER AS REPLACEMENT PARTS.
INDIVIDUAL PARTS ARE NOT AVAILABLE
SEPARATELY, YOU MUST ORDER THE ENTIRE KIT