manuals.online logo
Brands
  1. Home
  2. •
  3. Brands
  4. •
  5. Superior
  6. •
  7. Fireplace Accessories
  8. •
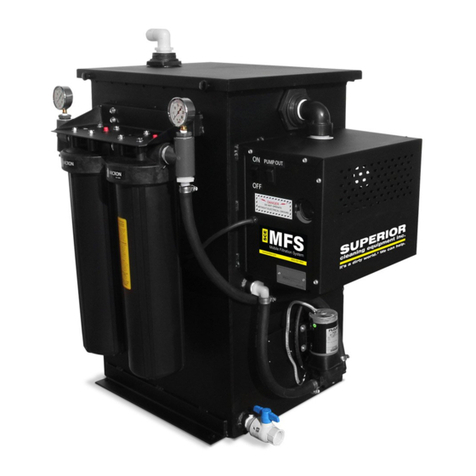
  9. Superior ASD3628-TI User manual

Superior ASD3628-TI User manual

NOTE: DIAGRAMS & ILLUSTRATIONS ARE NOT TO SCALE.
HEARTH PRODUCTS
KITS AND ACCESSORIES
750,209M
REV. NC 03/2006 DECORATIVE ARCH SCREEN DOOR KIT
TOOLS REQUIRED
Phillips Screwdriver
5/16” Socket or Nutdriver
GENERAL INFORMATION
This decorative screen door fits on the face of the appliance. If you encounter
any problems, need clarification of these instructions or are not qualified to
properly install this kit, contact your local distributor or dealer.
Read and understand all instructions and warnings in this docu-
ment before beginning the installation.
CAUTION
INSTALL ONLY WHEN THE APPLIANCE IS OFF AND COLD!
ARCH SCREEN
DOOR KIT
INSTALLATION INSTRUCTIONS:
1. AllModels-Usinga5/16”socketornutdriverremovescreenandrodassemblies
as shown in Figure 2. Reinstall the Screen Rod Screws! The Screen
and Rod Assemblies must NOT be installed when the screen door kit
is installed! You may wish to retain the screen and rod assemblies in
case the screen door kit is ever removed in the future (read Important
Note in Figure 2).
KIT CONTENTS
QUANTITY DESCRIPTION
1 ea. Screen Door, Left
1 ea. Screen Door, Right
1 ea. Doorframe
1 ea. Instruction Sheet
Table 2
1
INSTALLATION INSTRUCTIONS FOR DECORATIVE ARCH SCREEN DOOR KITS
FOR USE WITH UVF-36, UVFRC-3628, UVFRC-3628-H
UVFRC-4228 & UVFRC-4228-H UNIVERSAL VENTFREE FIREBOXES
* DECORATIVE SCREEN DOOR PANEL KITS
CAT. NO. MODEL WHERE USED
H1959 ASD3624-TI UVF-36
H1960 ASD3628-TI UVFRC-3628 & UVFRC-3628-H
H1961 ASD4228-TI UVFRC-4228 & UVFRC-4228-H
Table 1
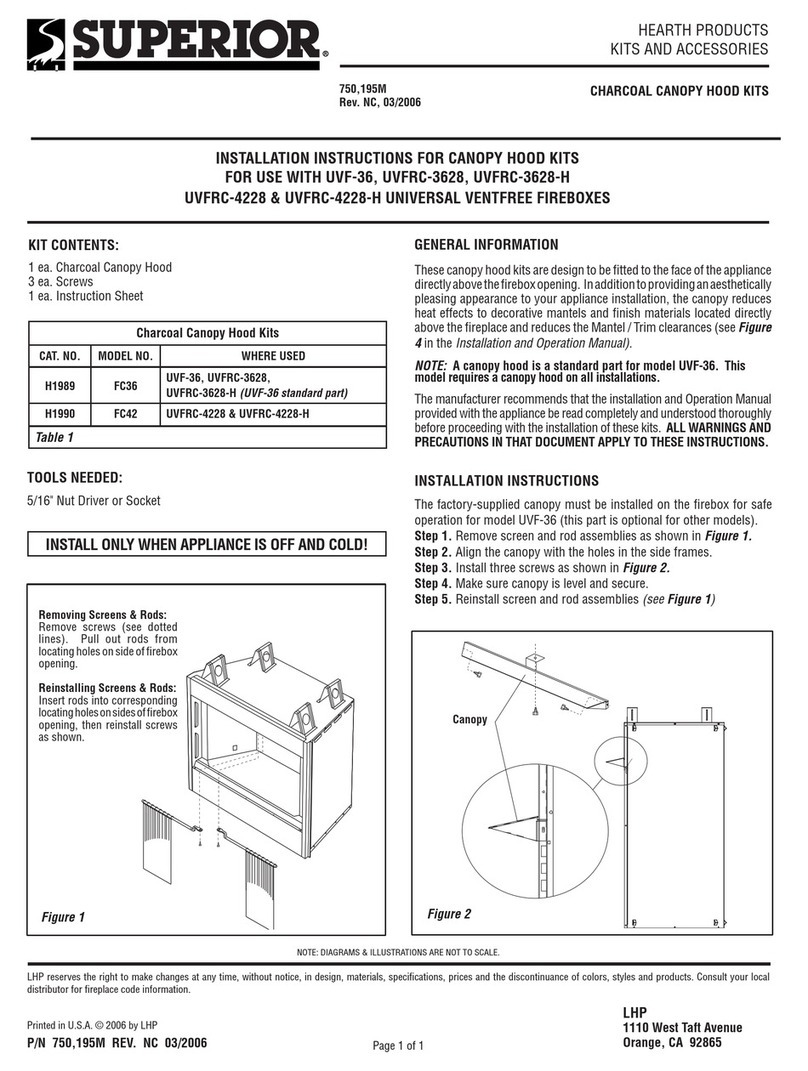
* A canopy hood is required when installing these Decorative Arch Screen Door Kits (the
canopy is sold separately for
UVFRC-3628, UVFRC-3628-H, UVFRC-4228 & UVFRC-4228-H
.
A canopy is a standard part for model UVF-36).
Left Screen
Door
Right Screen
Door
Doorframe
Figure 1
Figure 2
Remove Screens & Rods.
A) Remove screws (see dotted lines).
Pull out rods from locating holes on
side of firebox opening.
B) IMPORTANT: Reinstall screen rod
screws into the existing holes where
removed.
IMPORTANT NOTE: If this optional
screen door kit is ever removed, the
rod and screens MUST be reinstalled
for safe operation of the appliance.
2. All Models - Remove and save the (2) two upper side frame screws as
shown in Figure 3 (on both sides of firebox). Loosen the bottom side
frame screws (do not remove). See Figure 3.
Figure 3
A) Side Frame Screws
Using a phillips screwdriver remove the
side frame screw indicated here. Loosen
the lower side frame screws but DO NOT
remove them.
B) Set aside the screwsthat were removed
for later use.
Remove this screw
Firebox
Do NOT
remove
this screw
3. Models: UVFRC-3628, UVFRC-3628-H, UVFRC-4228 & UVFRC-4228-H
Only - Install Canopy (see Figure 4 and follow installation instruction in
the Installation And Operating Instructions Manual).
Loosen this screw, but
do NOT remove it.
Printed in U.S.A. © LHP 2006
P/N 750,209M REV. NC 03/2006
LHP reserves the right to make changes at any time, without notice, in design, materials, specifications, prices and the discontinuance of colors, styles and products. Consult your local distributor
for fireplace code information.
NOTE: DIAGRAMS & ILLUSTRATIONS ARE NOT TO SCALE.
LHP
1110 West Taft Avenue • Orange, CA 92865
Figure 8
2
CAUTION
ALL MODELS MUST HAVE A CANOPY INSTALLED WHEN
THIS SCREEN DOOR KIT IS INSTALLED!
4. All Models - Install doorframe assembly (provided) per instructions in
Figure 5, 6a & 6b.
Firebox
Doorframe
Bottom Locating
Bracket on Door-
frame locates
over the side
frame screws
which were
loosened
The (4) four locating brackets on
doorframe hook over side frame
screws shown in Figure 3
Hook the bottom doorframe locating brackets over the (2) two bottom side
frame screws (which were loosened in Step 3) as shown below.
Figure 5
A) Rotate the top of the doorframe flush
with firebox face then secure in place by
installing the (2) two screws which were
removed in Step 3 through the doorframe
brackets into the existing holes in side
frames.
B) Tightenthe(2) two loosescrews though
the bottom locating brackets (shown in
Figure 5).
C) Adjust the center top and bottom door-
frame brackets as shown in Figure 6b.
Door-
frame
Figure 6a
6. All Models - Install the screen doors by aligning hinge pins on the doors
with the hinge holes on the doorframe and slide down (see Figure 7). Ensure
the hinge pins are fully seated onto the shoulders of the hinge holes.
COMPLETED
INSTALLATION
Firebox
Secure Doorframe to
Appliance and Tighten
Screws
Doorframe
Left Screen
Door Hinge Pin
Figure 7 - Install Screen Doors
7. Close Doors. Installation is complete.
Canopy
Screen Door
Figure 4
Canopy
Install Canopy - Models: UVFRC-
3628,UVFRC-3628-H, UVFRC-4228
& UVFRC-4228-H Only
Doorframe
Position the top and bottom doorframe brackets
as shown. Brackets should be positioned
behind the cabinet top and bottom flanges of
firebox opening.
Top Doorframe Bracket
Bottom Doorframe Bracket Figure 6b
CENTER TOP & BOTTOM
DOORFRAME BRACKETS
Use center canopy screw (see Figure 4) to
secure center top bracket to firebox ceiling.

This manual suits for next models

2

Other Superior Fireplace Accessories manuals

Superior CLEO Guide

Superior

Superior CLEO Guide

Superior LK36-B User manual

Superior

Superior LK36-B User manual

Superior H1526 User manual

Superior

Superior H1526 User manual

Superior Network Adapter 206M User manual

Superior

Superior Network Adapter 206M User manual

Superior MFS Series Operation manual

Superior

Superior MFS Series Operation manual

Superior EDGE TRIM KITS User manual

Superior

Superior EDGE TRIM KITS User manual

Superior ARCHED FACE KITS SDVI User manual

Superior

Superior ARCHED FACE KITS SDVI User manual

Superior PHK30 User manual

Superior

Superior PHK30 User manual

Superior H1989 User manual

Superior

Superior H1989 User manual

Popular Fireplace Accessories manuals by other brands

Valor L2 1700K quick start guide

Valor

Valor L2 1700K quick start guide

Exodraft Xzense manual

Exodraft

Exodraft Xzense manual

Whalen Ruso MNFP62BF23-6 manual

Whalen

Whalen Ruso MNFP62BF23-6 manual

Woodstock Soapstone Fireview 201 manual

Woodstock Soapstone

Woodstock Soapstone Fireview 201 manual

EdilKamin SERBATOIO 250 Installation, use and maintenance

EdilKamin

EdilKamin SERBATOIO 250 Installation, use and maintenance

Bronpi KIT-1 instructions

Bronpi

Bronpi KIT-1 instructions

Town & Country Fireplaces 22150051 instructions

Town & Country Fireplaces

Town & Country Fireplaces 22150051 instructions

Travis Industries 33 DVI installation instructions

Travis Industries

Travis Industries 33 DVI installation instructions

Lopi Hearthview 864 user manual

Lopi

Lopi Hearthview 864 user manual

Lennox Hearth Products LENNOX MPE-33R installation instructions

Lennox Hearth Products

Lennox Hearth Products LENNOX MPE-33R installation instructions

Dimplex DFP6776C install guide

Dimplex

Dimplex DFP6776C install guide

Napoleon W175-0689 instruction manual

Napoleon

Napoleon W175-0689 instruction manual

Travis Industries 95400424 installation instructions

Travis Industries

Travis Industries 95400424 installation instructions

Osburn ZERO CLEARANCE KIT installation instructions

Osburn

Osburn ZERO CLEARANCE KIT installation instructions

Majestic QUARTZPLA36IN installation instructions

Majestic

Majestic QUARTZPLA36IN installation instructions

Napoleon DBPO36 installation instructions

Napoleon

Napoleon DBPO36 installation instructions

Dimplex SMP-130-E install guide

Dimplex

Dimplex SMP-130-E install guide

Empire Comfort Systems LS50TINF installation instructions

Empire Comfort Systems

Empire Comfort Systems LS50TINF installation instructions

manuals.online logo
manuals.online logoBrands
  • About & Mission
  • Contact us
  • Privacy Policy
  • Terms and Conditions

Copyright 2025 Manuals.Online. All Rights Reserved.