PICASSO CONTROL PANELPICASSO LITE CONTROL PANEL
AIMING BEAM
Select brightness of aiming beam
5 Levels: Off, Weakest, Weak, Strong, Strongest
VOLUME
Select volume of the beep
5 Levels: Mute, Quiet, Normal, Loud, Very Loud
LANGUAGE SELECTION
The default language is English. Other choices:
Portuguese, Japanese, German, French, Italian,
Spanish, Korean, Chinese, and Russian. To select a
language, depress the desired language button and
hold for two seconds.
PICASSO IS PRE-PROGRAMMED FOR SOME PROCEDURES. CHANGING PRESETS:
4 CUSTOM PRESETS ARE AVAILABLE IN AND MODES (8 TOTAL):
STEP 1: Select desired type of laser operation mode Continuous or Repeating.
Continuous Mode: INTERVAL and DURATION are not available. POWER
is able to be selected and saved as a preset.
Repeat Mode: all the parameters (INTERNAL, DURATION, and POWER)
are able to be selected as a preset. Use the buttons to select desired
interval and duration from 20ms to 9.9 secs.
STEP 2: Select desired preset 1–4.
STEP 3: POWER. Select desired power settings 0.5–7 watts using the left and right
white arrows
STEP 4: INTERVAL/DURATION. Select desired interval and duration (available only
in REP mode).
STEP 5: SAVE. Save desired settings by pushing the SAVE button for two
seconds until a beep is heard.
STEP 6: READY. Push STANDBY button to put unit into READY mode. Press the foot
switch to emit laser.
STEP 7: Repeat steps 1–6 to program additional presets.
SAVING PRESETS:
Each of the three default presets is customizeable. To change a preset from its default value, adjust power up or down to the desired
level, set aiming beam intensity (off, low, high), and speaker volume (off, low, high). Then press and hold the desired preset button for
four seconds until the power display cycles off and on. The new setting for the given preset has been saved.
SPEED MODE:
1.8W Continuous Mode
COMFORT MODE:
1.8W Gated (Repeat) Mode
30ms on/off
HYGIENE MODE:
0.5W Continuous Mode
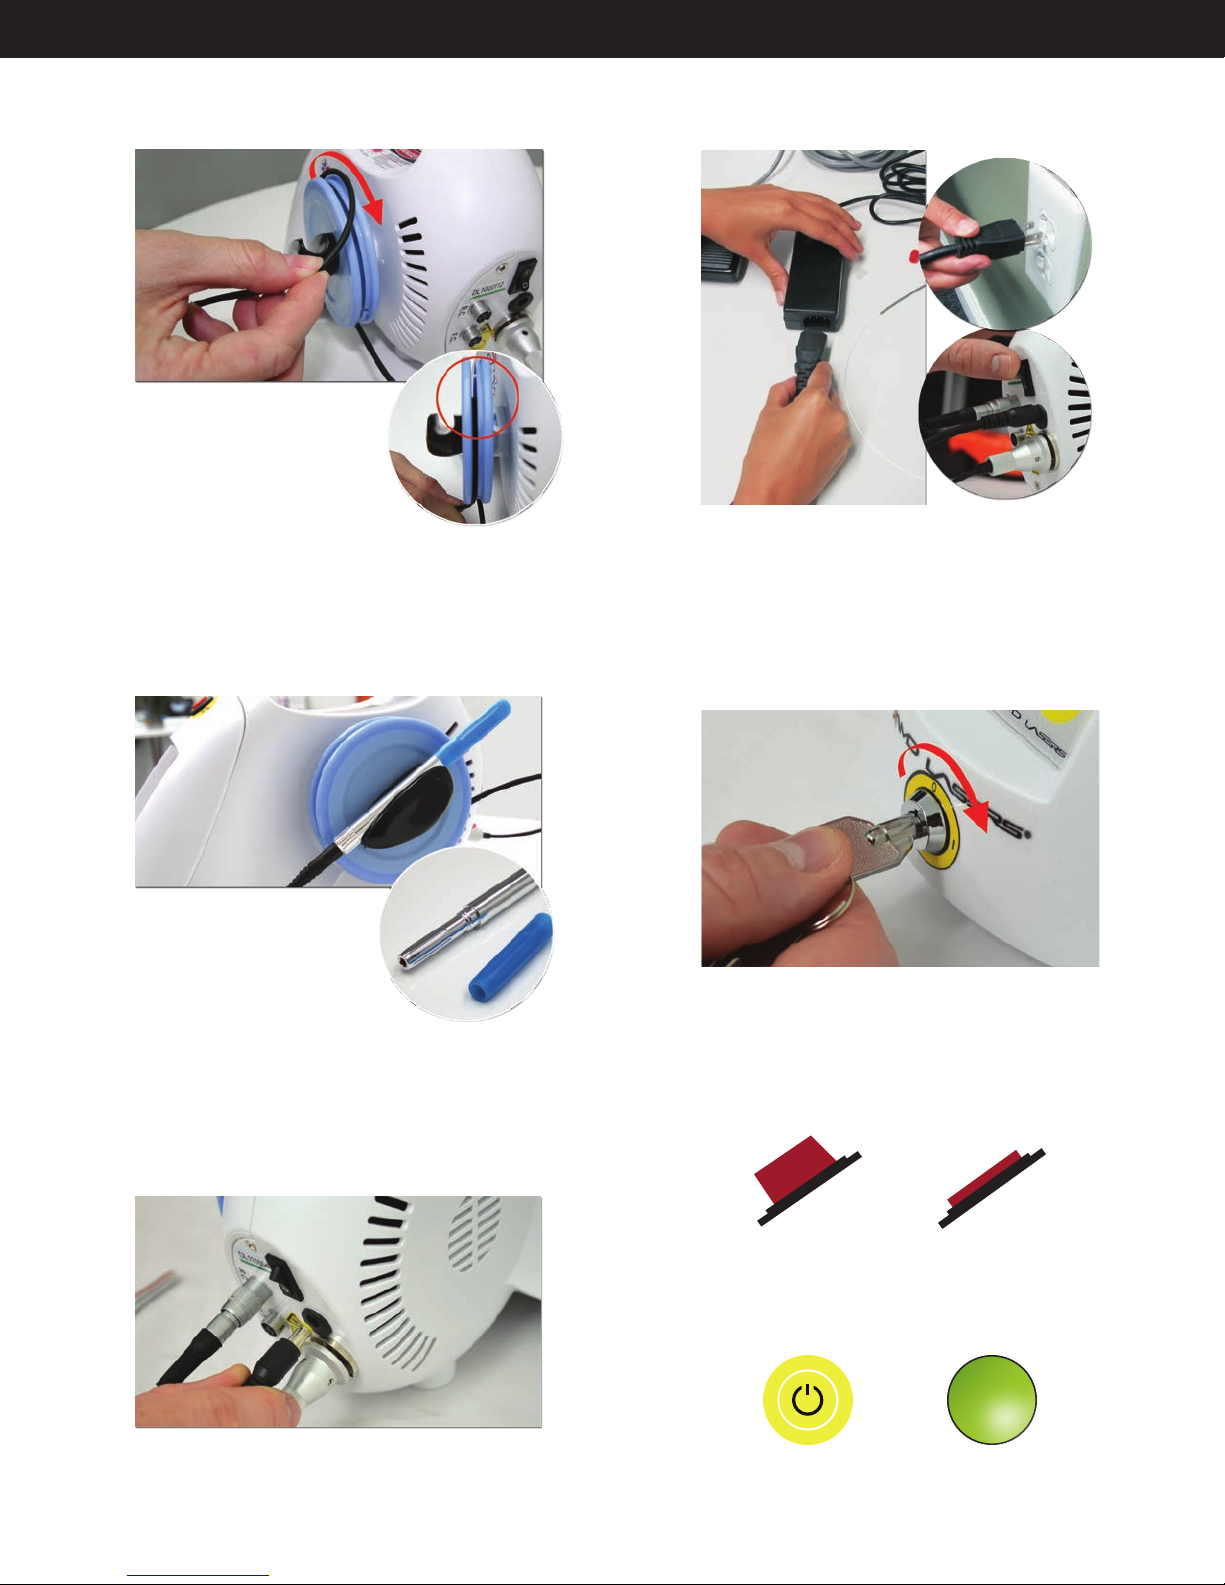
EASY STEPS TO START:
STEP 1:
Insert tips on the handpiece
STEP 2:
Select SPEED, COMFORT, or DIFFUSION
STEP 3:
Select STANDBY/READY button and step on
the foot control to activate the laser
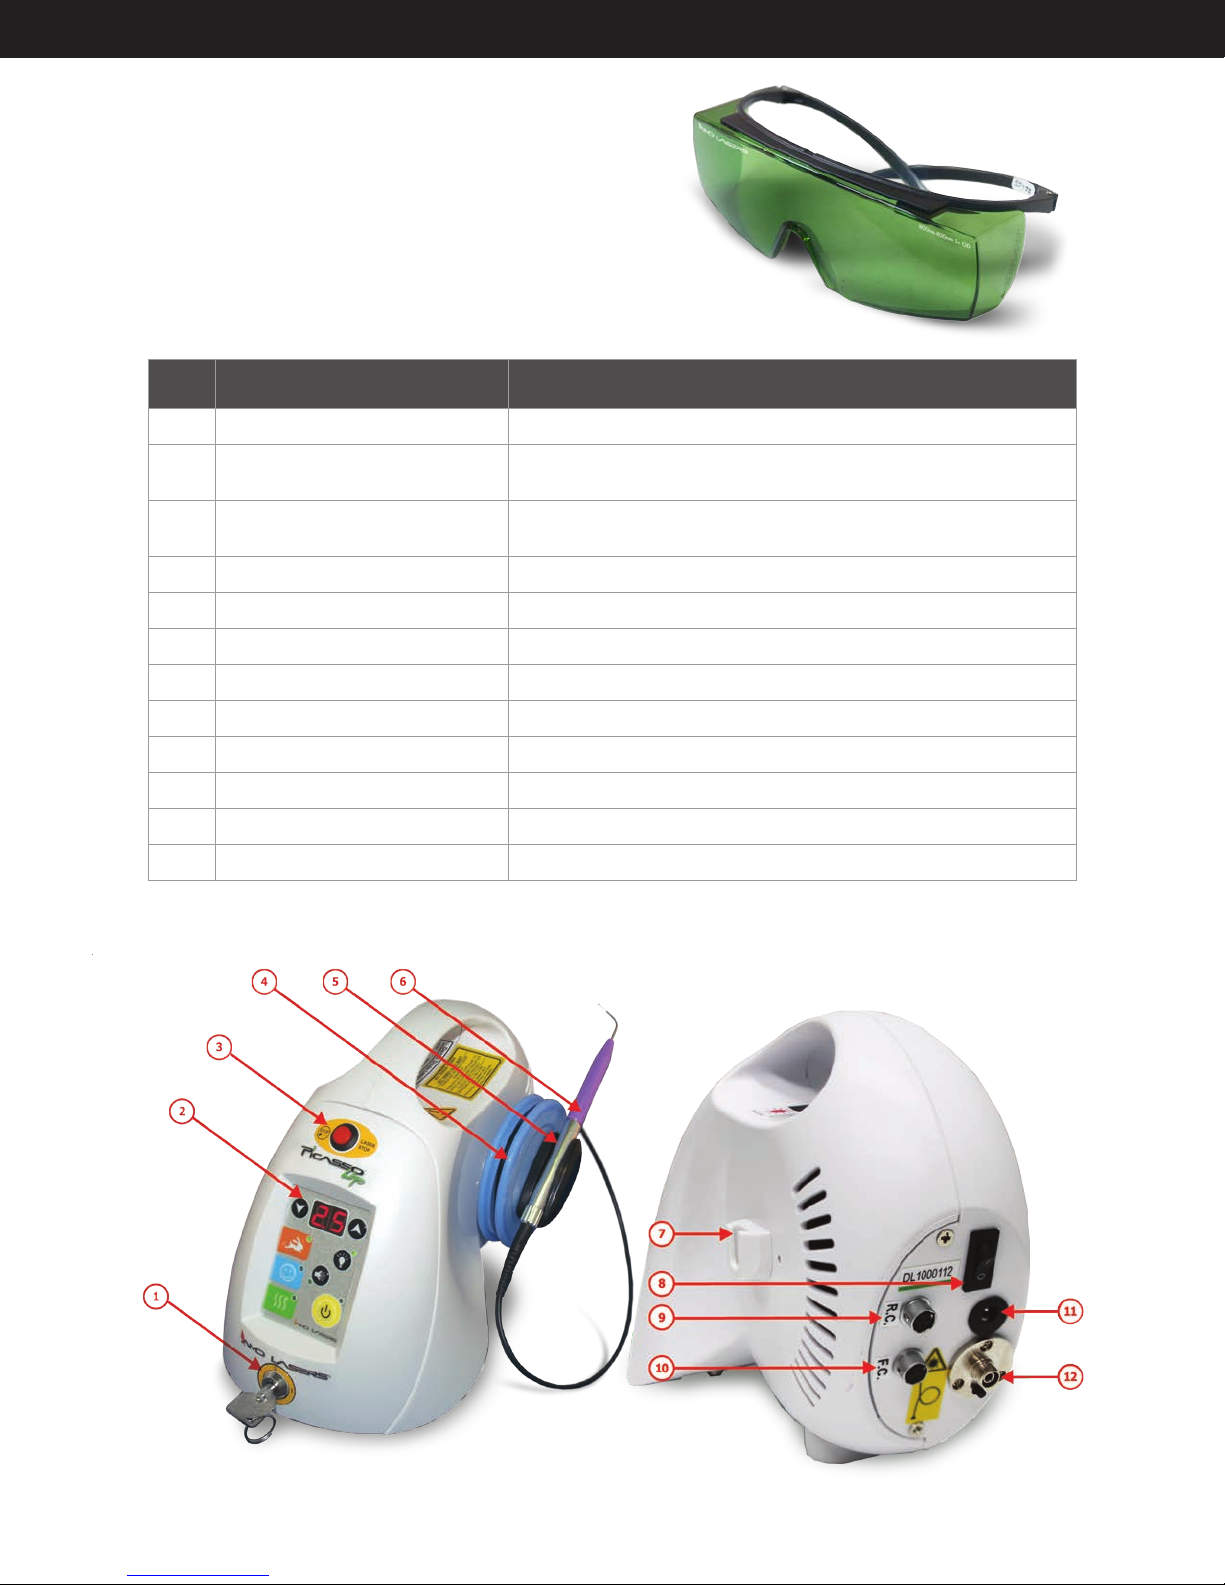
STEP 3 | EQUIPMENT DESCRIPTION
1 2 3 4
STAND
BY READY
#ITEM NAME ITEM DESCRIPTION
1Cont/Rep Continuous or Repeating Modes
2Presets
3Power 0.5 – 7.0 Watts
4Interval 20 ms – 9.9 secs, increments of 10ms
5 Duration 20 ms – 9.9 secs, increments of 10ms
6 Settings Language Selection, Aiming Beam, & Volume Settings
7Standby/Ready Standby or Ready Button
8Save Save Button
4
8
2
3
4
5
76
1
#ITEM NAME & DESCRIPTION
1Hygiene: Perio Pockets, Aphthous Ulcers, Pulpotomies
2 Comfort Mode: Gingivectomies, Exposing Implants/Brackets/Teeth
3 Speed Mode: Surgery, Troughing, Frenectomies
4Power Down
5Power Display
6 Power Up
7Aiming Beam Intensity: Off / Low / High
8Volume Setting: Off / Low / High
9 Standby/Ready
1
9
2
8
56
4
37