manuals.online logo
Brands
  1. Home
  2. •
  3. Brands
  4. •
  5. American Dynamics
  6. •
  7. Security System
  8. •
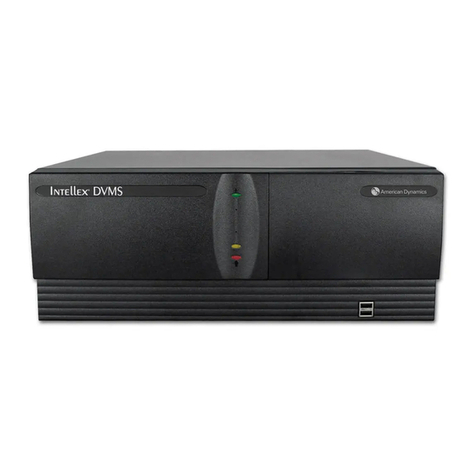
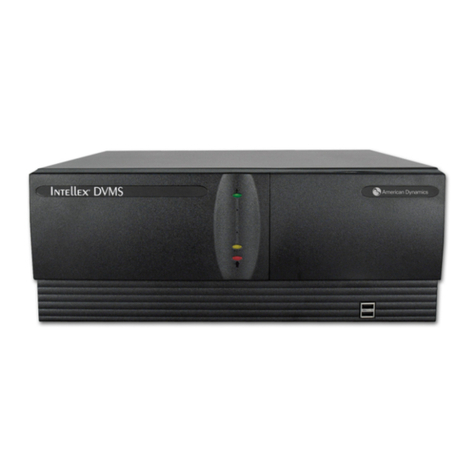
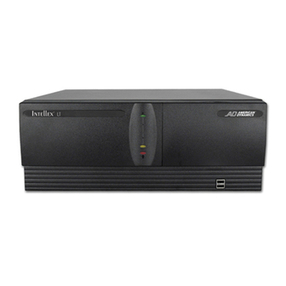
  9. American Dynamics Intellex Digital Recorder User manual

American Dynamics Intellex Digital Recorder User manual

Guide d’installation rapide pour les systèmes en rack de l’INTELLEX
Eléments standards
Contenu de la boîte
1
Eléments necessaries
2
Moniteur VGA ou écran plat
Caméras et câbles BNC
Accessoires facultatifs
Kit de montage en rack
Extension (Premier uniquement) de
port de données texte 1 à 4 ou 1 à 8
Connecteurs du panneau arriére
3
2. Connecter la souris
3. Connectez l’écran VGA, puis allumez l’écran.
Branchez l’adaptateur PS/2 vert au connecteur
noir de l’unité du panneau avant. Utilisez le
connecteur PS/2.
4. Brancher le contrôleur de dôme
Touch Tracker (en option)
Branchez-le au connecteur en série à
9 broches.
5. Connecter les caméras aux connecteurs
BNC
6. Définir la terminaison vidéo
Réglez la terminaison du signal vidéo sur 75 Ohms (si besoin) par l’écran Réglage
d’Intellex.
Si le signal vidéo est bouclé sur plusieurs unités via la sortie caméra, configurez le
signal vidéo à Hi-Z dans l’écran de configuration Intellex (Configuration > Caméras >
Terminaison), puis définissez la dernière unité à 75 Ohm.
7. Branchez l’alimentation de l’Intellex et allumez-le.
Remarque : Comme avec la majorité des disposi-
tifs, allumez l’écran VGA ou plat avant
d’allumer l’Intellex.
Appuyez doucement sur le commutateur d’alimentation basculant sur le panneau frontal. Des
informations vidéo devraient être affichées à l’écran. Le voyant d’alimentation s’allume sur le
panneau frontal et le ventilateur se met en marche pendant le démarrage de l’unité.
Mise sous tension et test
4
Si l’unité ne s’allume pas automatiquement :
Appuyez doucement sur le commutateur
d’alimentation basculant sur le panneau
frontal.
Pour éteindre l’unité :
Avec la souris, sélectionnez Utilitaire, Fer-
mer depuis l’interface utilisateur.
Pour remettre l’unité sous tension :
Appuyez doucement sur le commutateur
d’alimentation basculant.
Remarque : Le bouton de réinitialisation n’est normalement pas utilisé et il risqué
d’endommager le logiciel du disque dur.
L’Intellex devrait capter de la vidéo en direct et afficher ces informations à l’écran. La
LED d’alimentation est allumée et le ventilateur tourne.
Éteignez l’unité et continuez à installer des alarmes et autres accessoires, selon vos
besoins, en vous aidant du Guide d’installation et de configuration Intellex et du Guide de
l’utilisateur. Reportez-vous aux DVD pour le Guide d’installation et de configuration et le
Guide de l’utilisateur.
OUI !
Résultats
Si l’unité est sous tension, éteignez-la avec la souris en sélectionnant Utilitaire, Fermer
depuis l’interface utilisateur du moniteur VGA principal. Si l’interface utilisateur n’est pas
accessible depuis le moniteur VGA principal, appuyez sur le bouton de marche/arrêt pour
éteindre l’unité. Si l’unité ne s’éteint pas, appuyez sur le bouton de marche/arrêt pendant 10
secondes. Quand l’unité est éteinte, vérifiez les choses suivantes :
NON !
Si vous avez vérifié tous ces éléments et si l’unité ne se met pas en marche ou si vous
avez rallumé l’unité et elle ne fonctionne toujours pas correctement, veuillez contacter votre
représentant American Dynamics.
Connexions
Paramètres de terminaison
Câbles, cordons et autres connecteurs
Caméras
1. 4.
3.
2.
Remarque : Il est d’importance critique que vous sélectionniez le fuseau horaire correct
sous le système d’exploitation Windows, ainsi que le format vidéo approprié
pour votre région.
1. Brancher le connecteur du cable
PS/2 du panneau arrière
Branchez l’adaptateur PS/2 noir au
connecteur du panneau arrière.
Mise en
marche
Adaptateur USB/RS232
(Premier uniquement)
Souris
Accessoires
divers
Intellex Recovery/
Accessories DVD
Tapis de
souris
Instructions d’Installation
et supplément
Rails de glissement
(en boîtes et attachés
à l’emballage interne)
Si l’unité ne démarre pas automatiquement :
Mettez l’unité sous tension, écoutez le ventilateur se mettre à fonctionner et regardez le
voyant de marche/arrêt passer au vert (ON).
Commutateur
d’alimentation
3_2FP_1
Bouton de
marche/arrêt
Réinitialiser
(Rouge)
3_2FP_1
Voyants
Voyants de
marche/arrêt
Voyant de disque dur
Rouge = Un disque
dur active
Indicateurs d’alarme
Rouge = En alarme
Rouge = ON
(Marche)
Indicateur d’enregistrement
Rouge = Enregistrement
Vert = ON
5
5. Moniteur(s)
Remarque :
•Le moniteur VGA et autres périphériques doivent être mis sous tension avant
l’unité Intellex.
• Assurez-vous d’utiliser une unité d’alimentation ininterruptible (UPS).
• Il faut utiliser une protection contre les surtensions et une mise à la terre appropriée.
3_2FP_1
INTELLEX Quick Setup Guide for Rack Mount Systems
Standard Items
What’s in the Box
1
Required Items
2
VGA or Flat Panel Monitor
Cameras and BNC Cables
Optional Accessories
Rack Mount Kit
1 to 4 or 1 to 8 Text Data Port
Expander (Premier Only)
Rear Panel Connectors
3
2. Connect the Mouse
3. Connect the VGA monitor, then power up the monitor.
Connect green PS/2 adapter to black unit
connector on front panel. Use PS/2 connector.
4. Connect Touch Tracker Dome
Controller (optional)
Connect to the 9-pin serial connector.
5. Connect Cameras to
BNC Connectors
6. Set Video Termination
Set video signal termination to 75 Ohms if needed via the Intellex Setup screen.
When the video signal is looped to multiple units via the Camera Out, set the video
signal to Hi-Z on the Intellex Setup screen (Setup > Cameras > Termination), then set
the last unit to 75 Ohms.
7. Connect the Power to the Intellex and Turn On the Power
Note: As with most peripheral devices, power up
the VGA or Flat Panel Monitor before you
power up the Intellex.
Push gently on the power toggle switch on the front panel. Video information should be
displayed on the monitor. The power indicators illuminate on the front panel and the fan
begins operating as the unit powers up.
LEDs
Power Indicators
Green = ON
Hard Drive Indicator
Red = One Hard Drive
Active
Power Up & Test
4
Alarms Indicator
Red = Alarm State
If the unit does not power up automatically:
Push gently on the power toggle switch on
the front panel.
To shut down the unit:
Use the mouse to select Utility, Shutdown
from the user interface.
To power up the unit again:
Push gently on the power toggle switch.
Note: The Reset button is not normally needed and could cause damage to
the software on the hard disk.
The Intellex should be recording live video and displaying the information on
the monitor. The Power LEDs are illuminated and the fan is running.
Shut down the unit and continue to install alarms and other accessories, as needed, using
the Intellex Installation and Configuration Guide and the User Guide. Refer to the DVD for
the Installation and Configuration Guide and the User Guide.
YES!
Results
5
If your unit powered up, shut down by using the mouse to select Utility, Shutdown from the
user interface on the VGA Main Monitor. If the user interface is not available on the VGA
Main Monitor, press the Power Toggle to shut down the unit. If the unit does not shut down,
press the Power Toggle for 10 seconds. When the unit is shut down, check the following:
NO!
If you have checked all these items and the unit fails to power up, or you repowered
your unit and the unit still fails to operate properly, please contact your American Dy-
namics representative.
Connections.
Termination settings.
Cables, cords, and other connectors.
Cameras.
Monitor(s).
1. 4.
5.
3.
2.
Note: It is critical that you select the appropriate time zone in the Windows Operating
System and the appropriate video format for your location.
Power
Toggle
Reset (Red)
Red = ON
Record Indicator
Red = Recording
1. Connect the Rear Panel PS/2
Cable Connector
Connect black PS/2 adapter to
connector on rear panel.
Power In
USB/RS232 Adapter
(Premier only)
Mouse Miscellaneous
Accessories
Pack
2 Power Cords
Intellex Recovery/
Accessories DVD
Mouse Pad
Installation Instructions
and Addenda
3_2FP_1
Slide Rails (boxed
and secured to the
internal packaging)
If the unit does not power up automatically:
Power up the unit, listen for the fan to start, and watch for the Power LED (Green = ON).
Power Switch
Note:
• VGA Monitor and any peripherals should be powered up before the Intellex unit
is powered up.
• Be sure to use an Uninterruptible Power Supply (UPS).
• Be sure to use surge protection for power supply and provide appropriate
grounding.
8200-1036-01 A0
© 2013 Tyco Security Products. All Rights Reserved
8200-1036-01 A0
© 2013 Tyco Security Products. All Rights Reserved
PS/2 to USB adapter
USB Sensornet Adapter
If using a KVM switch (Belkin F1DA10xZ [2025-0568-
xx]) you will need to purchase the PS/2 to USB adapter
(2025-0643-01).
Adaptateur PS/2-USB
Adaptateur USB-Sensornet
Si vous utilisez un commutateur KVM (Belkin F1DA10xZ
[2025-0568-xx]), vous devez acheter l’adaptateur PS/2-
USB (2025-0643-01).
Alarm Connectors
(16 Camera
only)
Connecteurs d’alarmes
(Caméra 16 uniquement)
2 Cordons
d’alimentation
NOTE: The IntellexAdmin password is admin. You may need this to complete the Intellex setup.
REMARQUE : le mot de passe IntellexAdmin est admin. Ce mot de passe peut être nécessaire
lors de l’installation d’Intellex.
INTELLEX Quick Setup Guide for Rack Mount S
y
stems
G
uide d’installation rapide pour les s
y
stèmes en rack de l’INTELLE
X
3_2FP_1
Guía de configuración rápida
para sistemas de montaje en estantería INTELLEX
Elementos estándar
Contenido del paquete
1
Accesorios necesarios
2
Monitor VGA o de panel plano
Cámaras y cables BNC
Accesorios opcionales
Conjunto de montaje en estantería
Expansor de puerto de datos de
texto de 1 a 4 o de 1 a 8 (sólo la
versión Premier)
Adaptador USB Sensornet
Conectores en el panel posterior
3
2. Conecte el ratón
3. Conecte el monitor VGA luego encienda el monitor.
Conecte al adaptador PS/2 verde al conector
de unidad negro del panel delantero. Use el
conector PS/2.
4. Conecte el controlador de domo
Touch Tracker (opcional)
Conéctelo al conector de serie de 9 patillas.
5. Conecte las cámaras a los conectores
BNC
6. Establezca la terminación de vídeo
Establezca la terminación de la señal de vídeo en 75 ohmios si fuese necesario en la
pantalla Configuración de Intellex.
Cuando la señal de vídeo esté en el dispositivo de bucle con las demás unidades
a través del conector Salida de cámara, configure la señal de vídeo en Hi-Z en la
pantalla de configuración de Intellex (Configuración > Cámaras > Terminación), luego
configure la última unidad para 75 ohmios.
7. Conecte la alimentación a Intellex y enciéndala
Nota: Al igual que con la mayoría de los disposi-
tivos periféricos, encienda el monitor VGA
o el de pantalla plana antes de encender el
Intellex.
Presione suavemente el interruptor de alimentación en el panel frontal. Deberá aparecer la
información de vídeo en el monitor. Los indicadores de alimentación iluminan el panel frontal
y el ventilador comienza a funcionar ya que se enciende la unidad.
LEDs
Indicadores
de potencia
Indicador de disco duro
Rojo = Un disco duro
activo
Encendido y pruebas
4
Indicador de alarmas
Rojo = Estado de alarma
Si la unidad no se enciende automáticamente:
Presione suavemente el interruptor de
alimentación en el panel frontal.
Para apagar la unidad:
Use el ratón para seleccionar Utilidad,
Apagar el sistema en la interfaz de usuario.
Para volver a encender la unidad:
Presione suavemente el interruptor de ali-
mentación.
Nota: Normalmente, el botón de reinicio no se necesita y podría causar daños al software
en el disco duro.
Intellex deberá estar grabando el vídeo en vivo y mostrando la información en el monitor.
El LED de alimentación está iluminado y el ventilador está funcionando.
Apáguelo y continúe instalando las alarmas y demás accesorios, según sea necesario,
con la Guía de instalación y configuración de Intellex y la Guía del usuario. Consulte los
manuales en el DVD para ver la Guía de instalación y configuración y la Guía del usuario.
¡SÍ!
Resultados
Si la unidad está encendida, apáguela usando el ratón para seleccionar Utilidad, Apagar el
sistema en la interfaz de usuario del monitor principal VGA. Si la interfaz de usuario no está
disponible en el monitor principal VGA, presione el conmutador de potencia para apagar la
unidad. Si la unidad no se apaga, presione el conmutador de potencia durante 10 segundos.
Cuando se apague la unidad, compruebe lo siguiente:
¡NO!
Si ha comprobado todos estos elementos y la unidad no se enciende, o si vuelve a encend-
er la unidad y ésta sigue sin funcionar correctamente, póngase en contacto con el repre-
sentante de American Dynamics.
Conexiones
Parámetros de la terminación
Cables, cordones y otros conectores
Cámaras
Monitores
1. 4.
5.
3.
2.
Nota: Es fundamental que seleccione el uso horario adecuado en el sistema
operativo de Windows y el formato de vídeo apropiado para su ubicación.
Conmutador
de potencia
Restaurar
(Rojo)
Rojo = En-
cendido
Indicador de grabación
Rojo = Grabando
1. Conecte el conector de cable
PS/2 del panel posterior
Conecte al adaptador PS/2 negro al
conector del panel posterior.
Entrada de
potencia
Adaptador USB/
RS232 (sólo la
versión Premier)
Ratón
Paquete de acceso-
rios diversos
Intellex Recovery/
Accessories DVD
Alfombrilla
para ratón
Guía de configuración
rápida, suplemento e
información impresa
3_2FP_1
Guías de desliza-
miento (aseguradas al
embalaje interno)
Si la unidad no se enciende automáticamente:
Encienda la unidad, escuche para ver si se pone en marcha el ventilador y observe el
LED de potencia (verde = encendido).
Interruptor de
alimentación
3_2FP_1
INTELLEX-Rack-Systeme Kurzanleitung Installation
Standardausführung
Benötigte Komponenten
2
VGA-Monitor oder Flachbildschirm
Kameras und BNC-Kabel
Optionales Zubehör
Rack-Montage-Kit
Port Expander für Textdaten, 1 auf
4 oder 1 auf 8 (nur Premier)
USB-Sensornet Adapter
2. Die Maus anschließen
3. Schließen Sie den VGA-Monitor an und schalten dann den Monitor ein.
Stecken Sie den grünen PS/2-Stecker auf den
schwarzen Anschluss auf der Vorderwand.
Verwenden Sie den PS/2-Anschluss.
4. Den Touch Tracker-Dome-Con-
troller verbinden (optional)
Verbinden Sie den Dome-Controller mit
dem 9-poligen seriellen Anschluss.
5. Kameras mit BNC-Anschlüssen
verbinden
6. Video-Terminierung einstellen
Stellen Sie für das Videosignal ggf. über das Intellex-Fenster Setup den Abschlusswider-
stand 75 Ohm ein.
Wenn das Videosignal über den Kameraausgang an mehrere Einheiten gelenkt wird, stellen
Sie das Videosignal auf dem Intellex-Installationsbildschirm (Setup > Kameras > Terminier-
ung) auf Hi-Z und die letzte Einheit auf 75 Ohm ein.
7. Stecken Sie das Netzkabel in das Gerät und schalten den Strom ein
Hinweis: Wie bei den meisten Peripheriegeräten sollten
Sie zunächst den VGA- oder Flachbildschirm ein-
schalten, bevor Sie das Intellex-Gerät einschalten.
Drücken Sie vorsichtig auf den Stromkippschalter an der Frontplatte des Geräts. Auf dem
Bildschirm sollten Videoinformationen angezeigt werden. Die Stromanzeigen an der Front-
platte des Geräts leuchten auf, und der Ventilator beginnt seinen Betrieb, wenn das Gerät
hochgefahren wird.
LED-
Anzeigen
Netz-
Kontrollleuchten
Grün = EIN Festplatten-LED
Rot = eine Festplatte
aktiv
Alarmanzeige
Rot = Alarm
Wenn das Gerät nicht automatisch hochfährt,
verfahren Sie wie folgt:
Drücken Sie vorsichtig auf den Stromkip-
pschalter an der Frontplatte des Geräts.
So fahren Sie das Gerät herunter:
Klicken Sie in der Benutzeroberfläche des
VGA-Hauptbildschirms auf Utility > Shutdown.
So fahren Sie das Gerät wieder hoch:
Drücken Sie vorsichtig auf den Stromkip-
pschalter.
Hinweis: Der Neustartknopf wird im Allgemeinen nicht benötigt; bei Betätigung des
Neustartknopfs besteht die Gefahr, dass die auf der Festplatte gespeicherte
Software beschädigt wird.
Das Intellex-Gerät sollte Live Video aufzeichnen und die Informationen auf dem Bild-
schirm anzeigen. Die Strom-LEDs sind erleuchtet, und der Ventilator läuft.
Schalten Sie das Gerät ab und installieren nach Bedarf Alarme und anderes Zubehör unter
Zuhilfenahme der Intellex Installations- und Konfigurationshilfe und des Benutzerhandbuchs.
Für die Intellex Installations- und Konfigurationshilfe und das Benutzerhandbuch verweisen wir
auf die Handbuch-DVD.
JA!
Ergebnisse
5
Wenn Ihr Gerät hochgefahren wurde, fahren Sie das Gerät nun herunter, indem Sie in der
Benutzeroberfläche des VGA-Hauptbildschirms auf Utility > Shutdown klicken. Wenn die
Benutzeroberfläche des VGA-Hauptbildschirms nicht verfügbar ist, betätigen Sie den Ein-/
Aus-Schalter, um das Gerät herunterzufahren. Wenn das Gerät nicht herunterfährt, halten
Sie den Ein-/Aus-Schalter 10 Sekunden gedrückt. Nachdem das Gerät heruntergefahren
wurde, überprüfen Sie die folgende Komponenten und Einstellungen:
NEIN!
Fährt das Gerät nicht hoch, obwohl Sie in Verbindung mit diesen Komponenten keine Fehler
festgestellt haben, bzw. funktioniert das Gerät nicht ordnungsgemäß, obwohl Sie einen
Neustart ausgeführt haben, wenden Sie sich bitte an Ihren American Dynamics Vertreter.
Anschlüsse,
Terminierungseinstellungen,
Kabel, Leitungen und Steckverbinder und
Kameras,
Bildschirm(e).
1. 4.
5.
3.
2.
Hinweis:Es ist sehr wichtig, dass Sie im Windows-Betriebssystem die richtige Zeitzone
und das passende Videoformat für Ihren Standort wählen.
Ein-/Aus-
Schalter
(Netzschalter)
Rot = EIN
Aufnahmeanzeige
Rot = Daten warden
aufgezeichnet
1. Das PS/2-Kabel an der Rückwand
anschließen
Stecken Sie den schwarzen PS/2-
Stecker auf den Anschluss auf der
Rückwand.
Netzkabelbuchse
Adapter
USB/RS232
(nur Premier)
Maus
Beutel mit verschiedenem
Zubehör
2 Netzkabel
Intellex Recovery/
Accessories DVD
Maus-Pad
Installationsanleitung
und Ergänzungen
3_2FP_1
Laufschienen (karton-
verpackt und am in-
neren Verpackungs-
material befestigt)
Wenn das Gerät nicht automatisch hochfährt, verfahren Sie wie folgt:
Fahren Sie das Gerät hoch, hören Sie, ob der Lüfter anläuft und schauen Sie, ob die
Netz-Kontrollleuchte aufleuchtet (Grün = EIN).
Stromschalter
5
Rückwandanschlüsse
3
Lieferumfang
1
Verde =
Encendido
Nota:
• El monitor VGA o plano debe estar encendido antes de encender la unidad Intellex.
• Asegúrese de utilizar un sistema de alimentación ininterrumpida (SAI).
• Use una protección contra sobretensiones para el suministro eléctrico y tenga
disponible una conexión a tierra adecuada.
Neustart (rot)
Hochfahren und testen
4
Hinweis:
• Der VGA-Bildschirm und alle Peripheriegeräte sollten eingeschaltet werden, bevor Sie das
Intellex-Gerät hochfahren.v
•Stellen Sie sicher, dass Sie eine unterbrechungsfreie Stromversorgung verwenden
(UVS).
• Verwenden Sie einen Überspannungsschutz vor der Stromquelle und sorgen Sie für
eine geeignete Erdung.
8200-1036-01 A0
© 2013 Tyco Security Products. All Rights Reserved
8200-1036-01 A0
© 2013 Tyco Security Products. All Rights Reserved
Para el adaptador PS/2 - USB
Si utiliza un interruptor KVM (Belkin F1DA10xZ [2025-
0568-xx]) deberá adquirir el para el adaptador PS/2
USB (2025-0643-01).
PS/2-USB Adapter
Bei Verwendung eines KVM-Switches (Belkin F1DA10xZ
[2025-0568-xx]) müssen Sie zusätzlich den PS/2-US
Adapter erwerben (2025-0643-01).
Conectores de alarma
(Cámara 16 solamente)
2 cables de
alimentación
Alarmanschlüsse (nur
für 16 Kameras)
NOTA: La contraseña del IntellexAdmin es admin. Puede que la requiera para com-
pletar la configuración de Intellex.
HINWEIS: Das IntellexAdmin-Kennwort für Intellex lautet admin. Sie benötigen es eventuell für
die Intellex-Einrichtung.
G
uía de confi
g
uración rápida
p
ara sistemas de monta
j
e en estantería INTELLE
X
INTELLEX-Rack-S
y
steme Kurzanleitun
g
Installation

Other manuals for Intellex Digital Recorder

3

Other American Dynamics Security System manuals

American Dynamics Intellex DV16000 Installation and operation manual

American Dynamics

American Dynamics Intellex DV16000 Installation and operation manual

American Dynamics RABW4QUAD Assembly instructions

American Dynamics

American Dynamics RABW4QUAD Assembly instructions

American Dynamics AD2010N Manual

American Dynamics

American Dynamics AD2010N Manual

American Dynamics AD2032 User manual

American Dynamics

American Dynamics AD2032 User manual

American Dynamics DigiMux DG4004 User manual

American Dynamics

American Dynamics DigiMux DG4004 User manual

American Dynamics MegaPower 3200 User manual

American Dynamics

American Dynamics MegaPower 3200 User manual

American Dynamics AD2096A User manual

American Dynamics

American Dynamics AD2096A User manual

American Dynamics Intellex DV8000 User manual

American Dynamics

American Dynamics Intellex DV8000 User manual

American Dynamics AD2052 User guide

American Dynamics

American Dynamics AD2052 User guide

American Dynamics MegaPower 3200 Manual

American Dynamics

American Dynamics MegaPower 3200 Manual

American Dynamics Intellex DV16000 Installation and operating instructions

American Dynamics

American Dynamics Intellex DV16000 Installation and operating instructions

American Dynamics Intellex 2.0 Installation and operation manual

American Dynamics

American Dynamics Intellex 2.0 Installation and operation manual

American Dynamics Intellex DV16000 User manual

American Dynamics

American Dynamics Intellex DV16000 User manual

American Dynamics Intellex Ultra User manual

American Dynamics

American Dynamics Intellex Ultra User manual

American Dynamics MegaPower 3200 Service manual

American Dynamics

American Dynamics MegaPower 3200 Service manual

American Dynamics Intellex Ultra User manual

American Dynamics

American Dynamics Intellex Ultra User manual

American Dynamics VideoEdge Guide

American Dynamics

American Dynamics VideoEdge Guide

American Dynamics AD1273 CobraDome User manual

American Dynamics

American Dynamics AD1273 CobraDome User manual

American Dynamics AD2032 User manual

American Dynamics

American Dynamics AD2032 User manual

Popular Security System manuals by other brands

Vacron VDH-NK350A Hardware manual

Vacron

Vacron VDH-NK350A Hardware manual

Honeywell Home HS331 Series manual

Honeywell Home

Honeywell Home HS331 Series manual

ADT EZ using manual

ADT

ADT EZ using manual

Bosch SOLUTION ULTIMA instruction manual

Bosch

Bosch SOLUTION ULTIMA instruction manual

Velleman CCTVPROM11 Quick installation guide

Velleman

Velleman CCTVPROM11 Quick installation guide

Brahler DIGIMIC CamControl2 Bundle quick guide

Brahler

Brahler DIGIMIC CamControl2 Bundle quick guide

ABB Welcome M2303 manual

ABB

ABB Welcome M2303 manual

Honeywell NOTIFIER PAN1-PLUS Installation and user manual

Honeywell

Honeywell NOTIFIER PAN1-PLUS Installation and user manual

Teletek electronics SF 120 installation manual

Teletek electronics

Teletek electronics SF 120 installation manual

Ecco 7965 Series Installation and operation instructions

Ecco

Ecco 7965 Series Installation and operation instructions

ADEMCO Vista-50 user guide

ADEMCO

ADEMCO Vista-50 user guide

Silent Alert SW3A-2208-EU quick guide

Silent Alert

Silent Alert SW3A-2208-EU quick guide

Cisco 4116 - EtherFast Switch Design guide

Cisco

Cisco 4116 - EtherFast Switch Design guide

aquilar AquiTron AT-RAP-230 Installation & operation instructions

aquilar

aquilar AquiTron AT-RAP-230 Installation & operation instructions

API 1000 G quick start guide

API

API 1000 G quick start guide

ADEMCO via30+ user manual

ADEMCO

ADEMCO via30+ user manual

Vacron VVH-MDE304 quick start guide

Vacron

Vacron VVH-MDE304 quick start guide

Visonic MCS-700 installation instructions

Visonic

Visonic MCS-700 installation instructions

manuals.online logo
manuals.online logoBrands
  • About & Mission
  • Contact us
  • Privacy Policy
  • Terms and Conditions

Copyright 2025 Manuals.Online. All Rights Reserved.