manuals.online logo
Brands
  1. Home
  2. •
  3. Brands
  4. •
  5. American Dynamics
  6. •
  7. Security System
  8. •
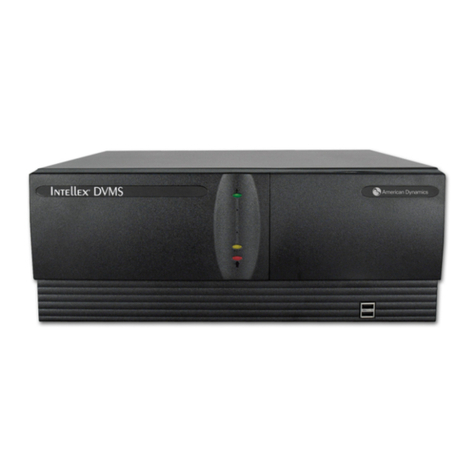
  9. American Dynamics Intellex Ultra User manual

American Dynamics Intellex Ultra User manual

INTELLEXUltra Quick Setup Guide
Standard Items
What’s in the Box
1
Required Items
2
VGA or Flat Panel Monitor
Video Inputs (Cameras, Cables)
Optional Accessories
1 to 4 or 1 to 8 Text Data Port
Expander
Touch Tracker
Connecting Devices to Rear Panel
3Power Up & Test
Your unit should be recording live video and displaying the information on the VGA
Main Monitor. The Power LEDs are lit and the fan is running.
Shut down the unit and continue to install alarms and other accessories, as needed, using
the Installation and Configuration Guide and the User Guide provided with your unit on the
Manual’s CD.
YES!
Results
Is the Unit functioning as described?
If your unit powered up, shut it down by using the mouse to select Utility, Shutdown from the
user interface on the VGA Monitor. If the user interface is not available on the VGA Main
Monitor, press the Power switch to shut down the unit. If unit does not shut down, press and
hold the Power switch for 10 seconds. After unit shuts down, check the following:
NO!
If you have checked all these items and the unit fails to power up, or you repowered your
unit and the unit still fails to operate properly, please contact your American Dynamics
Representative.
Power up the unit, listen for the fan to start, and
watch for the Power LED (Green = ON).
Connections.
Termination settings.
Cables, cords, and other connectors.
Cameras.
Monitor(s).
1. 5.
7.
6.
3.
2.
Note: It is critical that you select the appropriate time
zone in the Windows Operating System.
1. Connect the Cameras
Connect video cables from cameras
BNC connectors (1 - 16)
Use the optional looping panel for
video loop through
Hard Disk Drives.
4.
1 to 4 hard drives
(preinstalled)
Alarm Connectors
(DV16000)
Mouse
Power Cord
Intellex Recovery/Acces-
sories DVD
Mouse Pad
Installation Instructions
and Addenda
Slide Rails (boxed and
secured to the internal
packaging) Miscellaneous
Accessories Pack
4
5
Push gently on the Power button on the front panel. The power indicator on the front panel
illuminates and video information displays on the VGA monitor.
Push gently on the Power button.
If the unit does not power up automatically:
Push gently on the Power button on the
front panel.
To shut down the unit:
Use the mouse to select Utility, Shutdown
from the user interface of the VGA Main
Monitor.
To power up the unit again:
Note: The system will offer you an option of NTSC or PAL video formats. It is
important that you select the “Don’t ask me again” option (button highlighted,
on the same dialog) after selecting the desired video format. If you don’t, this
dialog will reappear upon every power up, interrupting automatic restarts of
Intellex.
Front Panel Controls and Indicators Note: The Reset button
is not needed for
power up, and us-
ing it could cause
damage to the
software on the
hard disk.
Switches
Red = Reset
Black = Power
LEDs
Alarms Red = Alarm State
Record Amber = Recording
Power Green = On
Power socket on
back panel
2. Connect the Mouse
3. Connect the Keyboard
(optional)
Note: Do not hot swap hard drives,
except on RAID units.
Desktop or Rack Mount Intellex
Ultra Looping Panel
4. Connect the VGA monitor
Alarm connectors (4)
(to be used later)
Call Monitor
Composite out
Eléments standards
Contenu de la boîte
1
Eléments necessaries
2
Moniteur VGA ou écran plat
Entrées vidéo (caméras, câbles)
Accessoires facultatifs
Extension de port de données
texte 1 à 4 ou 1 à 8
Touch Tracker
Connecter des dispositifs sur le panneau arrière
3Mise sous tension et test
Votre unité devrait enregistrer la vidéo en direct et afficher les informations sur
le moniteur VGA principal. Les voyants sont allumés et le ventilateur fonctionne.
Éteignez l’unité et continuez à installer les alarmes et autres accessoires nécessaires
à l’aide du Guide d’installation et de configuration et du Manuel de l’utilisateur fournis avec
l’unité.
OUI !
Résultats
Est-ce que l’unité fonctionne comme il faut ?
Si votre unité a démarré, arrêtez-la en cliquant avec la souris sur Utilitaire > Arrêt dans
l’interface utilisateur à l’écran VGA. Si l’interface utilisateur n’est pas disponible à l’écran
VGA principal, appuyez sur le commutateur d’alimentation pour éteindre l’unité. Si l’unité ne
s’éteint pas, maintenez enfoncé le commutateur d’alimentation pendant environ
10 secondes. Dès que l’unité s’est éteinte, vérifiez les éléments suivants :
NON !
Si vous avez vérifié tous ces éléments et si l’unité ne se met pas en marche ou si vous
avez rallumé l’unité et elle ne fonctionne toujours pas correctement, veuillez contacter
votre représentant American Dynamics.
Mettez l’unité sous tension, écoutez le ventilateur
se mettre à fonctionner et regardez le voyant de
marche/arrêt passer au vert (ON).
Connexions.
Paramètres de terminaison.
Câbles, cordons et autres connecteurs.
Caméras.
Moniteur(s).
1. 5.
7.
6.
3.
2.
Remarque : Il est essentiel de sélectionner le fuseau horaire
approprié depuis le système d’exploitation Windows.
1. Connectez les caméras
Connectez les câbles vidéo des caméras
Connecteurs BNC (1 - 16)
Utilisez le panneau de mise en boucle
optionnel pour mettre en boucle la vidéo
Lecteurs de disques durs.
4.
1 à 4 disques durs
(préinstallés)
Connecteurs d’alarme
(DV16000)
2 clés pour le panneau frontal
Souris
Cordon d’alimentation
Intellex Recovery/Acces-
soires DVD
Mouse Pad
Instructions d’Installation et
supplément
Rails de glissement
(en boîtes et attachés
à l’emballage interne) Accessoires divers
4
5
Appuyer doucement sur le bouton de marche/arrêt du panneau avant. Le voyant d’alimentation
sur le panneau frontal s’allume et des informations vidéo s’affichent à l’écran VGA.
Appuyer doucement sur le bouton
de marche/arrêt.
Si l’unité ne s’allume pas automatiquement :
Appuyer doucement sur le bouton
de marche/arrêt du panneau avant.
Pour éteindre l’unité :
Utilisez la souris pour sélectionner Ulitiaire,
Fermez depuis l’interface utilisateur du moniteur
principal VGA.
Pour remettre l’unité sous tension :
Remarque : Le système vous permet de choisir entre les formats vidéo NTSC et PAL.
Il est important que vous cochiez la case « Ne plus me poser cette
question » (bouton en évidence dans le même dialogue) après avoir
sélectionné le format vidéo adéquat. Si vous ne faites pas cela, le
dialogue apparaîtra à chaque démarrage, interrompant les redémarrages
automatiques d’Intellex.
Contrôles et voyants du panneau frontal Remarque : Le bouton de
réinitialisation
n’est pas nécessaire
pour la mise sous
tension et l’utiliser
pourrait
endommager
le logiciel sur le
disque dur.
Commutateurs
Rouge = réinitialisation
Noir = alimentation
Voyants
DEL
Alarmes Rouge = En alarme
Alimentation Vert = On
Bouton de marche/arrêt
(panneau arrière)
2. Connectez la souris
3. Connectez le clavier
(optionnel)
Remarque :N’échangez pas les
disques durs, excepté
les unités RAID.
Intellex de bureau ou pour
montage en rack
4. Connectez l’écran VGA
Connecteurs d’alarme (4)
(à utiliser plus tard)
Moniteur d’appel
Sortie vidéo composite
Pieds auto-adhésifs
Enreg. Ambre = Enregistrement
Note:
• VGA Monitor and any peripherals should be powered up before the Intellex unit
is powered up.
• An Uninterruptable Power Supply is required to to fully comply with EN50130-4.
• Be sure to use surge protection for power supply and provide appropriate
grounding.
Remarque :
•Le moniteur VGA et autres périphériques doivent être mis sous tension avant
l’unité Intellex.
• Assurez-vous d’utiliser une unité d’alimentation ininterruptible (UPS).
• Il faut utiliser une protection contre les surtensions et une mise à la terre appropriée.
2 Keys for Front Panel
Self-Adhesive Feet
5. Connect Network cable
(if used)
Panneau Ultra Looping
(mise en boucle)
5. Connectez le câble réseau
(si utilisé)
Guide de configuration rapide INTELLEX Ultra
8200-1037-01 A0
© 2013 Tyco Security Products. All Rights Reserved
8200-1037-01 A0
© 2013 Tyco Security Products. All Rights Reserved
6. Dome Controller
6. Connectez le contrôle de dôme
Non Soutenu
NOTE: The IntellexAdmin password is admin. You may need this to complete the Intellex setup.
REMARQUE : le mot de passe IntellexAdmin est admin. Ce mot de passe peut être nécessaire
lors de l’installation d’Intellex.
INTELLE
X
U
ltra Quick Setu
p
Guid
e
G
uide de confi
g
uration rapide INTELLEX Ultr
a
USB/RS232 Adaptateur
USB/RS232 Adaptor
Standardausführung
Lieferumfang
1
Benötigte Komponenten
2
VGA-Monitor Flachbildschirm
Videoeingänge (Kameras, Kabel)
Optionales Zubehör
Port Expander für Textdaten,
1 auf 4 oder 1 auf 8
Touch Tracker
Verbindungsgeräte zur Rückseite
3Hochfahren und testen
Ihr Gerät müsste Live-Videodaten aufzeichnen und die aufgezeichneten Daten auf
dem VGAHauptbildschirm anzeigen. Die Netz-Kontrollleuchten leuchten auf, und
der Lüfter schaltet ein.
Fahren Sie das Gerät herunter und installieren Sie die Alarme und sonstiges Zubehör nach
Bedarf, wie im Installations- und Konfigurationshandbuch und im Benutzerhandbuch be-
schrieben, das Sie auf der Handbuch-CD mit Ihrem Gerät erhalten haben.
JA!
Ergebnisse
Verhält sich das Gerät, wie hier beschrieben?
Falls Ihr Gerät hochgefahren ist, schalten Sie es ab, indem Sie auf der Bedienoberfläche des
VGA-Bildschirms mit der Maus Utility > Shutdown wählen. Falls die Benutzerschnittstelle
auf dem VGA-Hauptbildschirm nicht verfügbar ist, betätigen Sie den Netzschalter zum Ab-
schalten des Geräts. Falls sich das Gerät nicht abschaltet, betätigen Sie den Netzschalter
und halten ihn 10 Sekunden lang gedrückt. Nachdem das Gerät abgeschaltet ist, prüfen Sie
Folgendes nach:
NEIN!
Fährt das Gerät nicht hoch, obwohl Sie in Verbindung mit diesen Komponenten keine Fehler
festgestellt haben, bzw. funktioniert das Gerät nicht ordnungsgemäß, obwohl Sie einen Neus-
tart ausgeführt haben, wenden Sie sich
bitte an Ihren American Dynamics Vertreter.
Fahren Sie das Gerät hoch, hören Sie, ob der Lüfter
anläuft und schauen Sie, ob die Netz-Kontrollleuchte
aufleuchtet (Grün = EIN)
Anschlüsse
Terminierungseinstellungen
Kabel, Leitungen und Steckverbinder un
Kameras
Bildschirm(e)
1. 5.
7.
6.
3.
2.
Hinweis: Wichtig ist, dass Sie in Windows die richtige Zeitzone
einstellen.
1. Schließen Sie die Kameras an
Verbinden Sie die von den Kameras
ausgehenden Videokabel
BNC-Verbindungen (1 - 16)
Benutzen Sie die optionale Looping-
Platte für Video Loop Through
Festplatten
4.
1 bis 4 Festplatten
(vorinstalliert)
Alarmanschlüsse
(DV16000)
2 Tasten für Frontplatte
Maus
Netzkabel
Intellex Recovery/Zubehör
DVD
Maus-Pad
Installationsanleitung
und Ergänzungen
Laufschienen (kartonver-
packt und
am inneren Verpack-
ungsmaterial befestigt) Beutel mit verschiedenem
Zubehör
4
5
Drücken Sie den Ein- / Aus-Schalter (Netzschalter) auf der Vorderwand vorsichtig ein. Die
Stromanzeigen auf der Frontplatte leuchten auf, und auf dem VGA-Bildschirm werden Vid-
eoinformationen angezeigt.
Drücken Sie den Netzschalter vorsichtig ein.
Wenn das Gerät nicht automatisch hochfährt,
verfahren Sie wie folgt:
Drücken Sie den Ein- / Aus-Schalter (Netzschal-
ter) auf der Vorderwand vorsichtig ein.
So fahren Sie das Gerät herunter:
Klicken Sie in der Benutzeroberfläche des VGA-
Hauptbildschirms auf Utility > Shutdown.
So fahren Sie das Gerät wieder hoch:
Hinweis: Das System bietet die Auswahl zwischen dem NTSC- oder PAL-Videoformat. Es ist wichtig,
dass Sie die Option „Don’t ask me again“ (Bitte nicht mehr fragen) wählen (markiertes Feld im
gleichen Dialogfenster), nachdem Sie das gewünschte Videoformat gewählt haben. Sollten Sie
dies nicht tun, erscheint dieser Dialog bei jedem Hochfahren und unterbricht den automtischen
Neustart von Intellex.
Frontplatten-Steuerungen und -AnzeigenHinweis: Die Rücksetztaste
wird zum
Einschalten nicht
benötigt. Wird sie
trotzdem benutzt,
könnte dadurch
die Software auf
der Festplatte
beschädigt werden.
Schalter
Rot = Rücksetzen
Schwarz = Netz
LEDs
Alarme Rot = Alarmstatus
Aufzeichnen Gelb = Aufnahme
Leistung Grün = EIN
Stromsteckdose auf
der Geräterückseite
2. Die Maus anschließen
3. Schließen Sie die Tastatur an
(optional)
5. Schließen Sie das Netzwerkkabel an
(falls es benutzt wird)
Hinweis: Nehmen Sie - außer bei
RAID-Geräten - während des
Betriebs keinen Austausch
von Festplatten vor.
Desktop oder gestellmontiertes
Intellex-Gerät
4. Schließen Sie den VGA-Monitor an
Alarmverbindungen (4) (werden
zu einem späteren Zeitpunkt
benutzt)
Überwachungsmonitor
Videoausgangsanschluss
Haftfüßchen
Guía de instalación rápida de INTELLEX Ultra
Elementos estándar
Contenido del paquete
1
Accesorios necesarios
2
Monitor VGA o plano
Entradas de vídeo (cámaras, cables)
Accesorios opcionales
Puerto de datos textuales 1 a 4
ó 1 a 8
Touch Tracker
Conexión de dispositivos al panel trasero
3Encendido y Prueba
La unidad debe estar grabando vídeo en directo y mostrando la información en el moni-
tor principal VGA. El LED de potencia está encendido y el ventilador funcionando.
Apague la unidad y siga instalando alarmas y otros accesorios, según necesite, usando la
Guía de instalación y configuración y la Guía del usuario que se proporciona con la unidad
en el CD de manuales.
¡SÍ!
Resultados
¿Está funcionando la unidad según lo descrito?
Si la unidad está encendida, apáguela con el ratón al seleccionar Utilidad, apagar desde
la interfaz del usuario en el monitor VGA. Si la interfaz del usuario no está disponible en el
monitor principal VGA, presione el interruptor de alimentación para apagar la unidad. Si ésta
no se apaga, mantenga presionado el interruptor de alimentación durante 10 segundos. Una
vez que se apaga la unidad, verifique lo siguiente:
¡NO!
Si ha comprobado todos estos elementos y la unidad no se enciende, o si vuelve a
encender la unidad y ésta sigue sin funcionar correctamente, póngase en contacto con el
representante de American Dynamics.
Encienda la unidad, escuche para ver si se pone en
marcha el ventilador y observe el LED de potencia
(verde = encendido).
Conexiones
Parámetros de la terminación
Cables, cordones y otros conectores
Cámaras
Monitores
1. 5.
7.
6.
3.
2.
Nota: Es esencial que seleccione la zona horaria
correspondiente en el sistema operativo Windows.
1. Conecte las cámaras
Conecte los cables de vídeo desde las cámaras
Conectores BNC (1-16)
Utilice el panel con dispositivo en
bucle adicional para el vídeo con
dispositivo en bucle.
Unidades de disco duro
4.
1 a 4 discos duros
(preinstalados)
Conectores de alarma
(DV16000)
2 llaves para el panel frontal
Ratón
Cable de
alimentación
Intellex Recovery/Acceso-
rios DVD
Alfombrilla
para ratón
Instrucciones de
instalación y Anexos
Guías de deslizamiento
(aseguradas al embalaje
interno) Paquete de accesorios mis-
celáneos
4
5
Presione suavemente el interruptor basculante de encendido en el panel frontal. El indicador
de alimentación del panel frontal se ilumina y aparece la información de vídeo en el monitor
VGA.
Presione suavemente el interruptor bascu-
lante de encendido.
Si la unidad no se enciende automáticamente:
Presione suavemente el interruptor basculante
de encendido en el panel frontal.
Para apagar la unidad:
Use el ratón para seleccionar Utilidad,
Apagar el sistema en la interfaz de usuario
del monitor principal VGA.
Para volver a encender la unidad:
Nota: El sistema le ofrecerá una opción de formatos de vídeo NTSC o PAL. Es
importante que seleccione la opción “No volver a preguntarme” (botón
resaltado, en el mismo cuadro de diálogo) una vez seleccionado el formato
de vídeo deseado. Si no lo hace, este cuadro de diálogo volverá a aparecer
cada vez que se encienda, interrumpiendo automáticamente el reinicio de
Intellex.
Controles del panel frontal e indicadores Nota: No se necesita el
botón Reiniciar para
el encendido, su uso
podría ocasionar
daños al software
en el disco duro.
Interruptores
Rojo = Reiniciar
Negro = Alimentación
LEDs
Alarmas Rojo = Estado de
alarma
Grabar Ámbar = Grabando
Alimentación Verde = Encendido
Botón principal de encendido
(panel posterior)
2. Conecte el Ratón
3. Conecte el teclado
(opcional)
Nota: No intercambie discos duros,
excepto en las unidades RAID.
Intellex de escritorio
o de montaje en bastidor
4. Conecte el monitor VGA
Conectores de alarma (4)
(para utilizar posteriormente)
Monitor de llamada
Salida de video compuesto
Pie autoadhesivo
Nota:
• El monitor VGA o plano debe estar encendido antes de encender la unidad
Intellex.
• Asegúrese de utilizar un sistema de alimentación ininterrumpida (SAI).
• Use una protección contra sobretensiones para el suministro eléctrico y tenga
disponible una conexión a tierra adecuada.
Hinweis:
• Der VGA-Bildschirm und alle Peripheriegeräte sollten eingeschaltet werden, bevor Sie das
Intellex-Gerät hochfahren.v
• Stellen Sie sicher, dass Sie eine unterbrechungsfreie Stromversorgung verwenden
(UVS).
• Verwenden Sie einen Überspannungsschutz vor der Stromquelle und sorgen Sie für
eine geeignete Erdung.
Panel con dispositivo
en bucle Ultra
5. Conecte el cable Network
(si se utiliza)
Ultra Looping
Platte
INTELLEX Ultra Schnellinstallationsanleitung
8200-1037-01 A0
© 2013 Tyco Security Products. All Rights Reserved
8200-1037-01 A0
© 2013 Tyco Security Products. All Rights Reserved
6. Conecte el controlador domo
6. Schließen Sie die Dome-Steuerung an
NOTA: La contraseña del IntellexAdmin es admin. Puede que la requiera para com-
pletar la configuración de Intellex.
HINWEIS: Das IntellexAdmin-Kennwort für Intellex lautet admin. Sie benötigen es eventuell für
die Intellex-Einrichtung.
G
uía de instalación rá
p
ida de INTELLE
X
U
ltra
INTELLE
X
U
ltra Schnellinstallationsanleitun
g
Adapter USB/RS232
Adaptador USB/RS232
Other manuals for Intellex Ultra

2

Other American Dynamics Security System manuals

American Dynamics AD2052 User guide

American Dynamics

American Dynamics AD2052 User guide

American Dynamics Intellex DV16000 Installation and operation manual

American Dynamics

American Dynamics Intellex DV16000 Installation and operation manual

American Dynamics RABW4QUAD Assembly instructions

American Dynamics

American Dynamics RABW4QUAD Assembly instructions

American Dynamics AD2096A User manual

American Dynamics

American Dynamics AD2096A User manual

American Dynamics Intellex Ultra User manual

American Dynamics

American Dynamics Intellex Ultra User manual

American Dynamics VideoEdge Guide

American Dynamics

American Dynamics VideoEdge Guide

American Dynamics AD2010N Manual

American Dynamics

American Dynamics AD2010N Manual

American Dynamics Intellex DV16000 Installation and operating instructions

American Dynamics

American Dynamics Intellex DV16000 Installation and operating instructions

American Dynamics MegaPower 3200 Manual

American Dynamics

American Dynamics MegaPower 3200 Manual

American Dynamics DigiMux DG4004 User manual

American Dynamics

American Dynamics DigiMux DG4004 User manual

American Dynamics Intellex Digital Recorder User manual

American Dynamics

American Dynamics Intellex Digital Recorder User manual

American Dynamics Intellex DV8000 User manual

American Dynamics

American Dynamics Intellex DV8000 User manual

American Dynamics AD2032 User manual

American Dynamics

American Dynamics AD2032 User manual

American Dynamics Intellex DV16000 User manual

American Dynamics

American Dynamics Intellex DV16000 User manual

American Dynamics AD1273 CobraDome User manual

American Dynamics

American Dynamics AD1273 CobraDome User manual

American Dynamics AD2032 User manual

American Dynamics

American Dynamics AD2032 User manual

American Dynamics MegaPower 3200 User manual

American Dynamics

American Dynamics MegaPower 3200 User manual

American Dynamics MegaPower 3200 Service manual

American Dynamics

American Dynamics MegaPower 3200 Service manual

American Dynamics Intellex 2.0 Installation and operation manual

American Dynamics

American Dynamics Intellex 2.0 Installation and operation manual

Popular Security System manuals by other brands

Risco lightsys 2 user manual

Risco

Risco lightsys 2 user manual

Monacor TVCCD-623COL user manual

Monacor

Monacor TVCCD-623COL user manual

VC International FirstCall user guide

VC International

VC International FirstCall user guide

True-Kare K999 user guide

True-Kare

True-Kare K999 user guide

Panasonic WJ-NV200 product catalog

Panasonic

Panasonic WJ-NV200 product catalog

Seal One 2200 TF user manual

Seal One

Seal One 2200 TF user manual

Teknim VAS-741B Installation & user manual

Teknim

Teknim VAS-741B Installation & user manual

Esse-ti Helpy 2W G Series quick guide

Esse-ti

Esse-ti Helpy 2W G Series quick guide

Edwards B-KH Series installation instructions

Edwards

Edwards B-KH Series installation instructions

DSC PC 4020 - V3.0 manual

DSC

DSC PC 4020 - V3.0 manual

Ness PRO-LD user manual

Ness

Ness PRO-LD user manual

Polyision PS2W-SA series user manual

Polyision

Polyision PS2W-SA series user manual

Simplex 4010ES installation guide

Simplex

Simplex 4010ES installation guide

AFRISO AG 11 operating instructions

AFRISO

AFRISO AG 11 operating instructions

Winland EnviroAlert EA200 Installation & owner's manual

Winland

Winland EnviroAlert EA200 Installation & owner's manual

SeQual Eclipse Troubleshooting

SeQual

SeQual Eclipse Troubleshooting

Elitech RCW-800 Wifi user manual

Elitech

Elitech RCW-800 Wifi user manual

DSC neo HS2032 installation guide

DSC

DSC neo HS2032 installation guide

manuals.online logo
manuals.online logoBrands
  • About & Mission
  • Contact us
  • Privacy Policy
  • Terms and Conditions

Copyright 2025 Manuals.Online. All Rights Reserved.