manuals.online logo
Brands
  1. Home
  2. •
  3. Brands
  4. •
  5. American International
  6. •
  7. Automobile Accessories
  8. •
  9. American International TOYK932GB User manual

American International TOYK932GB User manual

iTOYK932GB
VEHICLE APPLICATION
Toyota
2016 PRIUS
www.aampglobal.com www.aius.net
2500 East Francis Street Ontario, CA 91761, U.S.A.
Sales: (800) 477-2267
Intl: (727) 572-9255
Support: 888-228-5560
©2016 AMERICAN INTERNATIONAL INDUSTRIES, INC. TECH Ver. 3/16 PRINT Ver. 6/16
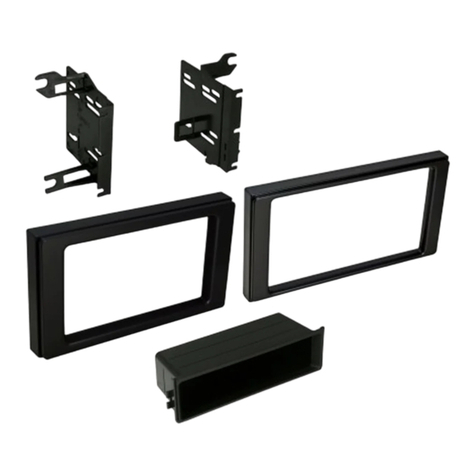
TOYK932GB Mounting Kit
DASH DISASSEMBLY INSTRUCTIONS
1. Using a soft tool unsnap side panel on passenger side of dash, located in the door jam.
2. From the are now exposed, using a soft tool, pop up the button on the grommet that is
engaged to dash trim bezel.
3. Gently unsnap and remove dash trim bezel, that includes the climate controls and
air vents and surrounds the radio and above the glove box.
4. Remove (4) 10 MM screws securing the radio mounting brackets
5. Remove factory radio and disconnect all wire harnesses.
23
DOUBLE DIN INSTALLATION INSTRUCTIONS
Figure A
KIT ASSEMBLY INSTRUCTIONS
Single ISO Mount Application
1. Insert pocket into lower section of the brackets and snap into rear pocket
support tabs.
2. Install brackets to rear of main frame using the (6) screws provided.
3. Insert ISO mountable radio between ISO mount brackets and loosely attach to sides
of radio using screws provided with radio when possible, or screws supplied with kit.
4. Using the main frame of the as a guide, slide radio forward or backward
for desired look and then tighten screws to the radio.
Note: Attach a rear support bracket to the rear of the new radio and adjust as
necessary to support the weight of the radio. Suggested
Double DIN ISO Mount Application
See Fig B for bracket tab removal.
1. Install brackets to rear of main frame using the (6) screws provided.
2. Insert ISO mountable radio between ISO mount brackets and loosely attach to
sides of radio using screws provided with radio when possible,
or screws supplied with kit.
3. Using the main frame of the as a guide, slide radio forward or backward
for desired look and then tighten screws to the radio.
Note: Attach a rear support bracket to the rear of the new radio and adjust as
necessary to support the weight of the radio. Suggested.
Figure B Remove shaded tabs
on left and right sides
of the brackets
(Right side not shown)

Other American International Automobile Accessories manuals

American International TOYK9714 User manual

American International

American International TOYK9714 User manual

American International ACU-K862 User manual

American International

American International ACU-K862 User manual

Popular Automobile Accessories manuals by other brands

Directed CHRYSLER9 installation guide

Directed

Directed CHRYSLER9 installation guide

Central Hydraulics 94641 Assembly and operating instructions

Central Hydraulics

Central Hydraulics 94641 Assembly and operating instructions

ARB Airlocker RD140 installation guide

ARB

ARB Airlocker RD140 installation guide

Graco CONTENDERTM 65 instruction manual

Graco

Graco CONTENDERTM 65 instruction manual

sylvansport Sunny Side Up installation manual

sylvansport

sylvansport Sunny Side Up installation manual

aFe Power 46-70022 instruction manual

aFe Power

aFe Power 46-70022 instruction manual

Thule Rapid 1169 Fitting instructions

Thule

Thule Rapid 1169 Fitting instructions

Emtron EVO 4-8 user manual

Emtron

Emtron EVO 4-8 user manual

Westin 27-1255 installation instructions

Westin

Westin 27-1255 installation instructions

Portwell PCS-8279 user manual

Portwell

Portwell PCS-8279 user manual

Tesland Powerlift instructions

Tesland

Tesland Powerlift instructions

Boyo VTM73FL user manual

Boyo

Boyo VTM73FL user manual

Mont Blanc FK93 Fitting instructions

Mont Blanc

Mont Blanc FK93 Fitting instructions

Yakima K976 instructions

Yakima

Yakima K976 instructions

WeatherTech No Drill MudFlap installation instructions

WeatherTech

WeatherTech No Drill MudFlap installation instructions

Jabra FREEWAY datasheet

Jabra

Jabra FREEWAY datasheet

banks PowerPDA 61100 Owner's manual with installation instructions

banks

banks PowerPDA 61100 Owner's manual with installation instructions

DECKED MT6 installation instructions

DECKED

DECKED MT6 installation instructions

manuals.online logo
manuals.online logoBrands
  • About & Mission
  • Contact us
  • Privacy Policy
  • Terms and Conditions

Copyright 2025 Manuals.Online. All Rights Reserved.