Amersham Biosciences AKTA design A-905 User manual

Autosampler A-905
18-1154-42
User Manual
18115442ab.book Page 1 Monday, June 23, 2003 3:46 PM

18115442ab.book Page 2 Monday, June 23, 2003 3:46 PM

Important user information
All users must read this entire manual to fully
understand the safe use of Autosampler A-905.
WARNING!
The WARNING! sign highlights instructions
that must be followed to avoid personal
injury. Do not proceed until all stated
conditions are clearly understood and met.
Caution!
The Caution! sign highlights instructions that
must be followed to avoid damage to the
product or other equipment. Do not proceed
until all stated conditions are clearly
understood and met.
Note
The Note sign is used to indicate information
important for trouble-free and optimal use of
the product.
CE certification
This product meets all requirements in applicable CE-
directives. A copy of the corresponding Declaration of
Conformity is available on request.
The CE symbol and corresponding declaration of
conformity, is valid for the kit and instrument when:
– used as a stand-alone unit, or
– connected to other CE-marked Amersham
Biosciences instruments, or
– connected to other products recommended or
described in this manual, and
– used in the same state as it was delivered from
Amersham Biosciences except for
alterations described in this manual.
WARNING!
This is a Class A product. In a domestic environment
this product might cause radio interference in which
case the user might be required to take adequate
measures.
Terms and Conditions of Sale
Unless otherwise agreed in writing, all goods and
services are sold subject to the terms and conditions of
sale of the company within the Amersham Biosciences
group which supplies them. A copy of these terms and
conditions is available on request.
Should you have any comments on this product, we will
be pleased to receive them at:
Amersham Biosciences AB
SE-751 84 Uppsala
Sweden
Trademarks
Drop Design, Ettan, UNICORN and ÄKTA are
trademarks of Amersham Biosciences Limited.
Amersham and Amersham Biosciences are trademarks
of Amersham plc.
Office Addresses
Amersham Biosciences AB
SE-751 84 Uppsala
Sweden
Amersham Biosciences UK Limited
Amersham Place
Little Chalfont
Buckinghamshire
England HP7 9NA
Amersham Biosciences Corp.
800 Centennial Avenue
P.O. Box 1327
Piscataway, N.J. 08855
USA
Amersham Biosciences Europe Gmbh
Munzinger Strasse 9
D-79111 Freiburg
Germany
Amersham Biosciences KK
Sanken Building
3-25-1 Hyakunincho, Shinjuku-ku
Tokyo 169–0073
Japan
www.amershambiosciences.com
© Copyright Amersham Biosciences AB 2003
– All rights reserved
Autosampler A-905
User Manual 18-1154-42 Edition AB
18115442ab.book Page 3 Monday, June 23, 2003 3:46 PM
18115442ab.book Page 4 Monday, June 23, 2003 3:46 PM

Contents
Autosampler A-905 User Manual 18-1154-42 Edition AB 5
Contents
1 Introduction
1.1 General .......................................................................................7
1.2 Safety .......................................................................................... 8
1.3 Safety symbols on Autosampler A-905 .........................................8
2 Installation
2.1 Unpacking ................................................................................... 9
2.2 Locating the A-905 ....................................................................10
2.3 Power connections ....................................................................11
2.4 UniNet connections ................................................................... 11
2.5 Selecting A-905 in UNICORN ....................................................11
2.6 Fluid connections ...................................................................... 12
2.7 Preparation of microplates and vials ........................................... 17
3Operation
3.1 General .....................................................................................21
3.2 Sample injection techniques ...................................................... 21
3.3 Manual instructions and parameters .......................................... 24
4 Maintenance
4.1 Injection valve ............................................................................ 29
4.2 Needle and tubing .....................................................................33
4.3 Syringe, sample loop and buffer tubing combinations .................34
4.4 Replacing the sample needle .....................................................38
4.5 Syringe ...................................................................................... 39
5 Troubleshooting
5.1 Faults and actions .....................................................................40
6 Reference information
6.1 Description ................................................................................42
6.2 Technical specifications ............................................................. 51
6.3 Accessories and consumables ...................................................53
18115442ab.book Page 5 Monday, June 23, 2003 3:46 PM

Contents
6Autosampler A-905 User Manual 18-1154-42 Edition AB
About this manual
This manual comprises two parts; a practical part (sections 1–5) and a
reference part (section 6).
Sections 1–5 contain the necessary information for operating the
instrument.
18115442ab.book Page 6 Monday, June 23, 2003 3:46 PM

Introduction 1
Autosampler A-905 User Manual 18-1154-42 Edition AB 7
1 Introduction
1.1 General
This manual describes Autosampler A-905 for ÄKTA™and
Autosampler A-905 for Ettan™. They are automated sampling injectors
for use in ÄKTA and Ettan liquid chromatography systems.
The autosampler features:
•Sample injection volumes as follows:
•1 µl to 1 ml (Autosampler A-905 for ÄKTA).
•0.1 µl to 1 ml (Autosampler A-905 for Ettan).
•Three different methods for injection.
•Biocompatibility.
•Different sizes of sample vials.
•Cooling of the sample vials.
Fig. 1-1. Autosampler A-905
Wash position
Drain wash
position
Condensed water
and leakage drain
Syringe dispenser
Syringe waste
Wash solvent
bottle
Support plate
Cover in open position
Buffer tubing
High-pressure valve
Tubing guide
Needle arm
icroplate
Transport solvent/
wash vial
18115442ab.book Page 7 Monday, June 23, 2003 3:46 PM

1Introduction
8Autosampler A-905 User Manual 18-1154-42 Edition AB
1.2 Safety
•The instrument is designed for indoor use only.
•Do not use in a dusty atmosphere or close to spraying water.
•Do not block the air inlet and outlet of the unit.
1.3 Safety symbols on Autosampler A-905
Autosampler A-905 contains the following safety symbol:
This sticker denotes the proximity of the sharp needle and the moving
needle arm of the Autosampler A-905, which, if not handled with care,
could result in injury or damage or destruction of these parts.
WARNING! Always disconnect the power supply before attempting to
replace any item on the instrument.
WARNING! Do not operate the Autosampler A-905 with the front
cover open.
WARNING! The instrument must not be opened by the user. It
contains high voltage circuits that can deliver a lethal electric shock.
WARNING! For continued protection against risk of fire, replace only
with fuses of specified type and rating. See technical specifications for
fuse data.
!
SHARP NEEDLE
AND MOVING PARTS
KEEP HANDS CLEAR
18115442ab.book Page 8 Monday, June 23, 2003 3:46 PM

Installation 2
Autosampler A-905 User Manual 18-1154-42 Edition AB 9
2 Installation
2.1 Unpacking
Unpack the instrument and check the items against the supplied
packing list. Inspect the items for obvious damage that may have
occurred during transportation.
Keep all packing materials if onward transport of the instrument is
expected.
Lift the A-905 with both hands under the instrument or with one hand
under the front and the other hand grasping the rear top.
CAUTION! Do NOT lift the instrument by the front cover!
18115442ab.book Page 9 Monday, June 23, 2003 3:46 PM

2Installation
10 Autosampler A-905 User Manual 18-1154-42 Edition AB
2.2 Locating the A-905
The A-905 needs approximately 28 cm of bench space and a mains
connection of 220-240 V or 100-120 V, 50/60 Hz, preferably taken
from the system base platform.
Make sure that none of the ventilation holes are blocked. Blockage of
the ventilation holes can cause malfunctioning of the A-905
Autosampler or even damage the electronics.
Do not install the A-905 in areas subject to excessive dust, direct
sunlight or shocks, and do not place it near a source of heat.
A–905 has two transportation safety devices which must be removed.
•Remove the locking screw holding the front cover. It is located at
the right side of the front cover. Save the locking screws.
•A red plastic cap is attached over the needle washing mechanism
below the front cover. Remove the plastic cap and save it.
Locking screw
Red cap
18115442ab.book Page 10 Monday, June 23, 2003 3:46 PM

Installation 2
Autosampler A-905 User Manual 18-1154-42 Edition AB 11
2.3 Power connections
Before connecting the mains cord to your separation unit, check that
the voltage setting of the A-905 matches the local mains supply voltage
and main fuses. Use only a supply appliance with protective grounding.
If the indicated voltage is not correct, select the proper voltage by
removing, inverting, and then re-inserting the voltage selector-
cartridge. Check that the right fuses are installed. If not replace them
with the fuses stated below:
•For 110-120 V~, use two 5 AT-fuses (slow).
•For 220-240 V~, use two 2.5 AT-fuses (slow).
When the voltage selection and fuses are correct for your power source,
plug in the power cord in a free outlet in the base platform of your
separation unit.
2.4 UniNet connections
Autosampler A-905 is controlled from the computer using UniNet
cables. The cables are connected to the UniNet-1 ports at the rear of
A-905. The cable routing depends on the liquid chromatography
system that is used. See the system documentation for detailed
instructions on how to connect A-905 to your system.
2.5 Selecting A-905 in UNICORN
After installing the hardware, Autosampler A-905 must be selected in
UNICORN™to make the instructions available.
1 Switch on A-905, the system, and the computer. Start UNICORN.
2In
UNICORN Main Menu, select Administation:System Setup.
3 Select system and then click Edit. Check that the correct strategy is
shown in the Strategy field.
4 Click Component.
5 Select AutoSampler A-905 (Autosampler in Ettan microLC) from the
list. Click OK twice and Close to complete the selection of A-905.
WARNING! For continued protection against risk of fire, replace only
with fuses of specified type and rating. See Technical specifications
for fuse data.
18115442ab.book Page 11 Monday, June 23, 2003 3:46 PM

2Installation
12 Autosampler A-905 User Manual 18-1154-42 Edition AB
2.6 Fluid connections
Autosampler A-905 for ÄKTA and Autosampler A-905 for Ettan are
factory-installed with different dimensions on some of the fluid
handling parts (see Table 2-1 ).
Table 2-1. Factory-installed fluid handling parts, ÄKTA vs. Ettan
Table 2-2 and Table 2-3 lists the dimensions of all factory-installed
tubing in the two autosamplers. A schematic presentation of all parts
that have contact with fluid is shown in Figure 2-1.
For optimal performance of the A-905, a correct combination of
syringe, loop and buffer tubing should be installed.
To get access to the fluid parts, open the front cover of the A-905.
Fig. 2-1. Parts in the flow path
Fluid handling part Autosampler A-905
for ÄKTA
Autosampler A-905
for Ettan
Syringe 1 ml 100 µl
Sample needle 15 µl 5 µl
Buffer tubing 2 ml 500 µl
Sample loop 1 ml 20 µl
Needle
Pump
Loop
Column
Dispenser
INJECT position
LOAD position
WASH
BOTTLE
4
3
21
6
5
WASTE
INJECTION
VALVE
18115442ab.book Page 12 Monday, June 23, 2003 3:46 PM

Installation 2
Autosampler A-905 User Manual 18-1154-42 Edition AB 13
Table 2-2. Factory-installed tubing in Autosampler A-905 for ÄKTA
Table 2-3. Factory-installed tubing in Autosampler A-905 for Ettan
Tubing Material Dimensions
Sample needle tubing
(Volume: 15 µl)
PEEK 135 mm ×o.d. 0.5 mm ×i.d. 0.25 mm
Buffer tubing from high
pressure valve to syringe valve
(Volume: 2 ml)
Teflon 2500 mm ×o.d. 1/16" ×i.d. 1.0 mm
Tubing, syringe valve to wash
solvent bottle
Tefzel 300 mm ×o.d. 1/16" ×i.d. 1.0 mm
Tubing, syringe valve to waste
solvent bottle
Tefzel 400 mm ×o.d. 1/16" ×i.d. 1.0 mm
1 ml PEEK loop PEEK o.d. 1/16" ×i.d. 0.5 mm
Tubing, general waste Silicone 2 x 1.2 m, o.d. 10 mm ×i.d. 7 mm
Tubing Material Dimensions
Sample needle capillary
(Volume: 5 µl)
Silicate
glass 135 mm ×i.d. 0.10 mm
Buffer tubing from high
pressure valve to syringe valve
(Volume: 500 µl)
Teflon 640 mm ×o.d. 1/16" ×i.d. 1.0 mm
Tubing, syringe valve to wash
solvent bottle
Tefzel 300 mm ×o.d. 1/16" ×i.d. 1.0 mm
Tubing, syringe valve to waste
solvent bottle
Tefzel 400 mm ×o.d. 1/16" ×i.d. 1.0 mm
20 µl PEEK loop PEEK o.d. 1/16" ×i.d. 0.5 mm
Tubing, general waste Silicone 2 x 1.2 m, o.d. 10 mm ×i.d. 7 mm
18115442ab.book Page 13 Monday, June 23, 2003 3:46 PM

2Installation
14 Autosampler A-905 User Manual 18-1154-42 Edition AB
2.6.1 System connections
To ensure reproducible injections,
make the connections to your
chromatography system according
to the installation instructions,
given in the system documentation.
Route the tubings through the
tubing guide on the right-hand side.
The A-905 has been flushed with
20% isopropanol. Make sure that
the mobile phase of your liquid
chromatography system is miscible
with isopropanol. If not, start with
an intermediate solvent as mobile
phase (disconnect the column).
2.6.2 Waste tubing
General waste
Connect the supplied drain
tubing to the right-hand drain
hose connector of the A-905 and
put the other end in a bottle
placed on the floor. This drain
removes all the liquid dispensed
into the wash position.
Note: Sample that is not injected
is also removed through
this tubing.
Syringe waste
Place the syringe waste tubing in a
small bottle below the A-905. If
injection volumes no larger than
the volume of the buffer tubing
are programmed, the syringe
waste will only be wash solvent.
Leakage drain
All leakage solvents are drained through the left-hand hose connector.
To
LC system
Tubing guide
Condensed
water and
leakage
Drain wash
position
Syringe
Waste
CAUTION! Make sure that the drain and waste tubings are not twisted
and obstructing the flow path.
18115442ab.book Page 14 Monday, June 23, 2003 3:46 PM

Installation 2
Autosampler A-905 User Manual 18-1154-42 Edition AB 15
2.6.3 Wash solvent
The A-905 has a built-in wash solvent
reservoir of 250 ml (ÄKTA) or 100 ml
(Ettan).
To position the wash solvent bottle:
1 Fill the wash solvent bottle with
20% ethanol.
2 Screw the bottle in the wash solvent
holder and place the holder on the
A-905.
3 Put the wash solvent tubing in the
wash solvent bottle.
4 Fill the tubing using the AutosamplerControl_905:SyringeEnd_9051
and SyringeHome_905 commands in Manual:Flowpath.
SyringeEnd_905 aspirates a
syringe volume of wash solvent
from the wash solvent bottle
and fills the wash solvent
tubing.
SyringeHome_905 dispenses the
syringe contents to the syringe
waste. Repeat this action until
the wash solvent tubing and the
syringe are completely filled.
5 If there is still air in the syringe, repeat step 4 while gently tapping
on the syringe as wash solvent is dispensed to waste. If the air in the
syringe persists, see section 4.5 Syringe.
1The instruction name does not contain “_905”in Autosampler for Ettan.
Wash solvent
tubing
Inj. valve
Wash
solvent
Syringe
waste
18115442ab.book Page 15 Monday, June 23, 2003 3:46 PM

2Installation
16 Autosampler A-905 User Manual 18-1154-42 Edition AB
6 After the wash solvent tubing and the syringe are filled, use the
AutosamplerControl_905:InitialWash_9051command in
Manual:Flowpath to perform a standard wash. All tubing connected
to the syringe valve will be filled and flushed with wash solvent.
The wash solvent bottle is now ready for use.
If you have an application that requires more than 100 ml of wash
solvent for a complete run, you can replace the wash solvent tubing by
a longer tubing with one end flanged for the valve fitting and place a
larger bottle outside the A-905. To fill this wash solvent tubing, repeat
the previous fill procedure a few times.
1The instruction name does not contain “_905”in Autosampler for Ettan.
18115442ab.book Page 16 Monday, June 23, 2003 3:46 PM

Installation 2
Autosampler A-905 User Manual 18-1154-42 Edition AB 17
2.7 Preparation of microplates and vials
Autosampler A-905 is delivered with the following standard type
microplates and transport vials:
•96-well low microplate (1 pc).
•96-well high microplate (1 pc).
•384-well low microplate (1 pc).
•48-vial adapter (1 pc).
•Transport solvent vials, 10 ml
See the table below and Figure 2-2 for detailed information on the
plates. Each plate type also has its own logical plate definition in
UNICORN.
2.7.1 Microplate and vial specifications
Plate definition in
UNICORN
Plate type Max. vial diameter
96HIGH 96-well high 7 mm
96LOW 96-well low 7 mm
384LOW 384-well low —
48VIALS 48-vial adapter 12 mm
Dimension of the microplate base:
Length
Width
127.75 ± 0.25 mm
85.5 ± 0.25 mm
Microplate height, including plate, vial and
cap/sealing:
12.5–47.0 mm
Transport solvent vial:
Width
Height
Max. 22.8 mm
Max. 47.0 mm
18115442ab.book Page 17 Monday, June 23, 2003 3:46 PM

2Installation
18 Autosampler A-905 User Manual 18-1154-42 Edition AB
Fig. 2-2. Microplate types for A-905
1 2 3 4 5 6 7 8
1 2 3 4 5 6 7 8
A
B
C
D
E
F
A
B
C
D
E
F
1 2 3 4 5 6 7 8 9 10 11 12
A
B
C
D
E
F
G
H
1234567 98 101112131415161718192021222324
A
B
C
D
E
F
G
H
I
J
K
L
M
N
O
P
48-vial adapter 96-well microplate
(High and Low)
384-well microplate
18115442ab.book Page 18 Monday, June 23, 2003 3:46 PM

Installation 2
Autosampler A-905 User Manual 18-1154-42 Edition AB 19
2.7.2 Recommended microplates and transport vials
The following 96-well microplates are recommended:
Greiner nos., low microplates: 655101, 651101, 650101
Greiner nos., high microplates: 780201
Nunc nos., low microplates: 143761, 168055, 156545, 163320
The following transport vials are recommended:
Chromacol no: 6 CV (6 ml), 10 CV (10 ml)
2.7.3 Filling and sealing wells and vials
The wells, the standard vials, as well as the conical vials, are filled by
using a narrow–end pipette to allow air to escape when filling the vial.
If vials are not used, rubber cap mats, self-adhesive aluminum foils and
sealing films are available for sealing the wells.
It is important that the seal is airtight. This maintains a pressure on the
vial that prevents air bubbles and stops evaporation of volatile samples.
Note: Check the seal after crimping or applying the rubber cap mat. If
a crimp cap can be turned easily, the seal is not airtight (re-adjust
hand crimper). The seal must not be deformed after crimping,
since this may also deform the needle.
The transport solvent vials are sealed by using a standard crimp tool.
CAUTION! Do not fill the wells or the vials to the edge! It will cause
sample to enter the gap between the steel needle and the PEEK
needle, risking extra cross-contamination of samples and fouling of
the needle pair.
CAUTION! Only use high microplates with the rubber cap mats. If
using low microplates, the needle might bend when attempting to
penetrate the cap mat.
18115442ab.book Page 19 Monday, June 23, 2003 3:46 PM

2Installation
20 Autosampler A-905 User Manual 18-1154-42 Edition AB
2.7.4 Initializing the microplate
The plate type used must be selected in UNICORN.
1In
System Control, select System:Settings...
2 Select Specials in the Instructions field, and then
AutosamplerParameters_905:PlateType1.
1The instruction name does not contain “_905”in Autosampler for Ettan.
18115442ab.book Page 20 Monday, June 23, 2003 3:46 PM
Table of contents
Other Amersham Biosciences Laboratory Equipment manuals

Amersham Biosciences
Amersham Biosciences TE 70 User manual

Amersham Biosciences
Amersham Biosciences AKTAexplorer User manual

Amersham Biosciences
Amersham Biosciences Hoefer DALT User manual

Amersham Biosciences
Amersham Biosciences MegaBACE 500 Technical manual

Amersham Biosciences
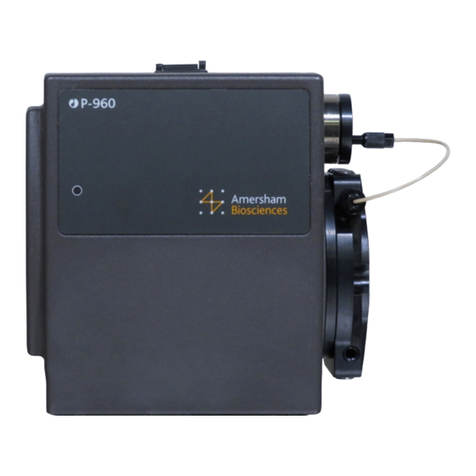
Amersham Biosciences AKTA design P-960 User manual
Popular Laboratory Equipment manuals by other brands

BIOMET
BIOMET OPTIVAC VACUUM MIXING SYSTEM Instructions for use

CertoClav
CertoClav Vacuum Pro 8-22L operating instructions

Endress+Hauser
Endress+Hauser Analytik Jena APU 28 Series operating instructions

Nahita
Nahita LGB004 manual

MJ Research
MJ Research PTC-100 Operation manual

Dosmatic
Dosmatic Advantage A20-10% Installation & operating instructions