Ampere Shower Power User manual

Shower Power Manual

There’s really no need to remind everyone how
crazy life is right now. We all need a micro-lift…
some time to relax, de-stress and even have a bit
of fun. Having as little as five minutes of alone
time is an easy way to get back on track. For a lot
of people, the time you spend in the shower may
be the only truly alone time you get all day. Why
not make the most of it?!
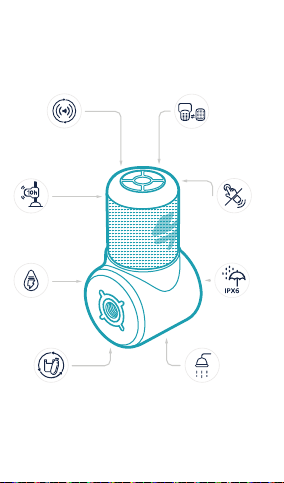
Enter… Shower Power. A patented Bluetooth
speaker that generates all of its power from the
water you are already using in the shower. Take a
shower while jamming out to your music, listening
to your favorite podcast, or relaxing to an
audiobook… What’s not to like? Shower Power has
transformed our daily showers and we know you
are going to love using it every day too.
Shower Power integrates seamlessly into your
daily routine. We designed it to be effortless to
use. Installation is fast and simple. It turns on and
pairs automatically. And best of all, you never
have to worry about charging it. With Shower
Power, you will always have a powerful
fully-charged Bluetooth speaker in your shower.
We guarantee that your time in the shower will
never be the same.
Welcome Note from the Founders

We didn’t stop at hydropower. Shower Power is
made from recycled ocean plastic. Not to mention,
the packaging for Shower Power, and all other
Ampere products, is 100% plastic-free.
Before using Shower Power, please read all the
instructions and watch our installation videos at
install-shower-power.ampere.shop. And, make sure
to register your product at register.ampere.shop to
lock in the one-year warranty and a $20 gift card.
Thank you for your support! We’d love to hear what
you think about Shower Power. Please email us
with any questions, concerns, feedback, etc. at
Thank you and happy showers!
Chase & Reid

Battery: 1800 mAh Lithium Ion
Frequency Range: 100hz-20Khz
Speaker: 40mm x 2
Speaker Power: 3W x 2
Supports Bluetooth®: 5.1
Weight: 520 g.
Size: 158 x 95 x 91mm
Specs

Fits 99% of
Showerheads
360° Sound &
Powerful Bass
Remote or
Touchpad
Control
Pair Two Together
for Surround Sound
100%
Powered by
Water
IPX6
Waterproof
Made from Recycled
Ocean Plastic
10 Hours of
Battery Power
10

What’s in the Box
Droplet
(aka Speaker)
Shower Dock
Male-male
Connector
Hex Key Sealing Tape Gaskets
(O-rings)

Quick Start Guid
For more detailed installation
instructions and how-to videos, go to
install-shower-power.ampere.shop
or scan the QR code below.
Before you begin, identify your shower fitting.
Fixed
The showerhead attaches
to a fitting that comes
straight from the wall at an
angle. The fitting is male
and the showerhead is
female.

Handheld
The showerhead attaches
to a hose that comes
from a fitting lower down
on the wall. The hose is
female and the
showerhead is male.
*Tip -
You can install Shower
Power on either end
depending on your
preference. It can be at the
base of the hose OR at the
end of the hose, attached
to the showerhead.
Rain
The showerhead attaches
to a fitting that comes
straight down from the
ceiling. The fitting is male
and the showerhead is
female.
*Installation steps are the same for fixed and rain shower fittings

Step 1 - Unbox Shower Power and remove the
speaker from the dock
Rotate the speaker 90 degrees counterclockwise to
separate it from the dock. Set the speaker and dock
aside.
Step 2 - Remove your showerhead from the fitting
Unscrew the showerhead. You can usually do this
by hand but may need a pair of pliers if it was
installed too tightly.
Step 3 - Install the male-male connector on the
appropriate side
Input
(smaller hole)
Output
(larger hole)

Shower Power is not bidirectional so it is critical to
determine which side of Shower Power is input and
which side is output. There is a sticker that indicates
the input side (this can be removed after the first
use). For additional confirmation and future checks,
the hole on the input side is smaller. As such, the turbine
will be more visible on the output side. In addition,
there is a small metal sensor on the output side.
Rain and Fixed
For these shower types, the male-male connector
will go on the output side (the side that connects to
the showerhead). First, screw in the male-male
connector by hand and then tighten it with the hex
key.
Handheld
For these shower types, the male-male connector
will go on the input side (the side that connects to
the hose). First, screw in the male-male connector
by hand and then tighten it with the hex key.
Step 4 - Connecting your showerhead to the
shower dock
Attach your showerhead to the shower dock.
Connect securely but don’t overtighten. If you
noticed that your showerhead/fitting already
used sealing tape, you may want to use it at this
stage of the installation process.

*Tip for handheld showers
If the showerhead is not oriented in the direction
you want then you can add a rubber O-ring
inside the output threads on Shower Power. Use
the thinner rings for smaller adjustments and the
thicker rings for larger adjustments. You can use
multiple if necessary.
Step 5 - Connect shower dock + showerhead to
the shower fitting
Finally, connect the shower dock, with the
showerhead now attached, to the shower fitting.
*Tip for rain and fixed showers
If the showerhead is not oriented in the direction
you want then you can add a rubber O-ring
inside the output threads on Shower Power. Use
the thinner rings for smaller adjustments and the
thicker rings for larger adjustments. You can use
multiple if necessary.
Step 6 - Connect the speaker (aka Droplet Pro) to
the shower dock
Align the bump in the underside of the shower
dock with the groove on the top of the speaker
(Droplet). The Ampere logo will be facing the same
direction as flow of water when and you should feel
the bump go into the groove. Then, rotate the
speaker 90 degrees. You will feel it “lock” into place
and the Ampere logo will be perfectly centered
along the side of Shower Power.

It’s leaking! What do I do?
The first thing to check is if you screwed in Shower
Power tight enough. The next solution is to try
adding rubber O-rings to the female ends of the
connection. Another solution is to use the included
thread sealing tape to make the connection tighter.
Wrap the sealing tape around the threads in a
counterclockwise direction for a better seal.
What do I do if Shower Power is not pointed in
the direction I want?
If the showerhead is not oriented in the direction
you want then you can add a rubber O-ring inside
the output threads on Shower Power. Use the
thinner rings for smaller adjustments and the thicker
rings for larger adjustments. You can use multiple if
necessary. You can also use the included thread
sealing tape to prevent leakage and screw to your
preferred direction.
Troubleshooting
Congratulations! Now you are ready to rock n’ roll.

Charging
Hydroelectric Charging:
Charging a Bluetooth speaker has never been
easier–all you have to do is take a shower.
Shower Power will charge whenever there is
flowing water. Under “normal use conditions,”
Shower Power will never need to be charged. We
consider “normal use conditions” to be water
pressure between 30-50 PSI, water temperature
of less than 120°F (50°C), and only using Shower
Power while the water is running.
If you use Shower Power without water running,
then you will be using the reserve battery power.
Continued use will result in needing to use the
USB-C port to charge the Shower Power.
USB-C Charging:
Remove Droplet (the speaker) from the Shower
Dock and make sure it is completely dry before
plugging in. You can charge Droplet with almost
any adapter from a reputable brand. Droplet is
compatible with QC and PD adapters.
Using Shower Power

Low Power Notifications:
When the battery level reaches 20% Shower
Power will beep three times. When the battery
reaches 10% it will beep three times. When you
hear this “low battery” sound, we recommend not
using Shower Power without water running.
Alternatively, you can use the USB-C port to
bring it back up to 100%.
Pairing
When Shower Power is turned on, it will enter
Bluetooth pairing mode automatically. The
“searching sound” will play for one minute but it
will remain in pairing mode for three minutes. If
no device is paired within three minutes, Shower
Power will automatically turn off.
To pair your device, open the Bluetooth pairing
tab on your device and select “Shower Power.”
Play your favorite audio from your device. You
can pause, play, skip, change volume, etc from
your device, via the button pad, or the Shower
Power remote control.

1. Hold for two seconds to turn
Shower Power on and off.
2. The power button will illuminate
green when the battery is
charging.
3. The power button will blink blue
while in pairing mode.
Button Pad
Power Button
1. Single press to pause and play your
audio.
2. Hold for two seconds to skip to the
next song.
Play Button

1. Hold for two seconds to turn
Shower Power on and off.
2. The power button will illuminate
green when the battery is
charging.
3. The power button will blink blue
while in pairing mode.
1. Single press to enter TWS pairing
mode.
2. Press and hold for 2 seconds to
enter Bluetooth pairing mode.
3. Hold for 10 seconds to clear the
Bluetooth pairing history.
Pairing Button
1. Single press the + and - buttons to
increase and decrease volume,
respectively, one level at a time.
2. Hold the + and - buttons to “scroll”
through the volume levels more
quickly.
+/- Buttons

Droplet/Droplet Pro
When sold with the Shower Dock, the speaker
and Shower Dock together are called Shower
Power (and Shower Power Pro). When purchased
separately, the speaker component is referred to
as Droplet (and Droplet Pro). Regardless of
whether you bought the speaker component as
part of “Shower Power” or separately, it will work
with any Shower Power Shower Dock.
TWS Pairing
Before pairing your device, turn on two Ampere
speakers (Droplet, Droplet Pro, Shower Power,
Shower Power Pro) and allow the two speakers to
connect. When they connect successfully, you’ll
hear a pairing sound.
Single press the pairing button to enter TWS
pairing mode. After two speakers are connected,
single press on one to disconnect it. After
disconnecting the TWS, if you would like to
re-pair, turn Droplet off and turn on again.
If you are having trouble getting the speakers to
connect, make sure that there are no devices
nearby that have paired to either speaker. If so,
go into your Bluetooth settings and “forget” all
Shower Power Accessories
1. Single press to enter TWS pairing
mode.
2. Press and hold for 2 seconds to
enter Bluetooth pairing mode.
3. Hold for 10 seconds to clear the
Bluetooth pairing history.

Shower Power-related Bluetooth devices. If you
are still having trouble connecting two speakers,
hold down the pairing button for ten seconds to
reset the Bluetooth pairing settings. You’ll hear a
“reset” sound. Then, turn off both speakers. Turn
them back on and press the pairing button once
on both speakers.
Shower Power Remote
The Shower Power remote works just like the
button pad on Shower Power itself. If it’s hard to
reach, the remote allows you to control all the
functionality from up to 5 meters away. The only
difference is that the power button on the remote
does not turn Shower Power on. Shower Power
will turn on automatically when water starts to
flow.

Just like any showerhead, over time, the Shower
Dock may become stained or dirty. This could be
a buildup of limescale, or metals and minerals
(like iron and manganese), or bacteria. It is fine to
clean the Shower Dock with the same cleaners
that you use for your showerhead. That could
include vinegar, baking soda, or gentle bathroom
cleaning spray.
Before you begin, remove the speaker (Droplet)
from the speaker dock and set it aside. When
cleaning the shower dock, pay close attention
when cleaning the inside as not to damage the
pogo pins. Be very careful with any cleaning
agents around the pogo pins and try to keep
them as dry as possible.
To clean the speaker component (Droplet),
remove it from the speaker dock and clean with a
damp cloth. Do not leave the pogo pin
connection wet or submerged in water.
Cleaning and Care

This device was tested for typical body-worn operations. To comply with RF
exposure requirements, a minimum separation distance of 20mm must be
maintained between the user’s body and the handset, including the antenna.
Third-party belt-clips, holsters, and similar accessories used by this device should
not contain any metallic components. Body-worn accessories that do not meet
these requirements may not comply with RF exposure requirements and should be
avoided. Use only the supplied or an approved antenna.
This device in compliance with the essential requirements and other relevant
provisions of Directive 2014/53/EU. All essential radio test suites have been
carried out.
CAUTION : RISK OF EXPLOSION IF BATTERY IS REPLACED BY AN INCORRECT
TYPE. DISPOSE OF USED BATTERIES ACCORDING TO THE INSTRUCTIONS
The product shall only be connected to a USB interface of version USB 2.0
Adapter shall be installed near the equipment and shall be easily accessible.
The plug considered as disconnect device of adapter
The device complies with RF specifications when the device used at 20mm form
your body
This device complies with part 15 of the FCC Rules. Operation is subject to the
condition that this device does not cause harmful interference (1) this device may
not cause harmful interference, and (2) this device must accept any interference
received, including interference that may cause undesired operation.
Changes or modifications not expressly approved by the party responsible for
compliance
could void the user's authority to operate the equipment.
NOTE: This equipment has been tested and found to comply with the limits for a
Class B digital device, pursuant to Part 15 of the FCC Rules. These limits are
designed to provide reasonable protection against harmful interference in a
residential installation. This equipment generates, uses and can radiate radio
frequency energy and, if not installed and used in accordance with the
instructions, may cause harmful interference to radio communications. However,
there is no guarantee that interference will not occur in a particular installation.
Warnings
Table of contents
Popular Bathroom Fixture manuals by other brands

BELLOSTA
BELLOSTA Edward 0807/C Installation instruction

Brizo
Brizo Virage T67430 Series manual

Alice's Garden
Alice's Garden AQUE SSH35FWCN manual

Spectrum Brands
Spectrum Brands Pfister Designer LF-048-DE Quick installation guide

Galvin Specialised
Galvin Specialised Safe-Cell 50110C Installation guidelines

Gessi
Gessi goccia 35237 manual

Cello
Cello Orinoco 70X90 instruction manual

Steinbach
Steinbach Deluxe Supreme ORIGINAL OWNER'S MANUAL

Triton
Triton Leona Installation and operating instructions

Santec
Santec ESTATE LYRA 4165TH Series quick start guide

Samo
Samo CEE ART B0901 Assembly instruction

Franke
Franke SANW200 Installation and operating instructions