步骤6:调试好免换模压接机BZW-6C,将端子压接在线材上(详细规格参照手册最后的附录)
Step6:Set up the mould-free crimp machine BZW-6C, Then crimp the terminal on the wire.
(please refer to the appendix at the end of this manual for more crimping information)
步骤5:如图示穿入④定位套,再穿入③ R4端子组件并推到底,
Step6:Push into the ④position sleeve, then push into the ③R4 terminal assembly and push to the bottom, as
shown in the figure.
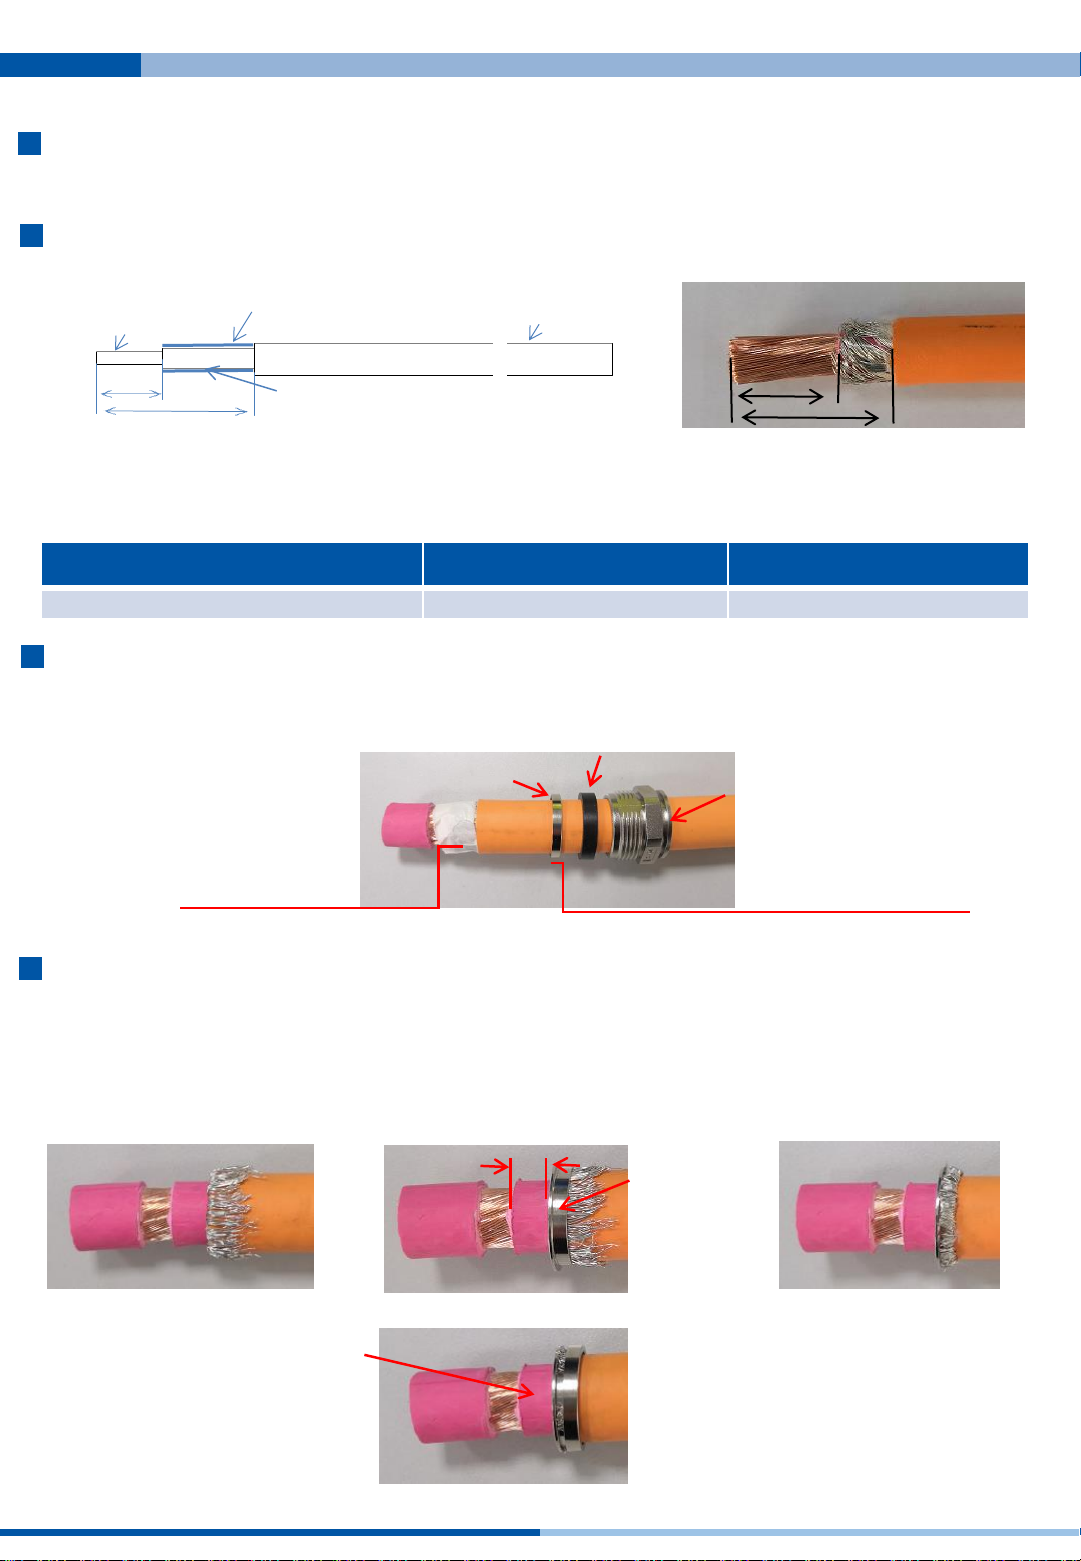
⑴建议使用附录中的线材,如果要使用其它的线材,请联系当地销售,让他们提供延伸的产品
Cables written in the appendix are highly recommended for crimping, please contact our local sales for help if you want to use other cables out
of this table
⑵客户需要重新确认压接区域横截面和拉力测试,这两项达到压接的质量标准,端子压接需要满足压缩比要求:80-90%
A good crimping process is determined by 3 factors: W、H and tensile test result, please confirm these 3 targets specified are met after
crimping, Terminal crimping needs to meet the compression ratio requirements: 80-90%.
⑶横截面仅供参考,客户负责采购压接工具或刀模
Cross section shape is only for reference, all crimping tools needed are supposed to be prepared by customers
端子压接高宽度尺寸,“W”:为压接宽度,“H”为压接高度(压接高宽度尺寸及拉力标准参考手册后的附录)
Terminal crimping quality depends on 2 parameters: "W" crimping width and "H" crimping height.( Please refer to the
appendix at the end of this manual for details)
03/05
Manual P/N:8P1143_ Rev.01 20210611
步骤7:插入R4 holder到②绝缘筒上, 转动使其触底
Step7:Bring ②insulation sleeve through R4 holder and rotate ②insulation sleeve until it arrives at a stop
position
步骤8:将半成品如下图示插入①屏蔽壳组件, 注意方向正确,防止损伤HVIL弹片,插到底后将密封圈推到位,
固定外壳与电缆,以10~12N∙m拧紧尾盖,完成此端线束组装。
Step8:Insert the semi-finished product into ①Shield shell assembly as shown below, pay attention to the
correct direction to prevent damage to the HVIL contact spring, then insert it into the end, push sealing into its
place, fix the housing and cable, tighten the end cap with 10~12N∙m, and complete assembly of the wire harness
at this end .
③R4端子组件
R4 terminal Assy
④定位套
Position sleeve
②绝缘筒
Insulation sleeve
确保R4尾部可见
Make sure R4 end visible
横截面
Cross section
H
W
PowerLokTM 10.0 单芯95mm2直头插头组装规范 PowerLokTM 10.0 1 POS 95mm2 180D Plug Assembly Manual