AMSL Diabetes t:slim X2 Installation and operation manual

Pump Start
Training Booklet

You have been given this resource because your healthcare professional has
chosen this product as a suitable treatment option for you.
Always read the label and use only as directed. Read the warnings available on
www.amsldiabetes.com.au/resources before purchasing.

Table of Contents
My t:slim X2™Insulin Pump Settings
Quick Reference Guides
Welcome to Pumping with Tandem 1
Personal Proles 2
View Status 4
Personal Proles 5
Pump Alert Settings 3
Instructions for Drawing Insulin from Cartridge into Syringe 6
Instructions for Filling the Cartridge 6
Load a Cartridge 7
Tandem AutoSoft™90 Infusion Set t:lock 8
Tandem AutoSoft™30 Infusion Set t:lock 9
Tandem TruSteel™ Infusion Set t:lock
10Tandem VariSoft™ Infusion Set t:lock
11
Bolus 12
Extended Bolus 13
Setting a Temp Basal Rate 14
Stop and Resume Insulin Delivery 15
diasend® Personal Uploader - Getting Started Guide 16
Flying with your t:slim X2 Insulin Pump 19
t:slim X2 System Specications 20
t:slim X2 System Options and Settings 21
t:lock™ Infusion Sets & Cartridges 23
2
4

Welcome to
Pumping with Tandem
Hi there!
Thank you for choosing the t:slim X2 Insulin Pump to help manage your diabetes.
This booklet will provide you with some helpful resources to get you started. For more
information, please refer to your t:slim X2 Insulin Pump User Guide.
If you have any concerns about your dosage, Blood Glucose (BG) levels or test
positive for ketones, please contact your healthcare professional or emergency
department, as we are unable to advise on these issues or any clinical aspect of your
diabetes management.
The Tandem t:simulator app can help your family/support team get familiar with your
new pump! Search for the t:simulator on the App Store or Google Play.
400
350
300
250
200
150
100
50
mmol/L
10.5
3
HRS
INSULIN ON BOARD: 1.1 u |1:09 hrs
OPTIONS BOLUS
B
10:20
5 Mar 2017
100% 235 u
22
18
14
10
6
2
If you need technical assistance with your insulin pump, we have a
dedicated 24/7 Australian-based Customer Care Team available on
1300 851 056.
1

Let’s Get Started!

My t:slim X2 Insulin Pump
Settings
You have now received your new t:slim X2 Insulin Pump. This document will assist
you with entering all of your settings provided by your healthcare professional into
your new t:slim X2 Insulin Pump.
Personal Proles
To begin, select:
Options > My Pump > Personal Proles > New
Program No 1. ‘Weekday’
Timed Settings
Time Basal
Rate
Correction
Factor
Carb
Ratio
Target
BG
12:00/00:00
IOB
Duration
Max
Bolus
Carbs
hrs o On
o O
Bolus Settings
2

Program No 2.
Timed Settings
Time Basal
Rate
Correction
Factor
Carb
Ratio
Target
BG
12:00/00:00
IOB
Duration
Max
Bolus
Carbs
hrs o On
o O
Bolus Settings
Pump Alert Settings
Select:
Options > My Pump > Alert Settings > Pump Alerts
*Set to Auto-On by default
unitsLow Insulin
Auto-On/O
In order to begin using your new t:slim X2 Insulin Pump, you must manually enter the settings discussed with
your healthcare professional (or directly from your previous insulin pump if applicable) into your new t:slim X2
Insulin Pump using the information you have recorded on the previous pages.
Contact your healthcare professional team if you have any questions about the settings you are entering.
Failure to use settings determined by your healthcare professional team will likely result in incorrect insulin
delivery.
If you require technical assistance with your insulin pump, please call our AMSL Diabetes Customer Care
Team on 1300 851 056.
IMPORTANT: These instructions are simplied to supplement training by your healthcare professional. Before
you begin, you should carefully read the t:slim X2 Insulin Pump User Guide and any inserts that come with your
system.
o O o On
3

Your t:slim Insulin Pump will
display the name of your active
profile, your current basal rate, the
time and amount of your last bolus,
and your current insulin-to-carb
ratio.
If you have an active Extended
Bolus, this screen will show how
much insulin has been delivered
out of the total amount requested.
Scroll down by tapping the
DOWN ARROW to display your
current Correction Factor, Blood
Glucose (BG) Target, Insulin
Duration, and whether or not you
are entering boluses based on
Carbohydrates.
View Status
The instructions below are provided as a reference tool for those who are already familiar with the use of an insulin pump and with insulin therapy in general.
Not all screens are shown.
on the t:slim X2™Insulin Pump
Explanation of Icons
The following icons may appear in the areas to the left
or right of the time and date on your pump’s Home Screen.
INSULIN ON BOARD (IOB)
Units 1.1 u 1:09 hrsTime Remaining
OPTIONS
BOLUS
10:20 AM
April 6, 2015 235 u
100%
A system reminder, alert, error, or alarm is active. Unlock
screen to view.
A temporary basal
rate is active.
Basal insulin is programmed
and being delivered.
A bolus is being delivered.
A temporary basal rate
of 0 u/hr is active.
A basal rate of 0 u/hr
is active.
All insulin deliveries
are stopped.
Tap the Insulin Gauge in the
upper right corner of the Home
Screen.
5.5
3
4

1.
Tap OPTIONS.
4.
Tap the name of the Personal Profile
to View/Edit.
7.
Tap the time segment you wish
to edit.
If not all segments are visible,
tap the arrow to scroll down.
2.
Tap My Pump.
5.
Tap Edit to edit or view
your settings.
8.
Tap Basal, Correction Factor, Carb
Ratio, or Target BG to set up, then
tap DONE.
When you are finished, tap SAVE.
3.
Tap Personal Profiles.
6.
Tap your current settings to see
the other segments of your day.
Turn ON to activate bolus calculator.
9.
Confirm settings. Recent changes
appear in orange.
Tap YES to confirm.
Personal Profiles
The instructions below are provided as a reference tool for those who are already familiar with the use of an insulin pump and with insulin therapy in general.
Not all screens are shown.
on the t:slim X2™Insulin Pump
INSULIN ON BOARD (IOB)
Units 1.1 u 1:09 hrsTime Remaining
OPTIONS
BOLUS
B
10:20 AM
April 6, 2015 235 u
100% BACK Options
Load
My Pump
STOP INSULIN
Temp Rate
BACK My Pump
Pump Settings
Alert Settings
Personal Profiles
Pump Info
BACK Profile 1
Edit
Delete
Activate
Duplicate
BACK Profile 1
Bolus Settings
6 hrs
DURATION
12 u
MAX BOLUS
ON
CARBS
Timed Settings 9:00a - 1:00p
0.75
BASAL
1:50
CORRECT
120
TARGET BG
1:10
CARB
BACK Personal Profiles
Profile 2 OFF
Profile 3 OFF
Profile 4 OFF
Profile 1 ON
NEW
BACK Timed Settings ADD
12:00 AM
0.60
BASAL
1:50
CORRECT
1:15
CARB TARGET BG
140
3:00 AM
0.70
BASAL
1:50
CORRECT
1:15
CARB TARGET BG
140
X
7:30 AM
0.65
BASAL
1:45
CORRECT
1:13
CARB TARGET BG
110
X
Timed Settings 12:00 AM
SAVE
BACK
Correction Factor 1u:50 mg/dL
Basal 0.75 u/hr
Carb Ratio 1u:10 g
Target BG 120 mg/dL
NO
YES
Target BG
120 mg/dL
Carb Ratio
1u: 10g
Correction Factor
1u: 50 mg/dL
Basal
0.75 u/hr
Confirm Settings?
INSULIN ON BOARD (IOB)
Units 1.1 u 1:09 hrsTime Remaining
OPTIONS
BOLUS
B
10:20 AM
April 6, 2015 235 u
100% Options
STOP INSULIN
Temp Rate
My Pump
My CGM
My Pump
Pump Info
Pump Settings
Alerts & Reminders
Personal Profiles
Profile 1
Bolus Settings
5 hrs
DURATION
10 u
MAX BOLUS
ON
CARBS
Timed Settings 12:00 - 00:00
0.75
BASAL
1:2.8
CORRECT
6.7
TARGET BG
1:10
CARB
12:00 AM
0.75
BASAL
1:2.8
CORRECT
1:10
CARB TARGET BG
6.0
3:00 AM
0.70
BASAL
1:3
CORRECT
1:15
CARB TARGET BG
6.0
7:00 AM
0.65
BASAL
1:3.5
CORRECT
1:9.4
CARB TARGET BG
6.5
Basal Press to Set Up
Correction Factor Press to Set Up
Carb Ratio Press to Set Up
Target BG Press to Set Up
2.8 mmol/L
6.7 mmol/L
BACK
Profile 1
Edit
Delete
Activate
Duplicate
BACK
Profile 1
Edit
Delete
Activate
Duplicate
BACK
Profile 1
Edit
Delete
Activate
Duplicate
BACK
Profile 1
Edit
Delete
Activate
Duplicate
BACK
Profile 1
Edit
Delete
Activate
Duplicate
5

Instructions for Drawing Insulin from Cartridge into Syringe
Instructions for Filling the Cartridge
Use proper clean technique while performing the following:
1. Inspect the needle and syringe package for any signs of damage.
Discard any damaged product.
2. Wash your hands thoroughly.
3. Remove the needle and syringe from their packaging. Securely twist needle
onto syringe. Safely remove protective cap from needle by pulling outward.
4. Insert needle into the prefilled insulin container (insulin penfill or vial).
5. Slowly pull back the plunger to the desired amount of insulin.
6. Once filled, Remove syringe from the prefilled insulin container.
7. Tap the syringe so that any air bubbles rise to the top. Then slowly push the
plunger upwards, forcing any air bubbles out of the filling syringe.
8. Check the syringe for air bubbles and do one of the following:
» If there are air bubbles present, repeat step 7 onwards.
» If no air bubbles are present, you are ready to move on to the next step.
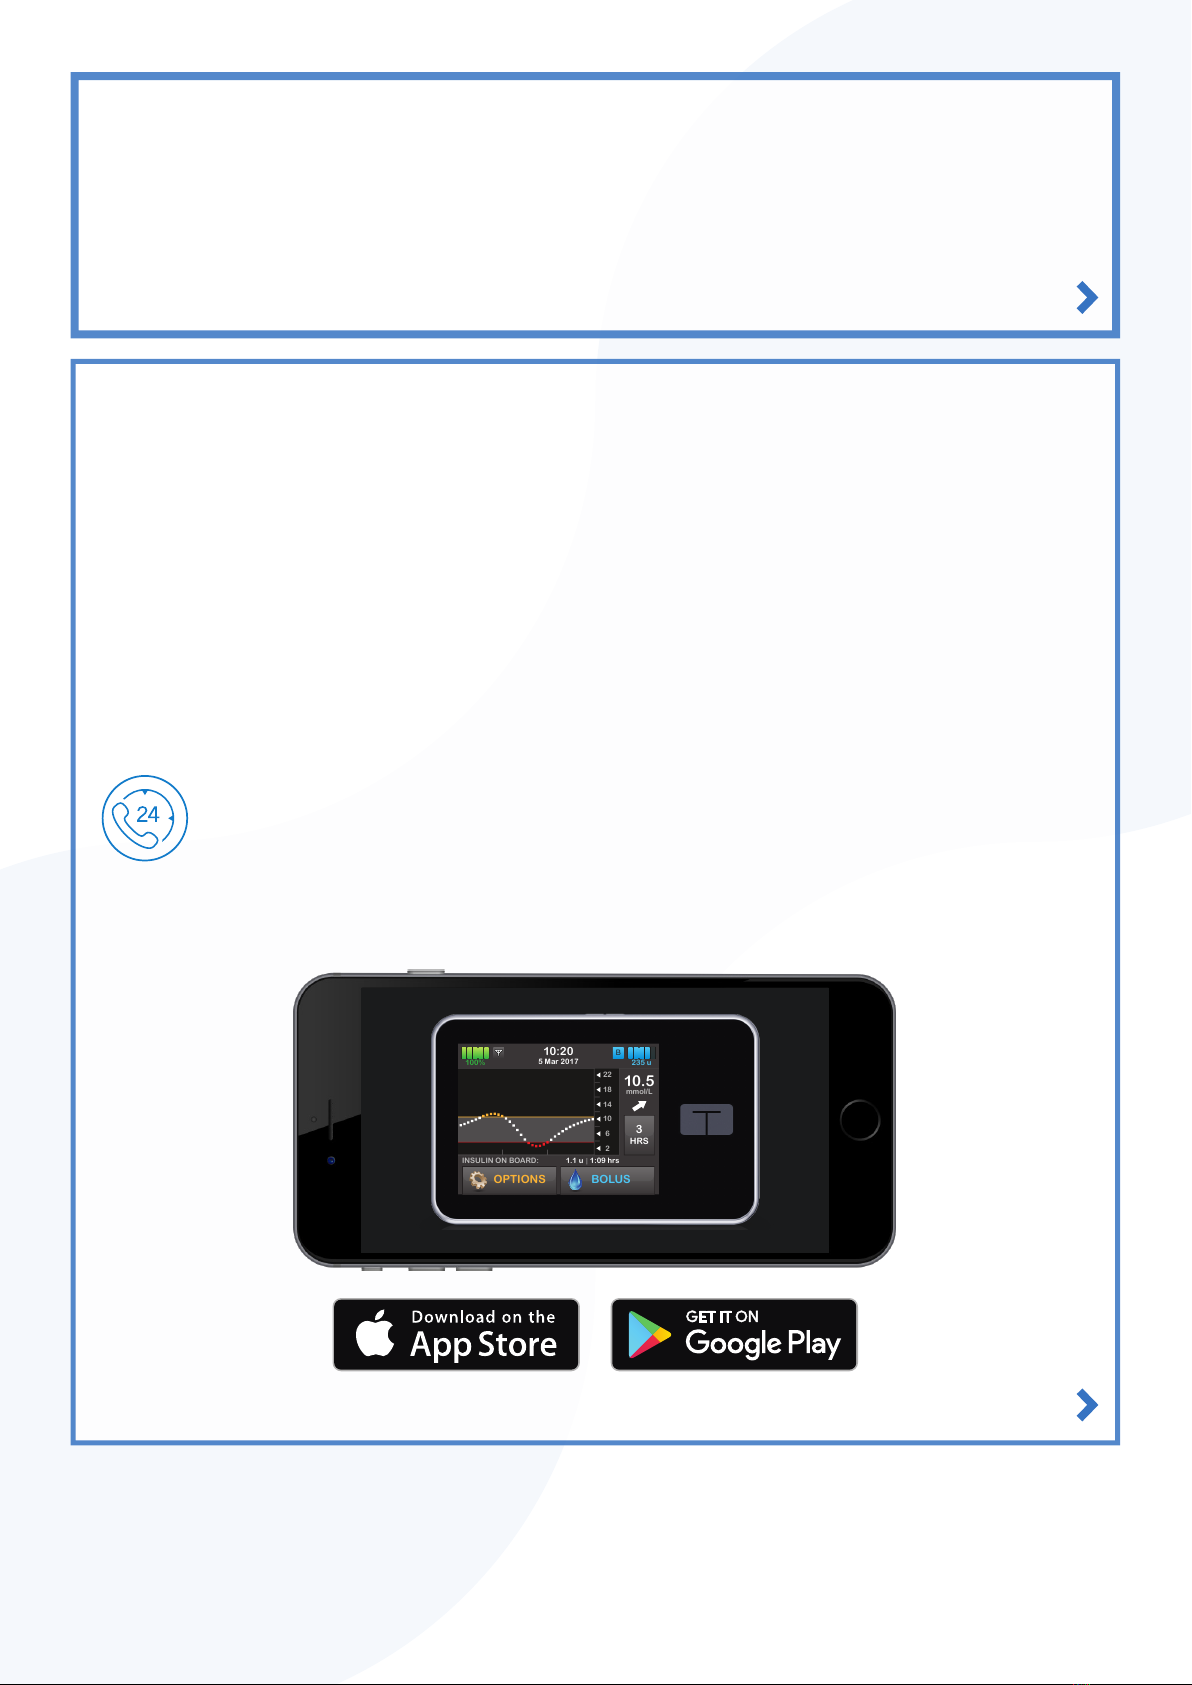
Refer to the User Guide
that came with your
system for detailed
installation instructions.
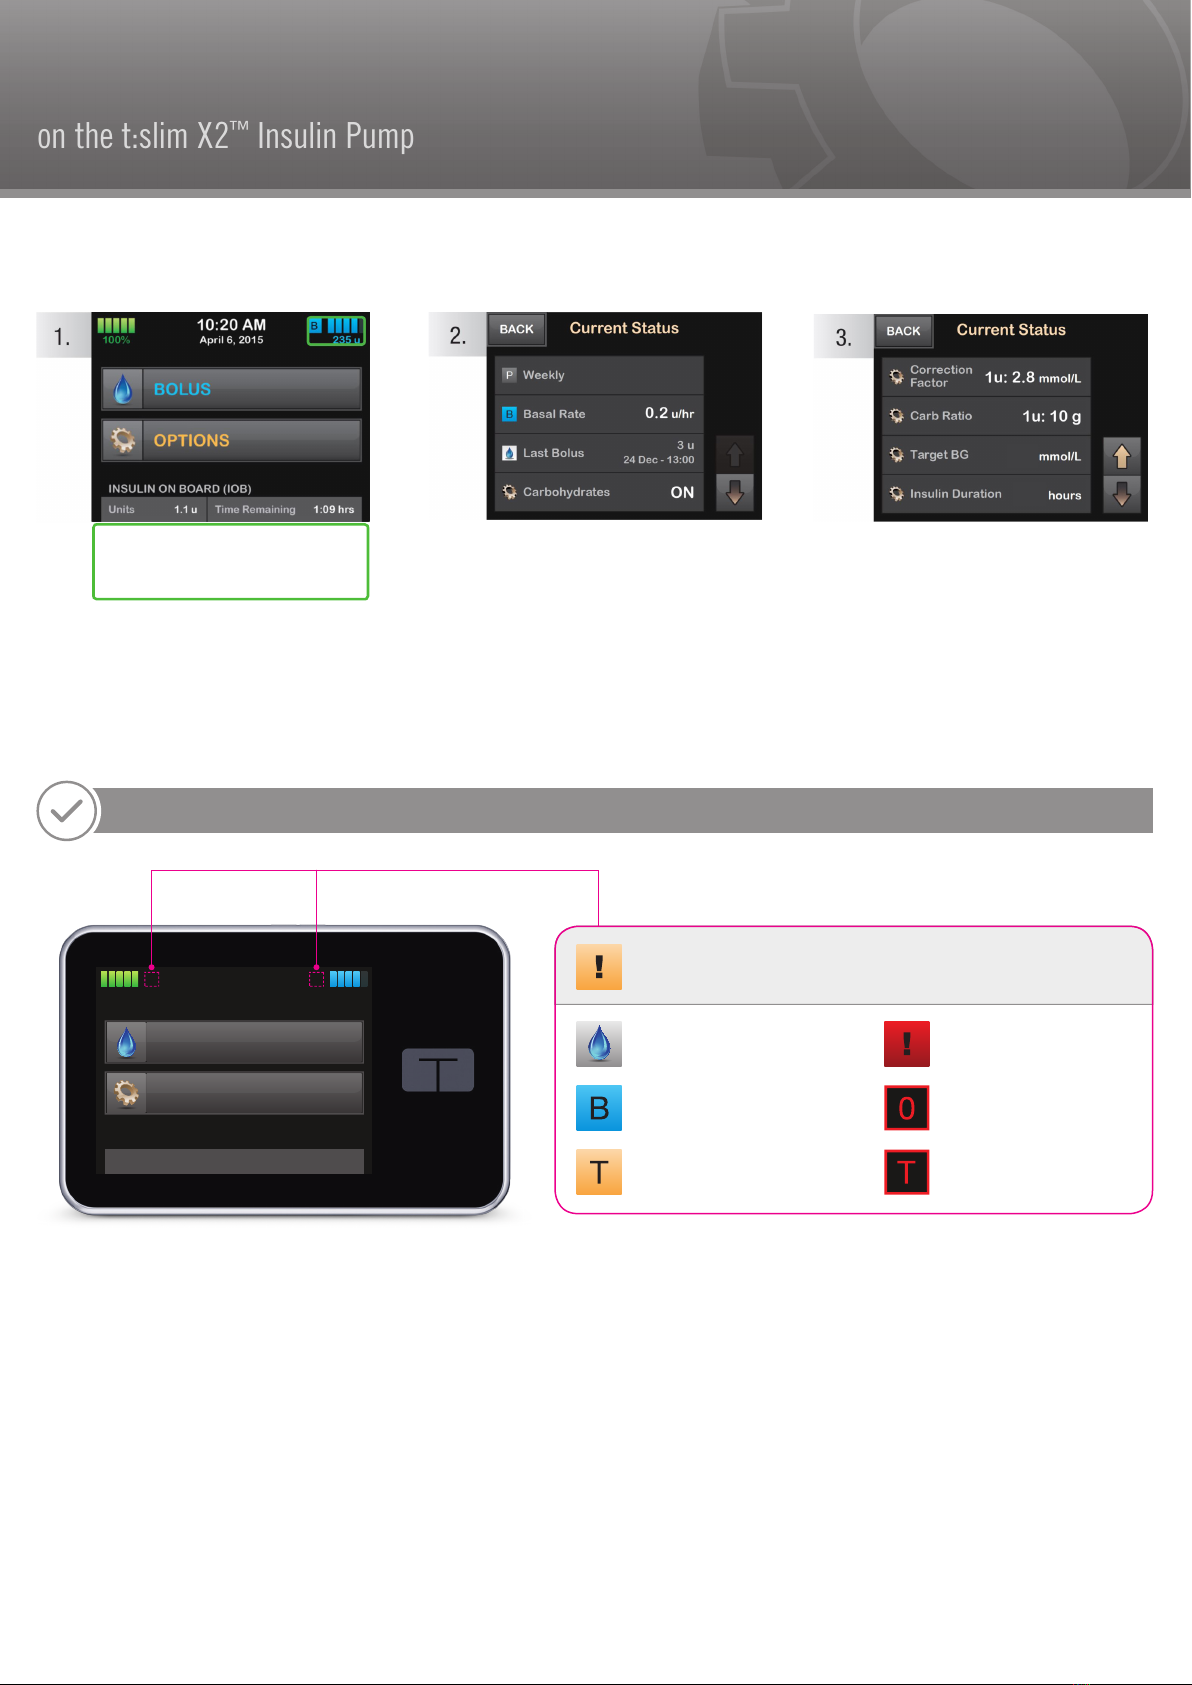
If instructed to load a filled cartridge,
perform the following before loading
the cartridge onto the pump.
1. Inspect the cartridge package for any signs of damage. Discard any
damaged product.
2. Open the package and remove the cartridge.
3. Hold the cartridge upright and gently insert the needle into the white insulin
fill port on the cartridge (see image E). The needle is not intended to go all
the way in, so do not force it.
4. Keeping the syringe vertically aligned with the cartridge, and the needle
inside the fill port, pull back on the plunger until it is fully retracted
(see image F). This will remove any residual air from the cartridge.
Bubbles will rise toward the plunger.
5. Make sure the needle is still in the fill port and release the plunger. Pressure
will pull the plunger to its neutral position but it will NOT push any air back
inside the cartridge (see image G).
6. Withdraw the needle from the fill port.
7. Turn the syringe upright and pull down on the plunger (see image H).
Flick the barrel to make sure that any air bubbles rise to the top.
8. Gently press on the plunger to remove air bubbles until insulin fills the needle
hub and you see a drop of insulin at the tip of the needle (see image I).
9. Re-insert the needle in the fill port and slowly fill the cartridge with insulin
(see image J). It is normal to feel some back pressure as you slowly
press on the plunger.
10. Maintain pressure on the plunger while you remove the needle from the
cartridge. Check the cartridge for leaks. If you detect insulin leaking,
discard the cartridge and repeat entire process with a new cartridge.
11. Always dispose of used needles, syringes, cartridges, and infusion sets
following your community’s regulation.
6

Load a Cartridge
on the t:slim X2™Insulin Pump
12.
RESUMING INSULIN screen is
temporarily displayed.
The instructions below are provided as a reference tool for those who are already familiar with the use of an insulin pump and with insulin therapy in general.
Not all screens are shown.
From the Options menu, tap
the Down Arrow, then tap
LOAD.
1.
BACK Options
Load
CGM History
Pump History
From the Load menu, tap
Change Cartridge. Screen will
display that all insulin deliveries
will be stopped.
Tap YES to continue.
2.
BACK Load
Site Reminder On
DONE
Change Cartridge
Fill Tubing
Fill Cannula
Verify that the infusion set is
disconnected from your body.
Connect the infusion set tubing
to the tubing connector on the
cartridge. Tap NEXT.
5.
10.
After the cannula fill is
complete, you can set a Site
Change reminder.
Tap SAVE if correct. Tap Edit
Reminder if settings need to be
changed.
SAVEBACK Site Reminder
Site Reminder OFF ON
Scheduled Day Friday
Scheduled Time 5:00 PM
Edit Reminder
3.
Disconnect the infusion set
from your body and tap NEXT
to continue.
8.
Tap Fill Cannula.
Insert a new infusion set and
connect filled tubing to site,
then tap NEXT.
NOTE: If you are using a steel needle
infusion set, there is no cannula fill.
Skip to 10.
Insert a new set and connect to
the filled tubing.
Press NEXT to fill the cannula with
insulin.
CLOSE
NEXT
6.
Hold the pump vertically to
ensure any air in the cartridge
will be dispelled first.
Tap START. The pump will
beep and vibrate regularly while
the tubing is being filled.
Tap Edit Fill Amount.
Select amount needed for
cannula fill. Refer to your
infusion set instructions for use
for proper cannula fill amount.
Tap START.
9.
7.
Tap STOP after 3 drops of
insulin are seen at the end of
the infusion set tubing.
Verify that drops are seen and
tap DONE.
11.
Load screen is displayed.
Tap DONE. A reminder to test
BG in 1 to 2 hours will display.
Tap RESUME.
Resume Insulin now?
This will resume your basal and
the active personal profile.
CLOSE
RESUME
4.
Remove the used cartridge.
Install filled cartridge. Tap
UNLOCK icon when completed
Tap NEXT to continue.
Fill Tubing
Fill Tubing START
Amount Filled 0u
BACK
Edit Fill Amount 0.7 u
Fill Cannula
Fill Cannula START
Amount Filled 0u
RESUMING INSULIN
7

8
AutoSoft 90 combines the insertion device and infusion set into a single sterile, portable unit. Ensure
you wash and dry your hands thoroughly and clean the area with a disinfectant wipe before following
the steps below.
Check the tamper-proof seal
and sterile paper. Do not
use device if the seal or paper
has been broken. Pull the
red tape to remove the seal.
Pull off the sterile paper.
Do not touch the spring.
Firmly press the three raised dots
on each side of the lid with one
hand and pull with the other hand.*
CAUTION: be careful not to bend
the introducer needle of the
AutoSoft 90 when removing the lid.
Carefully unwind tubing and place
a finger on the adhesive backing
paper when fully unwinding the
tubing.^
Connect AutoSoft 90 to a reservoir/
cartridge and the pump. Prime the
infusion set according to the pump
manufacturer’s instructions for use.
Ensure there are no air bubbles in
the tubing of AutoSoft 90.~
Pull up gently to remove the
adhesive backing paper, which
will come off in a single piece.
Place fingers on lined
indentations when loading the
insertion mechanism. Pull
spring up until you hear a
“click.”
Push in gently on the centre of
the insertion mechanism to
secure adhesive on the skin.
Put lid securely in place until
you hear a “click.” With lid
properly connected, AutoSoft
90 can be disposed of safely.
Carefully remove the needle
guard by gently twisting and
then pulling it. Secure tubing in
slot.
Place AutoSoft 90 on your clean,
dry insertion site and press the
round indentations on each side
of the insertion mechanism at
the same time.
CAUTION: before positioning
AutoSoft 90 over clean insertion
site, place the tubing in the slot
to ensure that the tubing is not
caught underneath the device
during insertion.
Grasp centre of insertion
mechanism. Pull back gently
and slowly. Fill the empty space in
the cannula with the following
prime:
U-100 insulin
6 mm: 0.3 units (0.003 mL)
9 mm: 0.5 units (0.005 mL)
*IMPORTANT NOTE: if the infusion set is not securely placed in insertion device with needle pointing straight ahead prior to insertion, pain or minor injury may occur. To avoid this, please ensure that the steps are done
gently, in order not to loosen/remove the infusion set by accident. Please note: this guide only illustrates some of the steps to follow when inserting AutoSoft 90 and it is not a substitute for reading the instructions for
use and cautions, which come with the product. When initially trying a new infusion set, we recommend this to be done under the supervision of a healthcare professional.
^Do not touch the AutoSoft 90 introducer needle when unwinding the tubing. Be careful not to pull too hard when the tubing is fully released. You could accidentally remove the infusion set from the introducer needle.
~ When priming the infusion set, hold AutoSoft 90 with the needle pointing down to ensure that the insulin does not come into contact with the adhesive backing paper.
1 2 3 4
5 6 7 8
12
9 10 11
Tandem AutoSoft 90 Infusion Set t:lock
Quick Reference Guide

9
AutoSoft 30 combines the insertion device and infusion set into a single sterile, portable unit. Ensure
you wash and dry your hands thoroughly and clean the area with a disinfectant wipe before following
the steps below.
Check the tamper-proof seal
and sterile paper. Do not
use device if the seal or paper
has been broken. Pull the
red tape to remove the seal.
Pull off the sterile paper.
Do not touch the spring.
Hold on the lined indentations
with one hand and pull the lid
off with the other.*
CAUTION: be careful not to
bend or touch the AutoSoft 30
introducer needle.
Place your fingers on the lined
indentations on each side. Pull
back the spring softly until you
hear a “click”. The needle
protector will lift up or peel off. Do
not touch or bend the needle.
Immediately before insertion,
carefully bend back the
needle protector and remove it.
This will remove part of the
adhesive backing paper. Be
sure the tape is not stuck on the
introducer needle.
INSERTION: place your index
finger on the top release button
and your thumb on the bottom
release button. Position AutoSoft
30 with its legs level (flat) on the
skin to ensure an insertion angle
of 30°. Maintain a 30° angle while
inserting and gently squeeze
once to insert in AutoSoft 30.
Make sure that the cannula
stays in place: put your finger
gently on the clear window
while removing the insertion
device and introducer needle.
Pull it gently straight back.
Put the lid back on for
disposal.
Secure the cannula with one
finger on the clear window.
Carefully remove the backing
paper under the cannula
housing as shown.
Remove the backing paper
under the front end. Massage
the adhesive thoroughly on to
the skin.
IMPORTANT: do not attempt
to straighten the adhesive if
curled.
Remove the circular protective cap. Prime infusion set until insulin
dispenses from the tip. Ensure there are no air bubbles in the tubing or
AutoSoft 30. Consult your pump manufacturer’s instructions for use for
proper priming procedures. Place a finger in front of the cannula housing and
insert the connector needle. Make sure the connector locks with a “click.”
Fill the empty space in the cannula with the following prime:
U-100 insulin:
0.7 units (0.007 mL)
= 30°
*IMPORTANT NOTE: If the infusion set is not securely placed in the insertion device with the needle pointing straight ahead, pain or minor injury may occur during insertion. Please note: this guide only illustrates some
of the steps to follow when inserting AutoSoft 30 and it is not a substitute for reading the instructions for use and cautions, which come with the AutoSoft 30 product. When initially trying a new infusion set, we
recommend this to be done under the supervision of a healthcare professional.
1
5
9
2
6
10
3
7
11
4
8
Tandem AutoSoft 30 Infusion Set t:lock
Quick Reference Guide

10
*IMPORTANT NOTE: if the infusion set is not securely placed in the insertion device with the needle pointing straight ahead, pain or minor injury may occur during insertion. Please note: this guide only illustrates some
of the steps to follow when inserting VariSoft and it is not a substitute for reading the instructions for use and cautions, which come with the VariSoft product. When initially trying a new infusion set, we recommend
this to be done under the supervision of a healthcare professional.
This guide is a summary only and intended as a quick reference guide. Always refer to package insert
for full instructions and precautions.
Tandem VariSoft Infusion Set t:lock
Quick Reference Guide
Wash and dry your hands
thoroughly. Likewise, clean the
insertion site and allow to dry.
Use of adhesive wipes will
clean the site and help the
infusion set to stay in place.
Hold the infusion set with one
hand. Gently remove the
adhesive backing paper with
the other hand.
Place one finger in front of the
clear window. Gently remove
the backing tape from the
other half of the site. Hold skin
tight and gently press outside
of adhesive tape to secure
edges.
Remove protective sleeve from
insertion needle.
Pinch skin tightly and insert
needle on 30 - 45° angle.
Secure the infusion set with
one finger in front of the clear
window. Squeeze release
section of insertion set by
pressing on ridged areas either
side of the set. Remove the
insertion needle and dispose of
in a sharps container .
Connect the line to the
cartridge in the pump and
prime the line. Ensure there
are no air bubbles.
Connect the line to the site
and make sure an audible click
is heard and fill the cannula.
NOTE: fill the empty space in the
cannula with the following prime:
U-100 insulin:
0.7 units (0.007 mL)
5 6 7
1 2 3 4
8

11
Wash and dry your hands
thoroughly. Likewise, clean the
insertion site and allow to dry.
Use of adhesive wipes will
clean the site and help then
infusion set to stay in place.
Connect the line to the
cartridge in the pump. Connect
the needle part of the infusion
set to the line. Prime the
insulin through the line until
you maintain a steady flow of
insulin for six seconds. Ensure
there are no air bubbles.
Remove the tape and needle
protector from the infusion set.
Hold the infusion set just above
the needle with one hand. Pinch
the skin at the injection site with
the other hand. Insert the
infusion set to its full length at a
90º angle (straight in).
Ensure the fixation material is
properly placed and
adequately covers the injection
site.
1 2 3 4
5
*IMPORTANT NOTE: if the infusion set is not securely placed in the insertion device with the needle pointing straight ahead, pain or minor injury may occur during insertion. Please note: this guide only illustrates some
of the steps to follow when inserting TruSteel and it is not a substitute for reading the instructions for use and cautions, which come with the TruSteel product. When initially trying a new infusion set, we recommend
this to be done under the supervision of a healthcare professional.
This guide is a summary only and intended as a quick reference guide. Always refer to package insert
for full instructions and precautions.
Tandem TruSteel Infusion Set t:lock
Quick Reference Guide

1.
Tap 0 Grams to enter the carbs for
your bolus.
NOTE: If this button reads “units”, the Carb
feature is turned off in the active profile.
4.
If a BG is entered that is below the
target, but above 3.9 mmol/L, you
will be offered the option to reduce
the bolus amount. To accept that
reduction tap YES otherwise tap NO.
7.
Tap DELIVER to deliver the food
bolus immediately.
2.
Enter desired value. Be sure
“grams” is displayed above keypad
for food boluses.
Tap DONE to continue.
5.
Tap NEXT to continue. Tap
units field to manually adjust
recommended dose.
8.
The Splash Screen confirms
delivery has started.
3.
Tap Add BG to enter your blood
glucose. Be sure “mmol/L” is
displayed above keypad when
entering BG values.
6.
Verify the dose and tap YES
to confirm.
9.
To cancel the undelivered portion
of the bolus, tap the Red “X” on
the BOLUS button on the Home
Screen, then tap YES to confirm
cancelled bolus.
Bolus
The instructions below are provided as a reference tool for those who are already familiar with the use of an insulin pump and with insulin therapy in general.
Not all screens are shown.
on the t:slim X2™Insulin Pump
grams
21 3
0
87 9
54 6
DONEBACK Enter Carbs
+/=
units
NEXT
BACK 0
BG
View Calculation
Add BG
CARBS
grams
0
units
NEXTBACK 3.8
BG
View Calculation
Add BG
CARBS
grams
38
units
NEXTBACK 3.58
View Calculation
CARBS
grams
38
BG
mg/dL
110
NO
YES
Your BG is Below Target
Reduce Bolus Correction?
Current IOB
0u
Current BG
110 mg/dL
NO
YES
BG
110 mg/dL
Carbs
38 g
Units To Deliver
3.58 u
Confirm Request?
INSULIN ON BOARD (IOB)
Units 1.1 u 1:09 hrsTime Remaining
B
10:20 AM
April 6, 2015 235 u
OPTIONS
Requesting 3.58 u Bolus ...
BOLUS
80%
BOLUS INITIATED
3.58 u
BACK
DELIVER
Deliver 3.58 u Bolus?
Adjusted Food
3.58 u
Adjusted Correction
0u
EXTENDED
ON
OFF
Your BG is Below Target
Reduce Bolus Calculation?
Current IOB
0u
Current BG
4.7 mmol/L
units
0
BG
View Calculation
Add BG
CARBS
grams
0
units
NEXTBACK 3.8
BG
View Calculation
Add BG
CARBS
grams
38
4.7 mmol/L
BACK
Profile 1
Edit
Delete
Activate
Duplicate
NO
YES
BG
110 mg/dL
Carbs
38 g
Units To Deliver
3.58 u
Confirm Request?
12

1.
Tap 0 Grams to enter the carbs for
your bolus.
NOTE: If this button reads “units”, the Carb
feature is turned off in the active profile.
4.
Tap ON to extend the bolus.
Tap NEXT to continue.
7.
The Delivery Screen will confirm
how much insulin will be delivered
up front, how much will be delivered
over time, and the delivery duration.
Tap DELIVER to start the bolus.
2.
Enter desired value. Be sure
“grams” is displayed above keypad
for food boluses.
Tap DONE to continue.
5.
Tap NEXT to use default settings
or tap the DELIVER NOW and
DURATION buttons and set your
desired values, then tap NEXT
to continue.
8.
The Splash Screen confirms
delivery has started.
3.
Tap NEXT to continue, then tap
YES to confirm.
NOTE: If an above-target BG is entered,
the correction bolus will not be extended.
6.
Tap YES to confirm.
9.
To cancel the undelivered portion
of the bolus, tap the Red “X” on
the BOLUS button on the Home
Screen, then tap YES to confirm
cancelled bolus.
Extended Bolus
The instructions below are provided as a reference tool for those who are already familiar with the use of an insulin pump and with insulin therapy in general.
Not all screens are shown.
on the t:slim X2™Insulin Pump
units
NEXTBACK 3.8
BG
View Calculation
Add BG
CARBS
grams
38
grams
21 3
0
87 9
54 6
DONEBACK Enter Carbs
units
NEXT
BACK 0
BG
View Calculation
Add BG
CARBS
grams
0
BACK
NEXT
Extend Food Bolus?
Food
3.8 u
Correction
NA
EXTENDED
OFF ON
units
NEXTBACK 3.8
60%
DELIVER NOW
3:30 hrs
DURATION
40%
DELIVER LATER
View Units
NO
YES
Deliver Later
40%
Deliver Now
60%
Duration
3:30 hrs
Confirm Request?
INSULIN ON BOARD (IOB)
Units 1.1 u 1:09 hrsTime Remaining
B
10:20 AM
April 6, 2015 235 u
OPTIONS
Requesting 2.28 u Bolus ...
BOLUS
80%
NO
DELIVER
Deliver 3.8 u Bolus?
Later
1.52 u
Duration
3:30 hrs
Now
2.28 u
BOLUS INITIATED
2.28 u Now + 1.52 u Later
13

Setting a Temp Basal Rate
The instructions below are provided as a reference tool for those who are already familiar with the use of an insulin pump and with insulin therapy in general.
Not all screens are shown.
on the t:slim X2™Insulin Pump
2.
Tap Temp Rate.
BACK Options
Load
My Pump
STOP INSULIN
Temp Rate
7.
The TEMP RATE STARTED splash
screen is displayed.
TEMP RATE STARTED
80% / 6:30 hrs
Tap OPTIONS.
1.
INSULIN ON BOARD (IOB)
Units 1.1 u 1:09 hrsTime Remaining
OPTIONS
BOLUS
B
10:20 AM
August 28, 2017 235 u
100%
8.
The Screen Lock screen will be
displayed with the orange “T” icon
indicating a Temp Rate is active.
NOTE: If a Temp Rate of 0% is currently
active, the status of insulin delivery
displays a red “T”.
INSULIN ON BOARD (IOB)
Units 1.1 u 1:09 hrsTime Remaining
T
10:20 AM
August 28, 2017 235 u
100%
2
3
1
3.
Tap Temp Rate.
BACK Temp Rate SAVE
Temp Rate 100%
View Units
Duration 15 min
4.
Using the onscreen keypad enter
the desired percentage. Tap DONE.
NOTE: Current rate is 100%. An increase
is greater than 100% and a decrease is
less than 100%. For example; 80% is 20%
less than your normal basal rate.
%
2
1
3
0
8
7
9
5
4
6
DONEBACK 80 6.
Verify settings and tap START.
BACK Temp Rate START
Temp Rate 80%
View Units
Duration 6:30 hrs
9.
NOTE: To stop Temp Rate at any time, tap
OPTIONS, tap X. A confirmation screen will
be displayed. Tap STOP.
BACK Options
Load
My Pump
STOP INSULIN
Temp Rate
Time Remaining
80%
6:30 hrs
Tap Duration. Using the onscreen
keypad, enter the desired length of
time for Temp Rate. Tap DONE.
NOTE: To see the actual units to be
delivered tap View Units.
5. BACK Temp Rate SAVE
View Units
Temp Rate 80%
Duration 15 min
21 3
0
87 9
54 6
14

1.
Tap OPTIONS.
4.
Tap OPTIONS.
2.
Tap STOP INSULIN.
5.
Tap RESUME INSULIN.
3.
Tap S T O P.
6.
Confirm by tapping RESUME.
NOTE: Any temp rates or boluses active
before you stopped delivery will not resume.
It will resume your active personal profile.
Stop and Resume Insulin Delivery
The instructions below are provided as a reference tool for those who are already familiar with the use of an insulin pump and with insulin therapy in general.
Not all screens are shown.
on the t:slim X2™Insulin Pump
Resume Insulin Delivery
Stop Insulin Delivery
INSULIN ON BOARD (IOB)
Units 1.1 u 1:09 hrsTime Remaining
OPTIONS
BOLUS
B
10:20 AM
April 6, 2015 235 u
100% BACK Options
Load
My Pump
STOP INSULIN
Temp Rate
This will stop all insulin deliveries,
including basal and any active
bolus or temp rate.
Stop all deliveries now?
BACK
STOP
Resume Insulin now?
This will resume your basal and
the active personal profile.
CLOSE
RESUME
INSULIN ON BOARD (IOB)
Units 1.1 u 1:09 hrsTime Remaining
April 6, 2015
10:20 AM
100% 235 u
!
BOLUS
ALL DELIVERIES STOPPED
OPTIONS
BACK Options
My CGM
My Pump
RESUME INSULIN
Temp Rate
15

Glooko diasend® Personal
Uploader for t:slim X2
Getting Started Guide
1
Download the diasend Uploader software
2
Log in with your user details
or create an account if you
are new to diasend.
Note: Choose the icon for your country of residence.
Complete the registration for a new
account and download the diasend®
Uploader software in the nal step of
the registration process.
Note: If you would like to install the
diasend® Uploader, you can access
the installation le from your account.
To do so, log into your account and
go to Tools.
Log in or start a new account at www.diasend.com
Username:
Password:
16
Table of contents
Other AMSL Diabetes Medical Equipment manuals