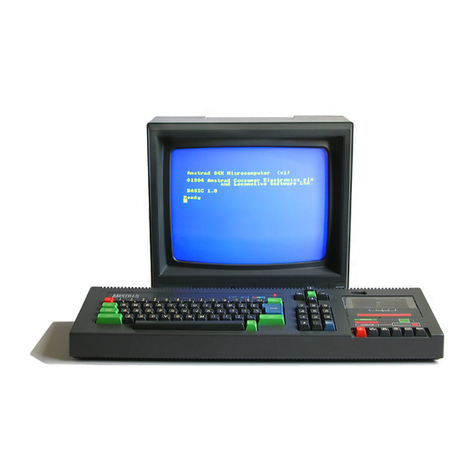
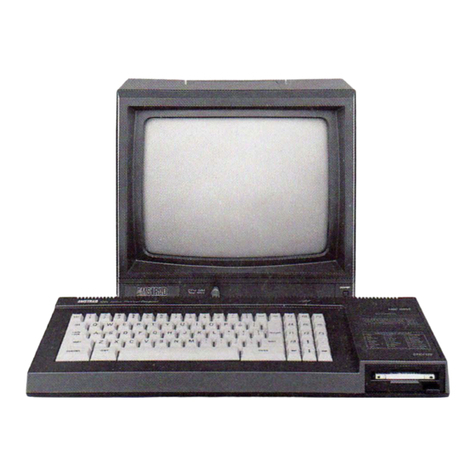
AMSTRAD CPC464 User manual


This manual is a Portable Document Format (PDF) version of the Amstrad Colour Personal
Computer (CPC) 464 User Manual.
This manual is © Copyright Amstrad plc, All rights reserved.
Website: www.amstrad.com
Permission has been granted for this manual to be distributed in an electronic form on the internet.
Scanning and OCRing from the original by David Wykes.
Typeset and cleaned up by Kevin Thacker.
Proofreading by Martyn Lycett.

CPC464
COLOUR
PERSONAL
COMPUTER
64K
Using this user guide
Computing has come a long way in a very short space of time; of all the technological advances in the
twentieth century, computing is easily the most startling.
Features of computer hardware and software have advanced far more rapidly than even existing
users are able to follow, and to attempt to show owners of the CPC464 all the available power and
subtlety of its BASIC, operating system and hardware attributes would require several thousands of
pages.
Thus this guide is a concise introduction to the CPC464 and its software. It will be supplemented by
many more specific and detailed instruction courses and publications.
Users familiar with other dialects of BASIC will become familiar with the framework of AMSTRAD
BASIC very quickly -and newcomers will quickly appreciate the direct and unambiguous nature of
the terminology used -it has been specifically devised and written to avoid the idiosyncrasies found
in many non-standard interpretations of BASIC, as well as introducing several fundamental ‘real
time’ features not previously available in a low cost computer.
The user guide is divided into three sections.
The first is the beginners Foundation Course, written specifically to introduce computing concepts
and terminology to the novice. If you have not previously owned or used a personal computer to the
point at which you have written a small program of your own, then we advise that you work through
the Foundation Course.
Those of you with previous experience should enter at Chapter 1.We have reiterated a number of
essential items concerning setting up and familiarisation, but have concentrated on introducing the
specific features of the CPC464 system, and made some assumptions about your familiarity with the
terminology.
Each of the ‘Primer’ chapters has been written to provide a broad guide to the many exciting features
of the CPC464. Some fundamental points are repeated for emphasis -and because many users will
want to dive straight into sound and graphics after the briefest possible introduction to the keyboard
and more methodical aspects of learning BASIC.
AMSTRAD’s‘Guide to BASIC’ training course is intended to provide athorough and extensively
illustrated approach to understanding the many facets of your CPC464 and its boundless potential
as acombination of tutor, games console and ‘pure’ computer, and we strongly advise that if you
want to learn in a thorough manner, then you invest in a copy -if you have not already done so!

Finally, an extensive Appendix section provides a broad overview of computing concepts, as well as
the machine-specific points of reference.
We wish you every success -you could not have chosen finer value for money, nor a computer with a
greater potential for developing your understanding of all aspectsof the subject. There is no finer
way of finding out about computing than by using a computer -and the CPC464 is particularly ‘user
friendly’.
AMSOFT
A division of
CONSUMER ELECTRONICS PLC
© Copyright 1984 AMSOFT, AMSTRAD Consumer Electronics plc and Locomotive Software Limited
Neither the whole or any part of the information contained herein, or the product described in this
manual may be adapted or reproduced in any material form except with the prior written approval of
AMSTRAD Consumer Electronics plc (‘AMSTRAD’).
The product described in this manual and products for use with it are subject to continuous development and
improvement. All information of a technical nature and particulars of the product and its use (including the
information and particulars in this manual are given by AMSTRAD in good faith. However, it is acknowledged
that there may be errors or omissions in this manual. A list of details of any amendments or revisions to this
manual can be obtained by sending a stamped, self addressed envelope to AMSOFT Technical Enquiries. We
ask that all users take care to submit their reply paid user registration and guarantee cards.
AMSOFT welcome comments and suggestions relating to the product or this manual.
All correspondance should be addressed to:
AMSOFT
169 Kings Road
Brentwood
Essex CM14 4EF
All maintenance and service on the product must be carried out by AMSOFT authorised dealers.
Neither AMSOFT nor AMSTRAD can accept any liability whatsoever for any loss or damage caused
by service or maintenance by unauthorised personnel. This guide is intended only to assist the
reader in the use of the product, and therefore AMSOFT and AMSTRAD shall not be liable for any
loss or damage whatsoever arising from the use of any information or particulars in, or any error or
omission in, this guide or any incorrect use of the product.
Within this manual, the reference Z80 is used with acknowledgement to Zilog Inc.
First Published 1984
-Second Edition Autumn 1984 Published by AMSTRAD
Compiled by W. Poel, R. Perry, I. Spital, Rd.
Watkins Typeset by AMSOFT Computer Graphics
AMSTRAD is a registered trademark of AMSTRAD Consumer Electronics plc. Unauthorised use of the
trademark or word AMSTRAD is strictly forbidden.

IMPORTANT
When reading this user guide, you should watch out for the different type styles that indicate the different ways
in which references are made to programs, [KEYS] which are present on the computer, but which do not result
in a printed character on the screen, and (general descriptions) which are associated with the programming
words, but are not to be typed in as part of the instruction.
1. Always connect the Mains Lead to a 3 pin Plug following the instructions contained in the first section
entitled ‘Setting Up’.
2. Never connect the computer keyboard, monitor or power supply/modulator to any piece of equipment or
source of power supply other than that described in this guide. Failure to comply with this will result in
serious damage, and invalidate the guarantee.
3. Keep flower vases, drinks, etc.well away from the computer keyboard, monitor or power
supply/modulator. If liquid is spilt into any of these units, serious damage will result. Under such
circumstances, consult qualified personnel.
4. Do not block or cover the ventilation slots on the top or back of the computer keyboard, monitor, or
power supply/modulator.
5. Turning off the power will lose all that is stored in the CPC464 memory. If you wish to save a program,
read Chapter 2 after having first completed the ‘Foundation Course’.
6. It is recommended that you use cassettes specifically designed for use with computers. However, it is
perfectly acceptable to use good quality audio-type cassettes made by leading manufacturers, providing
that they are not CR-02 or ‘metal’ tape, and are no longer than 90 minutes (C-90).
To enable you to locate programs recorded on the tape more easily, we suggest that you use C-12
cassettes (6 minutes per side.)
7. Note that cassettes containing programs from other types of computer cannot be run or loaded on the
CPC464.
8. If the cassette you are using has had the safety tabs removed to prevent accidental erasure of programs
then the record button will not depress. Please do not use force on this button, otherwise the
mechanism may be damaged. If you wish to re-record on a cassette where the safety tabs on the back of
the cassette have been removed, this may be achieved by covering the holes on the back of the cassette
with adhesive tape.
9. Remember to ensure that the tape in the cassette is wound beyond the first section (leader tape) before
you start to save a program.
10. Take special care not to use or store any of the units in direct sunlight, in excessively hot, cold, damp or
dusty areas, or places subject to any heavy vibration. Never store program cassettes near any magnetic
fields, such as those that occur in loudspeakers or large electric motors.
11. General care of your cassettes and regular cleaning of your datacorder mechanism should lead to error
free storage and retrieval of programs.
12. There are no user-serviceable parts inside the units. Do not attempt to gain access into the equipment.
Refer all servicing to qualified service personnel.
13. Neither the whole or any part of the information contained herein, nor the programs or products
described in this manual may be adapted or reproduced in any material form.
Contents
About this User Guide
Beginners’ Foundation Course
A gentle introduction for the newcomer to computing
F1 Setting Up
F2 Keyboard familiarisation
F3 Graphics, modes and sound
1 Starters
Connecting up the computer
Switching on
Keyboard primer
Displaying the character set
Editing the display
2 Cassette Datacorder
Loading and saving with the cassette Datacorder
The ‘Welcome’ cassette tape
3 BASIC primer
An introduction to the principles of CPC464 BASIC
Syntax of AMSTRAD BASIC
Variables, operators
Simple BASIC exercises
User defined keys
PRINT and display formatting
4 Variables, operators and data
Display formatting
Data and arrays
Dimensioning
Locate
5 Graphics primer
The principles of AMSTRAD CPC464 colour graphics:
INK, PEN, PAPER
MODES, PIXELS, ORIGINS, WINDOWS
Simple graphic handling routines
User defined characters

6 Sound primer
The scope of the CPC464’s sound
Tone and Volume Envelopes
Sound queues
Effects
7 Printers and joysticks
Using joysticks
The JOY command
Connecting a parallel printer
8 Concise reference guide to AMSTRAD BASIC
A concise summary of the BASIC language and keywords used
for programming the CPC464, listed in alphabetical order
9 Further programming information
The internal organisation of programs -firmware
Interrupts and their significance
Control characters
The relationship between the machine code subroutines and the
high level BASIC commands
10 Interrupt features
The real time features
AFTER, EVERY and REMAIN
Appendices
I. A newcomers’ guide to what you can and can’t expect a computer to do
Glossary of computing terms
II. Bits and bytes -binary and hexadecimal tutorial
III. ASCII codes and the character set
Character definitions and grids
Keyboard codes, expansion tokens
IV. Experienced users’ introduction and overview
V. The user interface and expansion bus
The input/output connections
VI. Text screen planners and organizers
VII. Musical planner
Notes and Tone Periods
VIII. Reserved words, and ERROR codes and messages

AMSTRAD CPC464
BEGINNERS’ FOUNDATION COURSE
Foundations 1:
SETTING UP
Initial instructions on the unpacking, interconnecting and
switching on your CPC464 system.
The AMSTRAD CPC464 colour personal computer can be set up using
either:
1.1 AMSTRAD GT64 Green Tube Monitor
1.2 AMSTRAD CTM640 Colour Monitor
1.3 AMSTRAD MP1 Modulator/Power supply and a domestic (UHF) TV
receiver.
Please refer to the appropriate section to enable you to connect up your Computer system correctly
and proceed onto the operating instructions.
1.1 AMSTRAD GT64 Green Tube Monitor
Unpack the monitor and connect a Mains Plug to the Mains Lead as follows:
WARNING
Disconnect the Mains Plug from the Supply Socket when not in use.
IMPORTANT
The wires in this Mains Lead are coloured in accordance with the following code:
Blue: Neutral
Brown: Live
If a13 Amp (BS1363) Plug is used, a5Amp Fuse must be fitted. The 13 Amp Fuse
supplied in a new Plug must NOT
be used. If any other Plug is used, a 5 Amp Fuse must
be fitted -
either in the Plug, or Adaptor or at the Distribution Board. As the colours of the
wires in the Mains Lead of this apparatus may not correspond with the coloured
markings identifying the terminals in your Plug, proceed as follows:
The wire which is coloured BLUE must be connected to the terminal which is marked
with the letter ‘N’ or coloured BLACK.
The wire which is coloured BROWN must be connected to the terminal which is marked
with the letter ‘L’ or coloured RED.

No internal connections need to be made, therefore no attempt should be made to
gain access to the inside of the equipment.
The computer should be positioned in front of the Monitor on asuitable table close to the Mains
Supply Socket. As shown in figure 1, connect the lead with the larger (6 pin DIN) Plug from the
monitor to the socket marked MONITOR on the back of the computer. Connect the lead with the
smaller (DC power) Plug from the monitor to the socket marked 5V DC on the back of the computer.
Ensure that the monitor POWER button is set to the OFF position (Out). Connect the Mains Plug
from the monitor into the Mains Supply (240v AC) Socket.
Now switch on the monitor, and then switch on the computer using the slide switch marked POWER
on the right hand end.
The red ON lamp at the top centre of the computer keyboard unit should be illuminated, and the
monitor will display the following picture:
Amstrad 64K Microcomputer <v1>
©1984 Amstrad Consumer Electronics plc
and Locomotive Software Ltd.
BASIC 1.0
Ready
Cursor
To avoid unnecessary eye-strain, adjust the control marked BRIGHTNESS until the display is
adequately bright for comfortable viewing, without glare or blurring of the writing.
You should also adjust the CONTRAST control to the minimum setting consistent with comfortable
viewing.
The vertical hold control on the GT64 is marked V-HOLD, and should be adjusted so that the picture
is correctly positioned in the middle of the screen, without jitter or ‘roll’.

1.2 AMSTRAD CTM640 Colour Monitor
Unpack the monitor and connect a Mains Power Plug to the Mains Lead as follows:
WARNING
Disconnect the Mains Plug from the Supply Socket when not in use.
No internal connections need to be made, therefore no attempt should be made to gain access to the
inside of the equipment.
The computer should be positioned in front of the Monitor on asuitable table close to the Mains
Supply Socket. As shown in figure 1,on the previous page, connect the lead with the larger (6 pin
DIN) Plug from the monitor to the socket marked MONITOR on the back of the computer. Connect
the lead with the smaller (DC power) Plug from the monitor to the socket marked 5V DC on the back
of the computer.
Ensure that the monitor POWER button is set to the OFF position. Connect the Mains Plug from the
monitor into the Mains Supply (240v AC) socket.
Now switch on the monitor, and then switch on the computer using the slide switch marked POWER
on the right hand end.
IMPORTANT
The wires in this Mains Lead are coloured in accordance with the following code:
Blue: Neutral
Brown: Live
If a13 Amp (BS1363) Plug is used, a5Amp Fuse must be fitted. The 13 Amp Fuse
supplied on anew Plug must NOT
be used. If any other Plug is used, a 5 Amp Fuse
must be fitted -
either in the Plug, or Adaptor or at the Distribution Board. As the
colours of the wires in the Mains Lead of this apparatus may not correspond with the
coloured markings identifying the terminals in your Plug, proceed as follows:
The wire which is coloured BLUE must be connected to the terminal which is marked
with the letter ‘N’ or coloured BLACK.
The wire which is coloured BROWN must be connected to the terminal which is marked
with the letter ‘L’ or coloured RED.

The red ON lamp at the top centre of the computer keyboard unit should be illuminated, and the
monitor will display the following picture:
Amstrad 64K Microcomputer <v1>
©1984 Amstrad Consumer Electronics plc
and Locomotive Software Ltd.
BASIC 1.0
Ready
Cursor
To avoid unnecessary eye-strain, adjust the control at the side of the monitor marked BRIGHTNESS
until the display is adequately bright for comfortable viewing, without glare or blurring of the
writing.

1.3 AMSTRAD MP1 Modulator/Power supply and a domestic
(UHF) Colour TV receiver.
The MP1 is an additional item that you may wish to purchase if you are currently using your
CPC464 computer with the GT64 green tube monitor. The MP1 enables you to use the computer
with your domestic colour TV and thereby enjoy the full colour facilities of your CPC464 computer.
Unpack the Modulator/Power Supply (MP1) and connect a Mains Plug to the Mains Lead of the MP1
as follows:
WARNING
Disconnect the Mains Plug from the Supply Socket when not in use.
No internal connections need to be made, therefore no attempt should be
made to gain access to the inside of the equipment.
Figure 2: The MP1 modulator and power supply
IMPORTANT
The wires in this Mains Lead are coloured in accordance with the following code:
Blue: Neutral
Brown: Live
If a13 Amp (BS1363) Plug is used, a5Amp Fuse must be fitted. The 13 Amp Fuse
supplied in anew Plug must NOT
be used. If any other Plug is used, a 5 Amp Fuse
must be fitted -
either in the Plug, or Adaptor or at the Distribution Board. As the
colours of the wires in the Mains Lead of this apparatus may not correspond with the
coloured markings identifying the terminals in your Plug, proceed as follows:
The wire which is coloured BLUE must be connected to the terminal which is marked
with the letter ‘N’ or coloured BLACK.
The wire which is coloured BROWN must be connected to the terminal which is marked
with the letter ‘L’ or coloured RED.

The modulator/power supply (MP1) should be positioned to the right of the computer on a suitable
table close to the TV set and the Mains Supply socket. As shown in figure 2, connect the lead with
the larger (6 pin DIN) plug from the MP1 to the socket marked MONITOR on the back of the
computer. Connect the lead with the smaller (DC power) Plug from the MPl to the socket marked 5V
DC on the back of the computer.
Connect the lead with the aerial plug from the MP1 to the aerial socket of your TV set.
Check that the computer POWER switch on the right hand end is set to the OFF position and then
connect the Mains Plug from the MP1 into the Supply Socket.
Now reduce the volume control on your TV set to a minimum, switch on your TV, and then switch on
the computer using the slide switch marked POWER on the right hand end.
The red ON lamp at the top centre of the computer keyboard unit should be illuminated, and you
must now tune in your TV set to receive the signal from the computer.
If you have aTV with push-button channel selection, press achannel button to select aspare or
unused channel. Adjust the corresponding tuning control in accordance with the TV set
manufacturer’s instructions (the signal will be approximately at channel 36 if your TV has a marked
tuning scale), until you receive a picture that looks like:
Amstrad 64K Microcomputer <v1>
©1984 Amstrad Consumer Electronics plc
and Locomotive Software Ltd.
BASIC 1.0
Ready
Cursor
Tune in the TV set accurately until the clearest picture is seen. The writing will be gold/yellow on a
deep blue background.
If your TV has arotary programme selector knob, turn the tuning knob until the above picture
appears and remains perfectly steady. (Again, at approximately channel 36).

1.4 JOYSTICK
The AMSOFT joystick model JY1 is an additional item that you may wish to purchase if you are
using the CPC464 computer with software games which incorporate the facility for joystick control,
and ‘firing’ within the game. The JYl can be plugged into the back of your computer using the 9-way
socket marked USER PORTS (I/O). The Amstrad CPC 464 computer can be used with two joysticks.
The second JY1 joystick should be plugged into the socket on the first joystick.
JOYSTICK PLUG (9-way)
SOCKET FOR SECOND
JY1 Joystick controller
1.5 Welcome Cassette
Packed into one of the polystyrene end caps in your computer packaging, you will have found the
‘Welcome’cassette tape. Open the door on the Datacorder unit by pressing the key marked
[STOP/EJECT], and then insert the cassette into the Datacorder of the computer as shown in figure
3 -make sure that the ‘SIDE 1’ printing is uppermost:
Figure 3 The right way to insert a cassette into the Datacorder
Close the lid until it latches shut, press the [REW]ind key on the datacorder to ensure that the tape
is rewound to the start. As soon as the tape stops, press the [STOP/EJECT] key. Reset the tape
counter to 000 by pressing the COUNTER RESET button.

Press down the key marked [CTRL] (Control), and AT THE SAME TIME press the small [ENTER]
key at the bottom right of the number-only keypad next to the Datacorder. The screen will respond
with the instructions:
RUN"
Press PLAY then any key:
Now press the [PLAY] key in the row at the front of the Datacorder until it locks down firmly,
followed by pressing any letter, number, or either [ENTER] key -or the space bar.
The tape will start to move, and after a short time you will see this message appear on the screen:
Loading WELCOME block 1
The tape will take approximately 5 minutes to load, you can see this happening on the screen since
‘block’ number will change to 2,3 etc., until the tape stops. At this time the ‘Welcome’ program will
begin to run. Just sit back and watch. The program runs continuously, so when you have finished
watching press the [ESC] key twice. This stops the program and you can now [STOP] and eject the
cassette, then turn it over to run side two.
After turning the cassette over ready for Side 2, once again remember to press the [REW]ind button
on the datacorder to ensure that the tape is rewound to the start.
Press down the key marked [CTRL] (Control), and AT THE SAME TIME press the small [ENTER]
key at the bottom right of the number-only keypad next to the Datacorder. The screen will respond
with the instructions:
RUN"
Press PLAY then any key:
Now press the [PLAY] key in the row at the front of the Datacorder until it locks down firmly,
followed by pressing any letter, number, or either [ENTER] key -or the space bar.
The tape will start to move, and after a short time you will see this message appear on the screen:
Loading WELCOME 2 block1
Follow the instructions given on the screen, and the program will invite you to participate by typing
instructions as it progresses.

1.6 LOADING OTHER SOFTWARE CASSETTES
THE WELCOME TAPE CAN ONLY BE LOADED AND RUN as described in the previous section
(1.5). Unprotected BASIC programs can be loaded by the following alternative methods. Rewind the
tape thatyou have inserted by pressing the [REW] key on the datacorder until the spools stop
turning, when you must immediately press the [STOP/EJECT] key.
Reset the computer to clear the memory by pressing the [CTRL], [SHIFT] and [ESC] keys in order -
but holdingeach key down until the [ESC] key is finally pressed –the screen will clear and the
original message will reappear as if you had just switched on.
The expression [ENTER] in the following instructions indicates that you must press either of the
two keys marked [ENTER] -do not type the word ENTER! The ”symbol is obtained by pressing
either [SHIFT] key together with the 2 key on the top row of the keyboard.
Type in:
Load"" [ENTER]
The computer asks you to., ..
Press PLAY then any key:
Now press the [PLAY] key in the row at the front of the Datacorder until it locks down firmly,
followed by pressing any letter, number, or either [ENTER] key -or the space bar.
The tape will start to move, and after a short time you will see this message appear on the screen:
Loading <program name>block 1
The block numbers will continue to increase until the tape has finished loading, and the message:
Ready
. ..will appear on the screen.
Alternatively, you may specify the name of the program that you wish to load. To do this, type in:
load ”<title>”[ENTER]

The computer asks you to.. ..
Press PLAY then any key:
Now press the [PLAY] key in the row at the front of the Datacorder until it locks down firmly,
followed by pressing any letter, number, or either [ENTER] key -or the space bar.
The tape will start to move. If the program you have asked the computer to load is not at the
beginning of the cassette, the computer will search through the tape until it finds the exact title that
you have asked it to load. Be careful to type in the program title correctly.
If, while searching for your program, the computer finds a different title to the one that you have
typed in, you will see this message appear on the screen:
Found <other-title> block 1
The computer will not load this program, but will continue to search through the tape until the exact
program title that you have typed in is found, or until you press the [ESC] key to stop the computer
searching the tape.
When the program has been found, you will see this message appear on the screen:
Loading <title> block 1
The block numbers will continue to increase until the tape has finished loading, and the message:
Ready
. ..will appear on the screen.
Then type:
run [ENTER]
. ..and the program you’ve just, loaded will run. If there was already a program in the memory, this
will be discarded and the newly loaded program will take it’s place.
To run a program directly, without first asking the computer to load it, simply type in:
RUN "" [ENTER]
..the computer will respond with the words:
Press PLAY then any key:
..after pressing [PLAY] followed by any letter, number, the space bar or either [ENTER] key, the
computer will search for, then load the program and run it without further instructions from the
keyboard. You can stop the sequence at any time by pressing [ESC] as usual.

1.7 Loading pre-recorded software cassettes
The instructions given so far will allow you to load any of the many titles of software available for
the CPC 464 computer.
However, please also refer to the correct loading instructions printed in each software package.
1.8 SAVE
Aprogram can be saved (recorded) for later use. Insert acassette the correct way and close the
cassette door (the record protection tabs in the rear of the cassette must not have been removed).
Press [REW] to rewind tape to the start, remembering to press the [STOP/EJECT] button when the
tape stops. Type in:
save ”(program title)”[ENTER]
The computer will respond with:
Press REC and PLAY then any key:
Now press the [REC] and [PLAY] keys on the Datacorder until they lock down firmly, followed by
any key (letter, number, space or [ENTER] keys).
The computer will then respond with:
Saving <program title> block 1
When the program has been saved, the cassette spools will stop and you will see the word: Ready
appears on the screen. Now press the datacorder [STOP/EJECT] key and your program has been
saved.
Note that you will not be able to save prerecorded software and games on to your own blank cassette.
Such programs are protected against unauthorised copying.

Foundations 2:
KEYBOARD
FAMILIARISATION
We will now explain the functions of some of the keys on the computer.
Those who are experienced in using computers may skip this section.
[ENTER]
There are two [ENTER] keys. Either of these keys enter the information that you have typed into the
computer. After the [ENTER] key is pressed, a new line is started on the screen. Each instruction
that you type in to the computer should be followed by pressing the [ENTER] key.
From now on, we will show [ENTER] as meaning press the [ENTER] key after each instruction or
program line..
[DEL]
This key is used to delete a character to the left of the cursor on the screen (for example a letter or a
number) which is not required.
Type in a b c d and you will see that the letter d is positioned to the left of the cursor. If you decide
that you do not want the letter d, press [DEL] once and you will see the d removed. If you press
[DEL] and continue to hold it down, the letters a b c will also be removed.
[SHIFT]
There are two [SHIFT] keys. If you press either of these and hold it down whilst typing a character, a
capital letter or upper case symbol will appear on the screen.
Type in the letter a then hold down the [SHIFT] key and type in the letter a again. On the screen you
will see:
aA
Now type in a few spaces by holding down the space bar. Try the following using the number keys
which are on the top line of the keyboard, above the letter keys. Type in the number 2, then hold
down the [SHIFT] key and type in the number 2 again. On the screen you will see:
2“
You can now see what happens when the [SHIFT] key is held down whilst pressing a character key.
Experiment by typing any of the character keys, either on their own, or together with the [SHIFT]
key.
[CAPS LOCK]
This has a similar operation to [SHIFT] except that you only have to press it once. From then on each
letter that you type in will be in capitals, although the number keys will not be shifted. Press [CAPS
LOCK] once, then type in:

abcdef123456
On the screen you will notice that although all the letters are shifted to capitals, the numbers have
not been shifted to symbols. If you wish to type in ashifted symbol while [CAPS LOCK] is in
operation, simply hold down the [SHIFT] keybefore pressing acharacter key. Press the following
keys while holding down the [SHIFT] key:
ABCDEF123456
On the screen you will see:
ABCDEF!"#$%&
If you wish to return to small (lower case) characters again, press [CAPS LOCK] key once again.
If you wish to type in capital letters and shifted upper case symbols without having to constantly
hold down the [SHIFT] key, this can be carried out by holding down the [CTRL] key, then pressing
[CAPS LOCK] key once. Now type in:
abcdef123456
On the screen you will see:
ABCDEF!"#$%&
It is still possible to type in numbers while [CTRL] and [CAPS LOCK] are in operation, by using the
number keys to the right of the main keyboard.
Holding down the [CTRL] key and pressing [CAPS LOCK] once will return you to the mode that you
were previously in -CAPS LOCK or lower case. If you have returned to the CAPS LOCK mode,
simply press [CAPS LOCK] once again to return to the lower case mode..
[CLR]
This key is used to clear a character within the cursor.
Type in ABCDEFGH. The cursor will be positioned to the right of the last letter typed (H). Now press
the cursor left key [<-] four times. The cursor will have moved four places to the left, superimposed
over the top of the letter E.
Other manuals for CPC464
3
Table of contents
Other AMSTRAD Desktop manuals

AMSTRAD
AMSTRAD CPC6128 User manual

AMSTRAD
AMSTRAD CPC464 User manual

AMSTRAD
AMSTRAD PC1512 User manual

AMSTRAD
AMSTRAD MegaPC User manual

AMSTRAD
AMSTRAD PC1640 User manual

AMSTRAD
AMSTRAD CPC664 User manual

AMSTRAD
AMSTRAD TS80 User manual

AMSTRAD
AMSTRAD CPC6128 User manual

AMSTRAD
AMSTRAD CPC6128 User manual

AMSTRAD
AMSTRAD CPC464 User manual
Popular Desktop manuals by other brands

Moxa Technologies
Moxa Technologies DA-820 Series Quick installation guide

Lenovo
Lenovo ThinkCentre A70z ALL-IN-ONE Guia do usuário

HP
HP Pavilion t200 - Desktop PC Technical specifications

Lenovo
Lenovo ThinkCentre M82 Hardware Maintenance Manual

HP
HP dx2420 - Microtower PC Service & reference guide

Sony
Sony VAIO VPCY21 SERIES user guide