manuals.online logo
Brands
  1. Home
  2. •
  3. Brands
  4. •
  5. Amulet Hotkey
  6. •
  7. Extender
  8. •
  9. Amulet Hotkey DXR-H4 User manual

Amulet Hotkey DXR-H4 User manual

DXR-H4
Quad Display KVM Extender Host Card
Quick Start Guide
www.amulethotkey.com QS-RHA4-1110 v2.0 December 2020
For Health and safety informaon, refer to the sheet LS-AHKL-0001.
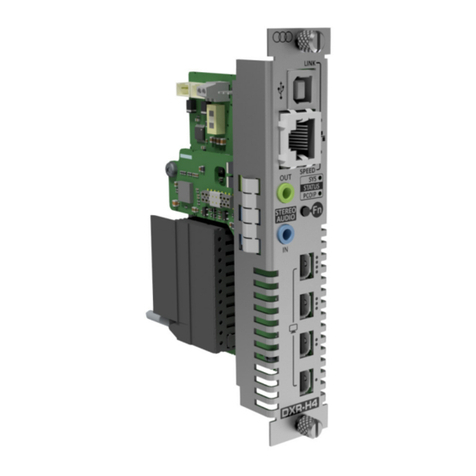
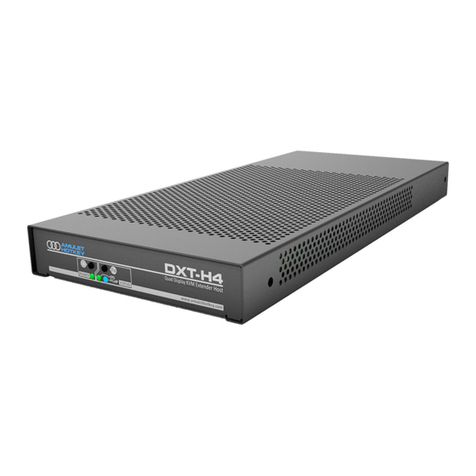
The Amulet Hotkey DXR-H4 is a rack-mounted, quad-display KVM Extender Host
card. The DXR-H4 uses PCoIP® for secure, high-performance remote access for
any workstaon, laptop, closed or legacy PC. The DXR-H4 sends data to a remote
zero client over a LAN/WAN. Almost any computer supporng USB and digital
video can be integrated into a mission-crical, remote-desktop soluon.
You will need:
DXiP rack with PSU ed;
DXR-H4 quad-display KVM Extender Host card;
DXR-H4 personality module (RJ45 or SFP variant);
cables for video, audio & USB (available separately in 1 m & 2.8 m sets);
SFP module (for SFP personality card only). See the SFP Modules
datasheet or contact Technical Support to discuss compable modules.
Preparaon
1 If possible, restart the host computers to ensure all updates are complete.
2 If possible, power down the DXiP chassis.
Install the DXR-H4 personality module into the chassis
1 Find the next available slot. If no other modules are installed, we recom-
mend that the rst personality module goes in slot 1.
Note: If using a split powered rack, decide rst whether to install the rst card
in slot 1 or 7, depending on which Power Supply Unit will power the card.
Figure 1: Install the personality module
2 With the Amulet Hotkey logo at the top, align the module with the slot
guides in the chosen slot at the rear of the DXiP chassis. See Figure 1.
3 Put the personality module a short distance into the slot unl the capve
screws align with the holes of the DXiP chassis.
4 Push the personality module fully home.
5 Turn the retaining screws (1) to keep the module in place.
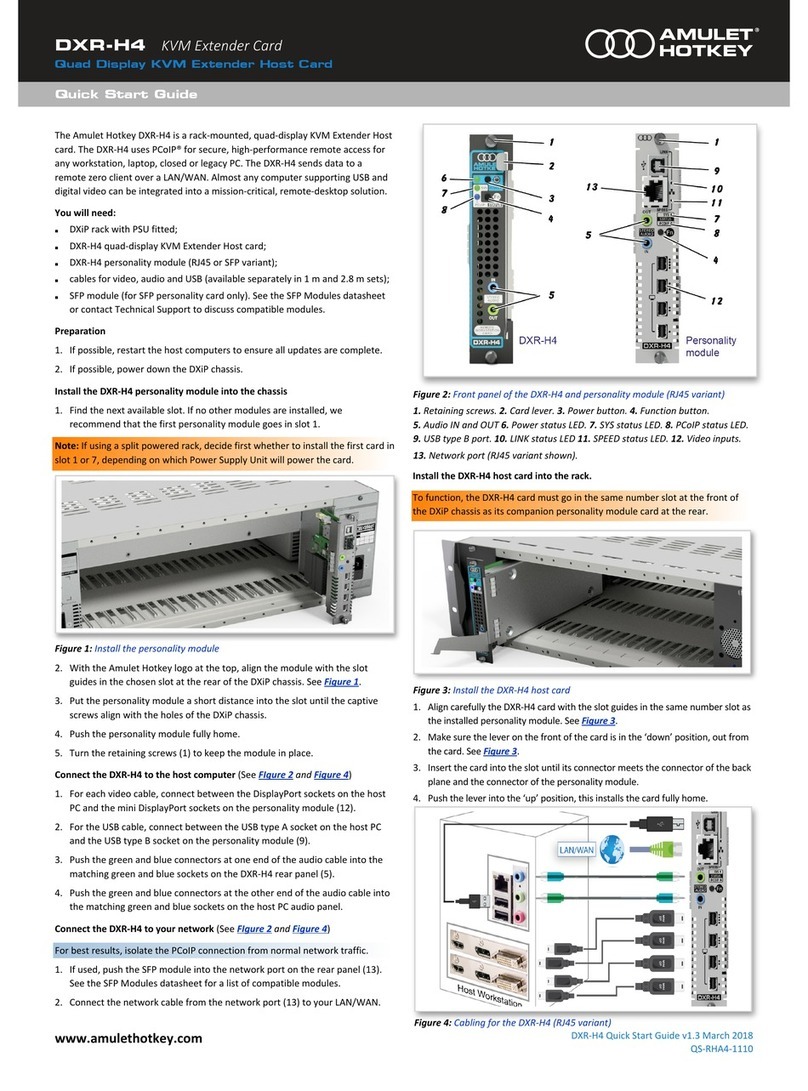
Connect the DXR-H4 to the host computer (FIgure 2 & Figure 4)
1 For each video cable, connect between the DisplayPort sockets on the host
PC and the mini DisplayPort sockets on the personality module (12).
2 For the USB cable, connect between the USB type A socket on the host PC
and the USB type B socket on the personality module (9).
3 Push the green and blue connectors at one end of the audio cable into the
matching green and blue sockets on the DXR-H4 rear panel (5).
4 Push the green and blue connectors at the other end of the audio cable
into the matching green and blue sockets on the host PC audio panel.
Connect the DXR-H4 to your network (FIgure 2 & Figure 4)
For best results, isolate the PCoIP connecon from normal network trac.
1 If used, push the SFP module into the network port on the rear panel (13).
See the SFP Modules datasheet for a list of compable modules.
2 Connect the network cable from the network port (13) to your LAN/WAN.
Figure 2: Front panel of the DXR-H4 and personality module (RJ45 variant)
1. Retaining screws. 2. Card lever. 3. Power buon. 4. Funcon buon. 5. Audio
IN and OUT 6. Power status LED. 7. SYS status LED. 8. PCoIP status LED. 9. USB
type B port. 10. LINK status LED 11. SPEED status LED. 12. Video inputs.
13. Network port (RJ45 variant shown).
Install the DXR-H4 host card into the rack.
Note: To funcon, the DXR-H4 card must go in the same number slot at the
front of the DXiP chassis as its companion personality module card at the rear.
Figure 3: Install the DXR-H4 host card
1 Align carefully the DXR-H4 card with the slot guides in the same number
slot as the installed personality module. See Figure 3.
2 Make sure the lever on the front of the card is in the ‘down’ posion, out
from the card. See Figure 3.
3 Insert the card into the slot unl its connector meets the connector of the
back plane and the connector of the personality module.
4 Push the lever into the ‘up’ posion, this installs the card fully home.
Figure 4: Cabling for the DXR-H4 (RJ45 variant)
www.amulethotkey.com DXR-H4 Quick Start Guide
Technical Support (Refer to legislaon sheet LS-AHKL-0001)
This device complies with part 15 of the FCC Rules (Class A)
Operang temperature range: 15° to 30° C (59° to 86° F)
Operang humidity range: 10% to 90% (non-condensing)
For product documentaon, downloads and technical assistance, visit:
© 2020 Amulet Hotkey Ltd. All rights reserved.
Informaon in this document is subject to change. No part of this document may be reproduced through any means including (but not limited to) electronic or
mechanical, without express wrien permission from Amulet Hotkey Ltd. Amulet Hotkey Ltd may have patents, patent applicaons, trademarks or copyrights or other
intellectual property rights covering subject maer in this document. PC-over-IP, PCoIP and the PCoIP logo are registered trademarks of Teradici Corp. Amulet Hotkey
and ‘soluons you can bank on’ are registered trademarks of Amulet Hotkey Ltd. Other product names and company names listed within this document may be trade-
marks of their respecve owners. Amulet Hotkey products are designed and built in the UK. For further informaon on all our products, visit www.amulethotkey.com.
DHCP or stac IP assignment
If your network uses DHCP, the DXR-H4 obtains its IP address from the DHCP
server. If no DHCP server is available, the DXR-H4 mes out aer three minutes
and adopts its default IP address of 192.168.1.100.
Note: Change the default IP address as soon as possible.
How to change the default IP address
All DXR-H4 cards will revert to the same default IP address, this can cause
conicts as the network grows. Use the Administrave Web Interface (AWI) to
assign a dierent stac IP address than the default.
1 Enter the default IP address of the DXR-H4 in a browser to access the AWI.
2 Enter the default password ahkdante and click Log In.
3 From the Conguraon menu select the Network opon.
4 Make sure the Enable DHCP opon is unchecked.
5 Enter the new fall-back default IP address into the IP Address elds.
6 Make sure the Enable DHCP opon is checked.
Connect a zero client to the DXR-H4
Several connecon methods are supported. The default method is Auto
Detect, but there are other methods such as SLP Discovery. You can also use a
connecon broker. See the DXR-H4 user manual for more details.
1 Make sure the remote Amulet Hotkey zero client is powered on.
2 Start a PCoIP session to connect the zero client to the DXR-H4. If you want
to use the default connecon method, click Connect. If not, do the steps in
Change the connecon method for the zero client.
Change the connecon method for the zero client
To change the default connecon method, use the On Screen Display (OSD):
1 Select Opons > Conguraon from the Menu Bar.
2 Click Unlock and enter the default password ahkdante. See the DXR-H4
user manual for how to change the default password.
3 Select the Session tab and select the connecon type from the menu.
4 Click on OK.
Setup complete
Once the zero client successfully connects to the host, check for the following
indicaons to show normal operaon:
LED Status Descripon
Power GREEN Card is ON
SYS GREEN Copper network connecon
SYS BLUE Fiber network connecon
PCoIP GREEN / GREEN ash Teradici OK
LINK GREEN / GREEN ash Network trac indicaon
SPEED
GREEN 1 Gbit network available
AMBER 100 Mbit network available
Firmware updates
Aer setup, it is important to update the rmware. See the manual for details.
Troubleshoong
LED Status Descripon
SYS RED ash Card error
SYS GREEN/BLUE ash Network detected, no link
PCoIP RED Teradici error
LINK OFF No network connecon or unrecognized SFP module
SPEED OFF No network connecon or unrecognized SFP module
Disable temporal dithering
Temporal dithering is a technique that graphics cards use to generate
intermediate colors, by rapidly alternang a pixel between two adjacent color
values. Enabling temporal dithering on a machine using PCoIP can result in high
bandwidth usage and poor performance. To disable temporal dithering:
Apple MACs: see AN - 057 Disable Temporal Dithering on macOS and OS X on
the support site for how to do this.
Windows PCs and workstaons: see KBA - 144 Disable temporal dithering on
Windows on the support site for how to do this.
Connect to a so client
Conguraon of the DXR-H4 is dependent on the specic host and client
operang systems. Contact Technical Support for further informaon.
Operaon of the front panel buons
Power: Press once to take the DXR-H4 unit in or out of standby. Press
and hold the buon for more than four seconds to reset the unit.
Fn: Press the buon for more than four seconds to acvate the ID
mode. With mulple DXR-H4 units, ashing LEDs on the cards help you
match the host card to its personality module.
Enable the Management Interface (MI)
1 With the unit on, press and hold both the Fn and Power buons.
The LEDs turn o briey then ash ORANGE.
2 Release the Fn and Power buons at the same me and wait for an audible
beep (see the manual for full details).
Safe power-down
To turn the unit o correctly, press the Power buon once and wait for the unit
to enter standby before removing the unit or power from the rack.
Other manuals for DXR-H4

2

Other Amulet Hotkey Extender manuals

Amulet Hotkey CoreModule FX600 User manual

Amulet Hotkey

Amulet Hotkey CoreModule FX600 User manual

Amulet Hotkey DXT-iP User manual

Amulet Hotkey

Amulet Hotkey DXT-iP User manual

Amulet Hotkey DXR-H4 User manual

Amulet Hotkey

Amulet Hotkey DXR-H4 User manual

Amulet Hotkey DXT-H4 User manual

Amulet Hotkey

Amulet Hotkey DXT-H4 User manual

Amulet Hotkey DXT-H4 User manual

Amulet Hotkey

Amulet Hotkey DXT-H4 User manual

Amulet Hotkey DeTwo User manual

Amulet Hotkey

Amulet Hotkey DeTwo User manual

Amulet Hotkey DXZC User manual

Amulet Hotkey

Amulet Hotkey DXZC User manual

Amulet Hotkey DXT-H4 User manual

Amulet Hotkey

Amulet Hotkey DXT-H4 User manual

Amulet Hotkey DXR-H4 User manual

Amulet Hotkey

Amulet Hotkey DXR-H4 User manual

Popular Extender manuals by other brands

Hall Technologies ULTRA-4K user manual

Hall Technologies

Hall Technologies ULTRA-4K user manual

Philco TB-2 instructions

Philco

Philco TB-2 instructions

Nikrans LCD-1000GDW quick start guide

Nikrans

Nikrans LCD-1000GDW quick start guide

MuxLab 500465 Quick installation guide

MuxLab

MuxLab 500465 Quick installation guide

PTN TPHD403P user manual

PTN

PTN TPHD403P user manual

Honeywell NOTIFIER PSE-6 instruction manual

Honeywell

Honeywell NOTIFIER PSE-6 instruction manual

Binary B-210-HDMATRIX-RECVR owner's manual

Binary

Binary B-210-HDMATRIX-RECVR owner's manual

Analog way LiveCore LOE016 quick start guide

Analog way

Analog way LiveCore LOE016 quick start guide

zBoost ZB645 Platinum manual

zBoost

zBoost ZB645 Platinum manual

Nitho NSW-JCEX-K quick start guide

Nitho

Nitho NSW-JCEX-K quick start guide

Matchmaster 05MM-RE03 user manual

Matchmaster

Matchmaster 05MM-RE03 user manual

Enable-IT 865W PRO quick start guide

Enable-IT

Enable-IT 865W PRO quick start guide

Raritan Cat5 Reach DVI user guide

Raritan

Raritan Cat5 Reach DVI user guide

Atlona AT-COMP300SL user manual

Atlona

Atlona AT-COMP300SL user manual

HiBoost Smartlink Series installation guide

HiBoost

HiBoost Smartlink Series installation guide

Gefen HDMI-CAT5-MS user manual

Gefen

Gefen HDMI-CAT5-MS user manual

Amped Wireless HIGHPOWER REA20v2 user guide

Amped Wireless

Amped Wireless HIGHPOWER REA20v2 user guide

DataBay KVME-300 user manual

DataBay

DataBay KVME-300 user manual

manuals.online logo
manuals.online logoBrands
  • About & Mission
  • Contact us
  • Privacy Policy
  • Terms and Conditions

Copyright 2025 Manuals.Online. All Rights Reserved.