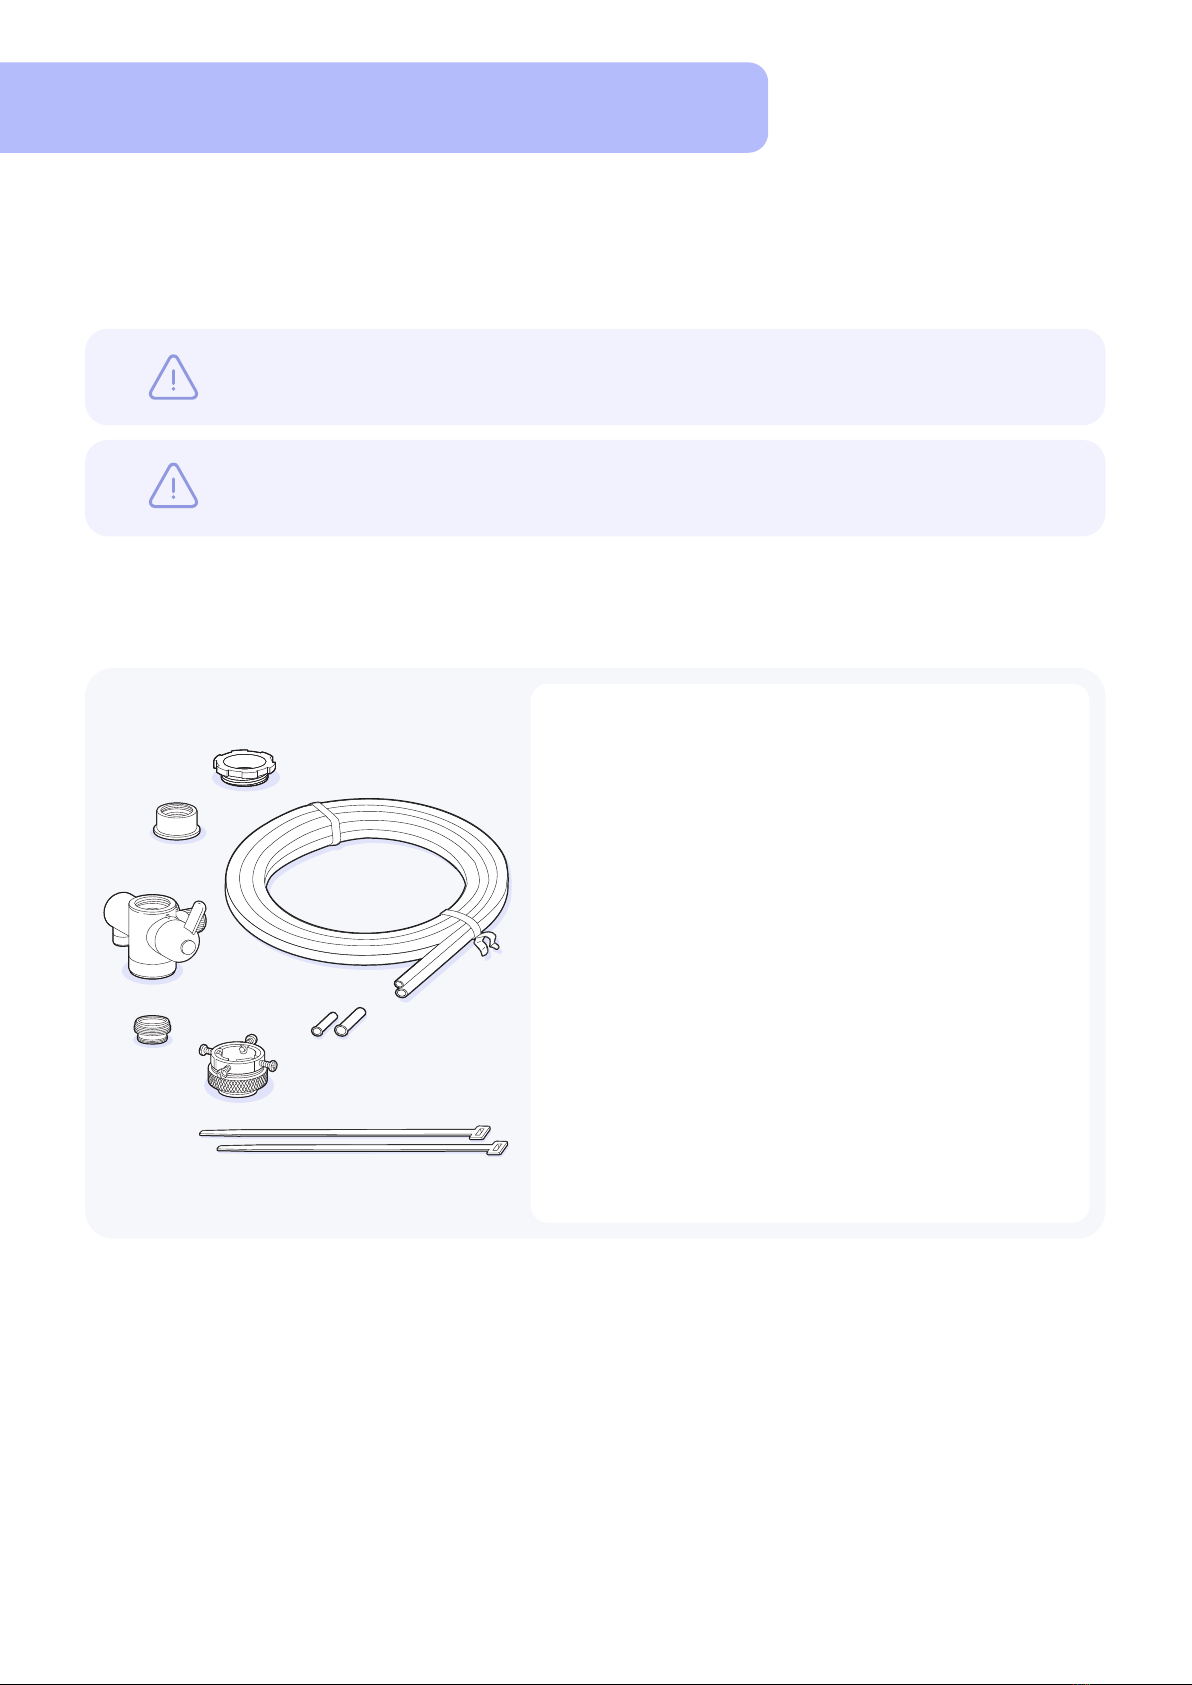
IMPORTANT SAFEGUARDS AND PRECAUTIONS
Improper connection of the power adapter can result in a risk of electric shock. Do not modify
the power adapter. If it will not t into the outlet, have a proper outlet installed by a qualied
electrician.
Regularly inspect product and plumbing ttings for water leaks, as water leaks can cause
property damage.
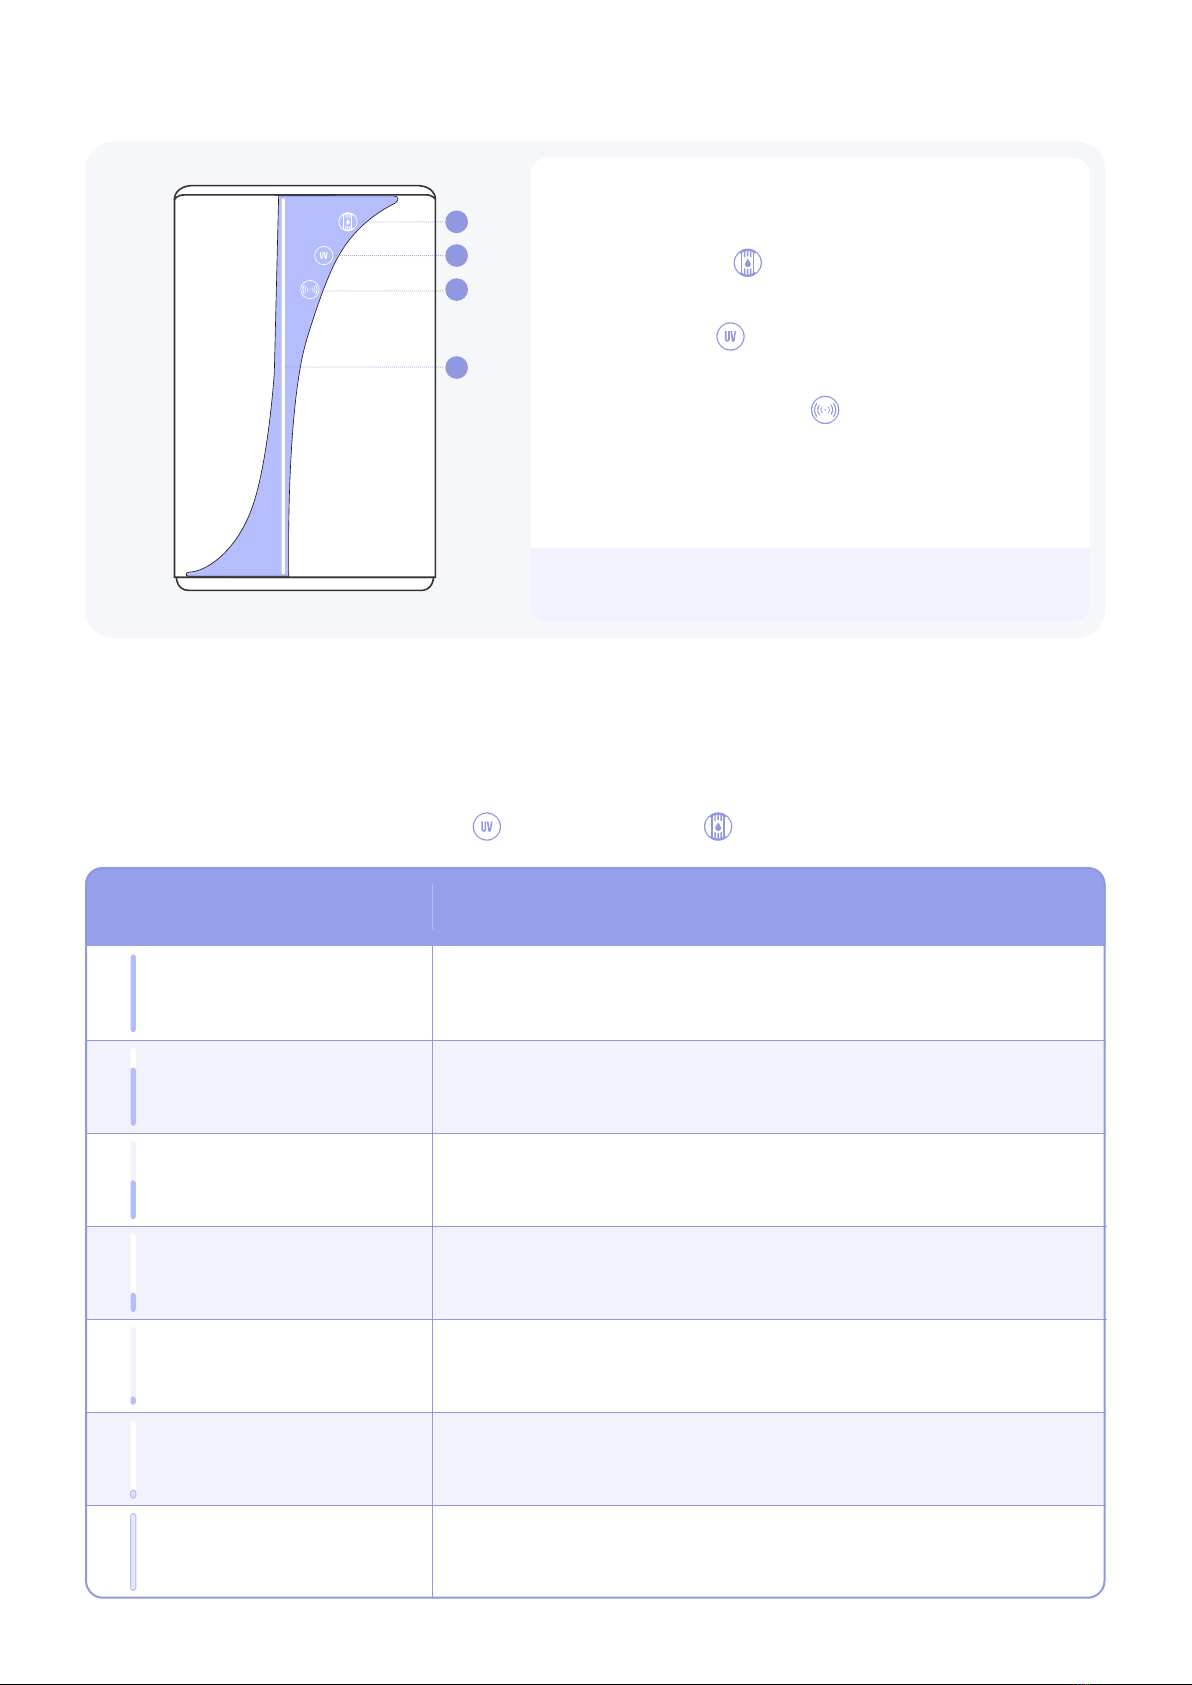
Anytime the UV icon on the display is solid red, there is no UV treatment. Contact Customer
Service.
Unintended use of the appliance or damage to the housing may result in the escape of
dangerous UV-C radiation. UV-C radiation may, even in small doses, cause harm to the eyes and
skin. Appliances that are obviously damaged must not be operated
Do not use with water that is microbiologically unsafe or of unknown quality without adequate
disinfection before or after the system. Systems certied for cyst reduction may be used on
disinfected waters that may contain lterable cysts. If your immune system is weakened or
compromised and for medical reasons, you need water of exceptional purity, consult your
healthcare provider before using.
The eSpring™ Pro Water Purier is designed for use only with cold, bacteriologically suitable
(potable) water.
Installation of the Water Purier must comply with all applicable Federal, Provincial, State,
Municipal and local laws and regulations.
During normal operation, if the Water Purier has not been used for several hours (3-4 hours),
run water through it for approximately 30 seconds prior to use.
DO NOT use with warm or hot water, as this may damage the Water Purier.
DO NOT install under full line pressure. Must be installed with eSpring™ faucet or diverter only.
Except for lead and a few other compounds, the eSpring™ Pro Water Purier is NOT designed
to remove soluble inorganic substances such as iron, calcium, magnesium, nitrates, arsenic or
uorides.
Plumber’s thread sealing compounds should NOT be used with the Water Purier.
DO NOT allow vegetable oil, petroleum jelly, or other lubricants, solvents, ammonia, alcohols,
acids, or strong cleaning solutions to come into contact with the Water Purier. They could cause
permanent damage to the Base Housing. When cleaning, use a mild liquid dishwashing detergent
(such as DISH DROPS™ Dishwashing Liquid) and water.
The system will let you know when it is time to replace the lter and UV source.
THE FILTER MUST BE REPLACED AT LEAST ONCE A YEAR. In areas of very poor water quality,
you may see a drop in the ow rate, indicating that lter replacement may be needed more
frequently. Even if water ow rate is not aected, the Filter must be replaced as soon as a year
has passed or when it has ltered 1,320 gallons (5000 L, about 13.7L a day) of water, whichever
comes rst. Please dispose according to local, state or federal laws.
This appliance contains a UV-C emitter. The UV source must be replaced every ve years or 500
hours of use by a trained service technician. (xxx-xxxx-xxxx).
15
16
17
18
19
2
1
3
4
5
6
7
8
9
10
11
Important Precautions
5