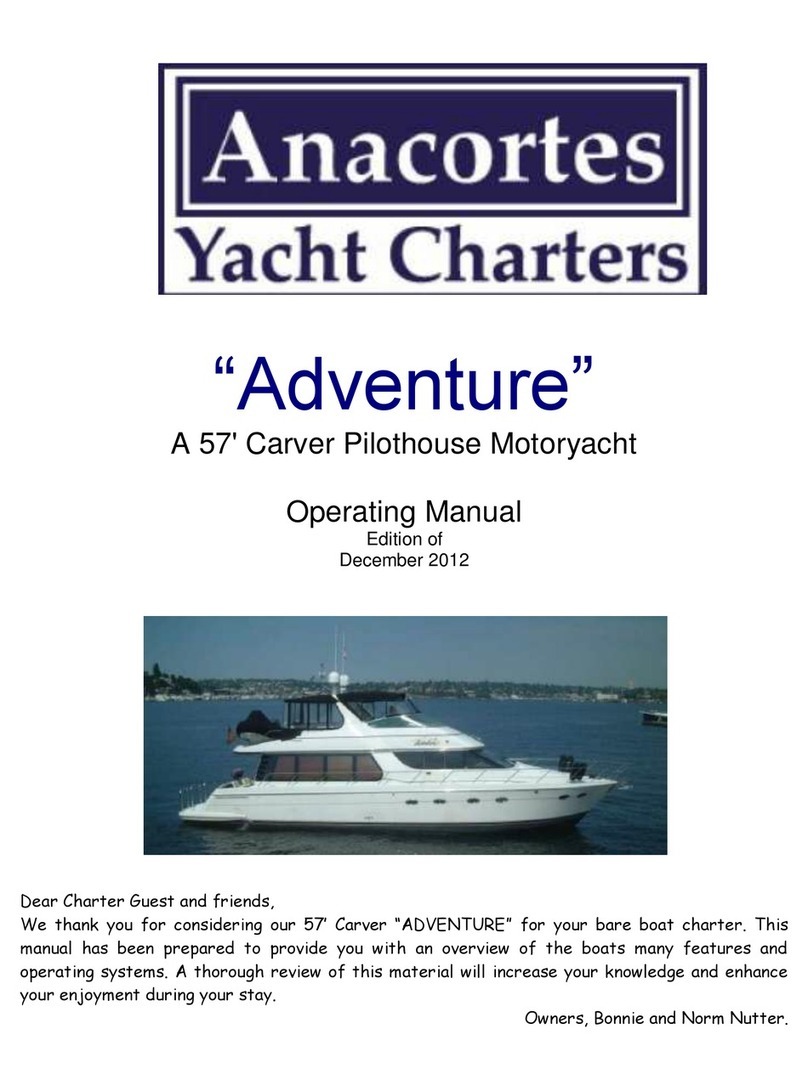
Anacortes Yacht Charters Adventure User manual

“Adventure”
A 57' Carver Pilothouse
Motoryacht
Operating
Manual
Edition of
June 2013
Dear Charter Guest and friends,
Thank you for considering “ADVENTURE” our 57’ Carver Motor Yacht for your charter experience. This
manual has been prepared to provide you with an overview of the boats many features and operating
systems. A thorough review of this material will increase your knowledge and enhance your enjoyment
during your cruise. Sincerely,
Bonnie and Norm Nutter

Section I.
General Description of “ADVENTURE
Carver 57' Yacht -Exterior
A manufacturer’s view of a Carver 570 sistership..
ADVENTURE herself differs in appearance in that
she has a fully enclosed flybridge with additional
canvas for the aft deck during those cooler nights
on the water. The aft deck canvas is removed
generally during the summer months.
[Looking forward along the port side deck. Note
the sturdy side rail as well as the rail above the
windows. You will be secure as you move about
this substantial boat!
Standing on the aft deck and looking forward you
will find the steps to the flybridge and access to
the 12 foot tender. To the right of the steps is the
engine room light switch. The lazarette hatch in
the center of the aft deck leads to the engine
room.

General Description of this Carver 57' Yacht
–
Exterior
(continued)
Above photo is Adventure’s Fly Bridge helm
station. Here you will have the vessels auto pilot,
GPS, radar, Depth sounder throttle controls and
VHF within easy reach
The custom twin helm seat offers you comfort and
allows for maximum visibility while underway or
docking.
For thosewhoenjoy a good old fashion BBQ or just want
to charbroil your steak or salmon, there is a propane grill mounted on the
starboard cabinet in the fly bridge sal
The fly bridge area is a great gathering place for crew
and guests and affords excellent view of the passing
scenery. The custom enclosure features sliding panels that
can open the area up to breezes on warm summer days.
For those of you who love to BBQ
Adventures offers a very large propane
grill mounted on the starboard cabinet on
the fly bridge. Treat your guest to a great
charbroiled steak or salmon. The upper
salon is a wonderful place to entertain.

General Description of this Carver 57' Yacht - Exterior (Continued)
Waste deck fittings ( starboard midship ) Water Fill (port & starboard midship
There are fresh (starboard) and seawater (port) wash-down faucets in the side compartments to rinse the anchor rode
with the supplied hoses/nozzle for the anchor chain or boat washing. Each fitting is labeled so make certain that you fill
the proper one for the purpose intended.
*** Note*** The fuel fittings are located on theaft transom and are not to be confused with the holding and water tank
fittings.
The Aft Flybridge aft deck is reserved for the yacht’s dinghy. Since there are no rails here, this area will not be used
by crew except for launching the tender. A safety gate in the rail between the boat and flybridge protects the crew.
The dinghy is launched with the deck crane and the remote control for the which is stowed in the cabinet next to
the icemaker on the flybridge forward.
The 12'AB Dinghy is equipped with an electric start/tilt 40 HP Yamaha outboard, with nav lights and electric bilge
pump.The electric Dinghy Davitis locatedaft of the upper seating areaand outside the enclosedfly bridge.
40 Horsepower Electric Start/Tilt powers
the dingy.
The rear swim step offers easy boarding of
the vessel and a large area to access and
tie up the dingy after launching.

General Description - Interior
Adventures Main Level; Swim Platform, Aft Deck, Salon, Galley and Pilot House and Foredeck
Full Galley View Double Freezer Refrigerator
Galley Dishwasher Salon Glass Ware & Wine Locker

General Description – Interior (continued)
Salon View Looking Aft Wine Cellar and Bottle Storage to Port
Lower Pilot House Instrument Panel Pilot House Seating Area to Port
The lower panel shows the aft seating area of the pilot house, the stairs to the fly
bridge and the steps leading to the salon where the DC and AC electrical
cabinets are located.

Section 1 – Guest Accommodations
Upper left is the VIP
Stateroom with an
adjoining bath and
shower to the right.
Lower left is the
master
stateroom with vanity,
separate head and
bath/shower. Each area
has its own climate
control system.
The Bunk Room offers
two
full length twin berths with
ample storage, lighting
and climate controls. The
guest bath for the VIP is
shared with the Room.

Section 2: Specifications, Capacities,
& Important Numbers
Important Data Specific To this Vessel
Hull Identification Number USCG Registration #
Vessel Name: Adventure
Vessel Official Number: 1111918
Vessel Registration Number: N/A
Hull ID Number CDRNA049B101
Capacities:
Sleeps six: Two in each stateroom (recommended)
Sleeps eight: Two in each Stateroom plus Two on the Settees
Fuel: 800 Gallons in two 400 gallon tanks
Fresh water: 200 Gallons in two 100 gallon tanks
HoldingTank: 100 Gallons in two 50 gallon tanks
Dimensions:
Length: 59 Feet 2 Inches including swim platform
Beam: 15 Feet 4 Inches
Draft: 4 Feet 9 Inches
Displacement: 52,500 Pounds with full fuel &
water
Fluids:
Motor Fuel: #2 Diesel
Motor Oil, mains: 15W-40 Chevron Delo Multigrade
Transmission Oil: 30W Chevron Delo Single Grade
EngineCoolant: 50-50 mix, ethylene glycol and water; corrosion inhibitor
added
Operating Parameters: 1600 RPM typical speed 10.8 knots, 12.0 gph
1725 RPM typical speed 11.4 knots, 14.0
gph
T
1750 RPM typical speed 11.6 knots, 16.0
gph
T
(1 700-1800 RPM is a “sweet spot” for this
boat)
2000 RPM typical speed 12.5 knots, 24.0 gph

Engine Room Tour
Engine Room view forward Port Engine view looking aft
Custom shore power cord retriever Air Conditioner compressors
Port Engine
view looking
forward to the
15Kw
generator
At left is a
stern view of
Adventure with
the dinghy and
enclosed
flybridge.
Aqua Whisper Water Maker (optional terms)

Engine Room &
Lazarette:
Access to the engine room is
through the hatch in the aft
cockpit through the lazarette.
There are two Engine Room
light switches (One on the
DC main breaker panel and
one on the starboard side
rear salon bulkhead next to
the aft upper salon stairs.
The starboard side of the
lazarette has four air
conditioning refrigeration units
plus a 110-volt AC sea water
pump to provide them with
cooling water; also located is
the aft side of the starboard
fuel tank and the Racor filter
for the starboard engine. Two
storage boxes hold the spare
anchor line and an extra 50'
shore power cord and
electrical adapters.
Midships aft in the
(Above) Laz starboard: Air
conditioning controls
w
i
th
compressors behind and seawater
pump below. Engine spare
parts/supplies in the boxes. (Below)
the starboard lazarette holds stern
thrusterbatteries& misc.supplies.
Thehatchraised;the steps to the boatdeckin
the corner of the cockpit visible at top.
(Another view of the ladder is on page 1.2) In
this viewyou can see the fuel tank & Racor.
Aft center of laz: Stern Thruster motor and
controls (the red button is the breaker reset),
sea water pump, trim tab pump, and hydraulic
steering ram. Air conditioninghose and wiring
is in the white bundlesto left.
lazarette are the motor and controls for the
stern thruster, trim tab pump, steering gear,
autopilot pump, and wash down pump; to
port in the lazarette are the port fuel tank,
stern thruster batteries and miscellaneous
supplies.
The engine room layout is fairly
symmetrical, with water tanks port and
starboard. The engine room provides
ample room and makes it easy to move
about and perform your daily inspections.
The House bank of batteries have been
doubled in size consisting of 8 led acid 8d
batteries to greatly extend the capacity of
the house bank system.
Looking forward from E/R door. Volvos each side, Kohler
generator
atforwardend.Bowthruster
batteries
are
under
raised
bilgefloor forward. The room is neat,brightlylit,clean.

Engine Room Views and Descriptions:
The port main engine,lookingaft. Battery chargerand batteries
are aftof engine;doorwayto lazaretteto left. Thecap closestto
the camerais the oil fillercap. The dipstickislowon the engine
nearthe aft end of the carnkcase.
E/R aft port corner. 20-amp charger (left) is for the engine and
generator batteries. Blue battery isolator. Yellow charger is the
sternthrustercharger;thelargewhiteboxis the 4000-wattsine-
wave inverter.Batteryswitches controlportengine,davit.
Port engine outboard:
Water
tank,
engine
coolant over-flow tank, blue spare oil
cans.(Thestarboardside is mirror.)
Port forward: Port head holding tank &
generator aqua-lift muffler in front of
engine.Stbdheadtankis opposite.
Down low, just port of the generator is its
battery and, further to port, the port
head’sVacu-Flushpump.
Dinghy:
Midships forward is the 15.5kw
Kohler generator; the cover is
lowered in this view. Water heater
is to starboard of it. Misc. supplies
in boxes are atop the genset.
Forward midships bilge well with
bilge pumpand floatswitch.
Forward
starboard
corner of engine
room: Generator sea strainer, fresh
water
pump, spare oil. The Vacu-
Flush pump
for the starboard head
isinlowerrightcorner of photo.

The boat is equipped with a 3-person Nouvarania 12' RIB-inflatable dinghy with a 40
horsepower Yamaha four-stroke outboard. Extra fuel for the dingy is stored on the boat deck
(aft end of the flybridge). The dinghy is very easy to lower to the water using the deck crane
with its remote control.
Deck Equipment:
The boat has ample mooring lines and fenders in place. There is a 300’ stern/shore line
located in the aft lazatette. The anchor is a Delta 55 lb plow style anchor with 200 feet of
chain anchor rode. The chain is marked at 10 foot increments with white paint and at 30 foot
increments in pink. An emergency anchor is located in the lazarette on top of the port side
fuel tank. Wash down hose outlets for both fresh and salt water are in
the cabinets adjacent to the anchor windlass.
Safety Equipment:
This vessel is equipped with five fire extinguishers, one each in the VIP stateroom and master
stateroom hanging lockers, on the flybridge aft of the icemaker cabinet, in the kitchen under the
sink and one mounted on the aft cockpit under the stairs.
This vessel is also equipped with an automatic, fixed system in the engine room with emergency
controls at both helm stations


3.1 - Checklists & Maneuvering Suggestions
Section 3: Checklists & Maneuvering
Suggestions
Operating Checklists -
First Thing Each Day:
Q Check engine oil, coolant.
Q Check under-engine oil pads. Okay?
Q Check fuel tank levels.
Q Check holding tank. Need pumping?
Q Turn off anchor light if illuminated.
Starting Engines:
Q All lines clear of propellers and on deck.
Q Items running on AC evaluated vis-a-vis the Inverter and generator.
Q Start Engines:
1. Turn one engine key “on” (but do not start)
2. Press Engine Control “Key” button until both red lights by “key” illuminate
3. Push “N” button until green blinks, advancing throttle about 3/4" past detent
4. Turn engine key past “On” to activate starter. (3-4 revs before injectors open!)
5. If engine does not start, turn to “off” and repeat that engine’s procedure.
6. When engine starts, reduce throttle gradually to idle, levers in “neutral”
7. Repeat steps 3 & 4 for other engine
8. Lights will be steady red by “key”, and green by “N” buttons. (See Section 4.3)
Q If engines do not turn over, see “What to Do If”.
Leaving Dock: (Only 3-4 minute engine warmup required!]
Q Shore power breaker “off”, cord removed, and stowed on board.
Q Lines removed as appropriate.
Q Fenders hauled aboard and stowed.
Q Lines and other deck gear secure/stowed.
Q Doors and hatches closed and secured as appropriate.
Underway:
Q Helms person on watch at all times.
Q RPM under 1400 until engines warm to 140°; RPM never to exceed 2400 RPM.
Q Wake effects always in mind.
Approaching Dock:
Q Fenders out on appropriate side. Q Trim Tabs “Up” (Bow Up)
Q Bow line OUTSIDE stanchions and bloused around to midships.
Q Engines dead slow, wheel centered for engine-only maneuvering.
Q Mate ready to secure stern first (in most circumstances).

3.2 - Checklists & Maneuvering Suggestions
At Dock in Marina:
Q Lines secure, including spring lines.
Q Trim Tabs “Up” (Bow Up)
Q Step stool out, if needed.
Q Water heater breaker off until Inverter current settles (see “Inverters” below).
Q Shore power cord connected.
Q Shore power switch “On” to appropriate shore power location.
Q Shore power confirmed on meters.
Q Inverter “On”.
Q Electric use monitored for current capacity of shore facilities.
Mooring at Buoy:
Q Skipper puts starboard side gate next to buoy with mate standing by it.
Q Mate loops 20' or so line, such as bow line, through buoy ring.
Q Mate holds two ends together, walks up side of boat to bow of boat.
Q With buoy held close to bow, line secured to each bow cleat through hawsepipe.
Q Inverter “Off” unless in use or Generator is running.
Mooring at Anchor:
Q Anchor is lowered from pulpit while boat is backed up slowly away from anchor.
Q When desired chain length out (4:1 or 5:1 scope), windlass is stopped.
Q Engines reversed “for count of five” until chain pulls up virtually straight. Note: the boat
is not held in reverse against a taught anchor chain!
Q Inverter “Off” unless in use or generator is running.
Overnight Checklist in Marina:
Q Shore power “On”.
Q Trim Tabs “Up” (Bow Up)
Q Inverter “On”.
Overnight at Anchor or Buoy:
Q Inverter “Off” to conserve batteries.
Q Trim Tabs “Up” (Bow Up)
Q Anchor light “On”.
Q DC electrical items all “Off” including radios, extra lights, etc.
Upon Arising:
Q If at anchor or buoy, Inverter “On” only if necessary.
Q If necessary, run generator to charge batteries if at anchor or buoy.
Q Inverter “On” if shore power available or generator is running.
Q Turn on heat if necessary.
Q Go to top of this Excell checklist.

3.3 - Checklists & Maneuvering Suggestions
Maneuvering Suggestions
Docking & Undocking
Usually it’s easier to dock bow in. Have your mate at the side rail opening, ready to
step off and secure the stern line, against which you can pull to swing the bow in toward the
dock. By having your mate ready to disembark when close to the dock, he/she will not have to
jump to the dock, risking a turned
ankle or falling overboard. It is the
skipper’s job to put the boat next to
the dock so the mate needn’t jump,
but merely step off!
When approaching a dock,
have the fenders out as required and
have the bow line already rigged,
passed through its hawse pipe, and
draped back on the side of the boat
between the stanchions so it can be
reached from the dock. Never put a line from a cleat over a rail: the boat’s weight will bend or
break the rail if it pulls against the line! Then, when the mate is ashore, the line can easily be
reached . . .
If dock clearance permits, spring the boat forward so that it pulls forward on the stern
line. This will bring the stern close to the dock. Let the bow line out enough so that the boat
can rest against the stern and midships fenders.
Maneuvering in a Harbor
With its twin screws, you’ll do best if you center the rudder and steer with the engines
only! The props are so large that the boat will respond well (except in high winds) just with use
of the propellers in forward and/or reverse. Take your time, and keep the boat running “dead
slow” so that you can plan each approach. You shouldn’t need to use the throttles at all.
Filling The Fuel Tanks
With the large fuel tanks, you can fuel the boat pretty fast at the boat’s aft-corner fill
fittings using a standard hose and nozzle (like the ones on auto gas pumps). You need to fuel
each tank separately. Fill both the tanks completely but do not spill fuel!
You can control the flow rate by sound, as the fill pipes make the characteristic “getting-
to-the-top-of-the-bottle” pitch change when the fill pipes begin to fill when the tanks themselves
are full but be careful: It’s a fairly long run to the tanks from the fill pipes! (The tank vents will
gurgle before the tanks are full, so when the vents begin gurgling, slow down until you hear the
fill pipes’ pitch change.)

3.4 - Checklists & Maneuvering Suggestions
Anchoring
-Anchoring can be accomplished safely with a minimum of fuss if you are prepared. Or, if you
are not ready, it can be stressful and dangerous for you or the boat.
-Before attempting to anchor, select an anchorage with a soft bottom such as sand, mud, or
gravel, if possible. Look at the charts and cruising guides for tips on good locations. Then,
choose the spot in the anchorage where you have room to “swing” on the anchor without
disturbing other boats. Remember, responsibility for leaving room goes to each successive
boat to arrive, for the first boat has priority in the anchorage!
-Here in the Northwest, because of the deep waters, all-chain rodes and small bays, we
anchor a little differently than in the Gulf of Mexico or Carribean, for example. First, except in
severe weather we use anchor chain scopes of only 4-to-1 or 5-to-1. For example, in water
that is 40 feet at high tide in the typical anchorage, we might use 160 feet of chain unless the
weather was to be gale force or greater winds.
-Second, because of the small bays and steep bottoms, we often rig a shore line from the
stern of the boat to shore. The best example of this would be at Todd Inlet at Butchart
Gardens. Here is a bay that can accommodate 8 - 10 boats, yet it is only about 150' wide and
200' long! Boats attach their bows to the mooring buoys or, in a few cases, anchor; and then
their sterns are secured to rings provided in the steep cliffs overlooking the bay. Boats are
thus perhaps only 15-20' apart, side to side.
-Third, boats often will “raft” side by side in busy marinas, although this is not too
common.
-Fourth, courteous boaters will call vessels coming into busy bays and offer to let them raft to
the same buoy, if signs on the buoys do not limit usage to only one boat depending upon
length.
-Anchoring safely requires two persons, one at the helm maneuvering the boat and one on the
bow operating the anchor. Putting the bow of the boat over the spot where the anchor is to be
placed after checking the depth on the depth sounder, the windlass foot-switches are used to
lower the anchor slowly toward (but not onto) the bottom, by watching the chain markings. The
anchor chain is marked in 10 foot lengths in white and every 30 feet in Red.
-When the anchor is about to reach bottom, the boat is backed away by putting the engines
into reverse for 5 seconds: Eddies from the chain indicate motion. Resume lowering the
anchor while drifting backwards (watch the eddies and add another burst or reverse if
necessary!) until the desired amount of chain is out. Stop paying out chain. Engage reverse
for five seconds at a time until the chain starts to pull straight off the bow toward the anchor. A
straight chain indicates a “set” anchor!
NEVER pull on the chain for more than five seconds, and never at any engine RPM
other than idle! Putting the boat’s weight plus its horsepower on the chain forcefully
even at idle will bend the anchor and/or damage the mooring gear!
If while checking the set, the chain rumbles and clunks, and seems to release in bursts,
it means you're anchoring on a rocky bottom and the anchor is not holding. Be patient: It may
not set on the first try, and you'll have to repeat the process sometimes to get a good "bight"
on the bottom.

3.5 - Checklists & Maneuvering Suggestions
Shore Lines
-When a shore line is required, anchors are set 75 - 100 feet from shore, with the boat
backing toward shore during anchor-setting. The stern line is put around a tree, and brought
back to the boat.
-During this process, be sure to keep clear of rocks near the shore, and allow for our
Northwest tides, occasionally twelve feet, and sometimes 20 feet when further north! Check
the present tide, and high and low tides before beginning anchoring: No sense anchoring in 15
feet of water if you're at the "top" of a 15 foot tide!
-To get to the shore, you will need to have a dinghy down, and then have your mate keep
the boat's stern toward shore with short bursts of reverse gear. Sometimes a helpful
boater already anchored will help you by taking your line to shore for you with his dinghy, a
neat "good deed" that you might reciprocate. We've met some nice boaters this way!
-The shore line is in the lazarette, and is long enough to usually allow taking it to a tree,
around it, and back to the boat so you don't have to go ashore to untie when leaving. With a
crew member keeping the boat in position, take the dinghy to shore pulling the end of the
shore line with you. Pass it around a tree, and pull it back to the boat if you can, since then to
get away in the morning all you have to do is release the bitter end from the boat, and pull it
aboard. Pull the line tight, as long as you've got over 100' total of line out: There is plenty of
sag/stretch, and we want to keep the boat in its area! If necessary, put a crab pot float or
fender on the line to warn others it’s there!
Here is a sketch of a properly anchored boat with a shore line (in this drawing, S=Scope, which
should be at least 4 x DL, the Depth at Low Tide):

3.6 - Checklists & Maneuvering Suggestions
Trim Tabs.
The boat is fitted with Trim Tabs. These are wide “flaps” attached to the aft end of the boat,
under the swim step at the trailing edge of the hull, operated hydraulically under the control of
the skipper by rocker switches at each helm station with an indicator nearby. At low speeds, up
to approximately six knots, the tabs do little, and should be left in the “Bow Up” position (see
below). But at speeds over this range, the tabs begin to take effect and will help the operator
lower the bow for more efficient cruising The best way to adjust the tabs is to lower them while
watching the “Speed” indicator to get the highest speed at a given throttle setting by adjusting
“Bow Down”. If the tabs are “Bow Down” too much, the steering gets mushy and speed drops
off a little, and the tabs should be adjusted “Bow Up” a little.
Because the trim tabs are so large, THEY MUST BE IN THE FULLY-BOW-UP POSITION
WHENEVER THE BOAT IS TO BE OPERATED IN REVERSE, otherwise the great water
forces against the tabs may damage them severely, even tearing them off the hull!
Bow and Stern Thrusters
“ADVENTURE” has been equipped with bow and stern
thrusters with controls at each helm. These will assist you in
getting extra close to the dock after you have put the boat within
three feet or so using the engines...
The thrusters run from their own banks of 24-volt batteries
which are charged only by AC...unless the generator is
operating, those batteries get no charging, so the thruster
batteries can easily be run down with excessive use if the generator is not on.
To operate the thrusters::
!
Turn on thrusters by pressing both “on” buttons simultaneously until the lights
stay lit;
!
Then operate the forward or aft “joystick” to run that thruster.
The thrusters only stay “ON” for about four minutes to protect them from
overuse. After they then turn off, you will have to turn them “on” again!
Do not overuse the thrusters! Operating them in “jabs” of 10-15 seconds at a time
should be enough...they cannot be run for extended times without shutting down when their
thermal overload protective relays open!

4.1 - Systems: Engines & Controls, Sea Strainers
Port
enginedipstickaboveyellow...
Section 4: Specific Discussion of Boat
Systems
This section of the operating manual will discuss each of the boat’s systems in turn. The
systems and major components discussed are grouped and in order as follows:
Main Engines & Sea Strainers
Dinghy, Davit & Outboard Motor
Fresh Water System;
Electrical-AC, Electrical-DC, and Inverter;
Heads and Holding Tanks;
Heating System;
Galley Equipment
Navigation Equipment, Radios, and Radar.
Main Engines, Engine Controls &
Sea
Strainers
The main engines on the boat are two Volvo TAMD74P EDC Diesels, each producing a
maximum of 500 horsepower. These extraordinarily-reliable, rugged machines are the top-of-
the-line, and can be expected to give you trouble-free, economical cruising.
On engine start, no long warm-up is required! Three or four minutes is sufficient, then load
the engines by putting the transmissions in gear. Do not run them over 1400 RPM until
the temperature gauges read at least 140° Fahrenheit. Do not run the engines for long periods
with the transmissions in neutral, with no load!
The engines require a regular, daily check, since once
underway, you will probably not check them while in use, tucked
away as the are beneath the cabin floor. Please perform this
check each morning (when the engine room is cool!):
!
CHECK THE OIL. The oil level should be between the
two marks on the dipstick. The dipsticks are located on
the inboard side of each engine, at the aft end of the
engine itself, fairly low on the crankcase. Use a paper
towel from the roll on the aft bulkhead, wipe the stick,
reinsert, and take reading. You must remove, wipe, and
re-dip the stick to get an accurate reading because the
Stbdenginedipstickbyyellowabove
air cleaner. sticks often will be “dry” the first time they are pulled!
Other manuals for Adventure
1
Table of contents
Other Anacortes Yacht Charters Boat manuals

Anacortes Yacht Charters
Anacortes Yacht Charters SCAPA Installation manual

Anacortes Yacht Charters
Anacortes Yacht Charters Adventure User manual

Anacortes Yacht Charters
Anacortes Yacht Charters BLUE MOON User manual

Anacortes Yacht Charters
Anacortes Yacht Charters Meg Ann lll 1998 5788 Bayliner User manual

Anacortes Yacht Charters
Anacortes Yacht Charters Surprise User manual

Anacortes Yacht Charters
Anacortes Yacht Charters Toot Suite User manual

Anacortes Yacht Charters
Anacortes Yacht Charters AEROKNOT User manual

Anacortes Yacht Charters
Anacortes Yacht Charters Orcastrate SUN MAJIC User manual