Ananda ANKDT User manual

ADJUSTABLE BASE
USER MANUAL
Please read and keep for future reference.
This manual contains important safety information.
SERIAL NUMBER:
MODEL: ANKDT


NEED ASSISTANCE? CALL US AT 1-855-726-2632 FROM 8:00AM TO 5:00PM PDT MONDAY-FRIDAY
PAGE 3
..............................................4
..........................5
...............................................................................6
....................................................................7
.................................................................8
.................9
.........................................................................10
...........................................11
................12
.................................13
.........14
....................................................15
...........................................16-18
........................................................19
.........................................................................................20
.......................................................21
................................................................22
......................................................23
REMOTE CONTROL SYNCHRONIZING TWO ADJUSTABLE BASES
REMOTE CONTROL FEATURES
APP & VOICE CONTROL SETUP
ALEXA VOICE COMMANDS
FAQ
TROUBLESHOOTING GUIDE
COMPONENT GUIDE
10 YEAR LIMITED WARRANTY
TABLE OF CONTENTS
TABLE OF CONTENTS
IMPORTANT SAFETY INFORMATION
WEIGHT RESTRICTIONS AND EMERGENCY BACKUP
FEATURES
GETTING STARTED
POWER CORD SETUP
JOINING TWO ADJUSTABLE BASES (CONNECTING STRAP)
LEG ASSEMBLY
MATTRESS RETAINER BAR ASSEMBLY
KD2 HEADBOARD FOOTBOARD BRACKET INSTALLATION
REMOTE ASSEMBLY AND FREQUENCY SET UP

NEED ASSISTANCE? CALL US AT 1-855-726-2632 FROM 8:00AM TO 5:00PM PDT MONDAY-FRIDAY
PAGE 4
PLEASE READ ALL INSTRUCTIONS AND SAFETY INFORMATION CAREFULLY
BEFORE USE AND ASSEMBLY
SAFETY INFORMATION
Only use the adjustable bed base for its intended use as described in this manual.
Follow the guidelines below for your safety, the safety of others and to avoid risk of
electrical shock, re, burns or injury:
• Avoid ngers in pinch-points.
•Two or more adults is strongly recommended for moving and assembling of the
adjustable bed base.
•Plug adjustable bed base into a surge protector (not included) or directly into a
suitable wall outlet.
• If the plug does not t your outlet, contact a qualied electrician to install a
suitable outlet. Unauthorized modication or failure to use a proper power
source or surge protector will void the electrical portion of your warranty.
•Keep power cords away from heated surfaces.
• To safely disconnect, ensure the base is in a at position with all motors off,
and unplug from power source.
•Always unplug the base from the electrical outlet before cleaning or servicing.
• Discontinue use of the bed base and contact a qualied service center if: it has
a damaged cord or plug, is not working properly, or has been dropped into water.
•Do not place the adjustable bed base or any of its components near or in water.
•Do not drop or insert objects into any opening. Never operate the base when
there is an obstruction between the moving parts of the adjustable base and
the metal frame.
•Replacing parts on the adjustable base is allowed to be done by consumer,
however tampering with internal components will void the warranty.
•Do not use accessories/attachments that are not recommended by the manufacturer.
•Exceeding this weight restriction could damage the bed and/or cause injury
and will void the warranty.
•Do not operate the adjustable bed base when a person or animal is underneath
the adjustable bed base.
•Mattresses may move or shift on bases – use caution.
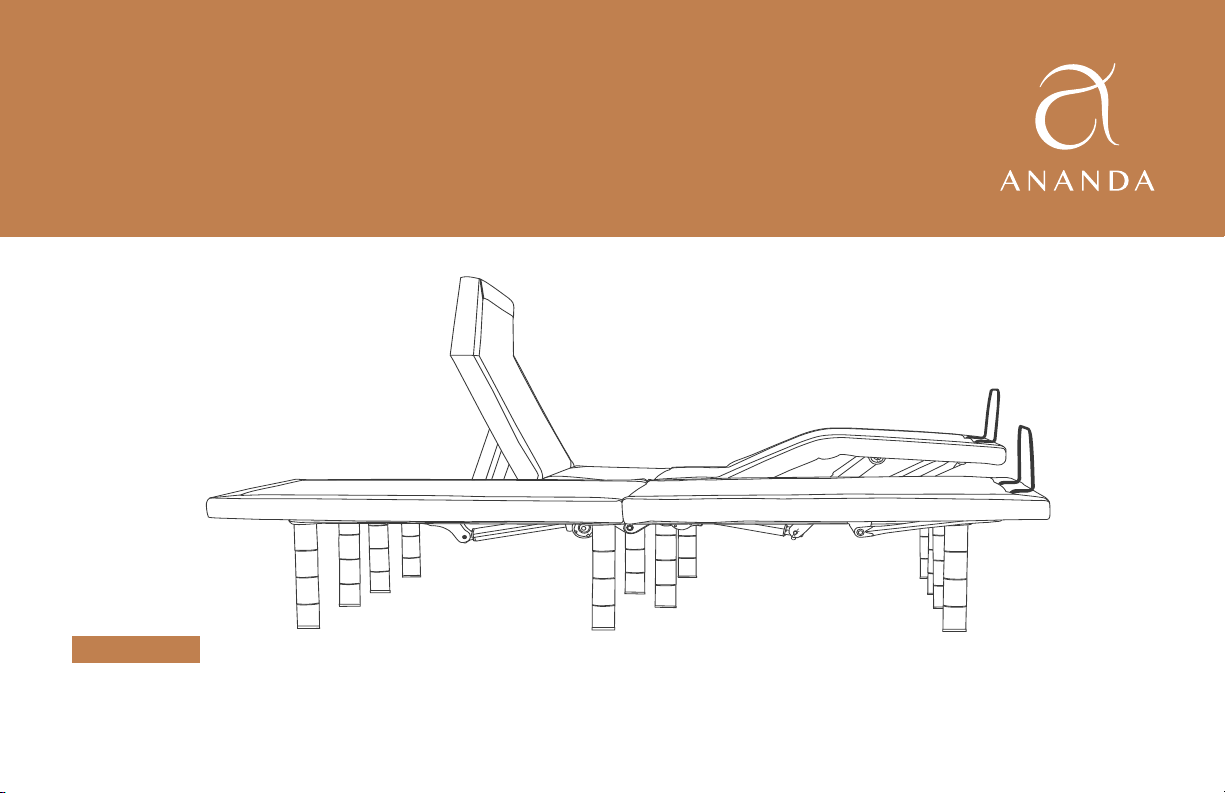
• All 6 legs must be installed and resting evenly on the oor. The legs must be
a minimum of 6” to maintain articulating clearance and must not exceed 12”;
anything taller is considered unstable.
VIOLATING ANY OF THE SAFETY INFORMATION WILL VOID THE
WARRANTY AND MAY RESULT IN INJURY OR DAMAGE TO FLOOR
TIPPING WARNING
Placing weight at the edge may cause base to tip.
IN-HOME USE
The adjustable base is designed solely for in-home use. This base was not designed
as a hospital bed and is not designed to meet hospital standards. Do not use this
base with tent type oxygen therapy equipment or near explosive gases.
OPERATION AND SUPERVISION
Close supervision is required when the bed base is used by or near children,
animals, convalescents or disabled persons. Immediately dispose of all packing
materials as they may pose a risk to small children and pets. To avoid injury,
do not allow children or small pets to play on or under the adjustable bed base.
PACEMAKERS
As with any product that produces a vibrating motion, it is possible that some
pacemakers may interpret this motion as a false sense of movement and/or
exercise. This may or may not affect your pacemaker. If you have any concerns,
please consult your physician.
IMPORTANT SAFETY INFORMATION

NEED ASSISTANCE? CALL US AT 1-855-726-2632 FROM 8:00AM TO 5:00PM PDT MONDAY-FRIDAY
PAGE 5
WEIGHT RESTRICTIONS
The recommended weight restriction for the adjustable base is 750 pounds,
which is calculated to include the weight of the mattress. To calculate the
weight limit, subtract the weight of the mattress from 750 pounds. The bed
will support the recommended weight limits if distributed evenly across the
base. This product is not designed to support or lift the total maximum weight
limit by the head or the foot section only. Consumers should not enter or
exit the bed with any portion of the adjustable base in the raised position;
always return the bed to a at position prior. If the weight limit is exceeded
on the head or foot mechanism, the master controller will stop all functions.
Exceeding the recommended weight limit restrictions could damage the bed
and void the warranty.
EMERGENCY BACKUP
In case of a power failure, the adjustable base features an emergency backup that
allows you to return the bed to the at position without power.
Step 1: Unplug the adjustable base.
Step 2: Locate the Emergency Battery Backup Box that is attached to the
power cord.
Step 3: Insert four 9-volt alkaline batteries (not included) into the battery box.
Step 4: Press and hold the reset button on the body of the control box to
atten the bed. (Reset button is inset. This step can only be completed
with a pen-tip or an object with a similar shape).
Step 5: Immediately remove the four 9-volt batteries after the base is returned
to the at position. The four 9-volt batteries must be removed before
power is restored to the adjustable bed base.
Warning: Leaving in the 9-volt batteries in the Emergency Battery Backup Box
after power has been restored will cause the electrical components to short out
and damage the master controller.
WEIGHT RESTRICTIONS AND EMERGENCY BACKUP

NEED ASSISTANCE? CALL US AT 1-855-726-2632 FROM 8:00AM TO 5:00PM PDT MONDAY-FRIDAY
PAGE 6
•Head and foot up/down positions; head up to 60 degrees, foot up to 35 degrees
•Pillow tilt support up to 30 degrees
• Head and foot massage with 10 minute auto shut-off
•USB charging ports
•14 button wireless remote control
• Wi for phone remote application
• Pre-programmed positions: anti-snore, zero gravity, and at position
•2 programmable positions: I and II
•Six legs with customizable heights
•Undercarriage is made with reinforced steel components for strength and durability
•Emergency backup battery box
•Mattress foot retainer bar
• Non-skid fabric
•Amazon Alexa voice control enabled with “Ananda Base WiFi” app
CONTACT OUR COMFORT CONCIERGE TO PURCHASE ACCESSORIES
•Head and footboard brackets
Note: This base is designed to t within a standard bedframe.
OPERATING NOISES
The massage function emits a noticeable tone during operation. As the massage
intensity level is increased, the tone will intensify. The noise will be less audible on
a carpeted oor and a bit more noticeable when on a hard oor surface.
During typical operation, the wheels, which allow the bed to articulate, will make
contact with the steel platform supports of the base creating a contact noise.
When entering, exiting or shifting weight on the base, this contact noise may be
audible as the wheels make contact with the steel platform supports of the base.
This is normal. Depending on the incline of the base, the noise levels can also
potentially increase.
FEATURES
FEATURES

(6x) Four-Piece
Adjustable Legs
(1x) Back-Up
Battery pack
(1x) AC/DC Power
Adapter per Base
(1x) Master Control Box
(Already installed under base)
(1x) Power Cord
Input voltage
100-240V per base
NEED ASSISTANCE? CALL US AT 1-855-726-2632 FROM 8:00AM TO 5:00PM PDT MONDAY-FRIDAY
PAGE 7
GETTING STARTED
NO TOOLS REQUIRED FOR ASSEMBLY.
Use caution at pinch points and unfolding the base
as parts may have shifted during shipping.
(1x) Wireless
Back-Lit Remote
(3x) AAA Batteries
Included per Base
(1x) Simultaneous
Synchronization Cable
(Only included with
Twin XL/CKS bases)
(1x) Foot Retainer bar
(2x) Wing-nuts per Base
(1x) Split Adj Base Sets
Connecting Strap
(Only included with
Twin XL/CKS bases)
GETTING STARTED

(1x) Backup
Battery pack
(1x) AC/DC Power
Adapter per Base
(1x) Power Cord
Input voltage
100-240V per base
(1x) Master Control Box
(Already installed under base)
NEED ASSISTANCE? CALL US AT 1-855-726-2632 FROM 8:00AM TO 5:00PM PDT MONDAY-FRIDAY
PAGE 8
POWER CORD SETUP
CAREFULLY open the adjustable bed base into an
L position on its side or lay at with the bottom
facing up. This step may require two adults for safety.
Ensure all power cord connections circled to the
right are completely plugged-in.
Installation of the Backup Battery Pack is optional.
Only put batteries into the Backup Battery Pack
during an electrical outage and after the power cord
is unplugged from a power source.
POWER CORD SETUP

NEED ASSISTANCE? CALL US AT 1-855-726-2632 FROM 8:00AM TO 5:00PM PDT MONDAY-FRIDAY
PAGE 9
JOINING TWO ADJUSTABLE BASES
If any split setup is being installed, plastic
connecting straps are provided (one per base) to
secure the bases together. Use both straps to secure
the head and foot portions together.
With the bases in their desired location, slightly
loosen both legs to allow the strap to t on the leg
bolt, between the leg washer and frame.
(A)
(B)
JOINING TWO ADJUSTABLE BASES
Slide side (A) of the connecting strap onto leg bolt.
Swing the strap and connect side (B) to the leg bolt.
Secure the strap by shifting to the left.
Re-tighten legs. Do not over tighten. Use the
remaining strap and repeat on other end of the base.

NEED ASSISTANCE? CALL US AT 1-855-726-2632 FROM 8:00AM TO 5:00PM PDT MONDAY-FRIDAY
PAGE 10
The legs must be a minimum of 6” to maintain
articulating clearance and must not exceed 12”;
anything taller is considered unstable.
VIOLATING ANY OF THE SAFETY GUIDELINES MAY RESULT IN
DAMAGE OR INJURY, VOID THE WARRANTY FOR IMPROPER USE
AND MAY CAUSE DAMAGE TO THE FLOOR.
LEG ASSEMBLY
Locate the legs and choose one of the heights.
Make sure the leg with the solid end is touching the
oor. Screw six legs into the pre-drilled holes by
hand. All legs must be installed and resting evenly
on the oor. The base will not operate properly
without the legs.
NEED ASSISTANCE? CALL US AT 1-855-726-2632 FROM 8:00AM TO 5:00PM PDT MONDAY-FRIDAYLEG ASSEMBLY

NEED ASSISTANCE? CALL US AT 1-855-726-2632 FROM 8:00AM TO 5:00PM PDT MONDAY-FRIDAY
PAGE 11
MATTRESS RETAINER BAR ASSEMBLY
Figure 2Figure 1
Locate the mattress retainer bar in the packaging.
At the foot of the base, there are two openings to
insert the mattress retainer bar. Slide the large retainer
bar into the opening at the foot of the bed.
Secure the retainer bar (Figure 1) with the included
wing-nuts (Figure 2). This will hold the mattress
retainer bar in place.

NEED ASSISTANCE? CALL US AT 1-855-726-2632 FROM 8:00AM TO 5:00PM PDT MONDAY-FRIDAY
PAGE 12
Hardware: (2x) Long Bolts, (2x) Nuts,
(2x) Washers, (1x) Side bracket
Locate the two holes on the frame at the
corner of the adjustable base, by the leg.
Find the side bracket with the correct angle
(see Figure 2A). Align bracket with base
holes and attach using (2x) Long Bolts,
(2x) Nuts and (2x) Washers. Repeat this
step for all sides.
V2 HEADBOARD &
FOOTBOARD BRACKET
HEADBOARD & FOOTBOARD BRACKET
2
Recommended Tools
•Socket Wrench
•Crescent Wrench
Included
(8x) Nut (8x) Washer (8x) Long Bolt (8x) Short Bolt (2x) Side Bracket 1 (2x) Side Bracket 2(4x) T-Connector
Hardware: (2x) Short Bolts, (2x) Nuts,
(2x) Washers, (2x) T-connector’s
Carefully place the base near its desired
location. Attach each T-Connector with
(2x) Short Bolts, (2x) Nuts and (2x) Washers.
Find the correct height and width for the
headboards/footboards and attach using the
extra bolts or the bolts provided with your
existing furniture. Check that all brackets and
furniture are secured prior to use.
3
Carefully place the base at (Figure 1A) or in
a side clamshell position (Figure 1B).
1
Figure 1A Figure 1B
Figure 2A
*Optional Accessory

NEED ASSISTANCE? CALL US AT 1-855-726-2632 FROM 8:00AM TO 5:00PM PDT MONDAY-FRIDAY
PAGE 13
REMOTE ASSEMBLY AND
FREQUENCY SET UP
REMOTE ASSEBLY AND FREQUENCY SET UP
Locate the wireless remote control and insert (3x) AAA batteries (included). The
remote control is pre-programmed to work with the adjustable bed base. If you
have more than one adjustable bed base, each remote control and adjustable
bed base set should be pre-programmed to work separately (see page 13).
If the remote control is not communicating with the bed (the base is not
responding by moving when the remote control is activated), please follow
the below steps:
Step 1: Unplug the adjustable base that is not being programmed.
Step 2: While the bed that is being programmed is plugged in, remove the
battery cover on the back of the remote control.
Step 3: Double click the switch on the control box under the base. At this time,
the light will illuminate.
Step 4: Press and hold the button on the back of the remote. The light will
begin to ash.
Step 5: Both lights on the control box and remote will be continuous, then
simultaneously turn off. At this point, pairing is complete.
FCC Compliance
This device complies with part 15 of the FCC Rules. Operation is subject to the
following two conditions: (1) This device may not cause harmful interference
and (2) this device must accept any interference received, including interference
that may cause undesired operation.
To comply with the FCC RF exposure compliance requirements, no change
to the antenna or the device is permitted. Any change to the antenna or the
device could result in the device exceeding the RF exposure requirements and
void user’s authority to operate the device.
Radio Frequency: 2.4 GHz

Master Control Box Master Control Box
Splitter Sync Cord Splitter
NEED ASSISTANCE? CALL US AT 1-855-726-2632 FROM 8:00AM TO 5:00PM PDT MONDAY-FRIDAY
PAGE 14 REMOTE CONTROL SYNCHRONIZING TWO ADJUSTABLE BASES
REMOTE CONTROL SYNCHRONIZING
TWO ADJUSTABLE BASES
Step 1: Unplug base from power source.
Step 2: Connect the end of the simultaneous synchronization cable into the
splitter for each control box. Use any open slot on the splitter.
Do not disconnect any other cords connected to the splitter; this will cause
other features on the base to malfunction. Only one sync cord is needed.
Step 3: Plug base back into the power source.
Step 4: Check to ensure all cords are securely attached. Both remotes will now
operate both bases simultaneously.
A AB B
Base A Base ABase B Base B
Dual Side Control Feature
Control the other side of the bed or both sides with the ip of a switch. Steps
1-4 must be completed prior to enable this feature. Move slider switch on back
of remote to set which base it will control. For bed A (slide to far left), bed B
(slide to far right) or to control both beds A and B simultaneously (slide switch
to the middle).
Controls
Both Bases
Controls
Base B

NEED ASSISTANCE? CALL US AT 1-855-726-2632 FROM 8:00AM TO 5:00PM PDT MONDAY-FRIDAY
PAGE 15
REMOTE
CONTROL
FEATURES
Programming button I or II: Get into desired
adjustable base position, hold button for 5 seconds.
BUTTON CYCLES
1x low / 2x mid / 3x high / 4x off
Download the “Ananda Base WiFi” application from your phone’s application
store to control your Adjustable Base through your phone.
*App requires account set-up and a 2.4G WiFi connection only.
Anti-Snore returns to the at position after ve minutes.
REMOTE CONTROL FEATURES
Pillow Tilt Down
Foot Up
Foot Down
Flat Position
Zero Gravity Position
Programmable
Position II
Anti-Snore
Head & Foot Massage:
3 Intensities
Foot Massage:
3 Intensities
Pillow Tilt Up
Head Up
Head Down
Programmable
Position I
Head Massage:
3 Intensities

NEED ASSISTANCE? CALL US AT 1-855-726-2632 FROM 8:00AM TO 5:00PM PDT MONDAY-FRIDAY
PAGE 16
AMAZON ALEXA
ANANDA BASE WIFI
APP & VOICE CONTROL SETUP
Apps to download
WiFi Connection
Set phone/tablet and smart device to 2.4G (non 5G connection). You can
change this in the app settings.
WiFi Dongle Disconnection
This step is only needed for split sets who want synced movements.
WiFi
Dongle 2
WiFi
Dongle 1
Master
Control Box 1
Master
Control Box 2
Register on the “Ananda Base Wi” App. 2 registrations/logins will be
required for split sets who want their beds to operate independently.
Press the Foot-up and Foot-down buttons for 5 seconds on the remote.
The blue LED light on the WiFi adapter will ash and beep every 3 seconds.
Open the WiFi settings interface on your phone.
Select the WiFi with the name “KeesonApCong-xxxxxxxx”.
Open the “Ananda Base Wi” App and select the menu button.
Select “All the Beds” option. Then select “Connect New Beds”.
1
2
3
4
Pair WiFi Dongle with “Ananda Base Wi” App
OR
GOOGLE HOME + GOOGLE ASSISTANT

NEED ASSISTANCE? CALL US AT 1-855-726-2632 FROM 8:00AM TO 5:00PM PDT MONDAY-FRIDAY
PAGE 17
Open the Amazon Alexa App.
Search for “South Bay Smart
Base skill” in the Alexa Skill
Store and enable it.
Enter email and password. You will use
the same email and password that is used
for the “Ronin WiFi” App.
Alexa and the WiFi adapter need to
be set to the same LAN and use the
same WiFi. First, you need to give
the command: “Alexa, ask my base to
nd device.” Once your bed nds and
connects to your device, move on to the
next page.
*Split sets who would like their beds to operate independantly
require 2 Amazon accounts, 2 Alexa devices and 2 Wi adapters.
5
2
6
3
Select the WiFi name that the WiFi adapter will
connect to. Input the WiFi password, then select
Done. Once the WiFi adapter makes the “Beep-
beep” sound, the connection is complete.
Note: If incorrect password is entered you will need
to restart from step 2.
Return to the “New Bed” screen in the App. Wait
for the ID to be displayed; it may take up to two
minutes for the ID to display. Click the ID number
then select Ok to complete the connection. Make
sure your phone is using the same WiFi as the
adapter.
Note: If you see a “Bing Failure” Warning, just click the ID number
again.
Voice Command for Amazon Alexa
APP & VOICE CONTROL SETUP
1

NEED ASSISTANCE? CALL US AT 1-855-726-2632 FROM 8:00AM TO 5:00PM PDT MONDAY-FRIDAY
PAGE 18
Open the Google Assistant
App. Search for “South Bay
Base”action and then select
“Talk to Power Base”. Afterwards
select “Link”.
Enter email and password. You will use the same email and password
that is used for the “Ronin WiFi” App.
Once your bed nds and connects to your device. use the invocation
phrase “Hey Google, Talk to Power Base” to start the bed action.
Then move on to the next page.
*Split sets who would like their beds to operate independantly please
note Google Home is not compatible at this time.
2
3
Voice Command with Google Home
1

NEED ASSISTANCE? CALL US AT 1-855-726-2632 FROM 8:00AM TO 5:00PM PDT MONDAY-FRIDAY
PAGE 19
ALEXA VOICE COMMANDS
Raise Head:
“... raise the head”
“... raise head”
“... put the head up”
Lower Head:
“... lower the head”
“... put the head down”
“... move the head down”
Raise Foot/Feet:
“... raise the foot”
“... raise my feet up”
“... put the feet up”
Lower Foot/Feet:
“... lower the foot”
“... take the foot down”
“... move my foot down”
Dual Massage:
“... start dual massage”
“... start dual massaging”
Start Head Massage:
“... start head massage”
“... start head massaging”
Start Foot Massage:
“... start foot massaging”
“... start the foot massage”
Turn Off Massage:
“... turn off massage”
“... stop massaging”
“... turn off the massaging”
Increase Head Massage Intensity:
“... increase head massage”
“... turn up the head massage”
“... increase the head massage intensity”
Decrease Head Massage Intensity:
“... decrease head massage”
“... turn down the head massage”
“... decrease head massage intensity”
Anti-Snore:
“... go to anti-snore”
“... anti-snore”
“... go to the anti-snore position”
Increase Foot Massage Intensity:
“... increase foot massage”
“... turn up the foot massage”
“... increase foot massage intensity”
Decrease Foot Massage Intensity:
“... decrease foot massage”
“... turn down the foot massage”
“... decrease foot massage intensity”
Zero G:
“... go to Zero G”
“... put me in Zero G”
“... Zero Gravity”
Flat:
“... go to the at position”
“... atten”
“... go at”
Raise Pillow Tilt:
“... raise the tilt”
“... increase pillow tilt”
“... raise pillow tilt”
Lower Pillow Tilt:
“... lower the tilt”
“... decrease pillow tilt”
“... lower pillow tilt down”
Preset Button 1:
“... go to preset one”
“... go to the preset one position”
“... take me to the preset one position”
Preset Button 2:
“... go to preset two”
“... go to the preset two position”
“... take me to the preset two position”
ALEXA VOICE COMMANDS

NEED ASSISTANCE? CALL US AT 1-855-726-2632 FROM 8:00AM TO 5:00PM PDT MONDAY-FRIDAY
PAGE 20
FAQ
FAQ
Will the adjustable base t inside my current
bed frame?
Yes, we designed the adjustable base width and
length to be ½” shorter than standard bed sizes to
ensure the base ts within most* bed frames. Even if
you have a headboard and footboard with side rails
and slats, our adjustable base will t right in place.
*Some bed frames, such as sleigh bed frames, do not provide enough clearance
for the mattress when the adjustable base is articulated.
What size of sheets do I buy for a King Split or Cal
King Split adjustable base?
Eastern Split King (EKS): Eastern King Split sheet
set OR (2) Twin XL sheets
Adjustable base dimensions
Twin XL: 37.5”W x 79.5”L x 15”H
Full: 53.5”W x 73.5”L x 15”H
Queen: 59.5”W x 79.5”L x 15”H
Split King: (x2) 37.5”W x 79.5”L x 15”H
Cal King Split: (x2) 35.5”W x 83.5”L x 15”H
EASTERN SPLIT KING (EKS) CALIFORNIA SPLIT KING (CKS)
California
King Split
Twin XL or
Twin Long
California
King Split
Twin XL or
Twin Long VS.
Also known as “Split King,” each half of the EKS is a Twin XL/Twin Long size.
Overall sleeping surface area is the same in the EKS and CKS.
The EKS is wider by 4” and the CKS is longer by 4”.
71”
75”
35.5”
83.5”79.5”
37.5” 37.5”
35.5”
Table of contents
Other Ananda Bicycle Accessories manuals
Popular Bicycle Accessories manuals by other brands

Shimano
Shimano DURA-ACE CS-R9200 manual

SR Suntour
SR Suntour HESC ATS Rear Motor System user manual

OLIGHT
OLIGHT MAGICSHINE RN 400 user manual

ROTOR
ROTOR ALDHU 3D Plus installation manual

Bosch
Bosch HERCULES Futura Compact 8 Translation of the original operating instructions

Cateye
Cateye CC-AT200W owner's manual