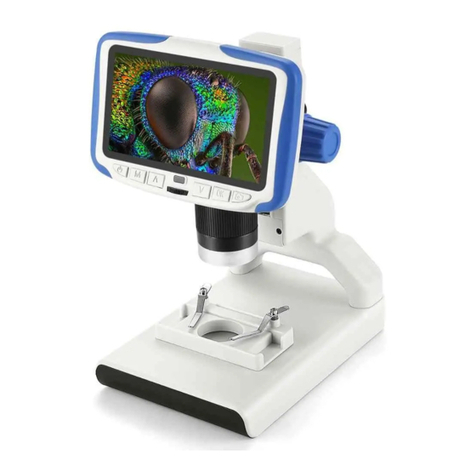
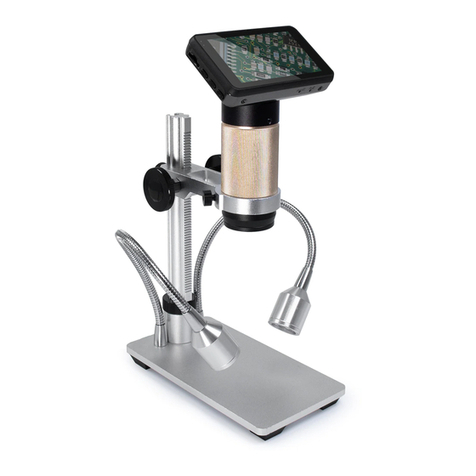
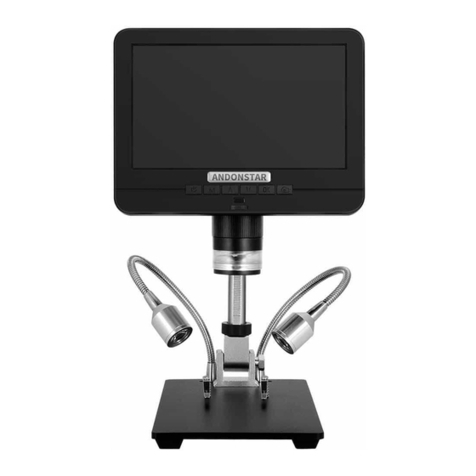
Andonstar AD203 User manual

INDICE
1. Seguridad y mantenimiento................................................................................................................1
2. Parametros basicos .................................................................................................................................1
3. Contenido de la caja................................................................................................................................2
4. Introduccion del producto ...................................................................................................................2
5. Instrucciones de los botones ..............................................................................................................3
6. Guıa rapida .................................................................................................................................................3
①. Soluciones de problemas ...........................................................................................................4
②. Boton de modo ...............................................................................................................................4
③. Grabacion de video .......................................................................................................................4
④. Toma de fotos..................................................................................................................................4
⑤. Configuracion de sistema ..........................................................................................................4
7. Salida USB ..................................................................................................................................................4
①. Instalacion de software ..............................................................................................................4
②. Pasos operativos ............................................................................................................................5
8. Preguntas frecuentes .............................................................................................................................5

1. Seguridad y mantenimiento
1. El microscopio no está diseñado para uso médico. El conjunto incluye piezas pequeñas, en particular los tornillos
de mariposa que se utilizan para sujetar el dispositivo principal en su lugar. NO permita el acceso sin supervisión de
bebés o niños pequeños.
2. El microscopio no está diseñado para uso en el campo. No es impermeable y no debe exponerse a temperaturas
extremas.
3. Cuando el microscopio esté funcionando, no dirija la luz LED a los ojos humanos para evitar lesiones.
4. Cuando el microscopio está funcionando durante mucho tiempo o está encendido, el lado izquierdo de la pantalla
y la posición de la placa principal estarán ligeramente calientes, lo cual es un fenómeno normal, no se preocupe.
5. La pantalla del dispositivo es muy frágil. Úselo con cuidado. No deje caer, presione con fuerza ni toque la pantalla
con objetos afilados.
2. Parametros básicos
Sensor imagen Sensor HD 2 MP
Salida video
1080FHD1920x1080
30FPS;
HD1080P 1440x1080 30FPS;
720P
1280x720
30FPS;
Formato video
AVI
Aumentos Pantalla incorporada de 4 pulgadas: 28X, aumento digital 3x: 84X;
Pantalla completa de computadora de 30 p
ulgadas: 200X
Resolución
fotos
Up
to
12M
(4032x3024)
Formato de foto
JPG
Mi
ínimo enfoque
M
í
nim
o
1cm
Cuadro
s por segundo
30FPS
Almacenamiento
Micro
SD
card,
Up
to
32G
Soporte Pc Soporta Windows 7/8/10(amcap software)
Alimentación
USB
5V
DC
Fuente de luz 8 diodos LED
Reso
lución
pantalla
800*480
Tamaño pantalla 4 pulgadas
Idiomas 12 tipos, chino simplificado / chino tradicional / inglés / japonés / francés /
alemán / coreano / vietnamita / portugués / ruso / español / italiano
Contenido del paquete
Microscopio de mano × 1 cable de alimentación × 1
correa de muñeca portátil × 1 bolsa portátil × 1
instrucciones × 1
Peso
18*13*4cm/0.215kg
Embalaje
19*20*6.5cm/0.5kg
1

3. Contenido de la caja
①Microscopio ②Bolso ③Cable USB ④Cinta de sujeción
3. Partes del miscroscopio
2

5. Instructiones de los botones
①Encendido / apagado ④Abajo / Alejar
(Mantenga presionado en el modo de espera de video
para ingresar al efecto de inversión de color
)
②Arriba / Acercar
(Mantenga presionado en el modo de espera de video
para ingresar al efecto Blanco y negro)
⑤Modo/menu
③Tomar video / foto
(Mantenga presionado en el modo de espera de video
para ingresar al efecto de rotación de imagen
)
⑥OK (Long press in the Video Standby Mode, the
screen will be hold)
6. Inicio rápido
1. Encienda la pantalla en el lado izquierdo del microscopio y presione y mantenga presionado el botón de
Encendido hasta que la pantalla se encienda. (Por lo general, el microscopio se encenderá automáticamente cuando
se conecte la alimentación)
2. Ajuste el brillo de la lámpara, ajuste la distancia del objeto y el ángulo de la pantalla, y ajuste manualmente la
rueda de enfoque para obtener la imagen deseada.
* Gire la rueda de ajuste de luz hacia arriba para iluminar y gírela hacia abajo para oscurecer
* Gire la rueda de enfoque en el sentido de las agujas del reloj para ampliar la ampliación, en sentido antihorario
para reducir la ampliación
* En el modo de espera de video, presione las teclas "arriba" y "abajo" para acercar / alejar digitalmente, hasta tres
veces.
3

①. Solución de problemas
Si hay un bloqueo, utilice el "orificio de reinicio o reset" para reiniciar el sistema. El "orificio de reinicio" es un
pequeño orificio debajo de la cubierta de plástico, que se puede presionar con la ayuda de la punta de un alfiler /
bolígrafo y otros objetos puntiagudos. Después de reiniciar el sistema, la máquina se reiniciará y la configuración se
restablecerá a la configuración de fábrica, pero las imágenes y los archivos de video guardados en la tarjeta de
memoria no se eliminarán
②. Modo Switch
En el modo de espera de video, presione la tecla "M" para cambiar al modo de imagen;
En el modo de imagen, presione la tecla "M" para cambiar al modo de reproducción de imagen / video;
En el modo de reproducción de imagen / video, presione la tecla "M" para cambiar al modo de espera de video;
En el modo de reproducción de imagen / video, presione las teclas "arriba" y "abajo" para cambiar de archivo.
Cuando el archivo sea un video, presione la tecla " " para reproducir el video
③. Grabar video
En el modo de espera de video, presione el botón " " para ingresar a la grabación de video, y luego presione
el botón “ “ para finalizar la grabación de video.
④. Take Pictures
En el modo de imagen, presione el botón " " para tomar la imagen.
⑤. Configuración de sistema
1). En el modo de espera, mantenga presionada la tecla "M" hasta que aparezca el menú de configuración de imagen
en la pantalla, y luego presione brevemente la tecla "M" para ingresar al menú de configuración del sistema.
2). Presione el botón "arriba / abajo" para seleccionar el parámetro que se va a configurar, y presione el botón "OK"
para ingresar el elemento y el contenido que se va a configurar.
3). Después de finalizar la configuración, presione la tecla "M" nuevamente para regresar al modo de espera.
3. Salida USB
①. Instalación de software Link de descarga del software Amcap: https://bit.ly/3woHmVG
Sistemas operativos soportados para la instalación: Windows XP, Windows 7, Windows 8, Windows 10
Los sistemas Windows10 y MacOS pueden usar la cámara del sistema para ver imágenes.
Después de que la descarga sea exitosa, abra el archivo comprimido que descargó, instálelo y ejecútelo.
Asegúrese de que el puerto USB de su ordenador proporcione suficiente energía estable y potente. Es posible que
algunos ordenadores portátiles no funcionen normalmente debido a una fuente de alimentación inestable, intente
con otro ordenador.
4
②. Pasos operativos
En este modo la resolución es 1280*720
1). Conecta el microscopio a la computadora.
2). En la pantalla del microscopio aparecen dos opciones "Almacenamiento masivo" y "Cámara de PC". Utilice
los botones "Abajo" y "Aceptar" para seleccionar "Cámara de PC".
3). Inicie el software "Amcap"
4). Elija el dispositivo de microscopio "Cámara USB" en "Dispositivos".
Tomar foto:
1). Configuración inicial: Opciones → Vista previa√, Captura → Imagen ija → Habilitar√,
2). Seleccione la ruta de almacenamiento de la imagen: Captura → Imagen ija → Carpeta
3). Tome una foto: Capturar → Imagen ija → Tomar (o presione directamente "Enter" en el teclado
Grabar video:
1). Seleccione la ruta de almacenamiento de video: Archivo → Establecer archivo de captura → Carpeta de
destino
2). Grabación: Capturar → iniciar captura → Aceptar → capturar → detener captura.
8. Preguntas frecuentes
• ¿Por qué se calienta el dispositivo?
El trabajo con microscopio requiere una cámara, GPU (procesador de imagen), CPU (procesador) y otros dispositivos
para trabajar juntos. Durante el procesamiento de imágenes o imágenes, el microscopio tiene una gran carga y
consume mucha energía. Las largas jornadas laborales pueden provocar cierto grado de calor. Este es un fenómeno
normal.
• ¿Por qué la imagen no es clara?
Ajuste el enfoque o el tubo de enfoque y el ángulo de irradiación de la luz. Cuando las condiciones lo permitan, se
puede agregar iluminación auxiliar para obtener mejores efectos de iluminación.
• ¿Por qué elegir el modo de reproducción después de la grabación y no hay imagen en la pantalla?
Es posible que el video no se guarde por completo, que la grabación no sea exitosa o que el archivo de video del
video sea demasiado grande y que el sistema necesite tiempo de ejecución. ¡No apague / apague durante la
grabación de video!
• ¿Por qué la imagen es anormal después de conectarse a la computadora?
Intente cambiar una computadora o un cable USB. Si no puede solucionarlo, póngase en contacto con nuestro
equipo técnico a tiempo.
5

AD203 Digital Microscope User Manual

LIST OF CONTENTS
1. Safety and Maintenance........................................................................................................................1
2. Basic Parameters .....................................................................................................................................1
3. What’s in the Box.....................................................................................................................................2
4. Product Introduction Picture .............................................................................................................2
5. Button Instructions.................................................................................................................................3
6. Quick Start..................................................................................................................................................3
①. Troubleshooting ............................................................................................................................ 4
②. Mode Switch .................................................................................................................................... 4
③. Record Video ................................................................................................................................... 4
④. Take Pictures ................................................................................................................................... 4
⑤. System Settings .............................................................................................................................. 4
7. USB Output.................................................................................................................................................4
①. Software Installation ................................................................................................................... 4
②. Operating Steps .............................................................................................................................. 5
8. FAQ.................................................................................................................................................................5

1
1. Safety and Maintenance
1. The microscope is not intended to medical use. The assembly includes small parts, particularly the thumbscrews
used to hold the main device in place. Do NOT allow unsupervised access by infants or toddlers.
2. The microscope is not intended for field use. It is not waterproof, and should not be exposed to extreme
temperatures.
3. When the microscope is working, please do not direct the LED light to human eyes to avoid injury.
4. When the microscope is working for a long time or is powered on, the left side of the screen and the position of
the main board will be slightly warm, which is a normal phenomenon, please don't worry.
5. The display on the device is very fragile. Please use with care. Do not drop, press hard or touch the display with
sharp objects.
2. Basic Parameters
Image sensor 2 MP HD Sensor
Video output
1080FHD1920x1080 30FPS;
HD1080P 1440x1080 30FPS;
720P 1280x720 30FPS;
Video format AVI
Magnification Built-in 4 inch screen:28X, 3x digital magnification:84X;
Full screen of 30inch computer:200X
Photo resolution Up to 12M (4032x3024)
Photo format JPG
Focus range Minimum 1cm
Frame rate 30FPS
Storage Micro SD card, Up to 32G
Pc support Support Windows 7/8/10(amcap software)
Power source USB 5V DC
Light source 8 built-in LED lights
Display resolution 800*480
Screen size 4inch
Language Support 12 types, Simplified Chinese / Traditional Chinese / English / Japanese / French /
German / Korean / Vietnamese / Portuguese / Russian / Spanish / Italian
Package contents
Handheld microscope × 1 power cable × 1
portable wrist strap × 1 portable bag × 1
instructions × 1
Product Data 18*13*4cm/0.215kg
Packaging data 19*20*6.5cm/0.5kg

2
3. What’s in the Box
(P1, what’s in the box)
①Microscope ②Carrying bag ③USB cable ④Wrist strap
4. Product Introduction Picture

3
(P2, Product Introduction Picture)
5. Button Instructions
①Power on/off
②Up/Zoom in
(Long press in the Video Standby Mode to enter the
Black&White effect)
③Take video/picture
(Long press in the Video Standby Mode to enter the
Image Rotation effect)
④Down/Zoom out
(Long press in the Video Standby Mode to enter the
Color Reverse effect)
⑤Mode/menu
⑥OK(Long press in the Video Standby Mode, the
screen will be hold)
6. Quick Start
1. Turn on the screen on the left side of the microscope and press and hold the Power button until the screen
lights up.
(Usually, the microscope will automatically turn on when the power is connected)
2. Adjust the brightness of the lamp, adjust the object distance and screen angle, and manually adjust the focus
wheel to obtain the desired image.
* Turn the light adjustment wheel up to brighten, and turn it down to darken;
* Turn the focus wheel clockwise to enlarge the magnification, counterclockwise to reduce the magnification;
* In the Video Standby Mode, press "up" and "down" keys to zoom in/out digitally, up to three times.

4
①. Troubleshooting
If there is a crash, please use the "reset hole" to reset the system. The "reset hole" is a small hole under the plastic
cover, which can be pressed with the help of a pin/pen tip and other pointed objects. After the system is reset, the
machine will restart, and the settings will be restored to the factory settings, but the images and video files saved in
the memory card will not be deleted.
②. Mode Switch
In the Video Standby Mode, press the "M" key to switch to the Picture Mode;
In the Picture Mode, press the "M" key to switch to the Picture/Video Playback Mode;
In the Picture/Video Playback Mode, press the "M" key to switch to the Video Standby Mode;
In the Picture/Video Playback Mode, press the "up" and "down" keys to switch files. When the file is a video, press
the " " key to play the video.
③. Record Video
In the Video Standby Mode, press the " " button to enter the video shooting, and then press the " " button
to end the video shooting.
④. Take Pictures
In the Picture Mode, press the " " button to take the image.
⑤. System Settings
1). In the Standby Mode, long press the "M" key until the image setting menu is displayed on the screen, and then
short press the "M" key to enter the system setting menu.
2). Press the "up/down" button to select the parameter to be set, and press the "OK" button to enter the item and
content to be set.
3). After finishing the setting, press the "M" key again to return to the Standby Mode.
3. USB Output
①. Software Installation
Amcap software download link: https://bit.ly/3woHmVG
Operating system required for installation:
Windows XP, Windows 7, Windows 8, Windows 10
Windows10 and MacOS systems can use the system camera to view images.
After download is successful, open the compressed file you downloaded, install and run it.
* Make sure that your computer's USB port provides enough powerful and stable power. Some laptops may not work
normally due to unstable power supply, please try to replace a computer. If there is a problem, please contact our
technical team.

5
②. Operating Steps
*In this mode, the resolution is 1280*720
1). Connect the microscope to the computer.
2). Two options "Mass storage" and "PC Camera" appear on the microscope screen. Use the "Down" and "OK" buttons
to select "PC Camera".
3). Start the "Amcap" software
4). Choose the microscope device " USB camera" in " Devices" .
Capture picture:
1). Initial setting: Options→Preview√, Capture→Still→Enable√,
2). Select the image storage path: Capture→Still→Folder
3). Take a picture: Capture→Still→Snap (or directly press "Enter" on the keyboard
Record video:
1). Select the video storage path: File→Set Capture File→ Target Folder
2). Recording: Capture→start capture→OK→capture→stop capture.
8. FAQ
•Why does the device feel warm?
Microscope work requires a camera, GPU (image processor), CPU (processor) and other devices to work together.
During imaging or image processing, the microscope has a high load and consumes a lot of power. Long working
hours may cause a certain degree of warmth. This is a normal phenomenon.
• Why the image is not clear?
Please adjust the focus or focus tube and light irradiation angle. When conditions permit, auxiliary lighting can be
added for better lighting effects!
• Why choose Playback Mode after recording, and there is no image on the display?
It is possible that the video is not saved completely, the shooting is not successful, or the video file of the video is
too large, and the system needs running time. Do not power off/shut down during video shooting!
•Why the image is abnormal after connecting to the computer?
Please try to change a computer or a USB cable. If you cannot solve it, please contact our technical team in time.
Table of contents
Languages:
Other Andonstar Microscope manuals

Andonstar
Andonstar AD409-Pro User manual

Andonstar
Andonstar 246 User manual

Andonstar
Andonstar AD206S User manual

Andonstar
Andonstar A1 Reference manual

Andonstar
Andonstar A1 User manual

Andonstar
Andonstar ADSM302 User manual

Andonstar
Andonstar 246S User manual

Andonstar
Andonstar ADSM201 User manual

Andonstar
Andonstar 246 User manual

Andonstar
Andonstar AD205 User manual