Andrew James 4 Day Automatic Pet Feeder User manual

Please read the instrucon manual carefully and keep it for future reference.
4 Day Automac Pet Feeder

Baery Powered Products
Baery safety
Always use the correct size
and type of baery speci-
ed.
Use good quality alkaline
baeries. Follow any in-
strucons provided on the
baeries and packaging.
Do not mix baeries of
dierent chemistries or mix
old and new baeries. Re-
place baeries as a set and
of the same type.
Remove the baeries if the
appliance is not to be used
for several months.
Always insert baeries with
the correct polarity. Align
the + (posive) and –
(negave) terminals to the
appliance.
Do not aempt to recharge
a baery unless it is marked
as “rechargeable”
Under extreme condions
baeries may leak uid
which can cause damage to
the appliance and, irritaon
or burns if contacted on the
skin. Avoid contact, clean
surfaces aected to prevent
damage. Wash hands in wa-
ter.
Store and dispose of baer-
ies safely. Keep out of the
reach of children. Ensure the
baery terminals cannot be
shorted by coins or other
metal objects. Do not incin-
erate baeries.
Baeries are subject to sep-
arate disposal requirements
and should not be disposed
of in general household
waste. Follow local require-
ments for disposal.
Features
24 hour clock display.
6 second personal voice
message recorder.
Personal Voice message calls
your pet when its feeding
me.
Food Bowl rotates according
to your set me.
The 4 Feeding mes can be
set for any me of day or
night.
C size alkaline baeries
(4pc’s required) not re-
quired.
Red LED indicates low
baeries.

Extra compartment top for
ice-pack or water.
Control Panel
1. MODE - switches between
clock or feeding me display.
Also increases clock me dur-
ing clock / feeding me set
mode.
2. SET – enters sengs mode.
Also conrms the me you
enter and advances to next
seng.
3. START NOW – starts the feed-
ing mer immediately.
4. Lo Baery Indicator— Indi-
cates when baery has low
power.
5. LCD Display— Displays
sengs.
6. START TOMORROW- starts
the feeding mer the next day.
7. REC – records your personal
voice message.
8. PLAY – plays back your record-
ed voice message.
9. MIC—Microphone to record
personal message.
ON SWITCH – Located on under-
side of base. Turns the feeder
on / o.
Turn o when the feeder will not
be used for an extended period of
me. Turning this switch o will
RESET all me and feeding
sengs.
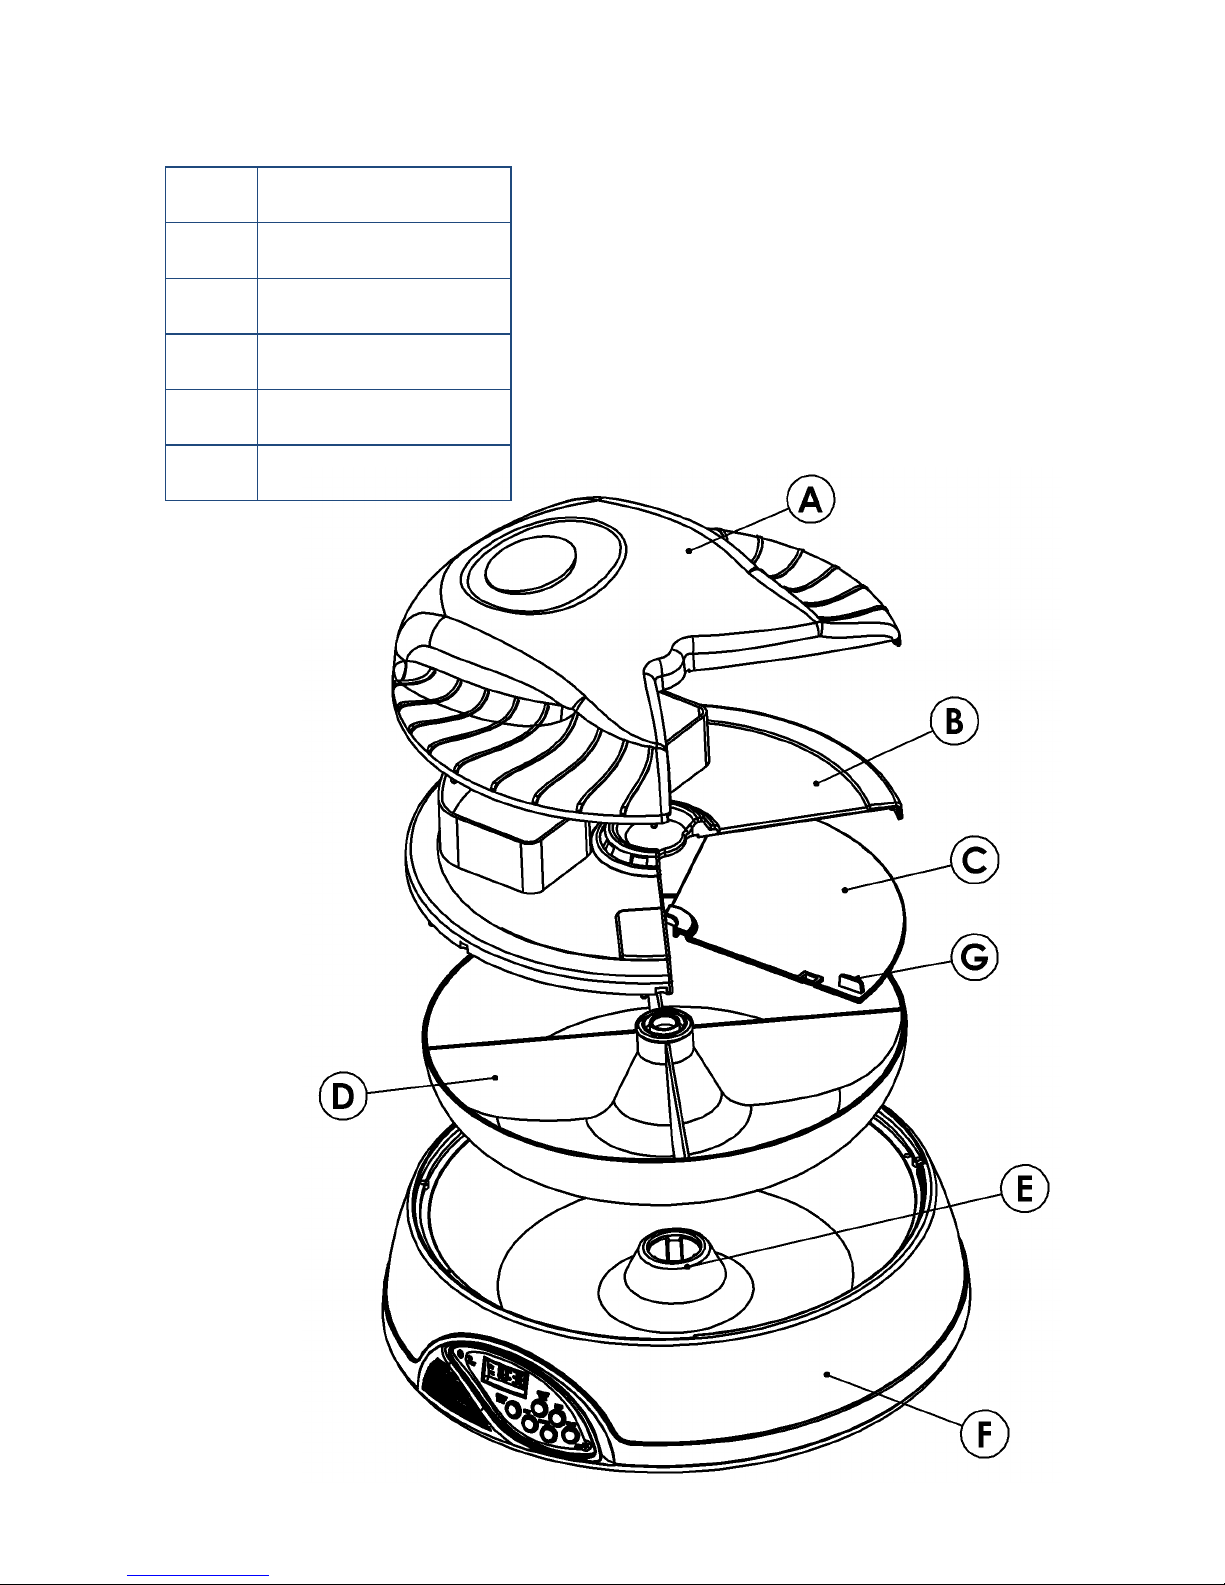
Appliance components illustraon
A. Bowl cover
B. Inner bowl cover
C. Slide cover
D. Food bowl
E. Hub
F. Feeder base
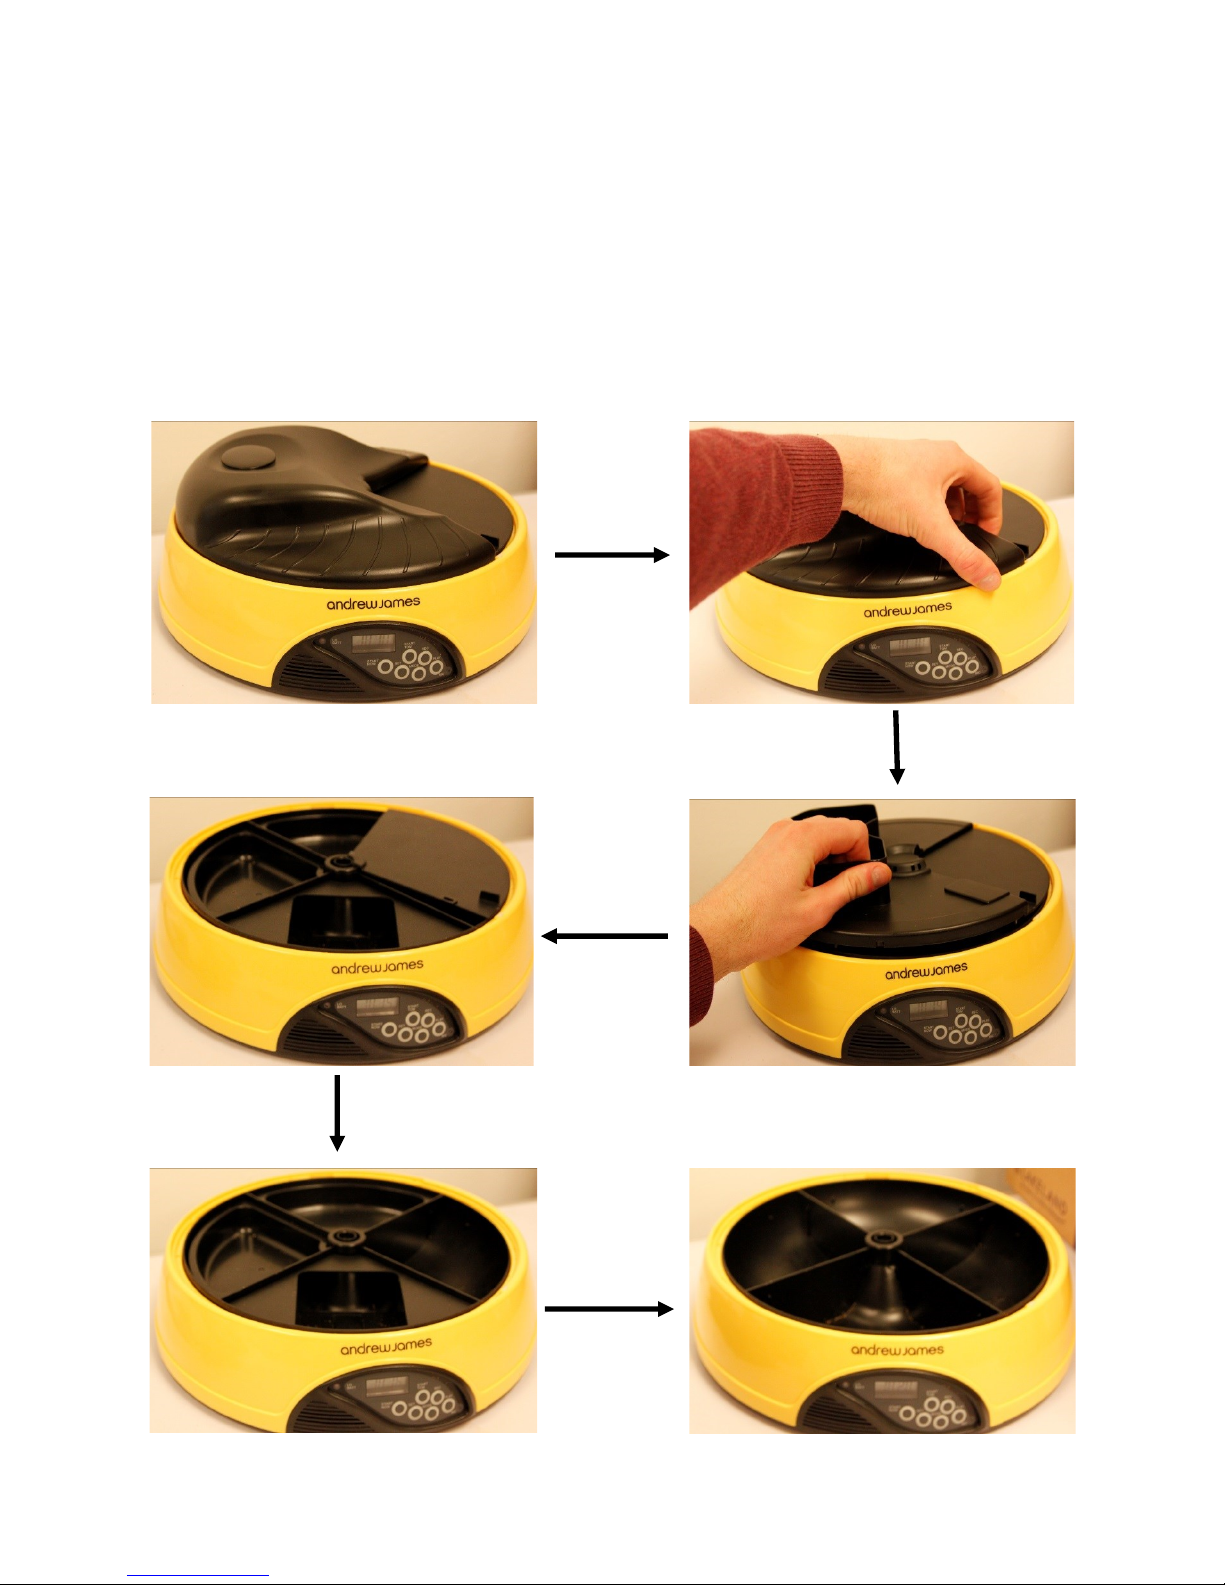
Disassemble
1. Remove the bowl cover (A) by
forcefully liing the lid from
underneath.
2. Remove the inner bowl (B).
3. Remove the slide cover (C).
Oponal: Remove the feedings trays
from the feeding base (D) the
appliance can be used with or
without the trays and rmly push
down.
Other manuals for 4 Day Automatic Pet Feeder
1
Table of contents
Languages:
Other Andrew James Pet Care Product manuals


