manuals.online logo
Brands
  1. Home
  2. •
  3. Brands
  4. •
  5. Anest Iwata
  6. •
  7. Paint Sprayer
  8. •
  9. Anest Iwata PC-18D User manual

Anest Iwata PC-18D User manual

-1-
取扱説明書
■
加圧コンテナ
PC−18D/PC−18DT
■1.
仕様
 ※ PC-18DT(水溶性対応):容器内面フッソコート処理、その他接液面はSUS仕様。
形式
容量
(L)
最高加圧
圧力
(MPa)
使用環境
温度範囲
(℃)
使用可能塗料
粘度範囲
エアホース
接続口
IN 側
エアホース
接続口
OUT 側
塗料ホース
接続口
全幅×全高
(mm)
質量
(g)
PC-18D 2.0 0.34 5〜40 300cP以下 G1/4 G1/4 G3/8 150×345 1250
PC-18DT 1200
■2.
安全性について
保護具の着用
・作業中は、眼鏡、マスクおよび手袋などの保護具を必ず着用してください。
塗料や溶剤が目に入ったり、吸い込む危険性があります。
換気に注意
・換気の良い場所で使用してください。
換気の不十分な狭い場所で使用すると、塗料や溶剤の飛散した揮発溶剤を吸い込み、有機溶剤中毒を起こすことがあります。
・作業中、身体に異常を感じたら、ただちに医師による治療を受けてください。
火気禁止
・火気のある場所や火気の近くで絶対に使用しないでください。特に下記のものは着火源となる可能性があり、非常に危険です。
・ タバコなどの裸火、 ・ ストーブ、ランプおよびヒーターなどの電気用品
破裂に注意
・製品を落下させないよう、取り扱いに十分注意してください。また軽微でも傷の付いた製品は絶対に使用しないでください。
耐圧強度が低下し、製品が破裂する危険性があります。
・万一、容器底部に付いているハカマが緩んでいる場合は容器底部を傷つける恐れがありますので、速やかにお買い上げの
販売店またはお近くの当社支店・営業所、サービス会社にご連絡ください。(2項の図参照)
・最高使用圧力範囲内で使用してください。製品が破損し、非常に危険です。
・安全弁を汚さぬよう注意してください。
安全弁を汚損すると、作動不良となり、容器内に最高使用圧力以上の圧力がかかり、製品が破損することがあります。
・容器セットを外す時は供給空気を遮断し、抜気弁で容器内の圧力を抜いてください。
加圧されたまま容器を外すと、容器内の液体や部品が飛散し非常に危険です。
製品の改造は絶対にしないでください
・安全弁の作動設定は変更しないでください。
安全弁は容器内の圧力が0.34MPa になったときエアを自動排出するよう設定されています。作動設定を変更すると容器内に
最高使用圧力以上の圧力がかかり製品が破損することがあります。
・部品を交換する場合は必ず純正部品を使用してください。十分な性能が発揮できないばかりか製品が破損することがあります。
アースの接続
・スプレーガン、被塗物および塗料や溶剤を入れる容器は、アースの接続を確実に行ってください。
アースが不十分ですと、静電気のスパークによる爆発や火災の危険性があります。
・洗浄時など、塗料や溶剤を排出する場合、塗料および溶剤を受ける容器は必ず金属製を使用し容器には必ずアースを接続して
ください。
使用禁止の液体
・食品や医療などの液体塗布等には使用しないでください。
この製品は塗装用です。部品から異物混入による健康障害の危険があります。
・トリクロルエタン、トリクロルエチレンなど、ハロゲン炭化水素系の液体は使用しないでください。製品と化学反応し、クラックを
生じる恐れがあります。
The English version is printed
on the back page.
この取扱説明書は、安全にご使用いただくために重要な警告、注意事項
および取扱い方法について記載しています。
この取扱説明書で扱われている機器は、塗装業務用途の商品です。
他の用途には使用しないでください。
正しい取り扱い指導を受けられ、機械の操作方法を理解された方以外の
人は、使用しないでください。
ご使用前に、必ずお読みになり、十分理解してからご使用ください。
本書はすぐに確認できる場所に大切に保管してください。
-2-
■3.
部品名称
○印は消耗品
  品名 数量
-18D -18DT
 1 塗料ジョイント 1 
 1 塗料ジョイント(SUS 仕様)  1
 2 取手 1 1
 3 取手ジョイント 1 
 3 取手ジョイント(SUS 仕様)  1
 4 抜気弁 1 1
 5 蓋 1 1
○ 6 蓋パッキン 1 1
 7 吸上管 1 
 7 吸上管(SUS 仕様)  1
 8 容器セット 1 
 8 容器セット(内部フッソコート)  1
 9 安全弁 1 1
 9-1 プラグ 1 1
9-2 六角ナット 1 1
9-3 安全弁バネ 1 1
○ 9-4 安全弁シート 1 1
 9-5 安全弁本体 1 1
 10 圧力計 1 1
 11 減圧弁ジョイント 2 2
 12 減圧弁本体セット 1 
 12 減圧弁本体セット  1
○ 13 O リング 1 1
 14 シート押しばね 1 1
○ 15 減圧弁シート 1 1
 16 ガイド 1 1
○ 17 ダイアフラムセット 1 1
 18 ダイアフラム押えばね 1 1
 19 ばね受け 1 1
 20 キャップ 1 1
 21 ジャミナット 1 1
 22 ツマミ 1 1
 23 六角ナット 1 
 23 六角ナット(SUS 仕様)  1
○ 24 逆止弁セット 1 
○ 24 逆止弁セット(SUS 仕様)  1
■4.
準備
この記号は機械の性能や機能を十分に発揮してお使いいただくため守っていただきたい内容を示します。
・加圧コンテナ内の圧力を抜く場合は、必ず減圧弁の調整ねじを反時計回りに回して緩めてから抜気弁を開き、圧力を抜いてください。
構造上、加圧コンテナ内の圧力が圧力計指示値より高くなる場合がありますので、必ず抜気弁を開けて圧力を抜いてください。
・減圧弁の設定値は0.34MPa を超えないように注意してください。安全弁は、容器内圧力が0.34MPa でエアを自動排出するよう設定されてい
ますが、作業前には必ず安全弁の作動確認を実施してください。
・塗料の充填量は8割以下にしてください。充填量が多すぎると、塗料が溢れ出す事があります。
PC-18DTの容器内面は、フッ素樹脂コーティング処理を施しておりますので、ワイヤーブラシ等の固い金属ブラシでは、こすらないでください。
また、フッ素系溶剤は使用しないでください。コーティングに傷がついたり、はがれたりしますと、非粘着性が低下し洗浄性等で高い効果が得ら
れなくなります。
①右図を参照し、加圧コンテナ、スプレーガンにエアホースおよび塗料ホースをしっかりと接続します。
②作業開始前に『外観の目視点検、および減圧弁・安全弁の動作確認』を必ず行ってください。
方法は「6−1 作業前の点検」を参照してください。
※異常が認められた場合は清掃、部品交換を含む適切な修理によって機能の回復が確認されるま
で絶対に使用しないでください。
③蓋セットから外した容器セットに塗料を充填します。充填量は最大でも8割以下としてください。
④蓋内部にパッキンがセットされていることを確認し、容器セットをしっかりとねじ込み固定します。
■5.
使用方法
手順1 トランスホーマから加圧コンテナにエアを供給し加圧コンテナの減圧弁で任意の塗料圧力に設定します。
手順2 スプレーガンの吹き付けエア圧力は、エア供給元のトランスホーマで調整します。
(加圧コンテナの減圧弁では調整できません)
手順3 接続したスプレーガンの取扱説明書を予め熟読し、よく理解してから吹き付け作業を開始して
ください。
手順4 作業を中断する際や、塗料を補充する際、あるいは作業を終了する際は、必ず加圧コンテナ
およびスプレーガンへのエア供給を止めてから、『加圧コンテナの抜気弁』を開き、加圧コンテナ
内の圧力を全ていてください。
減圧弁
抜気弁
-3-
■6.
保守・点検
破裂注意
保守、点検を行う際は、必ず供給エアを遮断してから抜気弁を開き、加圧コンテナ内の圧力をすべて抜いてから行ってください。
容器が加圧されたまま容器セットを外すと容器内の液体や部品が激しく飛散し非常に危険です。
また、加圧コンテナの圧力計が『0MPa』を指していても容器に圧力が残っている場合がありますので、必ず抜気弁を開けて圧
力を抜いてください。
6−1 作業前の点検
作業開始前に、必ず以下の点検を行って安全を確認してからご使用ください。
(1) 外観の点検
・蓋パッキンに汚損・破損がないか点検してください。
変形・破損・著しい傷みがある場合は交換してください。
(2) 容器セットの点検
・容器セット上面の折り返し部(右図)から口金の下端までの長さを計測し、16.4mm 以上あるか確認し
てください。
確認例) 折り返し部上端に定規など平らなものを置いて平面を出します。
 これと口金下端との間の寸法をノギスのクチバシ側で測定します。
・折り返し部が磨耗し、16.4mm 以下になると、加圧時に口金ごと蓋セットが抜け飛ぶ危険性があります
ので、容器セットを新品に交換して下さい。
・また、上面部やねじ部に傷や凹みがあると蓋パッキンを交換してもエア漏れが止まらない場合があります。
これらのようになった場合は、ご使用を中止して、正常な容器セットに交換してください。
・空気が漏れた状態のまま、絶対に使用しないでください(空気漏れの有無は蓋がしっかり締まっているかの指標となります)。
・
空気漏れが止まらない場合、蓋の締め込み不足や緩みに気付かず、加圧中に蓋が外れて飛び事故になる恐れがあります。
(3) ねじ山の点検
手順1蓋を全閉まで締め込みます。
手順2蓋を軽く上に引っ張りながら少しずつ緩めていき、蓋が外れるまでの回転数を測定します。
① 蓋が外れるまで 1 回転以上の場合継続してご使用いただけます。
②1回転未満で蓋が外れる場合ご使用を中止して容器セットを新品に交換してください。
ねじのかみ合わせが不足し、加圧中に蓋が外れ飛び事故になる危険性があります。
(4) ハカマの緩みの確認
・容器下部のハカマが緩んでいないことを確認してください。
・容器のハカマ部分を押えて蓋を締める際、あるいは緩める際にハカマだけが回ってしまうような場合はただちに容器のご使用を中止して、
容器セットを新品に交換してください。
緩みがあると容器の底が破損して、加圧中に暴発する危険性があります。
(5) 減圧弁の作動確認
手順1蓋セットを容器から外します。
手順2減圧弁のツマミを反時計回りに回して全閉まで緩めてから、エアジョイントにエアホースを接続し、元エアを供給してください。
手順3その状態で蓋セット裏面の逆止弁セットからエアが出ないこと、減圧弁のツマミを時計回りに回すとエアが出ることを確認してください。
減圧弁のハンドルを全閉にしても逆止弁セットからエアが漏れる場合は、減圧弁の故障です。減圧弁が正常に動作しないと、容器内に最高
使用圧力以上の圧力がかかり、製品が破損したり、加圧中に蓋が外れ飛び作業者にあたって怪我をすることがあります。
その場合、ただちに使用を中止し、減圧弁内部の点検・清掃を行い機能を回復させるか、減圧弁セットを交換してください。
(6) 安全弁の作動確認
手順1蓋セットを容器に取り付けます。
手順2エアジョイントにエアホースを接続し、エアを供給してください。
手順3減圧弁の圧力を徐々に上げ、圧力計の目盛りが0.3MPa から0.34MPa の間で安全弁が作動すること(エアが出てくること)を確認
してください。
安全弁が正常に作動しないと、容器内に最高使用圧力以上の圧力がかかり、製品が破損したり、外れた蓋や容器が作業者にあたって怪我
をすることがあります。
安全弁に異常があるときは直ちに使用を中止し、お買い上げの販売店またはお近くの当社支店・営業所、サービス会社に連絡してください。
(7) 日常の使用時
日常の使用時に液漏れや「シュー」という空気漏れがないかチェックしてください。
液漏れや空気漏れがある場合は上記の全ての項目を点検し、異常がなければ蓋をしっかりと締め直し
てください。
6−2 1週間毎の点検
手順1逆止弁セットを反時計回りに回して蓋セットから取外します。
手順2下図のように逆止弁セット上部の芯棒を指で押し、逆止弁板を開きます。
手順3逆止弁本体と逆止弁板の接触部などが塗料などで汚れている場合は、溶剤を浸したハケなどを
使用してきれいに洗浄してください。
口金
折り返し部
16.4mm
以上
押す
接触部
平らなもの
ノギス
クチバシ側
-4-
6−3 6ヶ月毎の点検
オーバーホールを実施し、消耗部品の交換をしてください。消耗部品は『3.部品名称』を参照してください。
6−4 ジョイント類の取り外し
ジョイント類のねじ部には高強度接着剤が塗布されておりますので、接続部に熱をかけると分解しやすくなります。
取り外す際は、他の部品を破損しないように注意してください。
■7.
故障と対策
現   象 原   因 対   策
塗料がでない ①塗料の詰まり。
②加圧されていない。
③塗料の粘度が高すぎる。
④逆止弁の塗料固着。
⑤減圧弁の故障。
①塗料経路を洗浄する。
②エアが供給されてない。または減圧弁圧力を上げる。
③塗料を希釈する。
④洗浄する。『6−2 1週間毎の点検』を参照。
⑤減圧弁の修理あるいは交換。
エアが漏れる ①抜気弁が開いている。
②安全弁が作動している。
③蓋パッキンが損傷している。
④容器や蓋のねじ部が損傷している。
⑤接続箇所の緩み。
⑥減圧弁の故障。
①抜気弁を閉める。
②減圧弁設定圧力を0.34MPa 以下に下げる。
③蓋パッキンを交換する。
④容器および蓋を新品と交換する。
⑤漏れている箇所を締め増しする。
⑥減圧弁セットを交換する。
塗料が漏れる ①容器セットの損傷。
②接続箇所の緩み。
③容器内の塗料が多すぎる。
④逆止弁が故障している。
⑤蓋パッキンが損傷している。
①容器セットを交換する。
②漏れている箇所を締め増しする。
③容器内の塗料を8割以下に減らす。
④分解・チェックし、必要あれば部品交換する。
⑤蓋パッキンを交換する。
■8.
保証と修理サービス
8−1 ◆保証について
●保証期間は、お買いあげの日から6ヶ月です。
●万一、故障の場合は、お買いあげの販売店又は当社支店・営業所、サービス会社にご連絡ください。
保証期間中は、無償修理いたします。
●本製品の故障または不具合に伴う生産補償、営業補償など二次損失に対する補償は致しませんのでご了承願います。
●次の場合は保証期間内でもお客様のご負担(有償)になります。
・取扱説明書の注意事項を守られなかったことによる故障および損傷
・お客様の取扱上の不注意による故障および損傷
・消耗品の交換・修理
・指定以外の動力源(電圧、周波数、燃料他)の使用による故障および損傷
・天災、地変、火災、地震、水害、塩害、落雷、公害などによる故障および損傷
・純正部品以外の部品が使用されている場合
・指定の修理店以外による修理がなされている場合
●保証は日本国内においてのみ有効です。 ThiswarrantyisvalidonlyinJapan
8−2 ◆修理サービスについて
● 修理はお買い上げの販売店または当社支店・営業所・サービス会社にご相談ください。
このとき、お買い上げの商品の形式名およびお買い上げの時期をお知らせください。
●保証期間経過後の修理は、修理により機能が維持できる場合、お客様のご要望により有料にて修理いたします。
各種お問い合わせ先は変更する場合がございますので、最新のお問い合わせ先に
つきましては当社ホームページをご覧ください。
アネスト岩田ホームページ 
http://www.anest-iwata.co.jp
取説 No.1691-04
コード No.04061350
〒223-8501 横浜市港北区新吉田町3176
-1-
Instruction manual
■
Pressurized container
PC−18D
,
PC−18DT
■1.
Specifications
PC18-D
T(
for water-base paints
):
inner surface is fluorine-coated, other wet
surfaces are stainless steel.
Capacity
(liters)
Max.
Operating
Pressure
MPa
Ambient
Temperature
℃
Viscosity
Range
Air hose
Connection
IN side
Air hose
Connection
OUT side
Fluid hose
connection
Width
×
Height
mm
Mass
g
PC
-
18D
2.0 0.34 5
〜
40
〜
300
cP G
1/4
G
1/4
G
3/8 150
×
345
1250
PC
-
18DT
1200
■2.
Safety precautions
WARNING
Wear p
rotective gear.
・
Be sure to wear protective gear such as proper glasses, mask and gloves during operation.
If not, paint or solvent can enter eyes or lungs.
Pay attention to ventilation.
・
Use it a well-ventilated site. Use at badly ventilated or narrow site can cause organic solvent poisoning by
sprayed paints or volatile solvents.
・
If you feel something wrong with your body during operation, immediately see a doctor.
Operating site must be strictly free from origins of explosions and fires.
・
Never use it in a flammable site. Especially the following can cause ignitions or spark:
・
open fire such as cigarettes,
・
electrical equipment such as stoves, lamps and heaters
Be careful about rupture.
・
Take special care not to drop it. Never use it with even the slightest damage.
・
If lower outside reinforcing sleeve of container becomes loose, it can damage the bottom of the container,
causing danger.
If the sleeve becomes loose, immediately stop operation and contact the shop which sold it to you.
(refer to figure on page 2)
・
Such product can rupture due to reduced ability to withstand pressure.
・
Use it at lower than max. Operating pressure. If not, product can become damaged, causing great danger.
・
Always keep safety valve clean A dirty safety valve can cause failure, creating higher than max. Operating
pressure on the inside and damaging product.
・
Before removing container set, be sure to turn off supply air and release pressure inside container by release
valve.
If you remove container which is under pressure, liquid in container and parts can fly, causing great danger.
Never alter product.
・
Never alter setting pressure of safety valve.
Safety valve is designed to leak air at 0.34MPa in the container.
If you alter setting pressure, higher than max. Operating pressure is put in container, causing damage of
product.
・
Be sure to use genuine parts when replacing parts. If not, it can cause inferior performance and damage product.
Be careful about grounding
・
Securely ground spray gun, work pieces and container containing paint and solvent. Insufficient grounding
can cause explosion or fire due to static spark.
・
When exhausting paint and solvent during cleaning, be sure to use metallic container which receives them,
and be sure to ground the container.
Never use it for food industry.
・
Do not use it for food industry. If done, foreign matter mixed with parts can cause health problems since it
does not use materials which are suitable for food.
・
Never use halogenated hydrocarbon liquids such as trichloroethane and trichloroethylene.
If done, it can cause chemical reaction with product and cause cracks.
The Japanese version is
printed on the back page.
This instruction manual includes important warnings, cautions and
operations. Before use, be sure to read and fully understand this
instruction manual. This
product is exclusively for coating purpose.
Do not use it for other purposes. The operator shall be fully
conversant with the requirements stated within this instruction manual.
Keep this instruction manual in an appropriate place for immediate
reference.
-2-
■3.
Parts list
No. Part name Quantity
-18D -18DT
1 Fluid joint 1
1 Fluid joint(stainless) 1
2 Handle 1 1
3 Handle joint 1
3 Handle joint(stainless) 1
4 Release valve 1 1
5 lid 1 1
○
6 Lid packing 1 1
7 Suction pipe 1
7 Suction pipe(stainless) 1
8 Container set 1
8 Container set (fluorine-coated) 1
9 Safety valve 1 1
9-1 Plug 1 1
9-2 hex nut 1 1
9-3 safety valve spring 1 1
○
9-4 safety valve seat 1 1
9-5 safety valve body 1 1
10 Pressure gauge 1 1
11 Air regulator joint 2 2
12 Regulator body set 1
○
13 O ring 1 1
14 Seat spring 1 1
○
15 Regulator seat 1 1
16 Guide 1 1
○
17 Diaphragm set 1 1
18 Diaphragm spring 1 1
19 Spring holder 1 1
20 Cap 1 1
21 Jam nut 1 1
22 Knob 1 1
23 Hex. nut 1
23 Hex. nut 1
○
24 Check valve set 1
○
24 Check valve set 1
■4.
Preparation
Important Indicates notes which we ask you to observe.
They are helpful to achieve full performance and function of product
・
To release air pressure in a container set, close an air regulator fully then, open release valve slowly.
Never remove a lid set before opening the release valve.
・
Never supply air more than 0.34MPa. If not, a safety valve will work and supplied air will be released through the safety
valve.
・
Before every working, supply air more than 0.34MPa to make sure the safety valve works.
・
Do not fill more than 80% of a container with paint. If not, it may cause leakage of paint from a lid set.
CAUTION
As the inner surface of container for PC-18
DT
is coated with fluorinated resin, do not rub it with hard metal such as wire brush.
And do not use with fluorine-based solvents. If done, it can damage fluorinated resin and reduce non-stickiness as well as
cleaning efficiency.
①
Refer to below drawing, and securely connect air hose
and fluid hose to pressurized container and spray gun.
②
Make sure that there is no damage on pressurized
container, and air regulator and safety valve works.
More detail, see 6-1 “Before starting every working”.
※
If you find any damage or malfunction, never use
until the problem has been solved.
③
Remove lid set and fill paint into container.
④
Check that packing is fitted to inside of lid and firmly
screw in container.
-3-
■5.
How to use
Job
1
Supply air from air transformer to pressurized container and set fluid pressure using air regulator.
Job
2
Adjust spraying air pressure by air regulator at air compressor side.
Air regulator of the pressurized container cannot adjust it.
Job
3
Carefully refer to instruction manual of spray gun and start spraying.
Job
4
When remove lid set for stopping working or refill paint, make sure that air supply to pressurized
container and spray gun is stopped and the release valve is opened.
■6.
Maintenance and inspection
WARNING
Be
careful
about ruptures.
Make sure that air supply is stopped and release valve is opened before maintenance and open release valve
before removing lid set, even if a pressure gauge of the pressurized container shows [0MPa]. If not, the lid set
may blow off and it may cause serious body injury.
6-1
Before starting every working
(1)
Lid packing
・
Check lid packing. Replace if damaged or deformed.
(2)
Container set
・
Measure dimension between the folded top and the bottom of the container thread. See
right figure.
Example) 1. Place flat object on the folded part.
2. Measure the dimension between the folded top and the bottom of the
container thread using caliper.
・
If the dimension is less than 16.4mm, the folded part is worn. Replace container set immediately. If not, the lid set may blow
off and it may cause serious body injury.
・
If the folded part is damaged or scratched, it may cause air leakage from the lid even if replacing lid packing. When it
happens, never use the pressurized container and replace container set immediately.
WARNING
・
Never use air leaking container.
・
Air leakage may cause that lid set blows off and serious body injury.
(3)
Container thread
Job 1 Close lid set fully.
Job 2 Loosen the lid set by little while pulling up and count rotation number until the lid set comes off.
①
If it takes more than 1 rotation until the lid set comes off
It can continue to use.
②
If it takes less than 1 rotation until the lid set comes off
Never use and replace container set immediately. If not, lid set may blow off by lack of engagement of thread and it may
cause serious body injury.
(4)
Sleeve
・
Check sleeve that is at bottom of container set is secured.
・
If the sleeve is rotated or removed, never use and replace the container immediately. If not, it may cause explosion of
container set and serious body injury.
Regulator
Release
Valve
Container
thread
Folded part
M
ore
than
16.4
m
Flat thing
Bottom
thread
Bill side of
vernie
r calipers
-4-
(5)
Air regulator operation
Job 1 Remove the lid set from the container set.
Job 2 Close air regulator on the lid set fully and connect air hose to the outlet fitting.
Job 3 Supply air and check if air does not flow out from the check valve set underneath of the lid set. Then, open the air
regulator and check if air flows out from the check valve.
If air flows out from the lid set while closing the air regulator, the air regulator may be failure. Never use and replace
or clean the air regulator immediately. If not, air more than maximum operating pressure into container set, and may
cause explosion of the container and serious body injury.
(6)
Safety valve
Job 1 Secure the lid set on the container set.
Job 2 Close air regulator on the lid set fully and connect air hose to the outlet fitting.
Job 3 Supply air and open the air regulator slowly. Then, check if air flows out from the safety valve at between 0.3 to
0.34MPa
If air does not flow out at more than 0.34MPa, the safety valve may be failure. Never use and replace the safety
valve immediately. If not, air more than maximum operating pressure into container set, and may cause explosion
of the container and serious body injury.
(7)
Daily inspection
Check if fluid and/or air does not leak from anywhere. during operation.
If you find liquid and/or air leakage, stop operation and find leakage. Never use until the leakage has been solved.
6-2
Weekly inspection
Job 1 Turn check valve set counterclockwise and remove it from lid set.
Job 2 Refer to below drawing, push stem at the top of check valve set with
a finger and open valve plate.
Job 3 Clean contact area between valve seat and plate with brush soaked
with solvent.
6-3
Semi-annual inspection
Overhaul and replace consumable parts with new ones. Refer to [3. parts
list] for consumable parts.
6-4
How to remove joints
All joints assembled with high-strength glue. Heat joint using hair dryer to disassemble. If not, it may cause damage of
thread.
■7.
Problems and remedies
Problems Causes Remedies
Paint does not come out.
①
Paint clogs.
②
Container is not pressurized.
③
Paint viscosity is too high.
④
Check valve is stuck with paint.
⑤
Air regulator is failure.
①
Clean paint passages.
②
Air is not supplied.
Increase air pressure at air regulator.
③
Dilute paint.
④
Clean
(
Refer to
『
6
.
Maintenance and inspection
』)
⑤
Repair or replace
Air leaks.
①
Release valve is opened.
②
Safety valve operates.
③
Lid packing is damaged.
④
Thread of container set and/or lid
set is damaged.
⑤
Connection is loose.
⑥
Air regulator is failure.
①
Close it.
②
Reduce pressure at air regulator to less than 0.34MPa.
③
Replace it.
④
Replace.
⑤
Tighten leaky section.
⑥
Repair or replace
Paint leaks.
①
Container set is damaged.
②
Connection is loose.
③
Too much paint in container.
④
Check valve is out of order.
⑤
Lid packing is damaged.
①
Replace container set.
②
Tighten leaky section.
③
Reduce its volume to 80% of full capacity.
④
Disassemble and replace parts if necessary.
⑤
Replace lid packing.
PUSH
Contact area
ManualNo.1691-04
CodeNo.04061350
3176,Shinyoshida-Cho,Kohoku-Ku,Yokohama223-8501,Japan

This manual suits for next models

1

Other Anest Iwata Paint Sprayer manuals

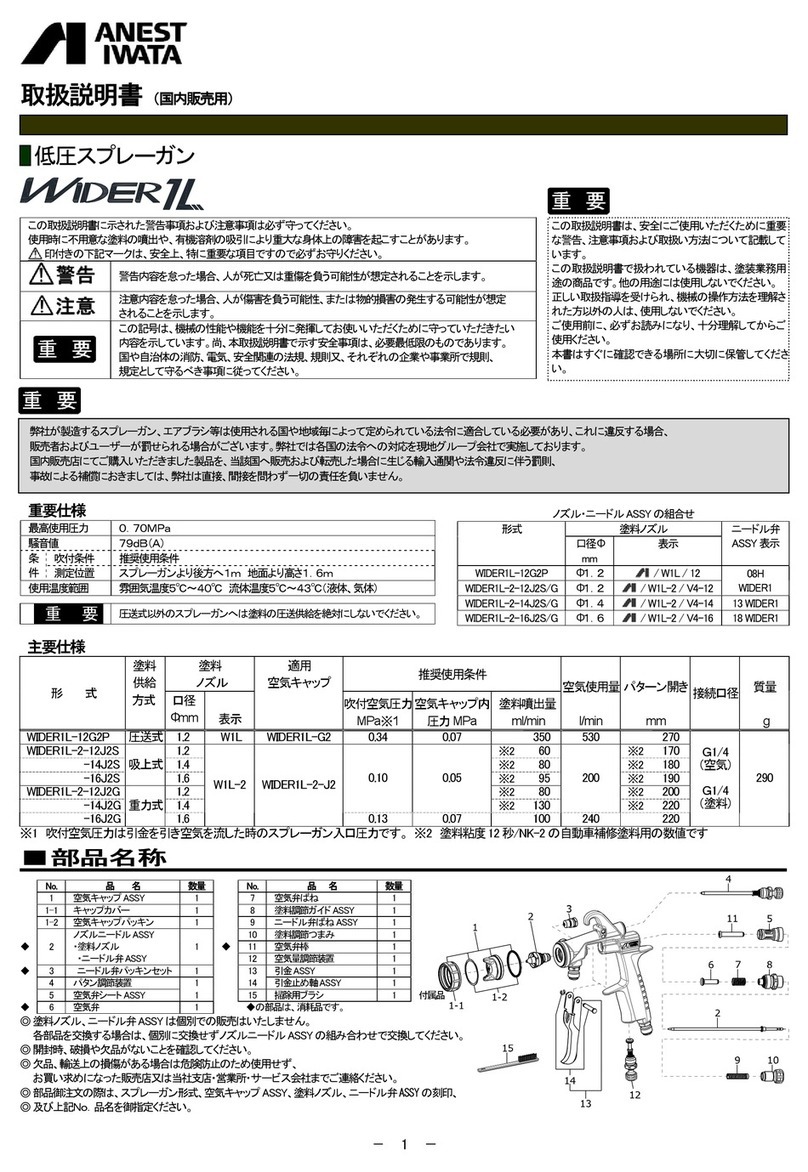
Anest Iwata WIDER1L-12G2P User manual

Anest Iwata

Anest Iwata WIDER1L-12G2P User manual

Anest Iwata WIDER1-08E2P User manual

Anest Iwata

Anest Iwata WIDER1-08E2P User manual

Anest Iwata WS400 Series User guide

Anest Iwata

Anest Iwata WS400 Series User guide

Anest Iwata WS-200 SP User guide

Anest Iwata

Anest Iwata WS-200 SP User guide

Anest Iwata WIDER1L-2-12J2S User manual

Anest Iwata

Anest Iwata WIDER1L-2-12J2S User manual

Anest Iwata W 400 User manual

Anest Iwata

Anest Iwata W 400 User manual

Anest Iwata E-M15C Series User manual

Anest Iwata

Anest Iwata E-M15C Series User manual

Anest Iwata TOF-5B User manual

Anest Iwata

Anest Iwata TOF-5B User manual

Anest Iwata WA 200 User manual

Anest Iwata

Anest Iwata WA 200 User manual

Anest Iwata WIDER2L-10G2P User manual

Anest Iwata

Anest Iwata WIDER2L-10G2P User manual

Anest Iwata AL-96 User manual

Anest Iwata

Anest Iwata AL-96 User manual

Anest Iwata KIWAMI-1-14B2 User manual

Anest Iwata

Anest Iwata KIWAMI-1-14B2 User manual

Anest Iwata High T.E.C. W400 WB User manual

Anest Iwata

Anest Iwata High T.E.C. W400 WB User manual

Anest Iwata KIWAMI-1-13B4 User manual

Anest Iwata

Anest Iwata KIWAMI-1-13B4 User manual

Anest Iwata CM-B2 User manual

Anest Iwata

Anest Iwata CM-B2 User manual

Anest Iwata MSGS-200 Series User guide

Anest Iwata

Anest Iwata MSGS-200 Series User guide

Anest Iwata ILA User manual

Anest Iwata

Anest Iwata ILA User manual

Anest Iwata MSU-323 C User guide

Anest Iwata

Anest Iwata MSU-323 C User guide

Anest Iwata ALS 333 C User guide

Anest Iwata

Anest Iwata ALS 333 C User guide

Anest Iwata WIDER4L Series User manual

Anest Iwata

Anest Iwata WIDER4L Series User manual

Anest Iwata SER-24PA User manual

Anest Iwata

Anest Iwata SER-24PA User manual

Anest Iwata AL-96 S5 User manual

Anest Iwata

Anest Iwata AL-96 S5 User manual

Anest Iwata AP-96-05 User manual

Anest Iwata

Anest Iwata AP-96-05 User manual

Anest Iwata SGA-3 Quick start guide

Anest Iwata

Anest Iwata SGA-3 Quick start guide

Popular Paint Sprayer manuals by other brands

Gema OptiFlex Pro BN Quick reference guide

Gema

Gema OptiFlex Pro BN Quick reference guide

Hudson Classic Plus instructions

Hudson

Hudson Classic Plus instructions

hecht 4122 Original instructions for use

hecht

hecht 4122 Original instructions for use

Spraying Systems PulsaJet 10000AUH-03-Z1 user guide

Spraying Systems

Spraying Systems PulsaJet 10000AUH-03-Z1 user guide

Emist EM360RC user manual

Emist

Emist EM360RC user manual

Excell ES4 instruction manual

Excell

Excell ES4 instruction manual

Foamit SP10.0L user manual

Foamit

Foamit SP10.0L user manual

BuildXell ST-2000-S Operation and maintenance instruction

BuildXell

BuildXell ST-2000-S Operation and maintenance instruction

Hudson Weed 'n Bug Eliminator instructions

Hudson

Hudson Weed 'n Bug Eliminator instructions

Firestone W563581081 Technical Information Sheet

Firestone

Firestone W563581081 Technical Information Sheet

CO/Tech JS-910FA-UK Original instructions

CO/Tech

CO/Tech JS-910FA-UK Original instructions

Power Fist 8006577 owner's manual

Power Fist

Power Fist 8006577 owner's manual

Hudson Neverpump Bak-Pak 13854 Instruction

Hudson

Hudson Neverpump Bak-Pak 13854 Instruction

Hardi BL Series Instruction book

Hardi

Hardi BL Series Instruction book

TOPMAQ SX-CZ60D user manual

TOPMAQ

TOPMAQ SX-CZ60D user manual

Toro Multi Pro 5800 Operator's manual

Toro

Toro Multi Pro 5800 Operator's manual

Selleys S100 operating manual

Selleys

Selleys S100 operating manual

Titan ED655 operating manual

Titan

Titan ED655 operating manual

manuals.online logo
manuals.online logoBrands
  • About & Mission
  • Contact us
  • Privacy Policy
  • Terms and Conditions

Copyright 2025 Manuals.Online. All Rights Reserved.