7. SPARE PARTS LIST
6. TROUBLESHOOTING
GUN DOES NOT SPRAY
- Fluid adj. knob (13) closed. Check and adjust.
- Tip hole of nozzle obstructed. Check and clean.
- Paint filter obstructed. Check and clean.
- Non drip obstructed. Check and clean.
INTERMITTENT SPRAY PATTERN
- Air escapes from fluid nozzle Check , clean & replace if
(2-1). necessary.
- Air escapes from fluid needle Tighten.
packing (3).
- Air escapes from cup joint or Tighten.
fluid hose joint .
- Dirt inside air cap (1). Clean.
DEFECTIVE SPRAY PATTERN
- Dirty nozzle (2-1)or air cap (1). Clean carefully.
Nozzle (2-1) or air cap (1) Replace If damaged.
has been damaged.
- Fluid nozzle (2-1) is loose. Tighten.
- Paint viscosity too high or Dilute paint or increase
too low. viscosity
- Fluid output too high or Adjust fluid adj. knob (13)
too low. to reduce or increase.
LEAKING
- Fluid nozzle (2-1), needle set Clean or replace if neces-
(2-2) or gun body (4), dirty, sary.
damaged or worn on seat.
- Dirt inside air cap (1). Clean.
- Loose fluid adj. knob (13). Adjust.
- Fluid needle spring (11) is Replace.
worn.
-Loose fluid nozzle (2-1). Tighten.
- Needle packing set (3) loose, Adjust, clean or replace.
too tight, dirty or worn.
AIR ESCAPES FROM AIR CAP
- Air valve (8), air valve seat (7) Clean or replace if neces-
or air valve spring (9) dirty sary.
or damaged.
- Air valve seat set o ring Replace.
(7-1) damaged or worn.
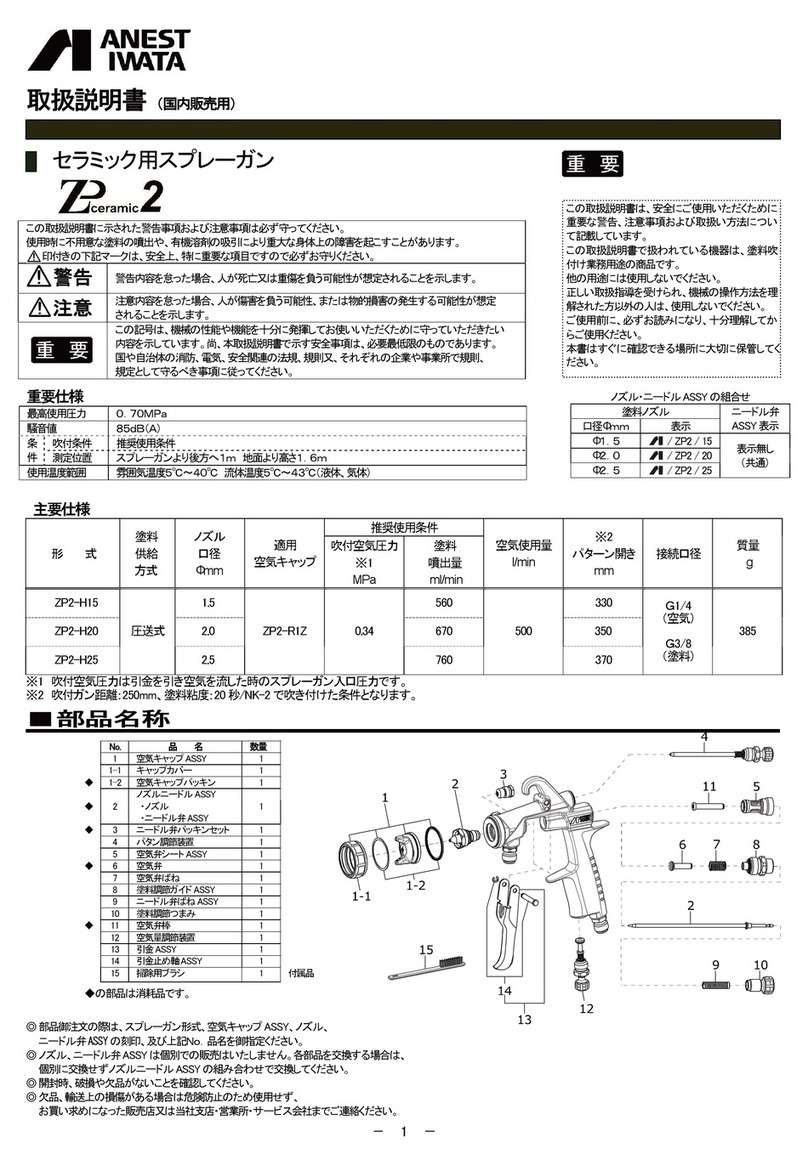
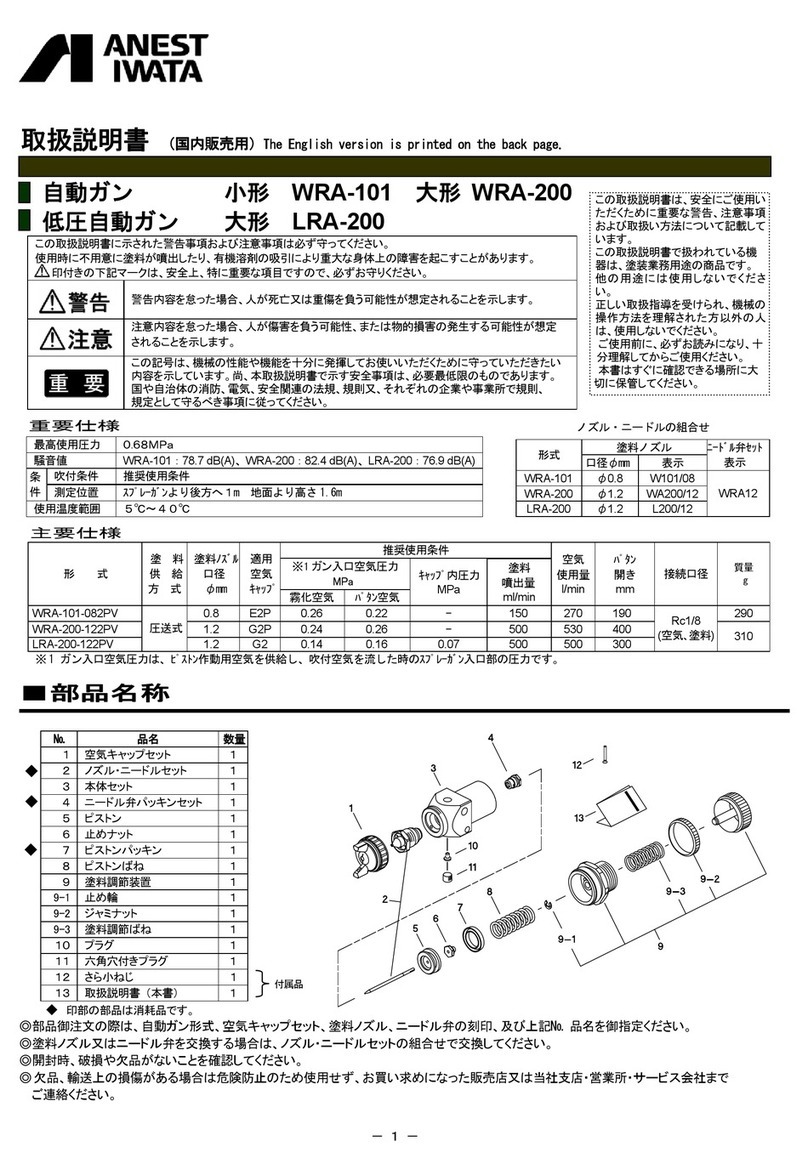
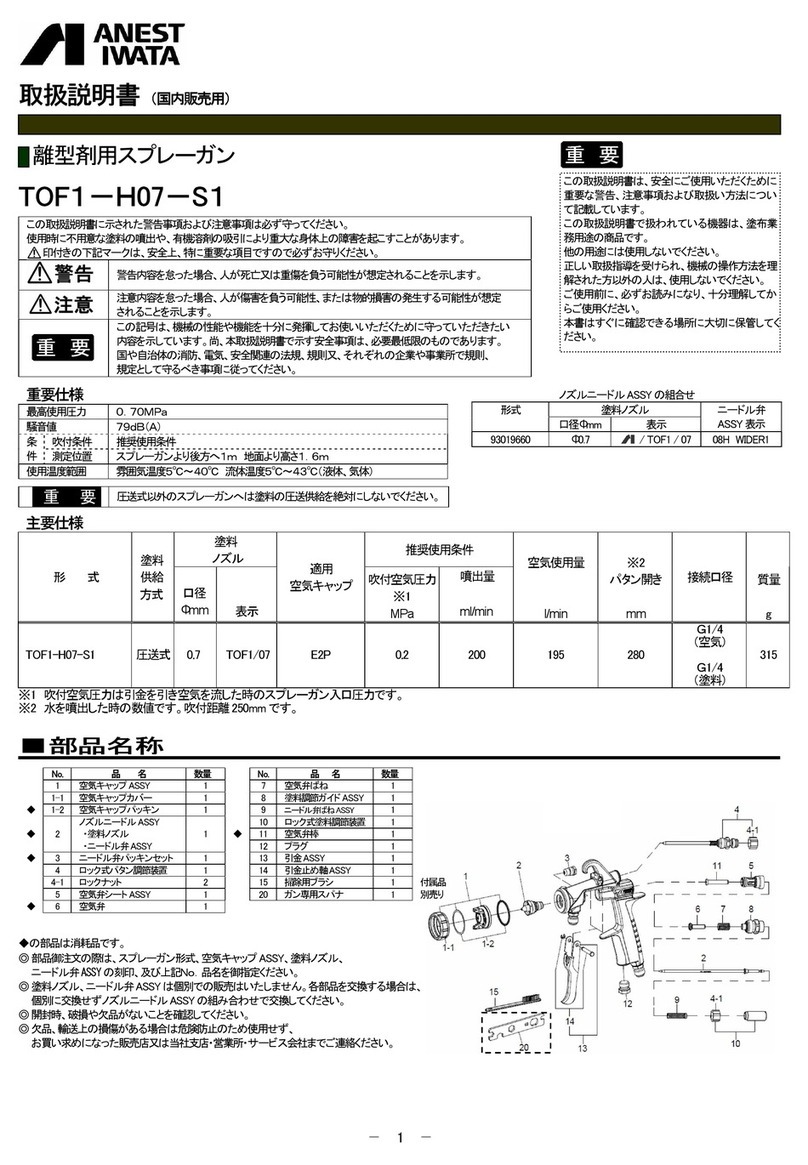
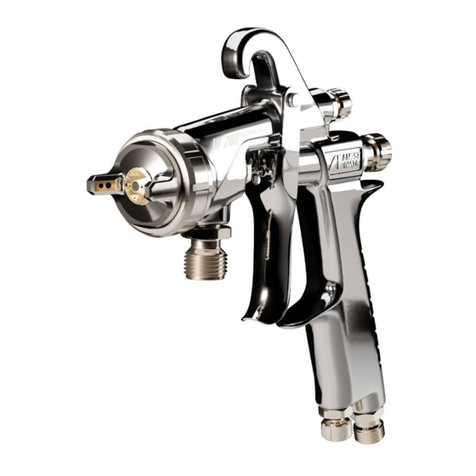
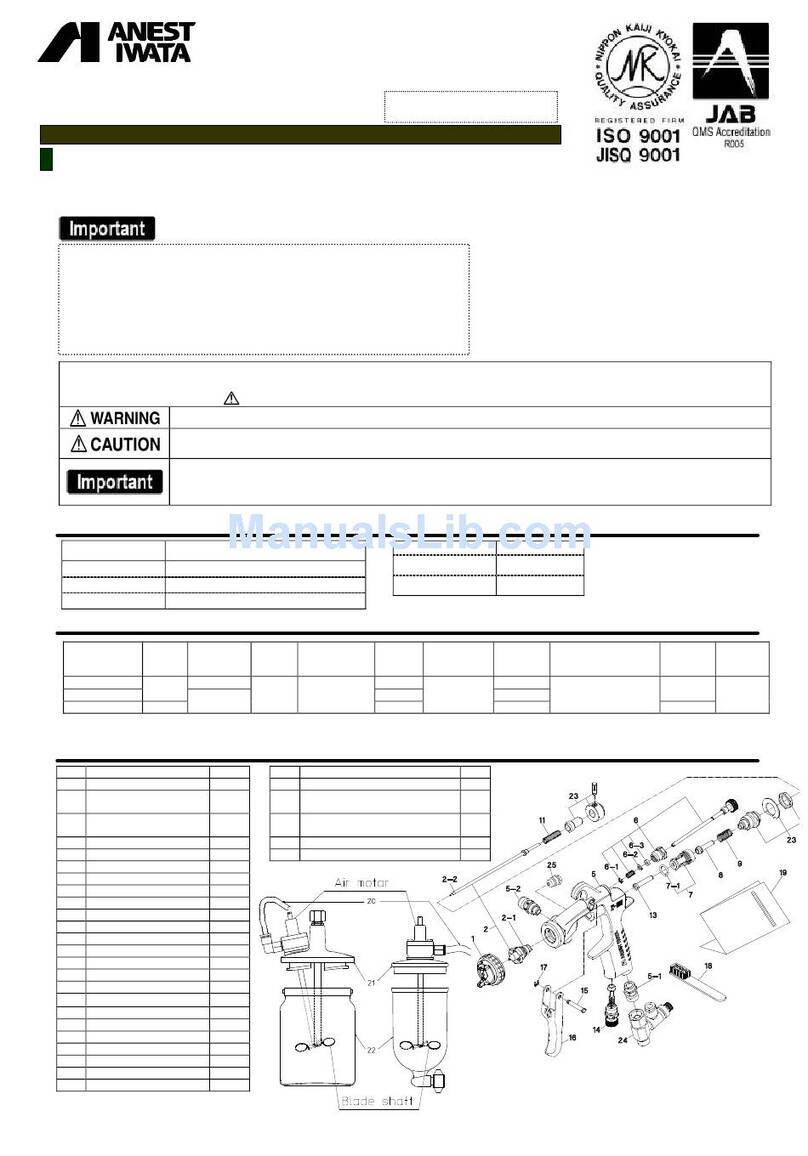
DESCRIPTION REF.
Air cap Ref. 1
Fluid Nozzle + Fluid needle set Ref. 2
Fluid Nozzle Ref. 2-1
Fluid needle Ref. 2-2
Needle packing set Ref. 3
Body set Ref. 4
Fluid nipple *Ref. 4-1
Air nipple Ref. 4-2
Pattern adjustment set Ref. 5
Adjustment knob Ref. 6
Air valve seat *Ref. 7
O’ring Ref. 7-1
Air valve Ref. 8
Air valve spring Ref. 9
Fluid adjustment guide Ref. 10
Needle spring Ref. 11
Fluid adjustment screw Ref. 12
Fluid adjustment knob Ref. 13
Air valve shaft Ref. 14
Air adjustment set Ref. 15
Trigger Ref. 16
Trigger stud Ref. 17
E stopper Ref. 18
Countersunk socket screw (Torx T10) Ref. 19
Spanner Ref. 20
Brush Ref. 21
Cup 600 cc Ref. 22
Lid Ref. 24
Knob Ref. 25
Allen wrench Ref. 33
Filter (optional)
Marked parts are wearable parts.
NOTE: When ordering parts, specify gun model, part name with ref.
No. and marked No. of air cap set, fluid nozzle and fluid needle.
*ATTENTION: To disassemble Air valve seat_ part.7, use 10 mm allen wrench
(Non ball point type).
To disassemble Fluid nipple_ part. 4-1, use 8 mm allen wrench.
600 cc CUP
GB
Fluid nozzle
Fluid needle
Size ø Mark Mark
1.2 WS400/12
1.3 Base WS400/13Base
1.3 Clear WS400/13Clear
1.4 Base WS400/14Base
1.4 Clear WS400/14Clear
1.3 HD (1.3.2) WS400/13 HD
1.4 HD (1.4.2) WS400/14 HD
1.5 HD (1.5.2) WS400/15 HD
1.3 OBS WS400/13 OBS
Nozzle_Needle Set COMBINATION
20015
40012
e. Air valve assembly (8), assemble air valve (8), air valve spring (9) and
fluid adj. guide set (10) together. Next, insert fluid needle set (2-2) into
fluid adj. guide set (10), fit it to gun body set (4) and screw fluid adj. gui-
de set (10).
- If you try to fit air valve spring (9) and air valve (8) to gun body set (4)
without fluid needle set (2-2), air valve (8) will not be fitted correctly and
the packing in the fluid adj. guide set (10) will be damaged.
f. Disassembly of pattern adjustment
set (5) and/or air adjustment set (15).
In order to disassemble pattern adj.
set (5) and/or air adj. set (15), first
of all unscrew countersunk socket
head screw Torx T10(C) and remove
adjustment knob (A) by pulling out it
carefully, as illustrated in Fig.1.
Then manually turn the hexagon
knob (D) of the adjustment counterclockwise to open it completely and
unscrew the hexagon face (B) with a spanner turning it counterclockwise.
-To reassemble pattern adjustment set (5) and/or air adjustment set (15),
reverse the procedure.
IMPORTANT: Before reassembling pattern adjustment set and/or air
adjustment set, make sure that these operations are carried out with the
adjustment fully open (Fig.1).
WARNING: When you reinsert the knob
(6) on the adjustment (B) and before to
tighten the countersunk socket screw
(C), make sure that it is pushed in until
it completely covers the face of the
hexagon knob of the adjustment
(Fig.2).
5.4 INSPECTION & REPLACEMENT STANDARD
WHERE TO INSPECT REPLACEMENT PART
a. Each hole passage of air cap (1) Replace if it is crushed or deformed
and fluid nozzle (2-1).
b. Packing and O ring Replace if it is deformed or worn out.
c. Leakage from seat section Replace them if leakage does not
between fluid nozzle (2-1) and stop after fully cleaning fluid nozzle
fluid needle set (2-2). (2-1) and fluid needle set (2-2).
If you replace fluid nozzle (2-1)or
fluid needle set (2-2) only, fully
match them and confirm that there
is no leakage.
GB
- Never soak air cap set (1) in solvent for an extended period, even when
cleaning.
- Never use metal brush to clean the gun.
1. Drain remaining paint from spray gun and cup, into a suitable container.
2. Pour cleaner into cup.
3. Unscrew air cap (1) by 2 turns, to allow atomizing air to back flush, fluid
passages of the gun.
4. Pull trigger (16) and make sure, that atomizing air enters cup.
5. Leave cleaner for a few seconds, then empty it into suitable waste contain-
er.
6. Repeat procedure above, until spray gun is clean.
7. Remove air cap (1) and cup from gun, then clean each section with brush
soaked with cleaner and wipe out with waste cloth.
8. DRY ALL PARTS completely and apply spray gun lubricant to each thread.
5.2 AUTOMATIC CLEANING PROCEDURE
_When using automatic spray gun washer, follow the instruction manual
provided with it. Before cleaning, make sure air is released from air
passages.
_Only use suitable cleaner designed for your spray gun washer.
_ Make sure that the equipment is dried immediately after cleaning.
_Do not leave spray guns inside spray gun washer, after cleaning.
Cleaner vapour can damage packings and cause corrosion inside gun
body.
_Do not leave spray guns soaking in cleaner.
_ Securely ground washer equipment.
Use of cleaner with waterborne coatings, can increase PH level, especial-
ly after several cleanings. Please, replace the cleaner regularly in order to
always ensure the best spray gun performance.
_ Make sure that the PH level of cleaner does not exceed the limit.
PH level: 6.0~8.0 (but only during cleaning).
5.3 DISASSEMBLY PROCEDURE
_Before disassembly, fully clean fluid passages.
a.Disassemble fluid nozzle (2-1), while
keeping fluid needle (2-2) pulled
(triggering) in order to protect its
seat section.
b.Disassemble fluid needle set (2-2).
(only when strictly necessary)
c. Remove fluid adj. knob (13), fluid adj.set (12) and needle spring (11),
extracting the spring and fluid needle set (2-2), from the back of fluid adj.
guide set (10) still assembled on the gun body (4).
d. Fluid needle packing set (3), must
always be adjusted while fluid needle
set (2-2) is inserted and in the follo-
wing way: tighten it by hand (about
a 60 degree turn) and then with
spanner. When you remove needle
packing set (3), do not leave plastic
piece of needle packing set (3) in the
gun body.
- If you tighten fluid needle packing set (3) too much, fluid needle set
(2-2) will not move smoothly, resulting in paint leakage from tip of fluid
nozzle (2-1).
-Try to adjust it carefully while pulling trigger and confirming movement
of fluid needle set (2-2).
- If you tighten it too much, repeat operation.
a
c
d
e
Plastic pieces
White
FIG. 1
FIG. 2
