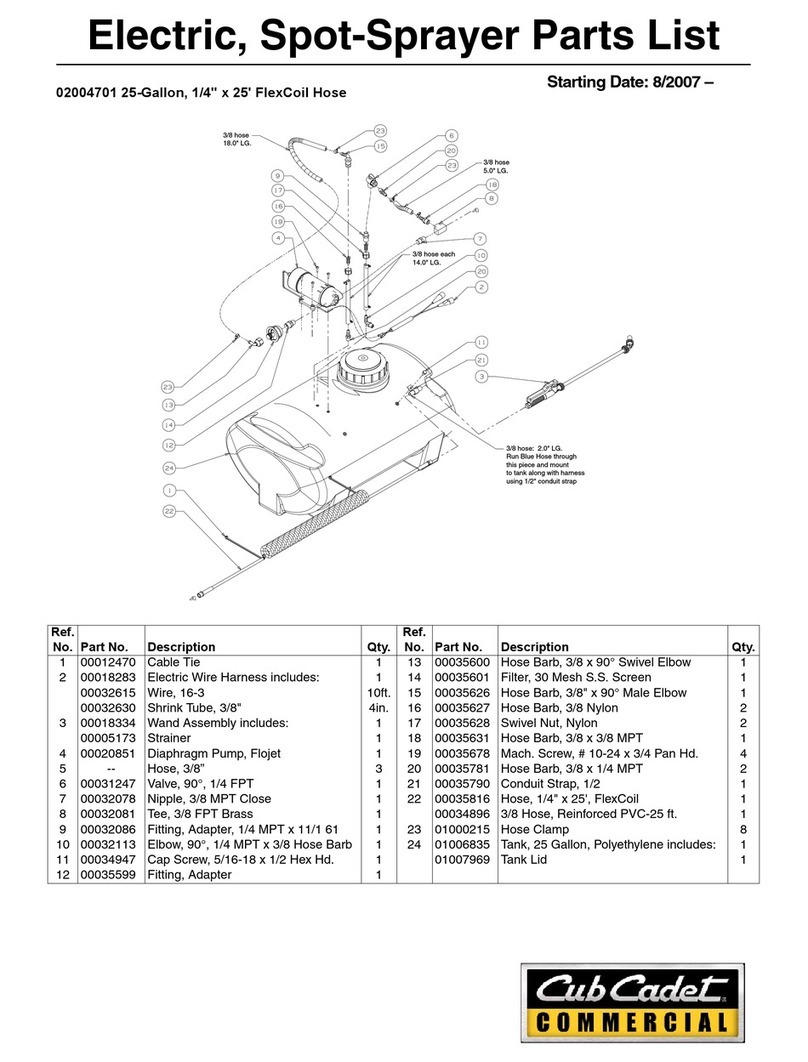
Cub Cadet FastAttach 19A30035100 User manual

Form No. 769-12543
(January 17, 2018)
CUB CADET LLC, P.O. BOX 361131 CLEVELAND, OHIO 44136-0019
OperatOr’sManual
WARNING
READ AND FOLLOW ALL SAFETY RULES AND INSTRUCTIONS IN THIS MANUAL
BEFORE ATTEMPTING TO OPERATE THIS PRODUCT.
FAILURE TO COMPLY WITH THESE INSTRUCTIONS MAY RESULT IN PERSONAL INJURY.
FastAttach™ Sprayer
19A30035100

To The Owner 1
2
Assembly & Set-Up .................................................. 5
Operation................................................................. 9
Maintenance & Adjustment.................................11
Warranty ............................................................12
Spanish.................................................................
French....................................................................
Table of Contents
Product Registration and Customer Support
Please register your product on our website, www.cubcadet.com.
If you have difficulty assembling this product or have any questions regarding the controls, operation, or maintenance of
this product, you can seek help from the experts. Choose from the options below:
◊ Visit us on the web at www.cubcadet.com
◊ Locate your nearest Cub Cadet Dealer at (877) 282-8684
◊ Write to Cub Cadet LLC • P.O. Box 361131 • Cleveland, OH • 44136-0019
Thank you for purchasing a Cub Cadet FastAttach™ Sprayer. It
was carefully engineered to provide excellent performance when
properly operated and maintained.
Please read this entire manual prior to operating the equipment.
It instructs you how to safely and easily set up, operate and
maintain your product. Please be sure that you, and any other
persons who will operate the product, carefully follow the
recommended safety practices at all times. Failure to do so could
result in personal injury or property damage.
All information in this manual is relative to the most recent
product information available at the time of printing. Review this
manual frequently to familiarize yourself with the product, its
features and operation.
Please be aware that this Operator’s Manual may cover a range
of product specifications for various models. Characteristics and
features discussed and/or illustrated in this manual may not be
applicable to all models. We reserve the right to change product
specifications, designs and equipment without notice and
without incurring obligation.
If you have any problems or questions concerning the product,
phone your local Cub Cadet dealer or contact us directly. Cub
Cadet’s Customer Support telephone numbers, website address
and mailing address can be found on this page. We want to
ensure your complete satisfaction at all times.
Throughout this manual, all references to right and left side of the
product are observed from the tractor operating position.
Thank You

Important Safe Operation Practices 2
3
General Operation
1. Read this Operator’s Manual completely before starting the
product. Study the controls and learn the proper sequence
of operation. Retain Operator’s Manual in a safe place for
future reference.
2. Do not allow anyone to operate or maintain this product
who has not read the manual.
3. Do not remove any shields, guards, decals or safety devices.
If a shield, guard, decal or safety device is damaged or
does not function, repair or replace it before operating the
product.
4. Make certain the sprayer is securely fastened to the frame
of the tractor.
5. When spraying pesticides:
a. ALWAYS FOLLOW THE DIRECTIONS ON THE LABEL
b. Avoid breathing vapors.
c. Avoid contact with skin, eyes or clothing.
d. Wear rubber boots or rubberized shoes.
e. Wear work clothes with long-sleeved shirts and
long-legged pants.
f. Change to clean clothing daily.
g. Wash hands and face before eating or smoking.
h. Bathe thoroughly as soon after spraying as possible.
6. Wear a face shield and rubber gloves when handling
concentrates.
7. Always wear safety glasses, long pants and safety shoes
when operating or maintaining this unit. Do not wear
loose-fitting clothing.
8. To avoid serious burns, do not touch the engine or muffler
while the engine is running or until it has cooled for at least
30 minutes after it has been shut off.
9. Keep adults, children and pets away from the sprayer and
the area to be sprayed.
10. Spray only in daylight.
11. Always check the area to be sprayed and remove debris
and other objects prior to spraying.
12. Keep the product and especially the engine/pump area
clean and free of grease, grass and leaves to reduce the
potential for over heating and fire.
Service
General Service
1. Keep all nuts, bolts, and screws tight to be sure the
equipment is in safe working condition.
2. For safety protection, frequently check components
and replace immediately with original equipment
manufacturer’s (O.E.M.) parts only, listed in this manual.
“Use of parts which do not meet the original equipment
specifications may lead to improper performance and
compromise safety!”
3. Maintain or replace safety and instruction labels, as
necessary.
4. Observe proper disposal laws and regulations for
chemicals, gas, oil, etc. to protect the environment.
WARNING: This symbol points out important safety instructions which, if not followed,
could endanger the personal safety and/or property of yourself and others. Read and follow
all instructions in this manual before attempting to operate this product. Failure to comply
with these instructions may result in personal injury.
When you see this symbol. HEED ITS WARNING!
CALIFORNIA PROPOSITION 65
WARNING! This product contains a chemical(s) known to the State of California to cause
cancer, birth defects or other reproductive harm.

4Section 2 — important Safe operation practiceS
SAFETY Symbols
This page depicts and describes safety symbols that may appear
on this product. Read, understand, and follow all instructions on
the product before attempting to assemble and operate.
Symbol Description
READ THE OPERATOR’S MANUAL(S)
Read, understand, and follow all instructions in the manual(s) before attempting to
assemble and operate
WARNING— HOT SURFACE
Engine parts, especially the muffler, become extremely hot during operation. Allow engine
and muffler to cool before touching.
WARNING: Your Responsibility—Restrict the use of this power product to persons who read, understand and
follow the warnings and instructions in this manual and on the product.
SAVE THESE INSTRUCTIONS!

Assembly & Set-Up 3
5
Contents of Carton
Part Number Description Qty.
1789-00578 Sprayer Support Bracket 1
2689-00689 Sprayer Tank Assembly 1
3VA-TDS-9GSS* Sprayer Tie Down Strap With Hooks 1
4VA-SG-4507F* Spot Sprayer Wand 1
5NA* Screw 2
6VA-33-103821* Battery Wire Harness 1
7VA-33-103817-CC* Pump Wire Harness 1
NS 819-010534 Cargo Carrier Kit 1
2
3
4
761
5
* Included with 689-00689

Section 3— ASSembly & Set-Up6
Part Number Description Qty.
1710-3105 Bolt 5/16-18 X .875 GR1 4
2720-04072A Star Knob 5/16-18 4
3721-04271 Rubber Plug 4
132
Hardware Pack 689-00692
Hardware Pack

Section 3 — ASSembly & Set-Up7
Required Tools
• Phillips Head Screwdriver (1) • Adjustable Wrench (1)
• 7/16” Wrench (1) • 3/8” Wrench (1)
WARNING! Disengage the PTO,
engage the brake lock, and stop the
tractor engine before performing
any preparation procedures. Place
the tractor on a firm and level
surface before beginning installation
procedures.
WARNING! The exhaust system
and surrounding areas are HOT. To
avoid personal injury, allow the
tractor to cool before beginning
any sprayer installation or removal
procedures.
Cargo Carrier Installation
1. Following the installation instructions
included in the box, install the cargo
carrier (819-010534) to the frame of the
tractor.
Sprayer Support Bracket Installation
1. Install sprayer support bracket (789-
00578) to cargo carrier with two star
knobs (720-04072A) and two 5/16” bolts
(710-3105). See Figure 3-1.
2. Install two star knobs (720-04072A)
and two 5/16” bolts (710-3105) into the
mounting holes shown in Figure 3-1.
3. Install four rubber plugs (721-04271)
into the tops of the four star knobs (720-
04072A). See Figure 3-1.
Figure 3-1
Install Broadcast Sprayer Assembly
1. Route the clear hose under sprayer tank
making sure that it is secured in the
grooves of the sprayer tank.
2. Fasten broadcast nozzle mounting
bracket to sprayer tank with the two
screws included with the sprayer tank
assembly. See Figure 3-2.
Figure 3-2
Note: Do not overtighten screws.
Attach Sprayer Tank Assembly To
Cargo Carrier
1. Place sprayer assembly on cargo carrier,
ensuring that it sits firmly atop star
knobs (720-04072A) and between
sprayer support bracket (789-00578). See
Figure 3-3.
2. Install sprayer tie down strap (VA-TDS-
9GSS). See Figure 3-3.
Figure 3-3
3. Fasten securely using the mounting
holes shown in Figure 3-4.
Figure 3-4
Note: The sprayer tie down strap is
adjustable. Tighten straps until the
sprayer tank is securely mounted to
cargo carrier.

Section 3— ASSembly & Set-Up8
FastAttach™ Front Attachments
Description Part Number
All-Season Plow 19A30037100
Brush Guard 19A30038100
More coming soon. Visit your local Cub Cadet Dealer or CubCadet.com for more information.
FastAttach™ Rear Attachments
Spreader (100 lb capacity) 19A30028100
Cargo Carrier (80 lb capacity) 19B30029100
Bagger (42" and 46" Decks) 19A30030100
Sprayer / Cargo Carrier Combo 19A30035100
More coming soon. Visit your local Cub Cadet Dealer or CubCadet.com for more information.
Assemble Spot Sprayer Wand to
Hose
1. Connect spot sprayer rod to wand
handle. See Figure 3-5.
Figure 3-5
2. Place spot sprayer wand in the wand
clips located on the front of the sprayer
tank. See Figure 3-6.
Figure 3-6
Connect Wiring Harnesses
1. Make sure that the switch is in the OFF
position. See Figure 3-7.
Figure 3-7
2. Connect the battery harness clips to
the battery terminals. Remove the
plastic cover, if present from the positive
battery terminal and connect the red
wire to the positive terminal, then
connect the black wire to the negative
terminal. See Figure 3-8.
Figure 3-8
3. Connect the battery wire harness to the
pump wire harness. See Figure 3-9.
Figure 3-9
Note: A small gap may be present when
connectors are assembled.
CAUTION: After installation of
the wiring harness, ensure that it
does not obstruct or make
contact with any moving parts of
you tractor. If needed, zip ties (not
included) can be used to secure
the wiring harness to the tractor.

Operation 4
9
Operation
WARNING! Before operating the
tractor, familiarize yourself with
the SAFE OPERATION PRACTICES
in the rider manual starting on
page 3.
WARNING! Exercise caution
while operating tractor with this
attachment, especially when
traveling in reverse.
CAUTION! To avoid an accident
or injury, do not allow adults to
operate the sprayer without
proper instruction. Never allow
children to operate.
Note: Before spraying chemicals,
fill the tank half full of plain water to
allow familiarization with the sprayer and
to prevent waste of expensive chemicals.
Spot Sprayer Mode
1. If not already running, start tractor.
2. To engage spot sprayer mode, rotate
valve control, located on the back of the
sprayer, to “OFF“ position. See Figure
4-10.
Figure 4-10
3. Move harness control to “ON” position to
start pump. See Figure 4-11.
Figure 4-11
4. To change the shape of the spray, rotate
the tip of the spot sprayer wand clock-
wise for a fan pattern spray or counter-
clockwise for a high-pressure stream.
See Figure 4-12.
Figure 4-12
5. Move harness control to “OFF” position
to stop pump. See Figure 4-13.
Figure 4-13
6. Disconnect the battery wire harness
from the pump wire harness when not
in use to prevent accidental battery
drainage. See Figure 4-14.
Figure 4-14

Operation 4
10
Broadcast Sprayer Mode
1. If not already running, start tractor.
2. To engage broadcast sprayer mode,
rotate valve control to “ON“ position. See
Figure 4-15.
Figure 4-15
3. Move harness control to “ON” position to
start pump. See Figure 4-16.
Figure 4-16
Note: Spot sprayer wand is functional
during broadcast sprayer mode.
4. Move harness control to “OFF” position
to stop pump. See Figure 4-17.
Figure 4-17
5. Disconnect the battery wire harness from
the pump wire harness when not in use
to prevent accidental battery drainage.
See Figure 4-18.
Figure 4-18
Drain
1. To drain excess fluids from the sprayer
tank, unscrew the cap located on the
bottom of the tank. Once drained,
make sure that the o-ring is in place and
tighten drain cap. See Figure 4-19.
Figure 4-19

Maintenance & Adjustments 5
11
Maintenance
General Maintenance
1. After each use, run clean water through
the sprayer.
2. Thoroughly drain and clean the sprayer
tank.
3. Never store chemicals in the tank.
4. When mixed, chemicals may cause an
undesireable effect or cause noxious
fumes.
5. Disconnect the wiring harness from the
battery when not in use.
6. Check sprayer tie down straps and
hardware.
Winterizing and Long-term Storage
The following steps should be followed for the
maintenance and storage of your sprayer.
1. Wash and flush out sprayer after
completion of each phase of your
program. Flush out sprayer when
changing chemicals if there is a
possibility of the chemicals being
incompatible. Use of a detergent is
advisable if the chemical manufacturer
does not make specific cleaning
recommendations. Flush system
completely, including nozzles. Never use
metal objects to open clogged nozzles.
2. Clean sprayer thoroughly before storing
at the end of the spraying season.
Permanent type anti-freeze added to the
final rinse will leave a rust inhibiting film
in parts of the sprayer.

LIMITED WARRANTY
The limited warranty set forth herein is given by Cub Cadet LLC with respect to
a new Spreader (hereinafter “Attachment”) purchased and used in the United
States and/or Canada to the Initial Purchaser (as defined herein). For Canadian
sales, the warranty is provided by MTD Products Limited.
Scope of the Limited Warranty
Cub Cadet LLC offers the following limited warranty to the Initial
Purchaser for residential or otherwise non-commercial use: except
for the Exclusions (defined herein), during the Warranty Period (as
defined herein), this Attachment will be free from manufacturing
defects (including workmanship and materials). The “Initial
Purchaser” is the first person to purchase this new Attachment from
an authorized Cub Cadet dealer, distributor and/or retailer of such
products. This limited warranty is non-transferrable. Except as
otherwise set forth herein, the limited warranty period for this new
Attachment purchased by the Initial Purchaser is one (1) year from
the date of purchase as shown on the original sales receipt for the
product (“Warranty Period”).
Defects in Workmanship or Materials
Except for the Exclusions, this Attachment is warranted to be free from
manufacturing defects in either workmanship or materials for the Warranty
Period. During the Warranty Period, Cub Cadet LLC will, at its option, either
repair or replace any original part that is covered by this limited warranty and
is determined to be defective in workmanship or material.
To qualify for this limited warranty this Attachment:
1. Must have been purchased from an authorized retailer.
2. Must have been purchased within the United States or Canada by the
Initial Purchaser.
3. Must have been used for residential purposes only.
4. Must have been used in a manner consistent with the normal and
proper intended use for this Attachment. This Attachment is not
intended for rental or commercial use.
Who can perform repairs under this warranty?
In order to qualify for the limited warranty as set forth herein, the repairs
made under this warranty must be performed by an authorized Cub Cadet
service provider.
How to get service under this limited warranty:
To locate a Cub Cadet warranty service provider, contact your authorized Cub
Cadet dealer, distributor, or retailer or contact Cub Cadet LLC at P.O. Box 361131,
Cleveland, Ohio 44136-0019 or call 1-877-282-8684 or log on to our Website at
www.cubcadet.com. In Canada, contact MTD Products Limited, Kitchener, ON
N2G 4J1, or call 1-800-668-1238 or log on to our Web site at www.mtdcanada.
com. This limited product warranty is provided by Cub Cadet LLC and is the only
product warranty provided by Cub Cadet LLC for this Attachment. A COPY OF
YOUR SALES RECEIPT IS REQUIRED FOR WARRANTY SERVICE.
What this limited warranty does not cover.
This limited warranty does not cover the following (the “Exclusions”):
1. Product purchased outside of the United States or Canada.
2. Damage due to lack of maintenance and/or improper maintenance as
described in the operator’s manual
3. Normal wear and tear resulting from use of the product.
4. Any expendable, consumable, or routine maintenance item which
needs replacement or service as part of normal maintenance, unless
such items have defects that cause failure or premature wear within the
first thirty (30) days of purchase. Normal wear items include but are not
limited to, tires, fuses, blades, batteries, belts, hoses, string trimmer line,
engine oil, hydraulic oil, grass bags, and other consumable items where
applicable, or adjustments, such as clutch, brake or deck adjustments
or tune-ups.
5. Use of the product that is not consistent with the intended use
thereof as described in the operating instructions, including, but not
limited to, abuse, misuse and/or neglect of the Attachment or any use
inconsistent with and/or non-compliant with instructions contained in
the Operator’s Manual.
6. Any Attachment that has been altered or modified in a manner not
consistent with the original design of the Attachment or in a manner
not approved by Cub Cadet LLC.
7. Paint repairs or replacements for defective paint (including materials
and application) are covered for a period of three (3) months; provided
however, that this limited warranty for defective paint does not apply
to and shall not cover damage(s) to the paint application resulting from
exposure to weather conditions and/or resulting from normal use of the
Attachment, including misuse.
This warranty does not cover and Cub Cadet LLC disclaims any responsibility
for:
1. Loss of time or loss of use of the Attachment.
2. Transportation costs and other expenses incurred in connection with
the transport of the Attachment to and from the authorized Cub Cadet
service provider.
3. Any loss or damage to other equipment or personal items.
4. Damages caused by improper maintenance or the use of other than the
specified fuel, oil or lubricants as approved in the operator’s manual.
5. Damage resulting from the installation or use of any accessory or part
not approved by Cub Cadet for use with the Attachment.
Limitations:
1. THERE ARE NO IMPLIED WARRANTIES, INCLUDING, BUT NOT LIMITED
TO, ANY IMPLIED WARRANTY OF MERCHANTABILITY OR FITNESS FOR
A PARTICULAR PURPOSE. NO WARRANTY SHALL APPLY AFTER THE
APPLICABLE WARRANTY PERIOD AS SET FORTH ABOVE AS TO THE
PARTS AS IDENTIFIED. NO OTHER EXPRESS WARRANTY OR GUARANTY,
WHETHER WRITTEN OR ORAL, EXCEPT AS MENTIONED ABOVE, GIVEN
BY ANY PERSON OR ENTITY, INCLUDING A DEALER OR RETAILER, WITH
RESPECT TO ANY PRODUCT SHALL BIND CUB CADET LLC. DURING THE
WARRANTY PERIOD, THE EXCLUSIVE REMEDY IS REPAIR OR REPLACEMENT
OF THE DEFECTIVE PART, AS SET FORTH ABOVE. (SOME STATES DO NOT
ALLOW LIMITATIONS ON HOW LONG AN IMPLIED WARRANTY LASTS, SO
THE ABOVE LIMITATION MAY NOT APPLY TO YOU.)
2. THE PROVISIONS AS SET FORTH HEREIN PROVIDE THE SOLE AND
EXCLUSIVE REMEDY ARISING FROM THE SALE. CUB CADET SHALL NOT
BE LIABLE FOR INCIDENTAL OR CONSEQUENTIAL LOSS OR DAMAGES
INCLUDING, WITHOUT LIMITATION, FOR TRANSPORTATION OR FOR
RELATED EXPENSES, OR FOR RENTAL EXPENSES TO TEMPORARILY REPLACE
A WARRANTED PRODUCT. (SOME STATES DO NOT ALLOW THE EXCLUSION
OR LIMITATION OF INCIDENTAL OR CONSEQUENTIAL DAMAGES, SO THE
ABOVE EXCLUSION OR LIMITATION MAY NOT APPLY TO YOU.)
3. In no event shall recovery of any kind be greater than the amount of the
purchase price of the product sold. Alteration of the safety features of
the product shall void this limited warranty. You assume the risk and
liability for loss, damage, or injury to you and your property and/or to
others and their property arising out of the use or misuse or inability to
How State Law Relates to this Warranty:
This limited warranty gives you specific legal rights, and you may also have
other rights which vary from state to state.
CUB CADET LLC
LIMITED WARRANTY ATTACHMENTS AND ACCESSORIES
Cub Cadet LLC, P.O. BOX 361131 CLEVELAND, OHIO 44136-0019, Phone: 1-877-282-8684
MTD Products Limited, Kitchener, ON N2G 4J1, Phone: 1-800-668-1238
108402

Formulario N.º 769-12543
(17 de enero de 2018)
CUB CADET LLC, P.O. BOX 361131 CLEVELAND, OHIO 44136-0019
Manual del OperadOr
ADVERTENCIA!
LEA Y CUMPLA TODAS LAS REGLAS Y LAS INSTRUCCIONES DE SEGURIDAD DE ESTE
MANUAL ANTES DE INTENTAR OPERAR ESTE PRODUCTO.
SI NO SIGUE ESTAS INSTRUCCIONES, SE PUEDEN PROVOCAR LESIONES PERSONALES.
Rociador FastAttach™
19A30035100

Al propietario 1
14
Armado e instalación.............................................. 5
Operación ................................................................ 9
Mantenimiento y ajuste........................................11
Garantía..................................................Contratapa
Francés.......................................................................
Índice
Registro de productos y atención al cliente
Por favor registre su producto en nuestro sitio web, www.cubcadet.com.
En caso de experimentar problemas para montar este producto o tener dudas con respecto a su control, funcionamiento o
mantenimiento, puede solicitar la ayuda de expertos. Seleccione una de las opciones siguientes:
◊ Visite nuestro sitio web en www.cubcadet.com
◊ Localice a su distribuidor Cub Cadet más cercano llamando al (877) 282-8684
◊ Escriba a Cub Cadet LLC • P.O. Box 361131 • Cleveland, OH • 44136-0019
Gracias por comprar un rociador Cub Cadet FastAttach™. Ha sido
cuidadosamente diseñado para brindar excelente rendimiento si se
lo hace funcionar y se lo mantiene correctamente.
Por favor lea todo este manual antes de hacer funcionar el equipo.
El manual le indica cómo configurar, hacer funcionar y mantener
el producto de manera fácil y segura. Por favor asegúrese de
que usted, y cualquier otra persona que utilice el producto, siga
atentamente y en todo momento las medidas de seguridad
recomendadas. De lo contrario, se podrían producir lesiones
personales o daños materiales.
Toda la información contenida en este manual hace referencia a la
más reciente información de producto disponible en el momento de
la impresión. Revise el manual frecuentemente para familiarizarse
con el producto, sus características y funcionamiento.
Por favor tenga en cuenta que este Manual del Operador puede
abarcar una variedad de especificaciones de producto para diversos
modelos. Es posible que las características y/o funciones incluidas
y/o ilustradas en este manual no se apliquen a todos los modelos.
Nos reservamos el derecho de modificar las especificaciones de
los productos, diseños y equipos sin previo aviso y sin generar
responsabilidad por obligaciones de ningún tipo.
Si tiene algún problema o duda respecto del producto, llame a su
distribuidor de servicio local Cub Cadet autorizado o póngase en
contacto directamente con nosotros. En esta página encontrará los
números de teléfono, la dirección del sitio web y la dirección postal
de la Atención al cliente de Cub Cadet. Queremos garantizar su
entera satisfacción en todo momento.
En este manual, todas las referencias al lado derecho e izquierdo del
producto se hacen observándolo desde la posición de operación del
tractor.
Muchas gracias

Medidas de seguridad importantes 2
15
Funcionamiento general
1. Lea este manual del operador en su totalidad antes de poner
en funcionamiento la máquina. Estudie los controles y aprenda
la secuencia operativa adecuada. Conserve este Manual del
operador en un lugar seguro para consultas futuras.
2. No deje que nadie que no haya leído este manual opere o
realice el mantenimiento de este producto.
3. No retire las protecciones, las calcomanías o los dispositivos de
seguridad. Si una protección, calcomanía o un dispositivo de
seguridad está dañado o no funciona, repárelo o reemplácelo
antes de operar el producto.
4. Asegúrese de que el rociador esté correctamente asegurado al
bastidor del tractor.
5. Cuando rocíe pesticidas:
a. SIGA SIEMPRE TODAS LAS INSTRUCCIONES DE LA
ETIQUETA.
b. Evite la inhalación de los vapores.
c. Evite el contacto con los ojos, la piel o la ropa.
d. Use botas de goma o zapatos engomados.
e. Use vestimenta de trabajo con mangas y pantalones
largos.
f. Quítese la vestimenta de trabajo y póngase ropa limpia
todos los días.
g. Lávese las manos y la cara antes de comer o fumar.
h. Báñese cuidadosamente tan pronto como haya
terminado de utilizar el rociador como sea posible.
6. Utilice una máscara que cubra el rostro y guantes de goma
cuando manipule productos concentrados.
7. Siempre use gafas de protección, pantalones largos y zapatos
de seguridad cuando opere o realice el mantenimiento de esta
unidad. No use vestimenta demasiado holgada.
8. Para evitar quemaduras graves, no toque el motor o
silenciador mientras el motor esté en funcionamiento o hasta
que se haya enfriado por lo menos durante 30 minutos luego
que se haya apagado.
9. Mantenga a adultos, niños y mascotas alejados del rociador y
del área a ser rociada.
10. Utilice el rociador únicamente de día.
11. Siempre realice un control del área a ser rociada y retire los
residuos u otros objetos antes de rociar.
12. Mantenga el producto y especialmente la zona del motor/
la bomba limpia y libre de grasa, césped y hojas para reducir
la posibilidad de que se produzca un sobrecalentamiento e
incendio.
Servicio
Servicio general
1. Mantenga todas las tuercas, pernos y tornillos bien ajustados
para asegurarse de que el equipo está en condiciones de
funcionamiento seguras.
2. Para proteger su seguridad, verifique frecuentemente los
componentes y reemplácelos inmediatamente por piezas
del fabricante del equipo original (O.E.M.) únicamente. lista
de piezas solamente en este manual. “El uso de piezas que
no cumplen con las especificaciones del equipo original
podría producir un rendimiento inadecuado y además puede
comprometer la seguridad”.
3. Mantenga o reemplace las etiquetas de seguridad e
instrucciones según sea necesario.
4. Respete las normas y reglamentaciones sobre la manera
correcta de eliminar productos químicos, gasolina, aceite, etc.
para proteger el medio ambiente.
ADVERTENCIA: Este símbolo indica instrucciones de seguridad importantes que de no
seguirse, se podría poner en peligro la seguridad personal y/o la propiedad suya y de terceros.
Lea y cumpla todas las instrucciones de este manual antes de intentar hacer funcionar este
producto. Si no sigue estas instrucciones, se pueden provocar lesiones personales.
Cuando vea este símbolo. TENGA EN CUENTA LA ADVERTENCIA.
PROPOSICIÓN 65 DE CALIFORNIA
ADVERTENCIA: Este producto contiene una sustancia química que según el Estado de
California puede producir cáncer, defectos de nacimiento u otros problemas
reproductivos.

16 Sección 2 — MedidaS de Seguridad iMportanteS
Símbolos de SEGURIDAD
En esta página, se presentan y describen los símbolos de seguridad
que pueden aparecer en este producto. Lea, comprenda y siga todas
las instrucciones incluidas en el producto antes de intentar armarla y
hacerla funcionar.
Símbolo Descripción
LEA LOS MANUALES DEL OPERADOR
Lea, entienda y cumpla todas las instrucciones incluidas en los manuales antes de realizar el
montaje de la unidad y utilizarla.
ADVERTENCIA— SUPERFICIE CALIENTE
Las piezas del motor, especialmente el silenciador, se recalientan durante la operación. Deje
que el motor y el silenciador se enfríen antes de tocarlos.
ADVERTENCIA: Responsabilidad. Sólo permita que usen este producto eléctrico las personas que lean,
comprendan y respeten las advertencias e instrucciones que aparecen en este manual y en el producto.
¡GUARDE ESTAS INSTRUCCIONES!

Armado e Instalación 3
17
Contenido de la caja
Referencia Número de pieza Descripción Cantidad
1789-00578 Soporte del rociador 1
2689-00689 Conjunto del tanque del rociador 1
3VA-TDS-9GSS* Fleje de amarre con ganchos del rociador 1
4VA-SG-4507F* Varilla de rociado por puntos 1
5ND* Tornillo 2
6VA-33-103821* Mazo de cables de la batería 1
7VA-33-103817-CC* Mazo de cables de la bomba 1
NS 819-010534 Kit de portador de cargas 1
2
3
4
761
5
* Incluido con 689-00689

Sección 3— ArmAdo einStAlAción18
Referencia Número de pieza Descripción Cantidad
1710-3105 Perno 5/16-18 X 0,875 GR1 4
2720-04072A Perilla estrella 5/16-18 4
3721-04271 Tapón de goma 4
132
Paquete de herrajes 689-00092
Paquete de herrajes

Sección 3 — ArmAdo einStAlAción 19
Herramientas requeridas
• Destornillador de cabeza Phillips (1) • Llave ajustable (1)
• Llave de 7/16" (1) • Llave de 3/8” (1)
ADVERTENCIA! Desenganche la
toma de fuerza, enganche el bloqueo
de freno y detenga el motor del tractor
antes de realizar cualquier
procedimiento de preparación.
Posicione el tractor sobre una
superficie firme y nivelada antes de
comenzar los procedimientos de
instalación.
ADVERTENCIA! El sistema de
escape y las áreas que lo rodean
están CALIENTES. Para evitar
lesiones personales, deje que el
tractor se enfríe antes de comenzar
cualquier procedimiento de
instalación o extracción del
rociador.
Instalación del portador de cargas
1. Instale el portador de cargas (819-010534)
en el bastidor del tractor siguiendo las
instrucciones de instalación incluidas en
la caja.
Instalación del soporte del rociador
1. Instale el bastidor del rociador (789-00578)
en el portador de cargas con dos perillas
estrella (720-04072A) y dos pernos de 5/16”
(710-3105). Consulte la Figura 3-1.
2. Instale dos perillas estrella (720-04072A)
y dos pernos de 5/16” (710-3105) en los
orificios de montaje que se muestran en la
Figura 3-1.
3. Instale cuatro tapones de goma (721-
04271) en la parte superior de las cuatro
perillas estrella (720-04072A). Consulte la
Figura 3-1.
Figura 3-1
Instale el conjunto del rociador al
voleo
1. Dirija la manguera transparente debajo del
tanque rociador asegurándose de que esté
asegurada en las ranuras del tanque del
rociador.
2. Ajuste el soporte de montaje de la boquilla
de distribución al voleo en el tanque
rociador con los dos tornillos incluidos
en el montaje del tanque del rociador.
Consulte la Figura 3-2.
Figura 3-2
Nota: No ajuste demasiado los tornillos.
Sujete el conjunto del tanque del
rociador en el portador de cargas
1. Ubique el conjunto del rociador en el
portador de cargas asegurándose que
se asiente firmemente sobre las perillas
estrellas (720-04072A) y entre el soporte
del rociador (789-00578). Consulte la Figura
3-3.
2. Instale el fleje de amarre del rociador (VA-
TDS-9GSS). Consulte la Figura 3-3.
Figura 3-3
3. Ajústelo bien utilizando los orificios de
montaje que se muestran Figura 3-4.
Figura 3-4
Nota: El fleje de amarre del rociador es
ajustable. Ajuste los flejes hasta que el
tanque del rociador esté bien instalado en
el portador de cargas.

Sección 3— ArmAdo einStAlAción20
Accesorios frontales FastAttach™
Descripción Número de pieza
Pala para cada estación 19A30037100
Protección del cepillo 19A30038100
Más productos próximamente. Visite al distribuidor de Cub Cadet de su localidad o CubCadet.com para obtener
más información.
Accesorios traseros FastAttach™
Esparcidora (capacidad de 100 lb) 19A30028100
Portador de cargas (capacidad de 80 lb) 19B30029100
Embolsadora (para plataformas de corte de 42 y 46 in) 19A30030100
Kit combinado de rociadora/portador de cargas 19A30035100
Más productos próximamente. Visite al distribuidor de Cub Cadet de su localidad o CubCadet.com para obtener
más información.
Instale la varilla de rociado por
puntos en la manguera
1. Conecte la varilla rociadora por puntos en
el mango de la varilla. Consulte Figura 3-5.
Figura 3-5
2. Ubique la varilla rociador por puntos en
los sujetadores de la varilla ubicados en el
frente del tanque del rociador. Consulte la
Figura 3-6.
Figura 3-6
Conecte los mazos de cables
1. Asegúrese de que el interruptor esté en la
posición OFF (Apagado). Consulte la Figura
3-7.
Figura 3-7
2. Conecte las abrazaderas del mazo de
cables de la batería a los terminales de la
batería. Retire la cubierta de plástico (si
está presente) del terminal positivo de la
batería y conecte el cable rojo al terminal
positivo, luego conecte el cable negro al
terminal negativo. Consulte la Figura 3-8.
Figura 3-8
3. Conecte el mazo de cables de la batería
con el mazo de cables de la bomba.
Consulte la Figura 3-9.
Figura 3-9
Nota: Puede haber una pequeña
separación cuando se ensamblan los
conectores.
PRECAUCIÓN: Después de la
instalación del mazo de cables,
asegúrese de que este no obstruya
ninguna pieza móvil del tractor ni
quede en contacto con estas. Si es
necesario, se pueden utilizar
precintos (no incluidos) para
asegurar el mazo de cables al
tractor.
Table of contents
Languages:
Other Cub Cadet Paint Sprayer manuals