−3−
■
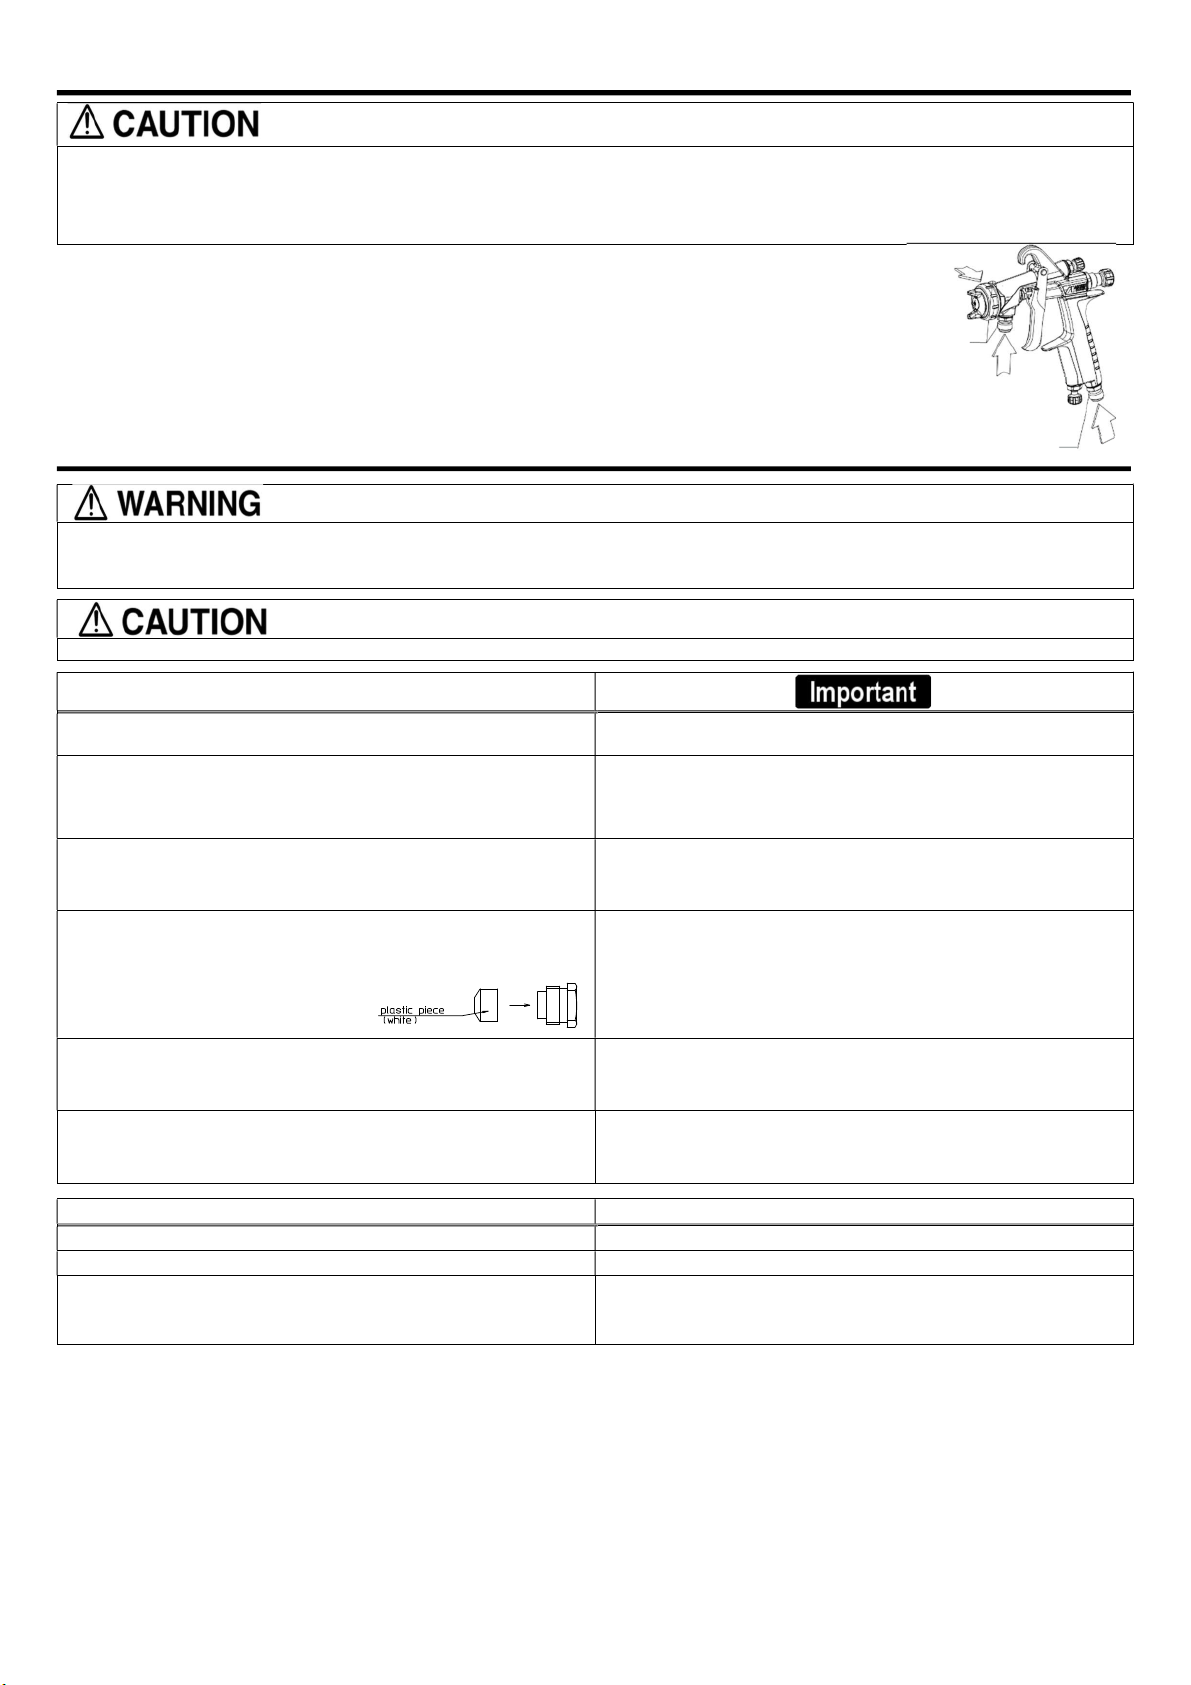
How to connect
・Use clean air filtered through air dryer and air filter. ······ If not, dirty air can cause paintingfailure.
・Before using the spray gunfor the first time, clean fluid passageswith thinner to remove rust preventive oil.
If not cleaned, the rustpreventive oil can cause paint failure, such asfish eyes.
・Firmly connect hose or cup to spray gun. ······ If not,disconnection of hoseor dropof cupcan causebodily injury.
Step1. Connect an air hose to airnipple tightly.
Step2. Connect a fluid hose or a container tofluid nipple tightly.
Step3. Flush the spray gun fluid passage with a compatible solvent.
Step4. Pour paint into container, test spray and adjust fluid output as well as patternwidth.
■
Maintenance and inspection
・First releaseair and pressure fullyaccording to item No. 3of “Improper use of equipment” of WARNING on page 2.
・Only an experienced person who is fully knowledgeable of the equipmentshould perform maintenance and inspection.
・
pH valueshall be 6 to 8,otherwise could cause corrosion.
・
Only usegenuine ANEST IWATA parts for anymaintenance or repairs.
Step-by-step procedure
Pourremainingpaint to anothercontainer. Cleanfluid passagesand
Spray asmall amount of thinner into fluid passages to clean them.
Incompletecleaningcan resultin poorspraypatternandcontaminatedpaint.
It is especially important clean thegun fully and promptly after using two-component paint.
Clean each section with brush soakedwith thinnerand wipeout with waste cloth.
Soaking whole spray gun in solvent may cause spray gun
cap assy. itself for extended period may cause adefectivespray pattern.
When cleaning, never scratch the aircap assy., fluid nozzle, or fluid needle assy..
Avoid touching or damaging the tip of the fluid nozzle orneedle.
3. Beforedisassembly,fully cleanfluidpassages.
Removefluidnozzle,usingaringspanner,boxwrenchoroptionalaccessoryspanner(code
93538601)
3. Duringdisassembly,avoid scratchingthe needle seatingsurface.
Either first remove the fluid needle or hold the trigger back while removingthe fluid nozzle,
to protectthe seating surface.
Ifyouneedtoadjustfluidneedlepackingset,fi
rsttightenitbyhand(withfluidneedleinplace).
Then tighten it further about 1/6 turn (60-degree)by spanner.
Whenyouremoveneedlepackingset,donotleavetheplastictipofthepackingin thespray
gunbody.
If you tighten the fluid needle packing set too much, fluid needle will not move smoothly,
resultinginpaintleakagefromtipofthefluidnozzle.Trytoadjustitcarefullywhilepullingthe
trigger and confirming smooth movement of the fluid needle.
If you tighten it toomuch, firstfully loosen it and then retighten again carefully..
5. To assemble the air valve, first assemble the airvalve, air valve spring, and fluid adj. guide
assy. together. Next,insert fluid needleinto fluid adj. guide assy.,then fititto spray gun body
and screw fluid adj. guide assy. in.
5. Ifyoutrytofitairvalvespringandairvalvetothe spraygunbodywithoutthefluidneedle,
the air valve may not be fitted correctly and the packing inside fluid adj. guide assy.can
bedamaged.
6. Before assembling thepattern adj. assy. or air adj. assy. back on to the gun body, fully turn
theadjustmentknobscounterclockwisetoopen.Onceinthegunbodythepatternadj.knob
andair adj. knobcan betightened.
6. If pattern adj. knob or airadj. knobis not fully opened when tightening into gun body, thetip
of it cancontact and damage theseating surface.
1. Each hole passage of aircap assy and fluid nozzle Replace ifit is crushed or deformed.
2. Packingand Oring Replaceif itis deformedor wornout.
3. Leakagefrom seating surfacebetweenfluid nozzleand fluidneedle Replace themif leakage does not stop after fully cleaning the fluid nozzle andneedle.
If you replace the fluid nozzle or fluid needle only, ensure they fully match and confirm that
thereis noleakage.
Fluid(Gravity)
Fluidnipple
(Suction /Pressure)
Air