AD-300 can switch and dim various loads, including Incandescent, Halogen, Low voltage Halogen, dimmable LED, and CFL lamps. Please make sure that proper
connection Mode is selected for specific load used.
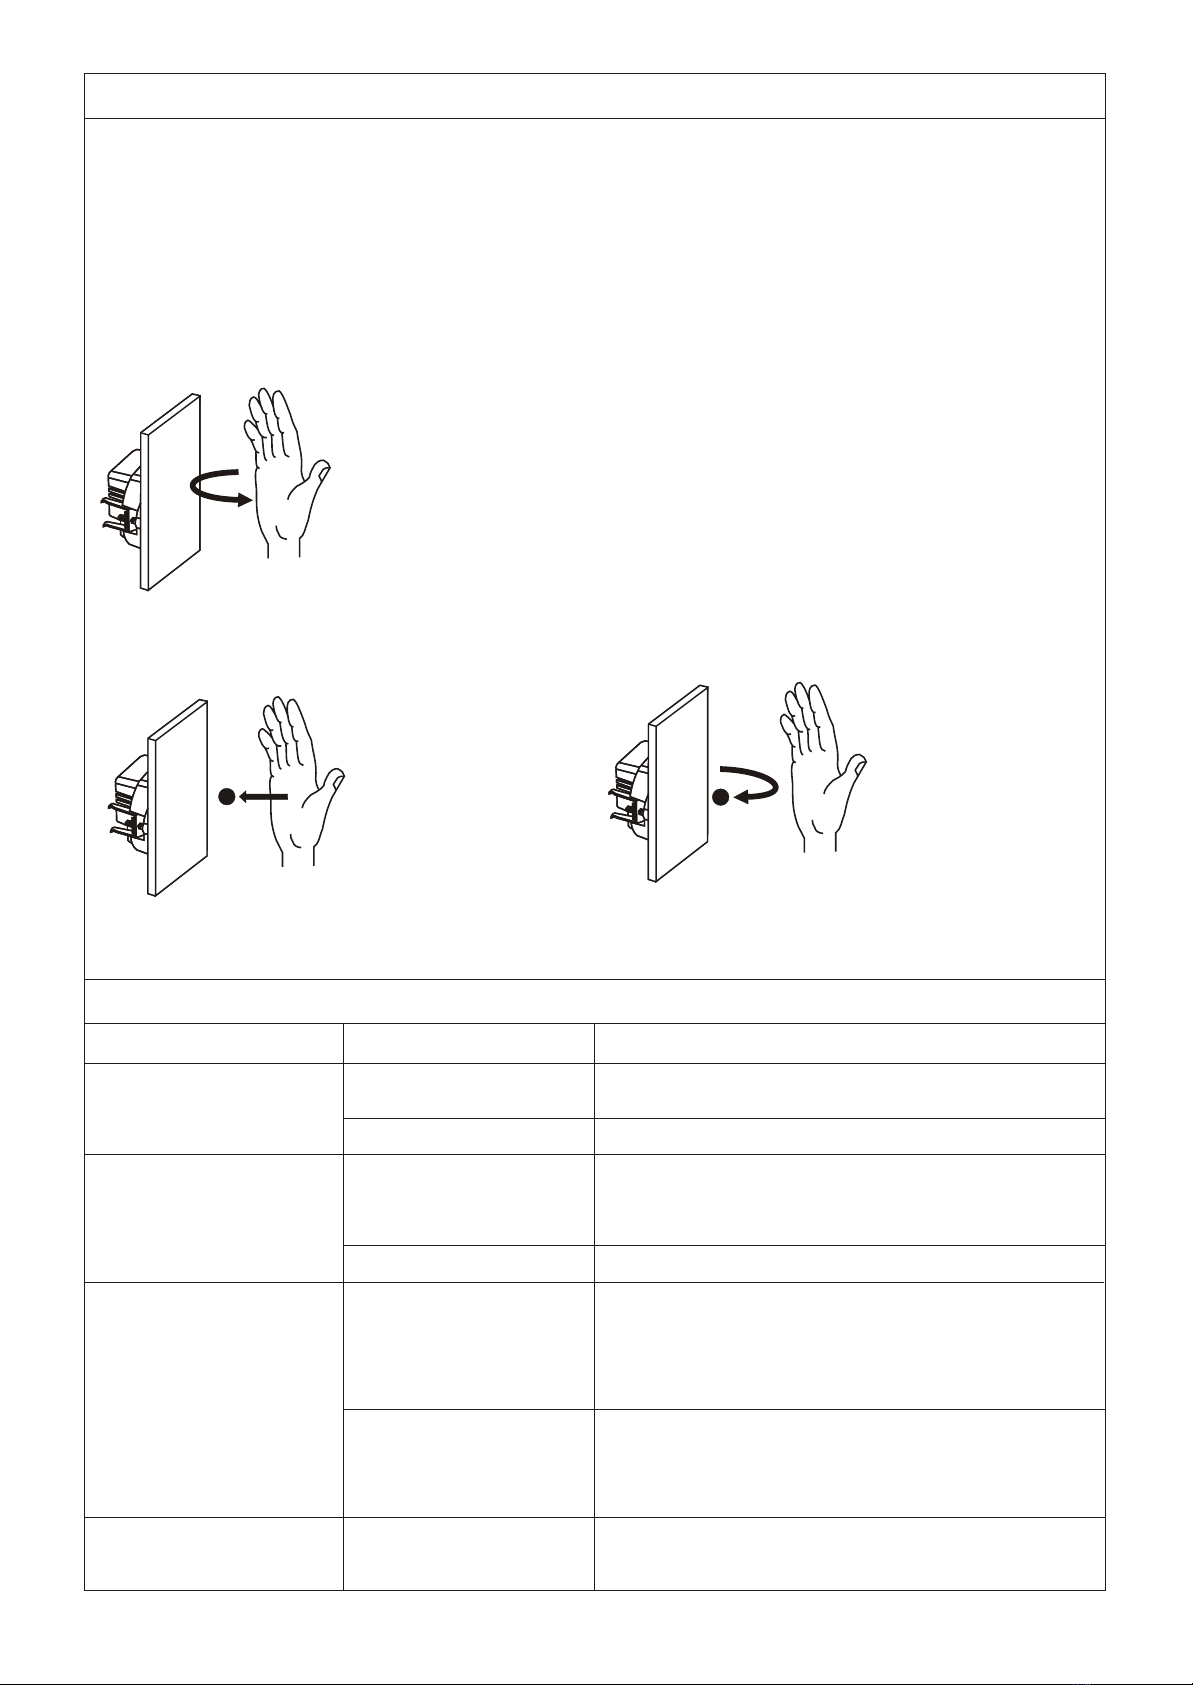
When AD-300 is connected and powered up, the lights can be turned on by moving the hand in front of the switch plate. When the hand enters the dimmer sensing range,
the dimmer will switch the lights on and set the brightness to the last selected level.
To change the brightness level of the lights, move the hand in front of the switch plate (into the dimmer sensing range) and hold it there for more than 1s.After 1s delay, the
output brightness will start to decrease. The light intensity will decrease until it reaches minimum brightness or until the hand leaves the sensing range. When desired
brightness level is reached, remove the hand. If an opposite direction of dimming is needed, move the hand outside of sensor range for a short period of time and enter
It again, staying in the range for longer than 1s. Now the light intensity will slowly increase until it reaches maximum brightness or until the object leaves the sensing range.
To turn the lights off, move the hand in front of the dimmer sensing range for a period shorter than 1s.
Whenever the hand enters the
sensing range in front of the
switchplate for period shorter
than 1s, the light turns on/off
To change the dimming direction,
the hand should leave the range
for a short period of time and enter
It again, staying in the range for
longer than 1s.
SYMPTOM
The light doesn’t turn on
The dimmer doesn’t react to hand
movement
Dimmer operation is inconsistent
(it doesn’t react consistently to the
hand movements)
Light can’t turn fully off
AD-300 TOUCHLESS DIMMER OPERATIONAL MANUAL
Turn the lights on and off:
Changing the light brightness (dimming):
Troubleshooting
Note: A touchless dimmer with an attached switchplate is depicted in the above examples. The dimmer mechanism is visible in the images for clarity but with typical
installation it would be hidden inside the wall box and only the switchplate would be visible on the wall surface.
POSSIBLE CAUSE
Faulty wiring
Faulty light bulb
Dimmer entered the calibration mode
Wrong connection mode
Close proximity of moving objects
Unshielded or poorly shielded
transformers or power supplies near
the dimmer, dimmer wiring, or as a
dimmer load.
Wrong connection mode
SOLUTION
Check if the dimmer is connected according to the connection diagram.
Check if the fuse is turned on after connecting
Check the lightbulb and replace it if necessary.
If the switch plate is exchanged, moved, removed, or re-attached, the dimmer
automatically enters the calibration mode, during which it does not react to any
hand movement. Wait for approx. 1-2 minutes for the dimmer to complete the cycle.
LED and CFL lamps should only be used when the dimmer is connected in Mode 1
The dimmer sensor reacts to any moving object in the sensing range that is large
enough. Check if any object close to the sensor can move into or close to the sensor
range (such as curtains, hanging wires, ropes or wall decoration)
Check if the switch plate is securely fixed. Moving the switch plate even slightly
can cause unreliable dimmer operation.
Poorly shielded transformers, drivers, and power supplies can cause excessive
EMI (electromagnetic interference), that can cause unreliable dimmer operation.
Use only certified and properly shielded power supplies.
Reduce sensing range to decrease sensibility
Light sources that can start to produce light with very low power (such as LED and
CFL lights) can’t be turned fully of in connection Mode 2. Use connection Mode 1
instead.
Whenever the hand enters the
sensing range in front of the
switch plate and is held there for
more than 1s, the light output
slowly decreases until it reaches
minimum brightness or until the
hand leaves the sensing range.


