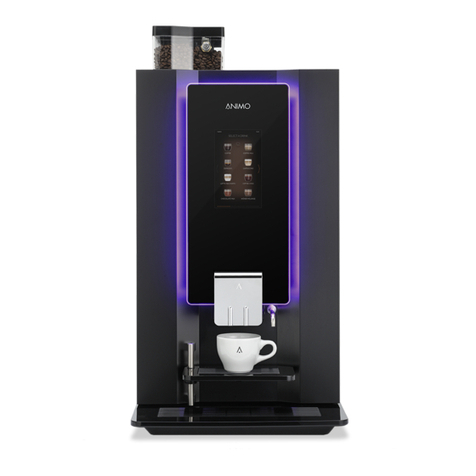
Animo OptiBean TOUCH 2017 Product guide

service book
OptiBean OptiBean XL
Model 2017
TOUCH
Your perfect espresso is just one touch away

2
OptiBean (XL) Touch
2017/09 Rev. 0.3
TABLE OF CONTENTS
FOREWORD ........................................................................................................................... 5
1. INTRODUCTION OPTIBEAN ................................................................................................ 6
1.1 Principles of operation..................................................................................................... 7
1.2 Model code...................................................................................................................... 8
2. FIRST MENU SETTINGS AFTER INSTALLATION................................................................. 9
2.1 User interface during free vend..................................................................................... 13
2.2 User interface when payment system is connected...................................................... 14
2.3 User interface drink selection screens
2.4 How do you program a recipe?..................................................................................... 15
2.5 How do you correct a recipe? ....................................................................................... 16
2.6 How do you measure weight of an ingredient only? ..................................................... 17
2.7 Adjustment rules ........................................................................................................... 18
2.7.1 Espresso group
Standard espresso group
XL espresso group
2.7.2 Coffee waste (puck)......................................................................................... 19
2.7.3 Coffee grinder
Run in period grinding disks
2.8 How to adjust a coffee?................................................................................................. 20
2.9 Adjustment tips.............................................................................................................. 22
2.10 Advanced recipe settings .............................................................................................. 23
2.11 Time line recipe settings
3. PRINCIPLES OF OPERATION............................................................................................. 24
3.1 Water management....................................................................................................... 25
3.1.1 Commissioning ................................................................................................ 26
3.1.2 Shut down
3.1.3 No preparation
3.1.4 Coffee preparation........................................................................................... 27
3.1.5 Chocolate preparation
3.1.6 Coffee with Milk preparation
3.1.7 Hot water preparation
3.1.8 Cold water preparation (optional)
3.2 Components.................................................................................................................. 28
3.3 Cup detection (optional)................................................................................................ 32
3.4 Espresso group............................................................................................................. 33
3.4.1 Operation......................................................................................................... 34
3.4.2 Espresso brewer spec’s................................................................................... 35
3.4.3 Dismantling...................................................................................................... 36
Espresso group
Drive unit
3.4.4 Replace ........................................................................................................... 37
3.5 Grinder ......................................................................................................................... 38
3.5.1 Basic adjustment ............................................................................................. 39
3.5.2 Service life ....................................................................................................... 40
3.5.3 Run in period grinding discs
3.5.4 Replacing grinding disks
3.5.5 Replacement drive belt.................................................................................... 41
3.5.6 Cleaning .......................................................................................................... 42

3
2017/09 Rev. 0.3
EN
OptiBean (XL) Touch
3.6 Instant group ................................................................................................................. 43
3.6.1 Adjustable mixer speed ................................................................................... 44
3.6.2 Ventilation mixer group .................................................................................... 45
3.6.3 Ventilation waste bin
3.7 Boiler system................................................................................................................. 46
Dry boil protection............................................................................................ 47
Temperature regulation
3.7.1 Dispensing valves............................................................................................ 48
3.7.2 Removing / replacing valves............................................................................ 49
4. MENU STRUCTURE ............................................................................................................ 50
4.1 The main menu
4.2 The Operator- and service menu .................................................................................. 52
Free vend [1.00] / Clock [1.01] / Switching times [1.02]
Recipe counters [1.03] / Quick recipe [1.04] / Software [1.06] ....................... 54
PIN code [1.07] / OptiLight [1.08] / Backlight [1.09] / 1.10 Cup sensors........ 55
Visual & sound [1.11] / Change operator pin code [1.12] ................................ 57
4.3 The Service menu......................................................................................................... 58
Quick recipe pro [2.01]
Button settings [2.02]
Recipe settings [2.03] ..................................................................................... 61
Recipe settings (continued) ............................................................................. 62
Recipe settings (continued) ............................................................................. 63
Settings [2.04].................................................................................................. 64
Settings (continued) ........................................................................................ 65
Settings (continued) ....................................................................................... 66
Settings (continued) ....................................................................................... 67
Reset counters [2.05] / Service boiler [2.06] ................................................... 68
Hardware test [2.07] ........................................................................................ 69
Hardware test (continued) .............................................................................. 70
Read log [2.08] / Clear log [2.09] / Load defaults [2.10] / ............................... 71
SD-menu [2.11] ............................................................................................... 72
SD-menu (continued) ...................................................................................... 73
PIN [2.12] / Additional settings [2.13] ............................................................. 74
Installation [2.14] / Descaling) [2.15] / Cleaning management [2.16] .............. 75
5. SETTINGS & SOFTWARE.................................................................................................... 76
5.1 Save settings................................................................................................................. 78
5.2 Load settings................................................................................................................. 79
5.3 Software installation...................................................................................................... 80
6. MAINTENANCE .................................................................................................................... 85
6.1 Daily rinsing program
6.2 Weekly cleaning program.............................................................................................. 86
6.3 Periodic maintenance.................................................................................................... 87
6.3.1 Service boiler
6.3.2 Service brewer................................................................................................. 88
6.4 Service contracts........................................................................................................... 89
6.4.1 Servicing
6.5 Descaling instructions ................................................................................................... 93
6.6 Maintenances espresso group...................................................................................... 96
6.6.1 Replacement kit 25K
6.6.2 Drive unit ......................................................................................................... 97

4
OptiBean (XL) Touch
2017/09 Rev. 0.3
6.7 Check / set pump pressure ........................................................................................... 98
7. TRANSPORT / SHUT DOWN .............................................................................................. 99
8. COMPONENT ACCESSIBILITY ......................................................................................... 100
9. ELECTRONICS OVERVIEW .............................................................................................. 102
9.1 Main control
9.1.1 Main control inputs
9.1.2 Main circuit board outputs....................................................................................... 104
9.1.3 Main circuit board communication ................................................................ 105
9.2 Interface / Display ....................................................................................................... 106
9.2.1 Connections
9.3 Power supply............................................................................................................... 107
9.3.1 Connections
9.4 Grinder circuit board.................................................................................................... 108
9.4.1 Connections
10. FAULT RECTIFICATION ..................................................................................................... 109
10.1 Read log
10.2 Erase log
10.3 Display message during use ........................................................................................110
10.4 Troubleshooting ...........................................................................................................113
11. Special options.....................................................................................................................116
11.1 Installation drain set
11.2 Installation Hot & Cold
11.3 Installation OptiBean with waste to litter bin.................................................................117
12. PAYMENT SYSTEMS ..........................................................................................................118
12.1.1 Standard conguration
12.1.2 Blocking coins
12.1.3 Activate existing token....................................................................................119
12.1.4 Programming a new token
12.1.5 Accepting euros & tokens
12.1.6 Accepting Tokens only (no Euro’s) ................................................................ 120
12.1.7 Coin channel cleaning
12.2 Coin changer (optional)............................................................................................... 121
12.2.1 Tube lling
12.2.2 Tube emptying
12.2.3 Programme a new token ............................................................................... 122
12.2.4 Coin channel cleaning
12.2.5 Fault analysis
DIMENSIONS Last page of this document

5
2017/09 Rev. 0.3
EN
OptiBean (XL) Touch
© 2017 Animo®
All rights reserved.
No part of this document may be reproduced and/or made public in print, microlm, electronic media
or any other form without the manufacturer’s prior consent. This also applies to the corresponding
diagrams and/or charts.
FOREWORD
Purpose of this document
This document is intended as a service appendix in addition to the user manual with which authorised
trained service personnel can install, program and maintain this machine.
- By authorised trained service personnel is meant: persons who can install, program,
maintain and carry our repairs on the machine.
Most of the settings, including the product settings are secured by a PIN code. This PIN code is
intended to prevent the user accessing the service menu.
It is recommended not to leave this document with the user after installation and to change the
standard factory PIN code.
All chapters and sections are numbered. The various gures referred to in the text can be found in the
illustrations at the front of this booklet or with the subjects concerned.
Pictograms and symbols
NOTE
General instructions for: WARNING, CAUTION or NOTE.
CAUTION !
Warning of possible serious damage to the device or bodily harm
WARNING
Warning of electricity and / or current danger
WARNING
Warning of electrostatic discharge (ESD) to electronics.
WARNING
Warning for serious crushing injury

6
OptiBean (XL) Touch
2017/09 Rev. 0.3
1. INTRODUCTION OPTIBEAN TOUCH
Explanation OptiBean Touch type designation:
Designation Meaning Description Cup volume Dispensing
Hight cup
Thermos jug
1e digit Number canisters 1 - 3
- standard brewer 6,5-9,5 gram 50-150ml 60-115mm 167mm
XL XL brewer 9,5-13,4 gram 150-230ml 60-115mm 167mm
Touch Touch screen Touch screen operated model year 2017
H&C Hot&Cold prepared for cabinet with cool unit
OptiBean
Touch
1
2
3
2 H&C
3 H&C
Base cabinet
Hot & Cold
OptiBean
XL
Touch
2 XL
3 XL
2 XL H&C
3 XL H&C
With access
to litter bin

7
2017/09 Rev. 0.3
EN
OptiBean (XL) Touch
1.1 Principles of operation
DV 1 DV 2
Mixer 2
Cacao
Topping
Coee
OptiBean 3 (XL) Touch
DV 4
KW 3
Brewer
Unit1 Unit 2
Hot water
Cold water
DV 1 DV 2
Mixer 2
Coee
OptiBean 2 (XL) Touch
DV 4
KW 3
Brewer
Unit1 Unit 2
Hotwater
Cold water
Topping
DV 1 DV 2
Mixer 2
Coee
OptiBean 1 Touch
DV 4
KW 3
Brewer
Unit1 Unit 2
Hot water
Cold water

8
OptiBean (XL) Touch
2017/09 Rev. 0.3
1.2 Model code
The OptiBean Touch models are standard executed according below canister conguration.
OptiBean (XL) Model code Canister congurations
Std. XL 1 3 4
1
3B 1A -Coffee beans
2
3B 2A 2B 2B Coffee beans Topping
3B 4A 2B 4B Cocoa
3B 5A 2B 5B Tea
3
3B 3A 2B 3B Coffee beans Topping Cocoa
3B 6A 2B 6B Topping Sugar
3B 7A 2B 7B Topping Tea
3B 8A 2B 8B Tea Cocoa
3B 9A 2B 9B Tea Sugar
3B AA 2B AB Topping Coffee inst.
3B BA 2B BB Topping Decaf inst.
Button settings
Download here an overview of the standard-and optional recipes: http://www.animo.eu/en/sd
Enter the web site address in your web browser and your can download the relevant technical
documentation without requiring a login code.

9
2017/09 Rev. 0.3
EN
OptiBean (XL) Touch
2. FIRST MENU SETTINGS AFTER INSTALLATION
The following data must be set in the operator and service menus immediately after the machine’s rst
use. The language factory setting is English.
Switch ON the machine
● Followtheinstructionsonthedisplay
● PressSELECTADRINKfor2secondsfor
easy access the OPERATOR MENU
Don’t want a easy access of the Operator menu?
Go to menu 1.11 Sound & Vision / 1.1.06 Menu key access /
and select Yes. Now this function only works when the door
key is ‘open’ so only the key owner can enter the menu.
0.05 OPERATOR MENU
Select to OPERATOR MENU to
enter the operator menu
Use PIN-code 1 - 1 - 1 - 1 - 1
One step back
Leave the menu
CANCEL
8%
OUT OF ORDER
2.14.00 COMMISIONING
CANCEL OK
BOILER FILLING
PLACE EMTY CONTAINER
PRESS OK
2.14.00 COMMISIONING
TEMPERATURE: 32 ºC
BOILER HEATING
CLEANING
ANIMO 10:10
MAKE YOUR CHOICE
COFFEE 2X COFFEE
ESPRESSO
LATTO MACCHIATO COFFEE CHOC
CAPPUCCINO
WIENER MELANGE
CHOCOLATE MILK
0.01 RINSE
0.02 CLEAN
0.03 STAND-BY
0.04 CLEANING TOUCH SCREEN
0.05 OPERATOR MENU
MAIN MENU
PIN-CODE (19)
0.05 OPERATOR MENU
1 2 3
4 5 6
7 8 9
0

10
OptiBean (XL) Touch
2017/09 Rev. 0.3
Operator menu (Page 52)
● 1.01 Clock Time (set)
Date (set)
● 1.02 Switchingtimes (set)
The machines energy save mode is standard activated, if this
function is not required it can be deactivated. To keep on saving
energy please always program a timer so the machine will switch
on and off automatically
● 1.08 OptiLight
The OptiLight is standard set on ‘Random’, it runs trough the whole
colour spectrum in 10 minutes. If only one colour is required set
random on 0 min. and mix your own colour using red, blue and green.
● 1.07SERVICEMENU
Select to SERVICE MENU to
enter the service menu
Use PIN-code 2 - 2 - 2 - 2 - 2
Service menu (Page 58)
● 2.02 Buttonsettings <Recipename> (set)
Every machine contains pre-programmed basic recipes. Each
button can be changed, if required. Which recipes are factory-set
can be found in recipes settings document which can be downloaded.
See http://www.animo.eu/en/sd
See chapter 2.1 How to program a recipe
● 2.01 QuickrecipePro <Recipe name>
Cup volume (ml) (set)
Coffee (sec.) (set)
Topping (sec.) (set)
Chocolate (sec.) (set)
Test recept
See chapter 2.2 How do you correct a recipe?
2.01 QUICK RECIPE PRO
2.02 RECIPE BUTTON SETTINGS
2.03 RECIPE SETTINGS
2.04 SETTINGS
2.05 RESET COUNTERS
2.06 SERVICE BOILER
2.07 HARDWARE TEST
2.08 READ LOG FILE
2.09 REMOVE LOG FILE
2.10 LOAD DEFAULTS VALUES
2.11 SD/USB MENU
2.12 CHANGE SERVICE PIN
2.13 OTHER SETTINGS
2.14 INSTALLATION
2.15 DESCALING
2.16 CLEANING MANAGEMENT
SERVICE MENU
1.00 FREE VEND
1.01 CLOCK
1.02 SWITCHING TIMES
1.03 RECIPE COUNTERS
1.04 QUICK RECIPE
1.06 HARDWARE / SOFTWARE
1.07 SERVICE MENU
1.08 OPTILIGHT
1.09 BRIGHTNESS DISPLAY
1.10 CUP SENSORS
1.11 SOUND & VISION
1.12 CHANGE OPERATOR PIN
1.13 CHANGE FREE VEND PIN
OPERATOR MENU
PIN-CODE (19)
0.05 OPERATOR MENU
1 2 3
4 5 6
7 8 9
0

11
2017/09 Rev. 0.3
EN
OptiBean (XL) Touch
(continued…)
● 2.04 Settings Language (set)
● 2.06 Serviceboiler Servicemoment
Cups (set)
Months (set)
Cups
The message indicates that the device must be descaled. If a water
lter is tted (recommended), this is also an indication that the lter
must be replaced.
Westronglyrecommendtouseawaterlter.
Calculateyourltercapacitybyusingthecapacity
informationprovidedwiththelter.Settheamount
of cups into the menu so the signal [Service Boiler]
appears on the display.
Months
If desired a point of time can de set when the service boiler needs to
appear. Example: If 12 months is set during installation the boiler
service message will appear on the display 12 months after
installation.
Water hardness table
Water quality Hardness Service moment
after (cups)
°D °F mmol/l mgCaCo3/l
Very hard 18-30 32-55 3,2-5,3 321- 536 5,000
Hard 12-18 22-32 2,2-3,2 214-321 12,500
Average 8-12 15-22 1,4-2,2 268-214 20,000*
Soft 4-8 7-15 0,7-1,4 72-268 40,000
Very soft 0-4 0-7 0- 0,7 0-72 0 = off
2.01 QUICK RECIPE PRO
2.02 RECIPE BUTTON SETTINGS
2.03 RECIPE SETTINGS
2.04 SETTINGS
2.05 RESET COUNTERS
2.06 SERVICE BOILER
2.07 HARDWARE TEST
2.08 READ LOG FILE
2.09 REMOVE LOG FILE
2.10 LOAD DEFAULTS VALUES
2.11 SD/USB MENU
2.12 CHANGE SERVICE PIN
2.13 OTHER SETTINGS
2.14 INSTALLATION
2.15 DESCALING
2.16 CLEANING MANAGEMENT
SERVICE MENU

12
OptiBean (XL) Touch
2017/09 Rev. 0.3
(continued…)
● SelectCLEANINGtorunthecleaningprogram(withoutcleaning
tablet) to reset the cleaning message
CLEANING
ANIMO 10:10
MAKE YOUR CHOICE
COFFEE 2X COFFEE
ESPRESSO
LATTO MACCHIATO COFFEE CHOC
CAPPUCCINO
WIENER MELANGE
CHOCOLATE MILK
Shut down
Please follow chapter 6 Transport / Shut down to empty the boiler
system before transporting or putting the machine in storage.
PIN CODE overview
Owner / key holder PINCODE Can be changed
Operator menu 1 - 1 - 1 - 1 - 1 see menu 1.12
Stand-by
Jug
Free vend pin 1 - 2 - 3 - 4 - 5 see menu 1.13
Trained service engineer
Service menu 2 - 2 - 2 - 2 - 2 see menu 2.12
0.01 RINSE
0.02 CLEAN
0.03 STAND-BY
0.04 CLEANING TOUCH SCREEN
0.05 OPERATOR MENU
MAIN MENU
PIN-CODE (19)
0.05 OPERATOR MENU
1 2 3
4 5 6
7 8 9
0
FREE VEND PIN
FREE VEND PIN

13
2017/09 Rev. 0.3
EN
OptiBean (XL) Touch
2.1 User interface during free vend
The user interface helps de user to select there drink (recipe) and informs them the progress of the
process. Some of the items below are standard not activated. The menu number behind it shows
where it can be activated in the menu.
Swipe or press to move to screen 2 and/or 3, depending on the number of drinks programmed.1.
Screen number and position2.
Cleaning and service attention signals3.
Show logo on cup (operator menu 1.11.02)4.
Show allergy information (operator menu 1.11.05)5.
Back button6.
Process7.
Show repeat recipe (operator menu 1.11.04)8.
Strength settings coffee, cocoa, milk or sugar / Number of cups in jug9.
CLEANING
ANIMO 10:10
MAKE YOUR CHOICE
COFFEE 2X COFFEE
ESPRESSO
LATTO MACCHIATO COFFEE CHOC
CAPPUCCINO
WIENER MELANGE
CHOCOLATE MILK
ANIMO 10:10
REPEAT RECIPE
YOUR CAPPUCCINO
IS READY
CLEANING
REMOVE CUP
ANIMO 10:10
YOUR DRINK IS BEING PREPARED
STOP
CAPPUCCINO
CLEANING
ANIMO 10:10
PLACE CUP
CAPPUCCINO
START
THIS RECIPE CONTAINS LACTOSE
CLEANING
1
5
3
8
2
4
ANIMO 10:10
PLACE CUP
CAPPUCCINO
START
CLEANING
ANIMO 10:10
PLACE CUP
CHOCOLATE MILK
START
CLEANING
ANIMO 10:10
PLACE CUP
COFFEE MILK SUGAR
START
CLEANING
6
7
ANIMO 10:10
PLACE JUG
JUG COFFEE
START
CLEANING
6
9

14
OptiBean (XL) Touch
2017/09 Rev. 0.3
2.2 User interface when payment system is connected
In user interface below shows how the user is informed when its switched in the payment modus.
Some of the items below are standard not activated. The menu number behind it shows where it can
be activated in the menu.
1. This line shows information how a drink must be paid (money, chip, card, etc.).
2. Credit can be displayed it the display. (service menu 2.04.05.00.09)
3. Each drink shows its own price. (service menu 2.02.01.02)
4 Free vend pin (1 - 2 - 3 - 4 - 5) (service menu 2.02.0x.00)
CLEANING
ANIMO 10:10
COFFEE 2X COFFEE
ESPRESSO
LATTO MACCHIATO COFFEE CHOC
CAPPUCCINO
CHOCOLATE MILK
INSERT MONEY
0,50 0,50
0,50 0,50
0,50 0,50
0,50
CREDIT: 0,00
ANIMO 10:10
REPEAT RECIPE
YOUR CAPPUCCINO
IS READY
CLEANING
REMOVE CUP
ANIMO 10:10
YOUR DRINK IS BEING PREPARED
STOP
PRICE 0,50
CAPPUCCINO
CLEANING
ANIMO 10:10
PLACE CUP, PLEASE PAY
CAPPUCCINO
PRICE 0,50 / CREDIT: 0,00
START
THIS RECIPE CONTAINS LACTOSE
CLEANING
1
3
2
FREE VEND PIN
4
2.3 User interface drink selection screens
There are maximum 3 screens to program. Each screen contains maximum 8 drink positions.
If there are (eg.) 12 drink selections programmed, only 2 screens are active.
If there are (eg.) 20 drink selections programmed, 3 screens are active.
ANIMO 10:10
MAKE YOUR CHOICE
1 2
3 4
5 6
7 8
ANIMO 10:10
MAKE YOUR CHOICE
9 10
11 12
13 14
15 16
ANIMO 10:10
MAKE YOUR CHOICE
17 18
19 20
21 22
23 24
Sceen 1 Sceen 2 Sceen 3

15
2017/09 Rev. 0.3
EN
OptiBean (XL) Touch
2.4 How to program a recipe?
Every machine contains pre-programmed basic recipes.
Each key can be changed, if required. In below
example button 1 will be change from coffee into
cappuccino.
1. Navigate to above service menu item.
2. Select Recipe button settings / 1 Coffee / Button
- The black and grey texts shows the recipes which
are available in the machine.
- The black are Active (buttons are visible in the
display).
- The grey text are not active (to activate go to
RECIPE ACTIVE and activate it.
3. Select the required recipe in the pre-programmed
recipe list and press OK.
Which recipes are factory-set can be found in
recipes settings document which can be
downloaded. See http://www.animo.nl/en/sd
In stead of a RECIPE a Free Vend PIN can be
programmed. Use this Free Vend PIN to switch
the touch panel on free vend when a payment
system is active.
>NONE<
COFFEE
2X COFFEE
ESPRESSO
COFFEE MILK
CAPPUCCINO
COFFEE CHOC
CHOCOLATE MILK
HOT WATER
DUBBLE ESPRESSO
LATTE MACCHIATO
WIENER MELANGE
2X ESPRESSO
JUG COFFEE
HOT MILK
COFFEE LATTE
ESPRESSO CHOC
CHOCOLATE
ESPRESSO MACCHIATO
COLD WATER
JUG COLD WATER
AMERICANO
COFFEE XL
2x COFFEE XL
CAPPUCCINO XL
COFFEE MILK XL
RISTRETTO
FREE VEND
2.02.00.00 BUTTON 1
CANCEL OK
2.01 QUICK RECIPE PRO
2.02 RECIPE BUTTON SETTINGS
2.03 RECIPE SETTINGS
2.04 SETTINGS
2.05 RESET COUNTERS
2.06 SERVICE BOILER
2.07 HARDWARE TEST
2.08 READ LOG FILE
2.09 REMOVE LOG FILE
2.10 LOAD DEFAULTS VALUES
2.11 SD/USB MENU
2.12 CHANGE SERVICE PIN
2.13 OTHER SETTINGS
2.14 INSTALLATION
2.15 DESCALING
2.16 CLEANING MANAGEMENT
SERVICE MENU
2.02.00 1 COFFEE
2.02.01 2 2X COFFEE
2.02.02 3 ESPRESSO
2.02.03 4 COFFEE MILK
2.02.04 5 CAPPUCCINO
2.02.05 6 COFFEE CHOC
2.02.06 7 CHOCOLATE MILK
2.02.07 8 HOT WATER
2.02.08 9 DOUBLE ESPRESSO
2.02.09 10 LATE MACCHIATO
2.02.10 11 WIENER MELANGE
2.02.11 12 2X ESPRESSO
2.02.12 JUG COFFEE
2.02.13 JUG HOT WATER
2.02.14 HOT MILK
2.02.15
2.02 RECIPE BUTTON SETTINGS
2.02.00.00 RECIPE SELECTION
2.02.00.01 RECIPE ACTIVE
2.02.00.02 PRICE
2.02.00.03 CUP VOLUME
2.02.00.04 MULTICUP
2.02.00.05 SET RECIPE FUNCTION
2.02.00.06 PUSH & HOLD (WATER ONLY)
2.02.00.07 LEAK OUT TIME
2.02.00.08 PRE-INFUSION
2.02.00.09 ALERGENS INFO
2.02.00.10 POSITION LOGO ON CUP
2.02.00.11 TEST RECIPE
2.02.03 1 COFFEE
FREE VEND PIN
example; OptiBean 3 Touch

16
OptiBean (XL) Touch
2017/09 Rev. 0.3
2.5 How do you correct a recipe?
Easy way to check the dispensed drink- volume and
taste without leaving the menu!
1. Navigate to above service menu item
2. Change one or more settings
3. Place a empty cup under the outlet and press
TEST RECIPE. You drink is made.
When the Cup volume (menu parameter) is
increased, instant products Topping and
Chocolate will be automatically proportional
increased. The coffee however will not
automatically increased!
If the optimum settings are found for the first coffee
button copy the set grinder time for all the coffee drinks;
Coffee Milk, Espresso, Cappuccino, Latte Macchiato,
etc.
1
2
3
20-30 sec.
30-40 sec.
120-150ml
150-230ml
XL
Standard
2.01 QUICK RECIPE PRO
2.02 RECIPE BUTTON SETTINGS
2.03 RECIPE SETTINGS
2.04 SETTINGS
2.05 RESET COUNTERS
2.06 SERVICE BOILER
2.07 HARDWARE TEST
2.08 READ LOG FILE
2.09 REMOVE LOG FILE
2.10 LOAD DEFAULTS VALUES
2.11 SD/USB MENU
2.12 CHANGE SERVICE PIN
2.13 OTHER SETTINGS
2.14 INSTALLATION
2.15 DESCALING
2.16 CLEANING MANAGEMENT
SERVICE MENU
2.01.00 1 COFFEE
2.01.01 2 2X COFFEE
2.01.02 3 ESPRESSO
2.01.03 4 COFFEE MILK
2.01.04 5 CAPPUCCINO
2.01.05 6 COFFEE CHOC
2.01.06 7 CHOCOLATE MILK
2.01.07 8 HOT WATER
2.01.08 9 DOUBLE ESPRESSO
2.01.09 10 LATE MACCHIATO
2.01.10 11 WIENER MELANGE
2.01 QUICK RECIPE PRO
2.01.04.00 CUP VOLUME +/-
2.01.04.01 COFFEE +/-
2.01.04.02 TOPPING +/-
2.01.04.03 TEST RECIPE
2.01.04 4 COFFEE MILK

17
2017/09 Rev. 0.3
EN
OptiBean (XL) Touch
? gram
Topping Choco
Coee
1
2
3
2.6 How do you measure the weight of an
ingredient only?
Only the grinder / ingredient motor will be driven
(no water is dispensed).
It is strongly recommended to check the coffee
measurement using a set of mini scales. These
are simple to order via the Internet.
1. Navigate to above service menu item
2. Hold a empty cup under the outlet.
3. Press TEST INGREDIENT. Only the chosen
ingredient will be dispensed.
4. Measure the weight of the ingredient*
*Coffee
Standard espresso group: min. 6,5 - max. 9,0 g.
XL espresso group: min. 9,5 - max. 12,5 g
2.01 QUICK RECIPE PRO
2.02 RECIPE BUTTON SETTINGS
2.03 RECIPE SETTINGS
2.04 SETTINGS
2.05 RESET COUNTERS
2.06 SERVICE BOILER
2.07 HARDWARE TEST
2.08 READ LOG FILE
2.09 REMOVE LOG FILE
2.10 LOAD DEFAULTS VALUES
2.11 SD/USB MENU
2.12 CHANGE SERVICE PIN
2.13 OTHER SETTINGS
2.14 INSTALLATION
2.15 DESCALING
2.16 CLEANING MANAGEMENT
SERVICE MENU
2.01.00 1 COFFEE
2.01.01 2 2X COFFEE
2.01.02 3 ESPRESSO
2.01.03 4 COFFEE MILK
2.01.04 5 CAPPUCCINO
2.01.05 6 COFFEE CHOC
2.01.06 7 CHOCOLATE MILK
2.01.07 8 HOT WATER
2.01.08 9 DOUBLE ESPRESSO
2.01.09 10 LATE MACCHIATO
2.01.10 11 WIENER MELANGE
2.01 QUICK RECIPE PRO
2.01.04.00 CUP VOLUME +/-
2.01.04.01 COFFEE +/-
2.01.04.02 TOPPING +/-
2.01.04.03 TEST RECIPE
2.01.04 4 COFFEE MILK
CANCEL OK
1.50 S
2.01.04.01 COFFEE BEANS
+
-
CANCEL OK
0.60 S
2.01.04.02 TOPPING
+
-
TEST INGREDIENT
TEST INGREDIENT

18
OptiBean (XL) Touch
2017/09 Rev. 0.3
Ø 37mm
Ø 44mm
Standard
min. 6,5 - max. 9,5* gram
XL
min. 9,5 - max 13,4* gram
min. 50 ml
max. 150 ml
min. 50 ml
max. 230 ml
* max. 9,0 gram
* max. 9,5 gram
* max. 12,5 gram
* max. 13,4 gram
(1,8 oz)
(5,3 oz)
(1,8 oz)
(8,1 oz)
(0,23 oz)
(0,34 oz)
(0,32 oz)
(0,34 oz)
(0,44 oz)
(0,47 oz)
(0,34 oz)
(0,47 oz)
(imp)
2.7 Adjustment rules
2.7.1 Espresso group
The OptiBean can be executed with following espresso
group:
Standard espresso groep
• A good cup of coffee (lungo) can be made With 7.5 -
8 grams (0,26 - 0,28 ounce) of coffee.
• Suitable for a maximum of 9.0 g (0,32 onnce)
ground coffee (1 cup of coffee).
• Not suitable to brew a double cup of coffee in one
brew cycle.
• There is a double-cup recipe (2x Coffee) available in
the software (double brew cycle)
XL espresso group
• Suitable for a maximum of 12,5 gr (0,44 ounce)
ground coffee (1 cup of coffee).
• Suitable to brew a double cup of espresso
(2x 70ml) or double cup coffee (2 x 115ml) in one
single cycle.
• Not suitable to brew a double cup of coffee
> 115ml in one cycle.

19
2017/09 Rev. 0.3
EN
OptiBean (XL) Touch
2.7.2 Coffee Waste (puck)
• It is very important how the compressed puck looks
like when it is thrown out of the brewer.
A too wet puck falling apart is a sign too little coffee
is being dispensed and / or the coffee grind is too
coarse tuned!
• Catch the puck while adjusting the compressed
puck. Tip; use the stainless steel brewer cover.
• A good puck is whole, dry and at least 15-17mm
thick.
• It is normal that a small amount of water leaves the
brewer when it opens.
2.7.3 Coffee grinder
There are two factors that affect the output of the
coffee grinder. The grinder rotation time (2.1 Quick
recipe pro / Coffee beans) and the grinding neness
of the coffee grinder. Try to find a balance between:
• Cup volume (menu setting)
• Amount ground coffee (menu setting)
• Ground coffee coarse or fine (grinder adjustment)
• When the coffee grinder is set coarser, the volume of
the grind increases.
• When the coffee grinder is set finer, the volume of
the grind decreases.
• Only adjust the grinder finer when the grinder is
running! Adjustment from fine to coarse can be done
when the grinder is stationary.
• Only adjust the grind setting in steps of 1/4 turn.
Note: only the 3rd cup of coffee is 100% made
with the changed grind fineness! (do not measure
the first 2 cups).
Run in period grinding discs
Tests have shown that new ceramic grinding discs have
a run in period of 10 kg of coffee beans (about 1350
cups at 7.5 g / XL=1000 cup at 9.5 g.).
We recommend to re-adjust (ner) the grinder
after this period.
15-17mm
1
2
3
1
2
3

20
OptiBean (XL) Touch
2017/09 Rev. 0.3
2.8 How to adjust a coffee?
After installation, the machine must always be adjusted
for the coffee beans to be used. Use this chapter to
help you do this. Once the coffee-making process has
been set, the user must always use the same bean
melange (mixture).
Coffee crème (lungo)
Always start with adjusting a Coffee (usually button
1). First make a couple of coffee without changing the
settings and measure the brewing time of this cup of
coffee.
The coffee brewing process time is from the moment
when the pump starts until the moment the pump
stops.
The brewing time of a coffee is dependent on two
factors:
• grind
• coffee dosage
Adjust the grinder in such away that a good cup of
coffee is made in accordance with the brewing times
shown on the right. Make use of Chapters 2.2 to 2.4
Espresso
Once the coffee Creme has been set, there is not much
more to be set for the Espresso.
Because the same coffee grind is used for an Espresso
based drink, the brew time for an Espresso (50 ml) will
be much shorter than a normal coffee.
If there is still volume left in the brew chamber from the
espresso group (Standard: max. 9,0 g. / XL:
max.12,5 g.)
its possible to increase the grinding time.
By increasing the grinder time for the espresso drink
in small steps, more coffee will be dispensed into the
brewer chamber. This created more resistance and a
longer brewing time.
2.01 Quick recipe pro
│
└──2.01.03Espresso(drink)
│
└───Espresso
Coffeebeans(ingredient)
20-30 sec.
30-40 sec.
120-150ml
150-230ml
XL
Standard
Table of contents
Other Animo Coffee Maker manuals

Animo
Animo TA 202 W User manual

Animo
Animo OptiBean Touch Product guide

Animo
Animo OptiVend Choco User manual

Animo
Animo DE 5 User manual

Animo
Animo A 202 W User manual

Animo
Animo B 200 WF User manual

Animo
Animo M series User manual

Animo
Animo TA 100 User manual

Animo
Animo OptiVend HS DUO NG User manual

Animo
Animo Excelso User manual

Animo
Animo primo compact User manual

Animo
Animo B100 User manual

Animo
Animo M200W User manual

Animo
Animo OptiFresh Bean Product guide

Animo
Animo ComBi Series 2017 Product guide

Animo
Animo OptiFresh Touch Product guide

Animo
Animo OptiFresh 1 User manual

Animo
Animo TV B200 W User manual

Animo
Animo ComBiline CB 1x5W User manual

Animo
Animo CB 20W User manual