anko VC8260-12A User manual

1
Vacuum Cleaner
User Manual
Model no.: VC8260-12A
PLEASE READAND SAVE THESE
INSTRUCTIONS FOR FUTURE REFERENCE

2
IMPORTANT SAFEGUARDS
FOR HOUSEHOLD USE ONLY.
This appliance should only be used for domestic cleaning, and must only be used
indoors, as described in this user guide.
1. Always switch off and remove the charger from the socket before cleaning the
appliance or any maintenance task.
2. This appliance is not intended for used by persons (including children) with
reduced physical, sensory or mental capabilities, or lack of experience and
knowledge, unless they have been given supervision or instruction concerning
use of the appliances by a person responsible for their safety.
3. Children should be supervised to ensure that they do not play with the
appliance.
4. If the power cord is damaged, it must be replaced by a qualified electrician in
order to avoid hazard or the appliance must be disposed of.
5. Keep hands, feet, loose clothing and hair away from rotating brush.
6. Use only the original charger supplied with the appliance.
7. Check that your supply voltage is the same as that stated on the charger.
8. When charging the appliance, the power switch must be off.
9. Never charge the batteries in temperatures above 37°C or below 0°C.
10. It is normal for the charger to become warm to the touch when charging.
11. Use only attachments provided.
12. Static electricity: some carpets can cause a small build up of static electricity. Any
static discharge is not hazardous to health.
13.
Do not suck up liquids!
14. Do not use your appliance out of doors or on any wet surface or for wet pick up.
15. Do no spray with or pick up flammable liquids, cleaning fluids, aerosols or their
vapors.
16. Do no continue to use your appliance or charger if it appears faulty.
17. Do not leave the appliance unattended when in use.
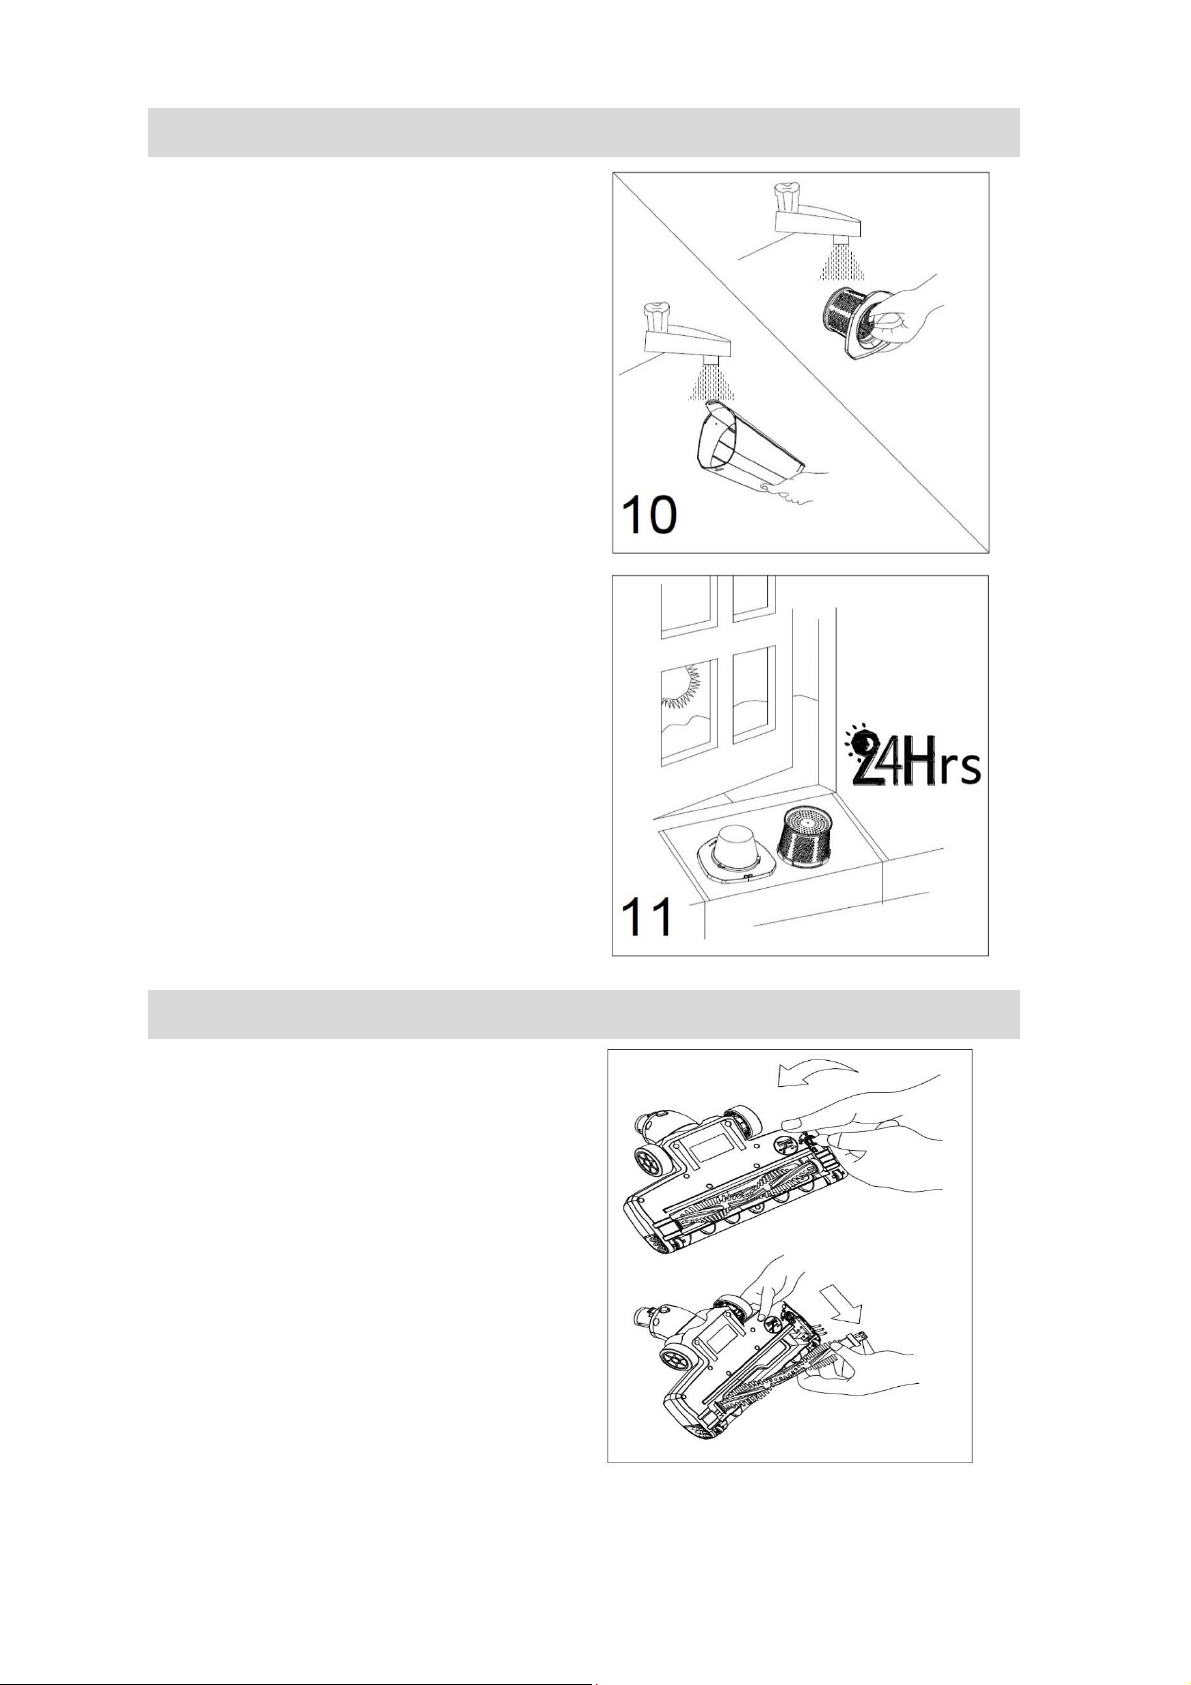
18. Never use the appliance without the filters in place!
19. Check the filters are inserted correctly!
20. Do empty the Dust Bin regularly for optimal operation of the vacuum.
21. Do not replace the batteries with non-rechargeable batteries.
22. The vacuum must use only with provided battery charger:
WJA-Y121750550W.
WARNING: Do not recharge non-rechargeable batteries.
WARNING: Before charging the product, please make sure your hands are dry.

3
WARNING: Please don’t touch the rolling brush with your hands when the machine is
in function.
WARNING: Please use the charger we supplied with the appliance. Other chargers
may cause electrical failure and/or fire.
End of Product Life Battery Disposal
If the cleaner is to be disposed of, the batteries should be removed.
The battery is to be disposed safely.
Used batteries should be taken to a recycling station and not disposed of with
household waste. To remove the batteries, please proceed according to the following
inspections:
IMPORTANT! Always fully discharge the batteries before removal and ensure the
charger is unplugged.
1. Run the vacuum cleaner until it stops to fully discharge the batteries.
2. Remove the ergonomic handle and the screw in the main body to open the cleaner.
3. Remove the motor battery housing and disconnect the cables.
4. Remove the batteries form the housing.
Note: Contact your local council waste disposal service for proper disposal facilities

4
PARTS
Stand unit
Handheld unit
Storage
A
Motorized brush head
I
Charger
O
Wall mount screw
B
Main body
J
Filter
C
Handheld unit release button
K
On/Off switch
D
Handle release button
L
Power/Charging indicator
E
On/Off & speed switch
M
Dust cup release button
F
Handheld vacuum unit
N
Dust cup
G
2 in 1 crevice tool
H
Brush head release button

5
HOW TO ASSEMBLE
Unfold the handle from the main body
until it locks into place. [1]
Align the brush head with the main body
and firmly push into the main body until
the brush head locks into place. [2]
For first use, charge your cleaner for 5hrs
and completely discharge battery. After
first use, the normal charging time is 4hrs.
[3]
The indicator light will blink when
charging and remain steady when fully
charged.

6
HOW TO USE
Turn on the vacuum cleaner by
pressing the On/Off switch [E] on main
body.
· Slow: Press once the On/Off switch.
· Fast: Press twice the On/Off switch.
Remove the handheld unit by pressing
the Handheld unit release button [C].
Lift the handheld unit from the Main
body.
Turn on the handheld unit by pushing
forward the On/Off switch [K]
Note: The 2 in 1 crevice tool can be
used with the handheld unit.

7
MORE ABOUT THE VACUUM
There are three indicator lights on top
of the handheld unit indicating the state
of charger.
When the battery is fully charged, all
three indication lights will light up.
As the vacuum cleaner is used, the
indicator lights will change from three
to two, then two to one.
The indicator will flash for around 20
seconds before the vacuum cleaner
turn off automatically.
THE PRODUCT NEEDS TO BE CHARGED
PERIODICALLY (2 or 3 TIMES A MONTH)
TO ENSURE OPTIMUM BATTTERY LIFE,
EVEN IF YOU HAVE NO INTENTION OF
USING IT FOR A LONG TIME

8
MAINTENANCE
Empty the dust cup
Press the dust cup release button and
pull out the dust cup
Pull out the filter.
Empty the dust cup.

9
Cleaning the filter
Wash the filter and dust cup under
running water.
Leave to dry for 24 hours.
Make sure the filter and dust bin are
dried thoroughly before fitting them
back to the unit.
IMPORTANT! Filters must be
cleaned regularly for best suction
performance and to prevent
over-heating and damaging the
vacuum cleaner
Cleaning the Rolling brush
Using a coin to turn the lock
anti-clockwise and lift the tab to
uncover the rolling brush. Pull out the
rolling brush for cleaning.

10
STORAGE
Assemble the handheld unit with
vacuum stand, fold the handle and
place it against the wall.
Wall Mount
There is a wall mount accessory
supplied with screws and wall
plugs if you prefer to stand the
vacuum cleaner against the wall.
To install the wall mount, position
it on the wall and at a suitable
height where can hold the handle.
Mark the two screw holes through
onto the wall using a suitable drill
(wood drill bit for timber wall, or
masonry drill bit for brick /
concrete walls, drill three holes
Ø6mm and 35 - 40mm deep.
Insert the plastic wall plugs into
each hole and gently hammer in
until they are flush with the wall,
place the hanging mount over the
holes, then insert the screws and
tighten up. Do Not Overtighten.

11
TROUBLE SHOOTING
Problem
Possible causes
Solutions
The vacuum cleaner does not
switch on
1. The power button on unit
has not been depressed.
2. Bad contact to mains power
socket/ charger jack
1. Press again the power
button.
2. Check connection and see
if battery is fully charged
Suction not strong
1. Brush head not correctly
fitted.
2. The dust cup is full
3. The filters are blocked
1. Check brush head had
connected to main unit
2. Empty dust cup
3. Wash the filter
Floor head hard to push
Rolling brush may be jammed
with debris etc.
Ensure the vacuum cleaner is
switched off then remove the
debris from the rolling brush.
Or, the carpet may be too long
aSPECIFICATION
Model number
V8260-12A
Battery
14.8V 2000mAh, Li-ion (x4 cells)
Working time:
Fast setting : 20-30min
Slow setting : 30-40min
Charging time:
4-5hr
Battery charger
WJA-Y121750550W
Input:100-240V 50-60Hz 24W;
Output 17.5V d.c. 550mA

12
12 MONTH WARRANTY
Thank you for your purchase from Kmart.
Kmart Australia Ltd warrants your new product to be free from defects in materials and
workmanship for the period stated above, from the date of purchase, provided that the
product is used in accordance with accompanying recommendations or instructions where
provided. This warranty is in addition to your rights under theAustralian Consumer Law.
Kmart will provide you with your choice of a refund, repair or exchange (where possible)
for this product if it becomes defective within the warranty period. Kmart will bear the
reasonable expense of claiming the warranty. This warranty will no longer apply where
the defect is a result of alteration, accident, misuse, abuse or neglect.
Please retain your receipt as proof of purchase and contact our Customer Service Centre
on 1800 124 125 (Australia) or 0800 945 995 (New Zealand) or alternatively, via Customer
Help at Kmart.com.au for any difficulties with your product. Warranty claims and claims
for expense incurred in returning this product can be addressed to our Customer Service
Centre at 690 Springvale Rd, Mulgrave Vic 3170.
Our goods come with guarantees that cannot be excluded under the Australian Consumer
Law. You are entitled to a replacement or refund for a major failure and compensation
for any other reasonably foreseeable loss or damage. You are also entitled to have the
goods repaired or replaced if the goods fail to be of acceptable quality and the failure does
not amount to a major failure.
For New Zealand customers, this warranty is in addition to statutory rights observed under
New Zealand legislation.
Table of contents
Other anko Vacuum Cleaner manuals