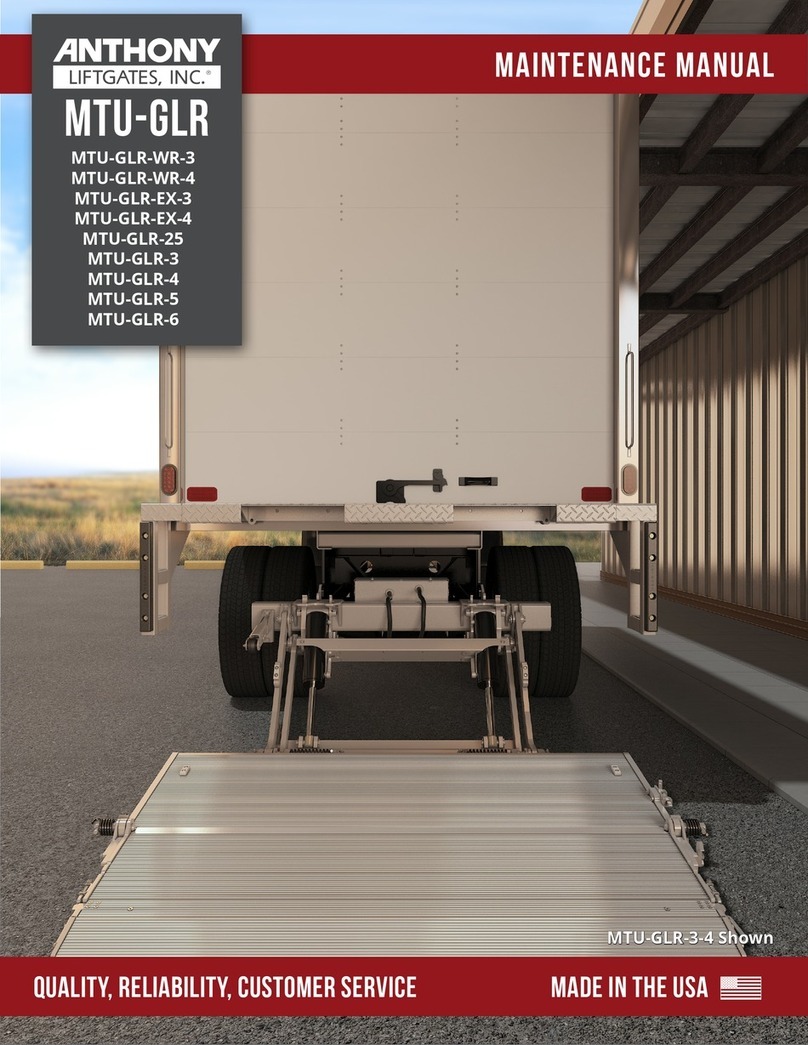
Anthony Liftgates ETU-20-44 User manual

MADE IN THE USA
ETU
Quality, Reliability, Customer Service
MODELS
ETU-20-44
ETU-25-50
For Serial Number 123751 and Greater
INSTALLATION MANUAL


ETU Installation 3 Anthony Liftgates, Inc.
800-482-0003 www.anthonyliftgates.com
Contents
1. General Information.........................4
1.1 Introduction ...........................4
1.2 General Safety.........................4
1.3 State and Federal Regulations ............4
1.3.1 Brakes..........................4
1.3.2 Lighting .........................4
1.3.3 Rear Impact Guards ...............4
1.4 Basic Installation Instructions..............4
1.5 If Installation Help is Required.............5
1.5.1 Installation and Maintenance (Dealer). .5
1.5.2 Customer Service and
Parts(EndUser)..................5
1.6 Registration ...........................5
1.7 Warranty .............................5
1.8 Replacement Parts and Hazard Decals......5
2. Safety....................................5
2.1 Safety is Your Responsibility ..............5
2.2 SafetyIconsNomenclature...............6
2.3 Safety Rules...........................6
2.3.1 Personal Protection................6
2.2.1 Personal Protection/Important
Information ......................6
2.2.2 Prohibited Actions . . . . . . . . . . . . . . . . . 6
2.2.3 Hazard Avoidance.................6
2.3.2 Equipment / Tools / Parts ...........7
2.3.3 Battery / Fuel Tank Safety...........7
2.3.4 Cutting Torch / Welding Safety .......7
2.4 Welding or Grinding Stainless Steel ........8
3. Nomenclature..............................8
4. Installation ...............................10
4.1 Tools Required........................10
4.2 Quick Reference Installation Guide ........10
4.3 Bed Height and Clearance Requirements . . . 10
4.4 Installation ...........................11
4.4.1 Preparation .....................11
4.4.2 Installing the Floor Extension .......12
4.4.3 Positioning the Liftgate ............15
4.4.4 Attaching Liftgate to Truck Frame....15
4.4.5 Adjust the Wheel Arm .............18
4.4.6 Mounting Control Switch and
Routing the Power Cable ..........19
4.4.7 Installing DOT Lighting, Decals, and
Any Components Not Part of Liftgate .21
4.5 Optional Accessories ...................21
4.5.1 Installing Rubber Dock Bumpers.....21
4.5.2 Installing Optional DOT Tubular
Bumper........................21
4.5.3 Cut-OffSwitch...................22
4.5.4 Final Inspection Checklist . . . . . . . . . .23
5. Decals..................................24
6. Lifting Fixture .............................27
7. Welding Steel to Stainless Steel ..............28
7.1 Safety — Welding or Grinding Stainless
Steel................................28
7.2 General Guidelines ....................28
7.2.1 WeldWire......................28
7.2.2 Shielding Gas ...................28
7.2.3 Welding Parameters ..............28

Anthony Liftgates, Inc. 4 ETU Installation
www.anthonyliftgates.com 800-482-0003
1. General Information
1.1 Introduction
Congratulations on selecting an Anthony Liftgates
TuckUnder™ liftgate.
All Anthony tuckunder model liftgates are factory
assembled, energized, and tested to ensure the
highest quality performance standards. ETU liftgates
ship completely assembled for fast, clean, and easy
installation.
To ensure your liftgate will perform to your expectations,
we have provided this Installation Manual, which is
designed to provide you with the necessary installation
instructions and safety precautions for the installation of
the ETU TuckUnder™ liftgates.
TypicalAnthony Liftgates ETU Tuckunder Model.
1.2 General Safety
WARNING Read, Understand, and
Follow the Manual
The success or failure of
this liftgate to properly and efficiently operate will
depend on a thorough and proper installation. Failure
to read, understand, and follow the installation
instructions and safety recommendations in this
manual, before installing the liftgate, can result in
serious injury or death to the operator or bystander.
Also, read and understand the operating instructions
in the separate Operation Manual (also found in the
information packet) before beginning the installation.
1.3 State and Federal Regulations
1.3.1 Brakes
WARNING When installed, the operation or
weight of this liftgate must not
alter or prevent vehicle
compliance to any existing State or Federal standards,
such as FMVSS 105 – Hydraulic And Electric Brake
Systems. Consult the truck frame manufacturer’s
recommendations for compliance.
Also, make sure the weight of the liftgate and its
fully loaded capacity will not overbalance the truck,
possibly raising the front wheels off the ground.
1.3.2 Lighting
WARNING When installed, the transport
position of this liftgate must not
alter or prevent vehicle
compliance to any existing State or Federal standards
such as FMVSS 108 – Lamps, Reflective Devices, and
Associated Equipment. Consult the truck
manufacturer’s recommendations for compliance.
1.3.3 Rear Impact Guards
WARNING When installed, the transport
position of this liftgate must
provide protection against rear
impact and comply with State or Federal standards in
your area.
The installer must make sure that guards are installed,
if necessary, to fulfill these standards. Anthony
Liftgates offers a bolt-on bumper, which will meet
the requirements of this standard. Consult each truck
manufacturer’s recommendations for compliance.
1.4 Basic Installation Instructions
1. This liftgate should only be installed by someone
with sufficient skills to understand the installation
and operation procedures, along with the use of any
equipment or tools used to install the liftgate. This
manual provides standard installation instructions,
which we believe to be the most desirable sequence.
These instructions cannot replace a qualified installer
with clear thinking and basic knowledge.
2. This manual provides easy-to-follow instructions,
along with photos and illustrations, which will help
guide the installation process. Safety precautions
have been clearly identified throughout each section
of this manual and must be followed.
3. A complete explanation of the safety terminology and
recommendations are included in section “2. Safety”
on page 5 of this manual and should be read
thoroughly before proceeding.
4. We urge the installer to call our qualified personnel if
you have installation questions.
5. Most problems occur when positioning the adapter
frame tube and mounting plates. Before completely
welding the mounting plates to the truck frame, call us
if you find the liftgate is not operating correctly.

ETU Installation 5 Anthony Liftgates, Inc.
800-482-0003 www.anthonyliftgates.com
1.5 If Installation Help is Required
1.5.1 Installation and Maintenance (Dealer)
For additional information on installation, refer to the ETU
TuckUnder™ liftgate website www.anthonyliftgates.com.
7R¿QGWKHPRVWFXUUHQWYHUVLRQRIWKHUHIHUHQFHPDWHULDO
choose LIFTGATES, TUCKUNDER™, ETU, and then
DOWNLOADS.
If you have any doubts or questions about installation,
call us. Before doing so, have the serial number, model
number, and lift capacity of your liftgate available.
Anthony Liftgates, Inc.
1037 West Howard Street
Pontiac, Illinois 61764
(815) 842-3383 or 800-482-0003
1.5.2 Customer Service and Parts (End User)
For service or ordering replacement parts, contact an
authorized dealer by going to www.anthonyliftgates.com
and selecting the FIND A DEALER tab. Enter your zip
FRGHWR¿QGWKHQHDUHVWDXWKRUL]HGVHUYLFHORFDWLRQ
1.6 Registration
Refer to the Operation Manual for the serial number
information.
1.7 Warranty
For a detailed copy of the Warranty Statement, refer to
the Operation Manual.
NOTICE Install the liftgate according to these
instructions to prevent voiding the
warranty.
1. Unauthorized modifications may cause improper
operation or other unforeseen problems or dangers.
If any deviation is deemed necessary, obtain written
permission from Anthony Liftgates.
2. Attach all decals and make sure they are legible, or
all warranties are void.
1.8 Replacement Parts and Hazard Decals
To order replacement parts or hazard/informational
decals, contact us through your normal dealer channels.
SAFETY
INSTRUCTIONS
N
I
NG
AR Being unaware of safety
recommendations can
lead to personal injury.
The installer must make sure all decals are attached
to the liftgate and truck and are legible.
2. Safety
2.1 Safety is Your Responsibility
It is the responsibility of the user to understand and
properly use this liftgate. Be aware of the inherent
dangers in the use of this product. Read, understand,
and follow all Warnings, Cautions, Notices, and Safety
Instructions in this manual, on the liftgate, or the truck.
Accidents can often be avoided by being alert and
recognizing potentially hazardous situations. Anyone
operating the liftgate must have the necessary training
required to use the liftgate safely. The safety information
in this manual serves as an essential guide in an attempt
to prevent injury or even death.
Anthony Liftgates cannot anticipate every possible
circumstance that might involve a potential hazard. The
LGHQWL¿FDWLRQRIKD]DUGRXVVLWXDWLRQVLQWKLVPDQXDODQG
on the product itself is, therefore, not all-inclusive. If you
use procedures, work methods, or operating techniques
QRWVSHFL¿FDOO\PHQWLRQHGE\$QWKRQ\/LIWJDWHV\RXPXVW
satisfy yourself that they are safe for you and bystanders.
Make sure the liftgate or truck is not damaged or made
unsafe by any operating method you choose.
DO NOT proceed if any doubt arises about the correct
or safe method of following any instructions found in this
or other related equipment manuals. If in doubt, seek
out expert assistance from your authorized dealer before
continuing.
Safety Signal Words
7KH³6DIHW\$OHUW6\PERO´LGHQWL¿HVSHUVRQDOLQMXU\
hazards and is followed by a signal word such as
WARNING or CAUTION to indicate the severity of
the danger.
This safety alert icon surrounds an image showing
DVSHFL¿FW\SHRILQMXU\WRDYRLG7KHVHLFRQVDUH
shown in “2.2.3 Hazard Avoidance” on page 6.
WARNING Indicates a potentially hazardous
situation which, if not avoided,
COULD result in death or serious
injury.
CAUTION Indicates a potentially hazardous
situation which, if not avoided,
MAY result in minor or moderate
injury.
NOTICE Indicates that equipment or property
damage can result if instructions
are not followed.
SAFETY
INSTRUCTIONS Indicates specific safety-related
instructions or procedures.
Note: Contains additional information important to a
procedure.

Anthony Liftgates, Inc. 6 ETU Installation
www.anthonyliftgates.com 800-482-0003
2.2 Safety Icons Nomenclature
This manual and the equipment have numerous safety
icons. These safety icons alert you to potential personal
injury hazards and draw attention to essential user
instructions.
2.2.1 Personal Protection/
Important Information
Read the manual
Eye protection
Face shield / welding
helmet
Breathing protection
Head protection
Protective shoes
Hand protection
Use two people when lifting
heavy objects
Use proper tools
Set parking brake
Remove key
OEM OEM parts
Properly installed parts
N
I
NG
AR Damaged safety sign
2.2.2 Prohibited Actions
Do not alter or modify
Do not weld
No smoking
No open flame
No alcohol
No drugs
2.2.3 Hazard Avoidance
Safety alert symbol
Slipping injury
Tripping injury
Pinch point hazard
Pinch hazard (foot)
Dangerous fumes
Adequate ventilation
Crush hazard
Crush hazard
Crush hazard (chock
wheels)
Chock wheels /rollover
hazard
Fall hazard (truck)
Fall hazard (platform)
Damaged parts hazard
Fire hazard
Sparks / fire hazard
Battery gas hazard
2.3 Safety Rules
2.3.1 Personal Protection
WARNING Do not work under the
liftgate while it is
suspended from the lifting
device. Failure of the lifting device could cause severe
crushing injuries. Do not remove the lifting device
until the liftgate is securely tack welded onto the truck
frame.
CAUTION
Wheninstallingoroperatingthisunit,wearappropriate
personal protective equipment. This list may include,
but is not limited to:
• A hard hat.
• Protective shoes with slip resistant soles.
• Protective goggles, glasses, or face shield.
• Protective clothing.

ETU Installation 7 Anthony Liftgates, Inc.
800-482-0003 www.anthonyliftgates.com
CAUTION Anthony Liftgates
recommends not
riding the liftgate;
however, if the operation requires it, make sure your
footing is stable before raising or lowering the
platform. Always stand away from the edge. When on
the ground, always stand clear of the liftgate when it
is operating.
Do not attempt to install the liftgate
under the influence of drugs or alcohol.
Consult your doctor before using the
liftgate while taking prescription medications.
To prevent personal injury, clean up any
spilled fluids immediately. To avoid
tripping, do not leave tools or
components laying around in the work area.
Failure to prevent the truck from moving
during the installation of the liftgate
could result in a serious crushing injury.
Always apply the truck’s parking brake
and remove the ignition key before
operating the liftgate. Failure to follow
this recommendation can result in injury.
Do not place hands or feet
into pinch points areas,
between the platform and
the platform extension, or under the edge of the
platform.
To prevent injury to the user, the liftgate and its
related components must be installed by a
qualified installer having knowledge and skill in
using a lifting device, a cutting torch, and welding
equipment.
N
I
NG
AR To prevent possible injuries due to improper
operation, make sure all decals are attached to
the liftgate and/or truck and are legible at all
times.
2.3.2 Equipment / Tools / Parts
CAUTION Do not install this unit if
it is damaged. If you
believe the unit has a
defect, which could cause it to work improperly,
you should immediately stop the installation and
remedy the problem before continuing.
Make sure the liftgate or truck will not be
damaged or made unsafe by the installation or
use of the liftgate.
Never secure the power cable to anything
which allows it to contact sharp edges, other
wiring, the fuel tank, fuel lines, brake lines, air
lines, exhaust system, or any other object that could
cause the power cable to wear or be damaged. A cut
battery cable can cause sparks and/or component
damage resulting in loss of vehicle control, serious
injury, or even death.
CAUTION OEM If replacement parts are
necessary, genuine
factory OEM replacement
parts must be used to restore the liftgate to the
original specifications. Anthony Liftgates will not
accept responsibility for damages as a result of using
unapproved parts. Using non-OEM replacement parts
voids the warranty.
2.3.3 Battery / Fuel Tank Safety
WARNING Keep sparks,
lighted
matches, and
open flames away from the top of the battery because
battery gas can explode. Always follow all the
manufacturers’ safety recommendations when
working around the truck’s battery.
Take precautions to avoid sparks coming into
contact with the truck’s fuel tank, brake lines,
or other flammable components. Sparks can
causean explosion of combustible materials,resulting
in serious injury or death.
2.3.4 Cutting Torch / Welding Safety
WARNING Take precautions to avoid
sparks from contacting
the truck’s fuel tank, brake
lines, or other flammable components. Sparks can
ignite combustible materials, resulting in serious
injury or death.
Always weld or use a cutting
torch in a well-ventilated area
and, if in an enclosed area, vent
the fumes to the outside. Breathing welding smoke
and paint fumes can cause serious injury.
Always follow all State and Federal health and
safety laws and local regulations when using an
arc welder, mig welder, or cutting torch. Also,
follow all manufacturers’ safety guidelines. If other
people are present during the installation of the liftgate,
shield the assembly area from their view.
To avoid eye injury during welding, always
wear a welding helmet with the proper lens to
protect your eyes.
To avoid eye injury while using a cutting torch,
always use eye protection with the proper lens
to protect your eyes.
SAFETY
INSTRUCTIONS Do not modify safety
devices. Do not
weld on the liftgate
assembly,excepttheadapterframetube. Unauthorized
modifications may impair its function and safety.
Make sure all parts are in good working
condition and properly installed. Replace any
damaged parts immediately.
Anthony Liftgates, Inc. 8 ETU Installation
www.anthonyliftgates.com 800-482-0003
2.4 Welding or Grinding Stainless Steel
CAUTION
Follow all OSHA and other workplace safety standards
when welding a steel liftgate to a stainless steel truck
body sill, which creates hexavalent chromium fumes
that can irritate the nose, throat, and lungs.
Repeated or prolonged exposure can damage the
mucous membranes of the nasal passages and
result in ulcers. In severe cases, exposure causes
perforation of the septum (the wall separating the
nasal passages).
Always wear proper breathing protection when
grinding or welding. Use ventilation or vacuum
systems to remove any contaminated air from the
work area.
3. Nomenclature
3.1 Platform Nomenclature
Streetside
Dock Bumper
Corner Cap
Rubber
Dock Bumper
Pad
Gusset Mounting
Plate
Floor Extension
Assembly
Wheel Arm
Gusset
Lift Frame
Flip-over Platform Section
Tubular Bumper
Attachment
(Optional)
Tubular Bumper
Attachment Brackets
Radius Arm
Adapter Frame
Tube
Main Platform Section
Curbside
Dock Bumper
Corner Cap
Rubber
Dock Bumper
Pad
(Optional)
Pump Box
Informational
Packet
Notched Mounting Plates

ETU Installation 9 Anthony Liftgates, Inc.
800-482-0003 www.anthonyliftgates.com
3.2 Gravity-Down Power Unit Nomenclature
Electric Motor
Hydraulic
Cylinder
Motor Start
Solenoid
Flow Control
Valve
Power Up
High-Pressure
Hose
Breather
Tube
Reservoir
Fill Port and
Breather
Cap
Power Cord with
Amp Fuse
Power Up
(Raising Valve)
Cartridge
and Solenoid
Control Switch
Control Box Wiring
(WHITE Wire)
(GREEN Wire)
10 Amp in-Line Fuse
(BLACK Wire)

Anthony Liftgates, Inc. 10 ETU Installation
www.anthonyliftgates.com 800-482-0003
4. Installation
4.1 Tools Required
The following is a list of suggested tools that should be
used to install the liftgate:
• Band Cutters
• Overhead Crane or Forklift
• Mig or Stick Welder
• Heavy-Duty C-Clamps
• Tape Measure
• Level (small, magnetic)
• Cutting Torch (in some applications)
• Heat Gun or Propane Torch for Shrink Tube (cable lug)
• Crimping Tool (cable lug)
4.2 Quick Reference Installation Guide
WARNING Failure to read,
understand, and follow
the detailed instructions
and safety recommendations in this manual, before
installing the liftgate, can result in serious injury or
death to the installer or bystanders.
4.3 Bed Height and Clearance Requirements
NOTICE To prevent damage to the truck
and/or the liftgate, make sure the
model being installed is compatible
with the bed height of the truck.
1. Place the truck on a flat, level surface with the parking
brake set.
SAFETY
INSTRUCTIONS Remove the keys to prevent
unwanted movement.
2. Be aware that as part of the installation preparation,
the liftgate will not operate properly if the truck bed
height is less than dimension (A). This minimum
height can be the result of a fully loaded truck. Do not
proceed if the truck will not meet the minimum height
requirement.
Truck Bed Height
Model
Bed Height (A)
Loaded Unloaded
ETU-20-44 36” min. 44” max.
ETU-25-50 38” min. 56” max.
A
3. Measure the actual height of the unloaded truck,
which must be equal to or less than dimension A
(maximum height). Do not proceed if this dimension
does not fall within the maximum height requirements.
4. Use the following illustration and chart to ensure
there is no interference between the liftgate and truck
frame, in the area of dimensions B and C, which
would prevent proper installation.
B
C
Note: The dimensions in the following chart are only a
guide for required clearances.
Mounting Clearance Requirements
Bed Height
(floor surface)
B
Floor Surface to
Bottom of Truck
Frame (minimum)
C
Distance with No
Obstructions
36” - 41” 15-3/4” 29”
42” - 49” 19” 24-1/4”
50” - 51” 20” 23-3/4”
52” - 53” 21” 23-1/4”
54” - 55” 22” 22-5/8”
56” - 57” 23” 22-1/2”

ETU Installation 11 Anthony Liftgates, Inc.
800-482-0003 www.anthonyliftgates.com
4.4 Installation
4.4.1 Preparation
WARNING Failure to
prevent the
truck from
moving during the installation of the liftgate could
result in serious personal injury or death.
SAFETY
INSTRUCTIONS Use two people to install
the liftgate safely.
NOTICE Check the OEM vehicle manual for
any special requirements before
welding on the truck’s frame. If
required, disconnect the battery cable before welding on
the truck frame.
1. Remove the banding securing the liftgate and loose
parts to the pallet. Remove the two step assemblies,
the center floor extension, the two side gusset angle-
iron parts, and the four side gusset flat plates.
Typical Single Liftgate Shipping Pallet.
2. Before proceeding, make sure the complete liftgate
and its related parts have been received, as listed
in the chart. In some cases, related installation parts
are located on the shipping pallet, or are shipped
separately. Some parts are located inside the pump
box.
Liftgate Installation Package
Description Qty.
Located on Pallet
Floor Extension 1
Reversible Step Assembly 2
Angle-iron Side Gussets 2
Side Gusset Mounting Plates 4
Power Cable with 175 Amp Fuse 1
Located Inside Pump Box
Information Packet (contains decals, manuals, shims,
and other related installation information) 1
Plastic Tie Wraps —
Optional Parts
Cab Cut-off Switch —
Rubber Bumper Pads and Mounting Hardware —
Tubular Bumper to help meet Rear Impact Guards
standard —
3. Carefully unfold the liftgate using two people. To
keep the liftgate somewhat level once it’s unfolded,
a wooden block, approximately 12 inches tall, can be
placed under the platform.

Anthony Liftgates, Inc. 12 ETU Installation
www.anthonyliftgates.com 800-482-0003
Note: A spacing guide is installed over the end of the
cylinder rod. Do not remove this guide until the
liftgate has been tack welded to the truck body.
4. Some truck body variations may require the body long
sill to be extended in order to help support the floor
extension. Always extend the body long sill as close
to the back of the truck as possible, without interfering
with the operation of the liftgate.
Truck Frame
Wood Filler
Truck Body
Body Long Sill
CAUTION Take precautions to avoid
welding sparks or the
flame from a cutting torch
coming into contact with the truck bed’s wooden floor
or other flammable components.
Note: Before extending the truck frame, make sure the
H[WHQVLRQ PHHWV WKH VSHFL¿FDWLRQV RI WKH WUXFN
manufacturer and that altering the frame will not
void the truck warranty.
5. Most truck bodies require the truck frame to be either
extended or cut back to properly install the liftgate.
Simply measure 20 inches from the rear edge of the
truck body frame to the long sill. Make a mark on the
long sill and either add or remove material from the
frame.
20”
Body Long Sill
Wood Filler
Truck Frame
Body Crossmembers
Note: Once the liftgate is installed, make sure it will
operate properly, without interfering with the truck
frame or the body long sill.
4.4.2 Installing the Floor Extension
CAUTION
There is a particular procedure to follow when welding
a steel liftgate floor extension to a stainless steel
truck body sill.
1. If desired, spray the parts of the truck body near the
areas to be welded with anti-splatter spray.

ETU Installation 13 Anthony Liftgates, Inc.
800-482-0003 www.anthonyliftgates.com
2. Find and mark the center of the truck’s rear sill and
the center of the floor extension with a white marker.
3. Install the floor extension.
a. Use a white marker to also mark the finish weld
locations with a repeating 2 inch continuous weld
with a 4 inch gap. Make your marks from both
ends inward toward the middle.
b. Using a lifting device, center the white mark on the
floor extension with the white mark on the truck
body.
c. With the center of the floor extension level with the
floor of the truck, begin tack welding at the center
and work outward. Make sure the extension remains
level and flush with the floor of the truck bed.
Note: 7KHÀRRUH[WHQVLRQKDVDQDWXUDOERZLQLWDQG
must be straightened as it is installed.
CAUTION Tack welds must be strong
enough to hold the weight
of the floor extension (up
to 300 lbs.) until the final welds are completed.
Insufficient welds may not hold the floor extension,
resulting in possible bodily harm.
112
2
3
434
d. Also, make sure the floor extension is level and
parallel to the truck’s rear sill.
4. Tack weld both sides of the support gussets to the
truck body sill.

Anthony Liftgates, Inc. 14 ETU Installation
www.anthonyliftgates.com 800-482-0003
5. Tack weld both the streetside and curbside dock
bumpers onto the floor extension. These parts are
symmetrical and can be placed on either side.
6. Once you have verified the floor extension is straight
and level, finish welding it to the sill of the truck body
with 2 inch long welds, every 4 inches.
Weld the dock bumpers to the floor extension and the
truck body sill using a continuous weld.
7. Weld both sides of the floor extension gussets.
8. If not already installed, weld several installer-supplied
strengthening plates between the cross members and
the truck body sill.
9. Position and weld both bumper gusset plates; one
onto the body and one onto the dock bumper.
10. Position and weld the bumper gusset between
the two gusset plates. The bumper gusset can be
reduced in length depending on the truck body
configuration.

ETU Installation 15 Anthony Liftgates, Inc.
800-482-0003 www.anthonyliftgates.com
4.4.3 Positioning the Liftgate
Use a forklift or overhead lifting device to lift the liftgate.
,IXVLQJDIRUNOLIWWKHXVHRIDOLIWLQJ¿[WXUHVLPSOL¿HV
installation process.
Note: Refer to “6. Lifting Fixture” on page 27 for a
GLPHQVLRQDOGUDZLQJWRIDEULFDWHWKHOLIWLQJ¿[WXUH
WARNING Do not work under the
liftgate while it is
suspended from the lifting
device. The liftgate can weigh up to 1,100 lbs. and
failure of the lifting device could cause serious
crushing injuries.
1. Place the lifting fixture over the liftgate.
2. Place chains or a lifting strap around the lifting fixture
and the platform.
NOTICE To prevent damage to the liftgate,
use wood or other protective
material between the lifting chain/
strap and the platform to avoid surface damage.
3. Adjust the chains/strap until the liftgate is almost
parallel with the ground.
4.4.4 Attaching Liftgate to Truck Frame
1. Raise and position the liftgate against the floor
extension.
WARNING Do not work under the
liftgate while it is
suspended from the lifting
device. The liftgate can weigh up to 1,100 lbs. and
failure of the lifting device could cause serious
crushing injuries. Do not remove the lifting device
until the liftgate is securely tack welded onto the truck
frame.
2. Center the platform from side-to-side with the truck
body.
3. Clamp the liftgate against the floor extension using
two large C-clamps, as shown.
4. Place a lifting device, such as a floor jack, under the
wheel arm tube, as shown.

Anthony Liftgates, Inc. 16 ETU Installation
www.anthonyliftgates.com 800-482-0003
5. Determine the installed height (B) of the adapter frame
tube using the chart and the illustration.
Mounting Requirements
A
Bed Height
(floor surface)
B
Floor Surface to Top of
Adapter Frame Tube
36” - 41” 15-3/4”
42” - 49” 19”
50” - 51” 20”
52” - 53” 21”
54” - 55” 22”
56” - 57” 23”
B
A
Note: In some cases, the top of the adapter frame tube
may be against the truck frame or even extend into
the truck frame. In these cases, it may be neces-
sary to notch the truck frame in order to achieve the
required height of the adapter tube frame.
6. Raise the adapter frame tube to the correct height of
dimension (B), which is based on the height of the
truck bed.
NOTICE Do not bend the wheel arm tube
during the leveling process.
7. Place the mounting plates onto the adapter frame
tube on each side. The mounting plates are symmetri-
cal and can be installed on either side as long as the
notch is facing the back of the truck, as shown.
9” MIN
Note: The mounting plate must extend at least 9 inches
above the bottom of the truck frame. Extend or
shorten the mounting plates, if necessary.
8. Tack weld the mounting plates to the frame in the
locations marked “X” (each tack weld should be a
3/8 inch fillet, 1 inch long).
CAUTION The tack welds
must be strong
enough to hold the
weight of the liftgate, which can be up to 1,100 lbs.
Insufficient welds may not hold the liftgate in place,
resulting in possible bodily harm.
9. Lower and remove the lifting device from under the
wheel arm tube.
10. Connect an external 12 Volt power source, such as
a slave battery, to the power terminal on the motor
start solenoid.
a. Connect the red jumper cable from the 12 Volt
slave battery to the positive (+) terminal of the
motor start solenoid.
b. Connect the black (–) cable to a ground on the
pump box.

ETU Installation 17 Anthony Liftgates, Inc.
800-482-0003 www.anthonyliftgates.com
11. Standing on the curbside of the truck, away from
the platform, actuate the DOWN switch to lower the
platform to the ground.
12. Remove the spacing guide from the lift cylinder.
13. Completely raise the platform. The outboard edge
of the flip-over section should be 1/2 to 3/4 inches
higher than the platform section, as shown when
correctly installed.
1/2" to 3/4"
14. Again, completely raise and lower the platform
several times.
15. The back of the platform should raise flush to the
floor extension.
16. Make sure the front edge of the flip-over platform
section contacts the ground. The rear edge should
also contact the ground. If the front edge does not
touch the ground, refer to the next step.

Anthony Liftgates, Inc. 18 ETU Installation
www.anthonyliftgates.com 800-482-0003
17. If the end of the platform does not contact the
ground, adding a shim to the stop block will raise the
outboard end of the flip-over section.
Removing material from the stop blocks will lower
the outboard end of the flip-over section.
Note: One shim can move the ramp end of the platform
as much as 1/2 inch.
18. If the platform is operating correctly, finish welding
the mounting plates. If the platform does not make
a complete cycle, adjust the mounting plates, as
necessary.
CAUTION Take precautions to avoid
welding sparks coming
into contact with the truck
bed’s wooden floor or other flammable components.
SAFETY
INSTRUCTIONS For safety purposes, finish
welding the liftgate while the
platform is on the ground, not in
a raised position.
NOTICE Cover the cylinder rod to prevent
weld spatter from damaging it.
19. With the platform on the ground, finish welding the
mounting plates to the truck frame and adapter
frame tube. Use a continuous weld around all sides
of the adapter frame tube and on both sides of the
mounting plates.
4.4.5 Adjust the Wheel Arm
The wheel arm positions the angle of the platform as it
is unfolded from the stored position. The wheel arm can
be adjusted, so the platform is positioned with either a
greater or lesser angle.
WARNING Never stand behind the
liftgate when it is opened.
Always stand to the side
and away from the edge of the platform. When
adjusting the position of the wheel arm, consider that
the vehicle may be parked on a upward sloped
surface. Adjust the wheel arm to prevent the platform
from completely unfolding in this type of situation.
1. The wheel arm consists of two parts. The wheel arm
mounting tube is welded onto the adapter frame tube.
The wheel arm slides over the wheel arm mounting
tube. If not already in place, slide the wheel arm onto
the wheel arm mounting tube.

ETU Installation 19 Anthony Liftgates, Inc.
800-482-0003 www.anthonyliftgates.com
2. Hold the platform at approximately a 10-degree angle
(slanting inward toward the truck).
10°
3. Slide the wheel arm tube out until it touches the
platform.
10°
4. Tack weld the wheel arm tube to the wheel arm
mounting tube.
5. Open and close the platform to make sure the wheel
arm is in the desired location and complete the weld.
4.4.6 Mounting Control Switch and Routing the
Power Cable
1. Remove the slave battery’s jumper cables and
disconnect the wires of the control switch from the
power unit.
2. Mount the control switch to the truck’s rear curbside
post, so it can be reached while standing at the
curbside of the truck, away from the liftgate platform.
3. Disconnect the wires of the control switch from the
power unit.
4. Install the protective rubber grommet in the dock
bumper and route the wire through the dock bumper.
5. Reattach the control unit wires to the appropriate
terminals, as shown.
2
3
1
1. Yellow solenoid wire to green control cable wire.
2. Black 10 Amp fuse wire to black control cable
wire.
3. Red motor start solenoid wire to white control
cable wire.

Anthony Liftgates, Inc. 20 ETU Installation
www.anthonyliftgates.com 800-482-0003
6. Connect the long section of the power cable to the
motor start solenoid.
WARNING Never secure the power
cable to anything which
allows it to contact sharp
edges, other wiring, the fuel tank, fuel lines, brake
lines, air lines, exhaust system, or any other object
that could cause the power cable to wear or be
damaged. A cut battery cable can cause sparks,
resulting in the loss of vehicle control, serious injury,
or even death.
7. Route the long length of power cable along the truck
frame to the battery box attaching it with plastic tie
wraps or wire clips.
If the cable is too long, cut it to the desired length.
8. If desired, install an optional cut-off switch.
WARNING AnthonyLiftgatesstrongly
recommends the installa-
tion of an optional cab
cut-off switch “4.5.3 Cut-Off Switch” on page 22.
Allowing power to the liftgate when the truck is unat-
tended can result in serious injury or death.
9. If the power cable requires a new cable lug on the
end, follow these steps.
a. Strip the insulation one inch back from the end of
the cable to expose the copper wire.
ALI-00394
T
Y
P
E
S
G
T
T
Y
P
E
S
G
T
1"
T
Y
P
E
S
G
T
T
Y
P
E
S
G
T
T
Y
P
E
S
G
T
T
Y
P
E
S
G
T
b. Position the cable lug over the exposed wire, as
shown. Crimp the cable lug using a cable crimping
tool (hydraulic or manual).
c. Use heat shrink tubing to insulate the new
connection, leaving only the mounting hole
exposed.
NOTICE DO NOT crimp (smash) the cable
lug with a hammer to secure it to the
cable. Proper wire connection is
crucial to the life and dependability of the liftgate’s
electrical components. A poor connection through the
cable lug can result in low Voltage causing the liftgate to
work improperly.
10. Mount the fuse in a location that accessible should
the fuse require replacement.
11. Route the short, section of the cable into the battery
box and connect the end to the positive (+) post of
the truck battery.
12. Use the control switch to raise and lower the
platform.
Other manuals for ETU-20-44
3
This manual suits for next models
1
Table of contents
Other Anthony Liftgates Lifting System manuals

Anthony Liftgates
Anthony Liftgates MTU-GLR Series User manual

Anthony Liftgates
Anthony Liftgates ALB-1500 Guide

Anthony Liftgates
Anthony Liftgates ETU-20-44 User manual

Anthony Liftgates
Anthony Liftgates ETU-20-44 User manual

Anthony Liftgates
Anthony Liftgates AC-1600 User manual

Anthony Liftgates
Anthony Liftgates ETU-20-44 User manual

Anthony Liftgates
Anthony Liftgates MRT-3500 General instructions

Anthony Liftgates
Anthony Liftgates SM Series User manual

Anthony Liftgates
Anthony Liftgates SM Series User manual