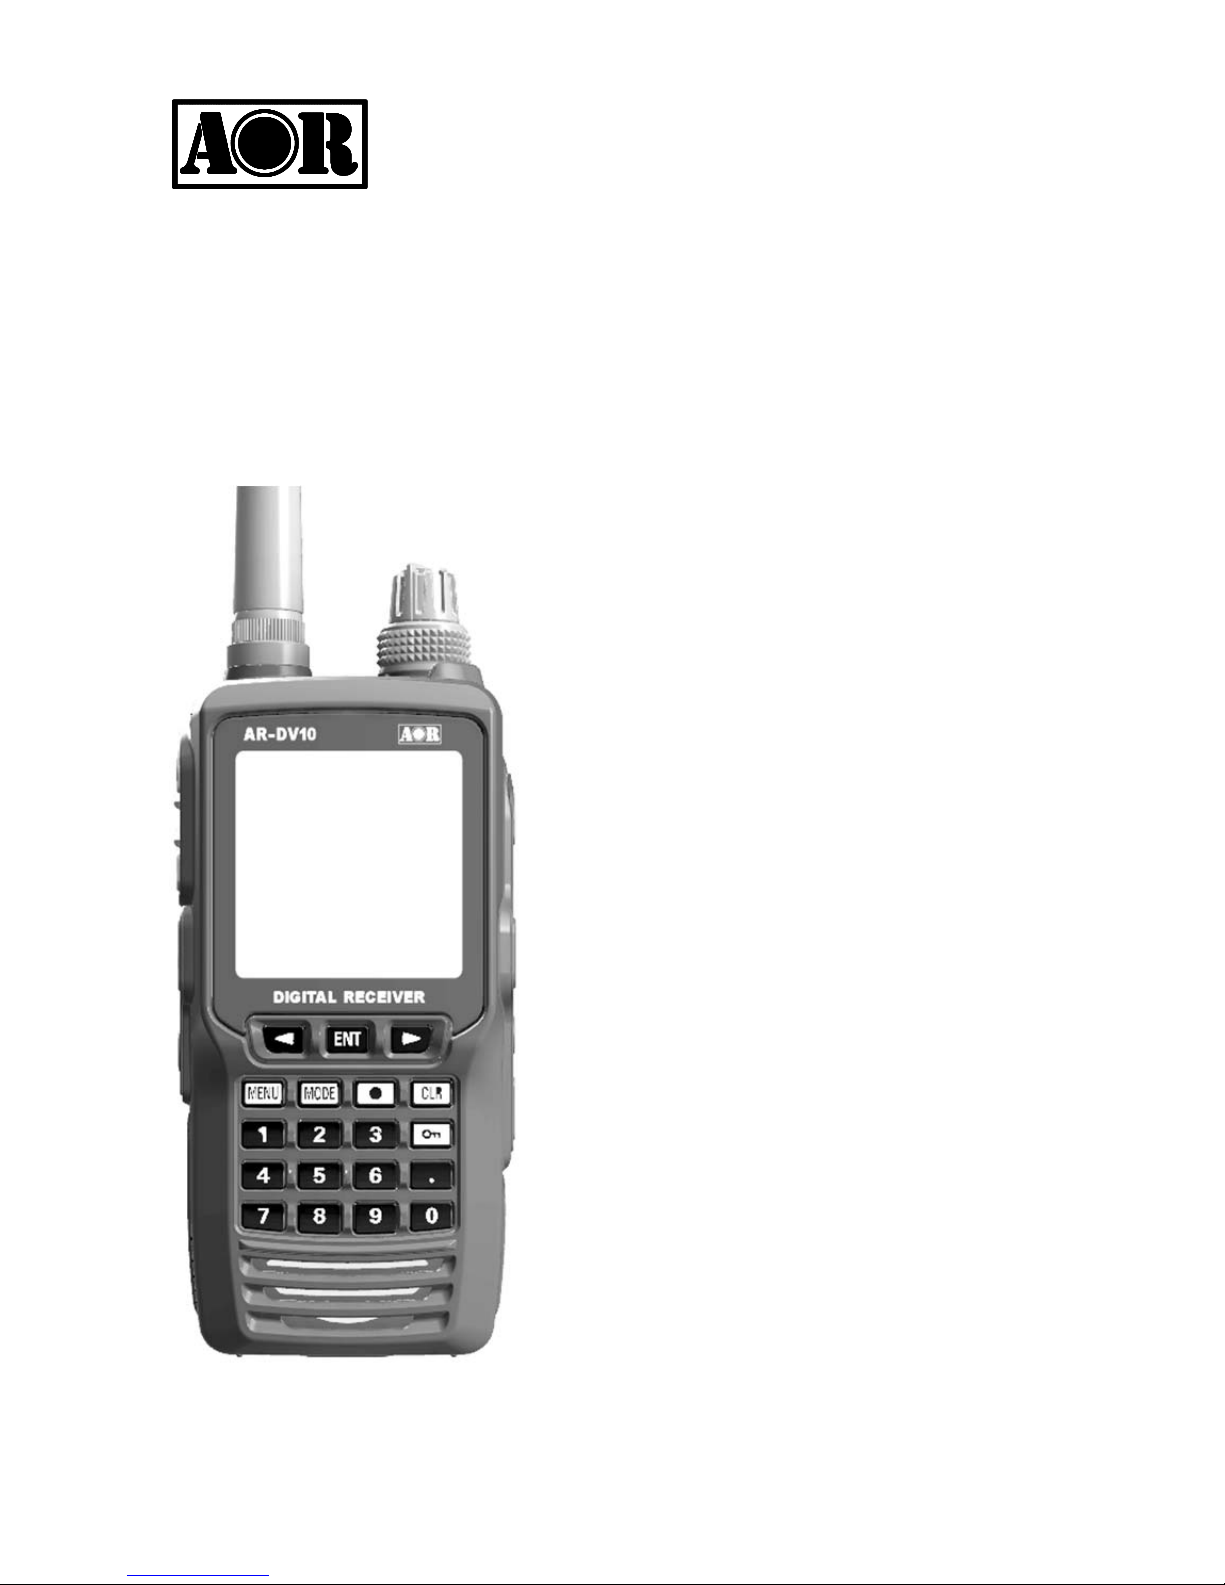
AOR AR-DV10 User manual

®
DIGITAL RECEIVER
AR-DV10
Operating manual
AOR, Ltd.
Authority On Radio Communications
Stay up to date! Operating manual addendum and firmware updates available at
http://www.aorja.com/receivers/ar-dv10.html

.]

INTRODUCTION
Thank you for purchasing the AR-DV10.
AR-DV10 is the world's most advanced multi-mode, SDR hand-held receiver that supports a
variety of digital, as well as analog modes.
Enjoy multi-digital signal monitoring on the go!
Some of its outstanding features are:
1) Wideband reception 100kHz ~ 1300Mhz
2) Multi-mode digital demodulation (automatic detection except for Tetra)
3) All-mode analog reception
4) Fast Memory Scan
5) Fast Program Search
6) Receiving support functions (such as step-adjustment, offset and priority reception)
7) MicroSD card support (recording, memory data input/output, firmware updates)
8) Dedicated radio IC for 520kHz-1710kHz AM and 64MHz-108MHz FM broadcasts.
9) Supplied accessories: Large capacity Lithium-ion battery pack, AC power adapter,
alkaline battery tray, cigarette lighter DC/DC converter, fast charger cradle.
10) IPX5 water resistant (providing the antenna, battery pack, belt clip, and all rubber
covers are firmly attached)
11) 65 (W) x 137 (H) x 41 (D) mm compact design
Please read this operating manual carefully. Its information will allow you to enjoy maximum
performance from your receiver.
We sincerely hope that the AR-DV10 will be your monitoring companion for many years to
come.
AOR, Ltd.

2
TABLE OF CONTENTS
INTRODUCTION............................................................................................................1
TABLE OF CONTENTS..................................................................................................2
SAFETY PRECAUTIONS...............................................................................................5
1. SUPPLIED ITEMS......................................................................................................6
2. CONTROLS & CONNECTORS .................................................................................7
2.1. TOP PANEL.............................................................................................................7
2.2. FRONT PANEL........................................................................................................7
2.3. LEFT SIDE ..............................................................................................................8
2.4. RIGHT SIDE............................................................................................................8
2.5. REAR PANEL..........................................................................................................9
2.6. BOTTOM PANEL.....................................................................................................9
2.7. LCD DISPLAY .......................................................................................................10
3. POWER SUPPLY.....................................................................................................14
3.1. BATTERY PACK INSTALLATION & REMOVAL ....................................................14
3.2. BATTERY PACK CHARGING................................................................................15
3.3. POWERING WITH ALCALINE BATTERIES..........................................................16
3.4. POWERING WITH CIGARETTE LIGHTER DC/DC CONVERTER.......................17
4. ANTENNA ................................................................................................................18
4.1 EARPHONES ANTENNA .......................................................................................18
5. BASIC OPERATION ................................................................................................19
5.1. POWER ON/OFF ..................................................................................................19
5.2. VOLUME ...............................................................................................................19
5.3. VFO MODE RECEPTION .....................................................................................19
5.4. FREQUENCY INPUT ............................................................................................20
5.5. RECEIVE MODE SELECTION..............................................................................21
5.6. IF BANDWIDTH SELECTION ...............................................................................21
5.7. SQUELCH .............................................................................................................22
5.8. TUNING STEP ......................................................................................................23
5.9. STEP-ADJUST......................................................................................................24
6. AUDIO RECORDING ...............................................................................................26
6.1. FILE FORMAT .......................................................................................................26
6.2. RECORDING DURATION .....................................................................................26
6.3. RECORDING START/STOP .................................................................................26
6.4. PLAYBACK............................................................................................................27

3
6.5. SD CARD FORMATTING......................................................................................27
7. MEMORY CHANNEL & SCAN OPERATIONS ........................................................28
7.1. SAVE A FREQUENCY INTO A MEMORY CHANNEL ...........................................28
7.2. SCAN A MEMORY BANK......................................................................................29
7.3. SCAN PASS ..........................................................................................................31
7.4. BROWSE MEMORY BANKS/CHANNELS............................................................31
7.5. EDIT A MEMORY CHANNEL ................................................................................32
7.6. ASSIGN TITLES TO MEMORY BANKS ................................................................33
7.7. CREATE A GROUP OF LINKED MEMORY BANKS .............................................33
7.8. SCAN A GROUP OF LINKED MEMORY BANKS .................................................35
7.9. COPY/ERASE/MOVE CHANNELS, BANKS AND GROUPS ................................35
8. PRIORITY RECEPTION...........................................................................................36
9. PROGRAM SEARCH...............................................................................................37
9.1. CREATE A SEARCH BANK...................................................................................37
9.2. RUN A SEARCH....................................................................................................38
9.3. SEARCH PASS .....................................................................................................39
9.4. CREATE A GROUP OF LINKED SEARCH BANKS ..............................................40
9.5. SEARCH A GROUP OF LINKED SEARCH BANKS..............................................41
9.6. COPY/ERASE/MOVE SEARCH BANKS, GROUPS AND PASS FREQ................41
10. ADVANCED OPERATION......................................................................................43
10.1. SIGNAL ATTENUATOR .......................................................................................43
10.2. AGC.....................................................................................................................43
10.3. INPUT CHARACTERS & SYMBOLS ..................................................................44
10.4. DATA EDITOR (COPY, MOVE, DELETE)............................................................45
10.5. ADVANCED SQUELCH TYPES ..........................................................................46
10.5.1. CTCSS & REVERSE TONE .............................................................................46
10.5.2. DCS..................................................................................................................46
10.6. ANALOG VOICE DESCRAMBLER .....................................................................47
10.7. ADVANCED DIGITAL MODE SETTINGS............................................................48
10.8. OFFSET RECEPTION ........................................................................................49
10.9. REMOTE MODE .................................................................................................50
11. RECEIVER SETTINGS ..........................................................................................51
11.1. CALENDAR & CLOCK ........................................................................................51
11.2. SYSTEM SETTINGS ...........................................................................................51
12. RECEIVER DATA BACKUP & RESTORE.............................................................54
13. FIRMWARE UPDATE ............................................................................................56

4
14. TROUBLESHOOTING ...........................................................................................58
15. SPECIFICATIONS..................................................................................................60

5
SAFETY PRECAUTIONS
Do not use any other power adapter than the one supplied with the receiver. Only the
supplied power adapter is tested and approved for use this receiver. Using third-party
power adapters may cause smoke, fire, or cause the battery to burst.
Do not operate with earphones at high volume levels. If you experience a ringing in your
ears, reduce the volume level or discontinue use.
Do not operate the receiver in a wet environment unless the flexible rubber antenna,
battery pack, belt-clip and all rubber cover s are securely attached to the receiver, and
that the battery pack is dry before attachment. Exposing the inside of the receiver to
water can result in serious damage to the receiver. In case the battery pack has been
exposed to water, immediately dry the contacts completely before attaching it again to
the receiver.
Do not operate the receiver while driving a vehicle, as an accident may occur.
Do not use harsh solvents such as alcohol or benzene to clean the receiver, as it is
likely to damage the receiver’s surfaces. If the receiver became dirty, wipe it clean with
a soft, dry cloth.
Do not leave the receiver in direct sunlight for an extended time, or in areas with
temperatures below –10°C or over +60°C
This receiver meets IPX5 requirements for waterproof protection. However, once the
receiver has been dropped or opened by a non authorized person, waterproof
protection cannot be guaranteed because of possible damage to the receiver’s case or
waterproof seal.
Special precautions regarding the supplied lithium-ion battery pack:
Do not short the terminals of the battery pack. Shorting may occur if the terminals touch
metal objects, therefore proceed with caution when placing the battery pack in pockets
or bags. Shorting may damage the battery pack, and constitute a potential fire hazard.
Do not expose the battery pack’s terminals to any liquid. Do not charge or use a wet
battery pack.
Do not try to open, impact the battery pack or solder the terminals as it may cause liquid
leakage, fire hazard, damage and personal injury.
Never expose the battery pack to temperatures higher than +60°C such as in vehicles
during hot seasons, as it could catch fire and also degrade the pack’s performance.
Do only charge the supplied AOR battery pack with the supplied AOR power adapter.
Only the supplied power adapter is tested and approved for use with the supplied AOR
battery pack. Using third-party battery packs or power adapters may cause smoke, fire,
or cause the battery pack to burst.
Recycling of the lithium-ion battery pack
Lithium-ion batteries have an estimated life time of 300 to 500 charges, after which they
become weak, even fully charged. Contact your local dealer to purchase a new battery
pack and to obtain information on how lithium-ion batteries should be recycled in your
country.
Li-ion 00

6
1. SUPPLIED ITEMS
・AR-DV10 Digital Receiver (including antenna ring) 1
・AA-10 AC power adapter* 1
・BP-10 Lithium-ion battery pack 1
・CC-10 Fast charger cradle 1
・BC-10 Belt clip 1
・RA-10 Antenna 1
・DC-10 Cigarette lighter DC/DC converter 1
・BT-10 Alkaline battery tray 1
・microSD card 1
・Printed user manual 1
(
* The European version is AA-10E
)

7
2. CONTROLS & CONNECTORS
2.1. TOP PANEL
(1) Antenna jack (BNC 50Ω)
Connect the supplied flexible antenna or an
external antenna.
(2) Antenna ring
Covers the gap between the antenna and the
jack. Remains on the jack when the antenna is
removed.
(3) VOLUME (inner) knob
Turn this (inner) control clockwise to increase
the volume and counterclockwise to decrease
the volume.
(4) DIAL selector (outer) knob
Tunes the frequency up or down and selects
menu items.
2.2. FRONT PANEL
(5) LCD (liquid crystal display)
Shows selected operation conditions, as
described in chapter 2.7 “LCD DSPLAY”
(6) Cursor keys and [ENT] key
[◀] and [▶] are used to change the frequency
or select an item displayed on the LCD.
Press the [ENT] key to determine the
selection or entered values. [ENT] can also
switch VFOs. Press and hold to display the
memory channel registration menu.
(7) [MENU] key
Displays the MENU-TOP screen.
(8) [MODE] key
Displays the receive modes menu.
(9) [ ●] REC key
Starts/stops audio recording on SD card.
(10) [CLR] key
Cancels the current operation or goes to
parent menu.
(11) [ ] key lock
Press and hold to enable/disable the lock
feature. When enabled, all controls except
VOL and PWR will be disabled.
(12) Numeric keypad
The keypad is used when setting frequencies, bank & channel numbers, or for an entry
selection in a menu.
(13) Loudspeaker
(1) (2) (3) (4)
(5)
(6)
(7)
(8)
(12)
(13)
(9)
(10)
(11)

8
2.3. LEFT SIDE
(14) POWER switch
Press briefly to switch on. Press and hold for 3
seconds to turn the receiver off.
(15) SQL/MONI (squelch/monitor) switch
Press to select the squelch value to be adjusted with
the DIAL. Press again to validate.
Press and hold to open the squelch manually,
allowing to listen for weak signals. That is the
MONITOR function.
(16) microSD card slot
Lift the rubber cover to install the supplied SD card.
Used for audio recording & playback, backup and
restauration of memory/bank/system/CSV data, as
well as firmware updates.
All rubber covers must be closed and
the battery pack installed for
the receiver to be waterproof (IPX5).
2.4. RIGHT SIDE
(17) EARPHONES jack
(3 pin 3.5mm, mono output)
Lift the rubber cover to connect earphones. A setting
allows the earphones cable to act as an antenna for
FM (64-107.99999MHz, IF bandwidth 100kHz only).
(18) DATA jack
(USB mini- B socket)
Lift the rubber cover to connect a USB cable for
command control. (No AOR software supplied.)
(19) EXT DC jack
To power from an external source, connect either the
supplied AC power adapter or the cigarette lighter
DC/DC converter.
For safety reasons, only use the supplied power
sources.
(14)
(15)
(16)
(17)
(18)
(19)

9
2.5. REAR PANEL
(20) Belt clip screw holes
Mount here the belt clip with the 2 supplied
screws.
When the belt clip is not used, it is important
to fix the screws to the body to prevent water
filling these holes.
(21) Belt clip
(22) Battery pack
Only use the supplied lithium-ion battery
pack.
Be sure that the rubber gasket on the battery
pack is not loose when inserting.
All rubber covers must be closed and
the battery pack installed for
the receiver to be waterproof (IPX5).
2.6. BOTTOM PANEL
(23) Battery pack latch
(24) Locking plate (grey color)
To install the battery pack:
Insert the battery in the battery compartment,
press the end of the battery latch on the bottom of
the receiver, then lock the pack by sliding the
locking plate beside the latch until the entire
“LOCK” appears.
To remove the battery pack:
Turn the receiver off, slide the locking plate until
the “UNLOCK” appears entirely, lift up the end of
the battery by pressing the battery latch, then pull
out the battery from the receiver.
(20)
(21)
(22)
(23)
(24)

10
2.7. LCD DISPLAY
Section Icons
1
Key lock status
All controls except VOL and PWR are disabled.
Press and hold to enable/disable the lock feature.
◉
Remote control status
All controls except VOL and PWR are disabled.
Press the ENT key to stop remote control.
[REC] Currently recording on SD card.
Press the [ ●] key to toggle recording on or off.
Battery status
:Fully charged
〜:Partially full
:Battery almost empty (urgently recharge the battery)
:charging*
:Running on external power*
(
*: Not displayed when charging through the charger cradle
)
07:54:26
Time(HH:MM:SS in 24 hour format )
1 →
2 →
3 →
4 →
5 →
6 →
7 →

11
2
[VFO] Operation mode
[VFO]:VFO
[
MEM]
:Memory channel readout
[SCN]:Scan
[SER]:Search
FM15
Demodulation mode and IF bandwidth in kHz or Hz.
FM100, FM30, FM15, FM6 (kHz)
AM15, AM8, AM5.5, AM3.8 (kHz)
USB2.6, USB1.8, LSB2.6, LSB1.8 (kHz)
CW500, CW200 (Hz)
IF bandwidths for digital modes: FM30, FM15, FM6 (kHz)
[D] Digital demodulation is activated.
DSTR Digital mode which has been set or which has been
automatically detected by the receiver.
DSTR: D-STAR
YAES: YAESU (C4FM)
DMR: DMR (Tier 1 / Tier 2 / MOTOTRBO)
D-CR: Japanese D-CR & NXDN (6.25k)
dPMR: dPMR (446 Tier 1)
ALIN: ALINCO (EJ47U)
P-25: APCO25 (Phase 1)
T-DM: TETRA (Direct mode, mobile to mobile)
[Au]Auto-detection of digital modes is activated. (Except Tetra)
20k
Frequency step in kHz.
Step-adjust value (when activated) is shown in section 5.
3
VFO-A XXXX.XXX XX
VFO-B XXXX.XXX XX
-------------------
00-00 XXXX.XXX XX
BANK.T (bank title)
CH.T (channel title)
00 XXXX.XXX XX
BANK.T (bank title)
Receive frequency (In MHz over 3MHz and in kHz below
3MHz. The VFO of the upper line is the one currently
received.
----------------------
For memory channel readout and scan modes, the bank and
channel numbers are displayed on the upper side. The bank
and channel titles are on the lower side.
For search mode, the bank number is displayed on the upper
side. The bank title is on the lower side.
Memorychannelreadoutmode Searchmode
UPPER SIDE→
LOWER SIDE→

12
4
[B]
BUSY(The squelch is open)
S-Meter signal strength meter (relative signal strength)
Relative signal strength of incoming signal is indicated in
standards S points, from S1 to S9. Calibration above S9 is in
dB up to +60dB.
microSD card
Solid:Card ready
Blinking:Checking, please wait .
5
NSQ:nnn (or LSQ)
Adj: 10k
DUP
Others:
VolATT
CTC
DCS
RTN
VI
AGCF
AGCM
AGCS
RF-G
ATT
EAR
PAS
Noise squelch set at level nnn
Level squelch set at level nnn
Frequency step adjustment value
Offset frequency is active
Volume attenuator is active
CTCSS squelch is active
DCS squelch is active
Reverse tone squelch is active
Analog voice descrambler is active (not available for US
consumer version.)
Automatic gain control “fast” is set
Automatic gain control “mid” is set
Automatic gain control “slow” is set
Manual gain control is set
Signal attenuator is ON
The earphones cable acts as an antenna for FM
(64-107.99999MHz, IF bandwidth 100kHz only)
Frequency pass is on.
6
from CCCCCC /3
to CQCQCQ
rep1 CCCCCC C
rep2 CCCCCC C
Details on incoming signal. Type of information is mode
dependent.
7
[
◀
] [
A< - >B
] [
▶
]
Each of the three black rectangles
can appear as following:
Select with physical [◀], [ENT] and [▶] buttons below the
display.
◀
Move to left or lower the frequency (by 10-fold of set step).
▶Move to right or higher frequency (by 10-fold of set step).
A<->B
Switch between VFO-A and VFO-B.
ENT
Validate an input
▲
Go one line up
▼Go one line down
↩
Return to previous screen
BS
Erase a character at the right edge
C◀
Move to left digit
C▶Move to right digit
SEL
Selection
SET
Settings
SET&
↩
Set and return to previous screen
NEXT
Go to next

13
S<->Z
Toggle between search, scan and VFO.
COPY
Copy date and time information

14
3. POWER SUPPLY
CAUTION REGARDING THE LITHIUM-ION BATTERY PACK.
・ Do not leave the charger connected to the receiver for continuous periods in excess of
24 hours. Long term overcharging can degrade the lithium-ion battery pack and
significantly shorten its useful life.
・ A complete discharge of the battery is likely shorten its lifespan.
・ The receiver standby mode consumes some battery power even when the receiver is
switched off. If you do not use the receiver for over a month, to prevent over- discharge
of the battery, either remove the battery pack from the receiver or charge the battery
every month.
・ If you have to store the battery outside of the receiver for an extended period of time, to
prevent over-discharge you should charge it for about 2 hours once every 6 months.
・ The battery pack can be charged approximately 300 times, however over-charge or
over-discharge might reduce this number.
Do not attempt to open the battery pack as personal injury or damage to the lithium-ion cells
could occur if they become accidentally short-circuited.
3.1. BATTERY PACK INSTALLATION & REMOVAL
INSTALLATION
1. Insert the battery in the battery compartment and press the end of the battery latch on
the bottom of the receiver.
2. Lock the pack by sliding the locking plate beside the latch until the entire “LOCK”
appears.
3. The receiver will power on automatically. To switch it off, simply press the red power
button for 3 seconds.
REMOVAL
1.
Turn the receiver off.
2. Slide the locking plate until the “UNLOCK” appears entirely.
3. Lift up the end of the battery by pressing the battery latch, then pull out the battery from
the receiver.
Battery pack latch
Locking plate (grey color)
Slide down to unlock
Slide up to lock
Rubber gasket must
not be loose.
BP-10

15
3.2. BATTERY PACK CHARGING
It is necessary to charge the lithium-ion battery fully before its first use.
1. Install the battery pack onto the receiver. Ensure that the receiver is switched off.
2. Insert the AC power adapter’s DC plug into the jack located on the back of the fast
charger cradle, then plug the AC power adapter into the AC line outlet.
3. Insert the receiver into the fast charger cradle as pictured.
You may connect the AC power adapter directly to the receiver, however charging is much
slower.
Approximate charging times of a fully discharged battery pack:
・ AC power adapter connected to receiver: 90%charge:8~9 hours
Full charge:11~12 hours
・ AC power adapter connected to fast charger cradle: 6〜7 hours
Note:
While it is possible to switch the receiver on and operate it while charging the battery pack,
the charging time will be significantly longer.
A:
When the AC power adapter is connected directly to the receiver, after approx. 10
seconds the LCD will indicate “CHARGING”. Once the battery is fully charged, this
indication will disappear. If the receiver is switched on while the charger is still connected, a
icon will appear on the top of the LCD. A minute later it will turn to to indicate a
charging status.
Important:
Do not leave the AC power adapter connected directly to the receiver after the charge is
complete, as long term overcharging can degrade the lithium-ion battery pack and
significantly shorten its useful life.
AC power adapter connected either directly to the
receiver or to the fast charger cradle.
A
B
AA-10
CC-10

16
B:
When the AC power adapter is connected to the fast charger cradle and the receiver
inserted into the cradle, the cradle’s LED will first turn red, indicating a charging status. Once
the battery pack is full, it will turn green.
A flashing red LED indicates a charging error. If this occurs, please check following:
・ Inspect the battery pack and charger cradle electrodes for any stain or obstructive object.
・ The battery pack might be over-discharged. A totally empty battery pack cannot be
charged using the cradle. In that case connect the AC power adapter directly to the
receiver to charge the battery pack for about 10 minutes. Then continue the charge as
usual through the charger cradle.
3.3. POWERING WITH ALCALINE BATTERIES
The supplied alkaline battery tray allows operation of the receiver using six “AA” size
alkaline battery cells.
Important:
・ The battery tray must NOT be used with rechargeable cells, as it does not contain the
thermal and over-current protection circuits required when utilizing Ni-Cd and Ni-MH
cells!
When installing the alkaline batteries, insert the (-) end first, then press in the (+) end so
the battery snaps into place. Pay attention to the polarity indicated inside the tray.
Insert (-) ends first.
Alkaline battery tray BT-10

17
3.4. POWERING WITH CIGARETTE LIGHTER DC/DC CONVERTER
Using the supplied cigarette lighter DC/DC converter (DC-10), you can use a vehicle's
cigarette lighter socket (12V or 24V) as the power source.
Important:
・Do not connect any accessory unapproved by AOR to supply DC power; otherwise the
receiver may be damaged.
・The AOR cigarette lighter DC/DC converters from other receivers are not compatible with
the AR-DV10.
Insert this end to your vehicle’s cigarette
lighter socket.
Insert the DC plug firmly into the
receiver’s EXT-DC socket
DC-10

18
4. ANTENNA
The AR-DV10 is supplied with a flexible rubber antenna to be attached to the 50 Ohm BNC
jack located at the top of the receiver.
Note:
・ AR-DV10 does not feature any internal AM ferrite antenna.
・ Due to physical limitations, the supplied flexible rubber antenna is not ideal for reception
of LW, MW or SW. Although it does work to some extend, you should connect a
dedicated external antenna for optimal reception of those bands. However as the
receiver’s RF stage is extremely sensitive, if the signal is too strong, it could potentially
overload the RF stage. It is therefore highly advised to use an external antenna signal
attenuator if you connect an external antenna.
ANTENNA INSTALLATION
1. Make sure that the antenna ring is in place.
2. Align the slots of the supplied rubber antenna to the pins of the antenna jack.
3. Rotate the antenna clockwise ¼ turn to lock the mechanism.
・ To remove the rubber antenna, rotate the antenna anti-clockwise ¼ turn to unlock the
mechanism.
The antenna ring covers the gap between the antenna and the jack. Remains on the jack
when the antenna is removed. The ring does not fulfill any waterproofness function.
4.1. EARPHONES ANTENNA
When this function is activated, the earphones cable acts as an antenna for FM
(64-107.99999MHz, IF bandwidth 100kHz only).
1. Press [MENU]→use the cursor key [▶] to select [OPT]
and press [ENT].
2. Use the cursor key [▶] to select [EAR ANT] and press
[ENT].
3. Select ON or OFF by rotating the DIAL selector knob.
4. Press [ENT] twice.
When set to ON, [EAR] will be displayed on
the main screen.
Rubber antenna
Antenna ring
Antenna jack
RA-10
Other manuals for AR-DV10
1
Table of contents
Other AOR Receiver manuals