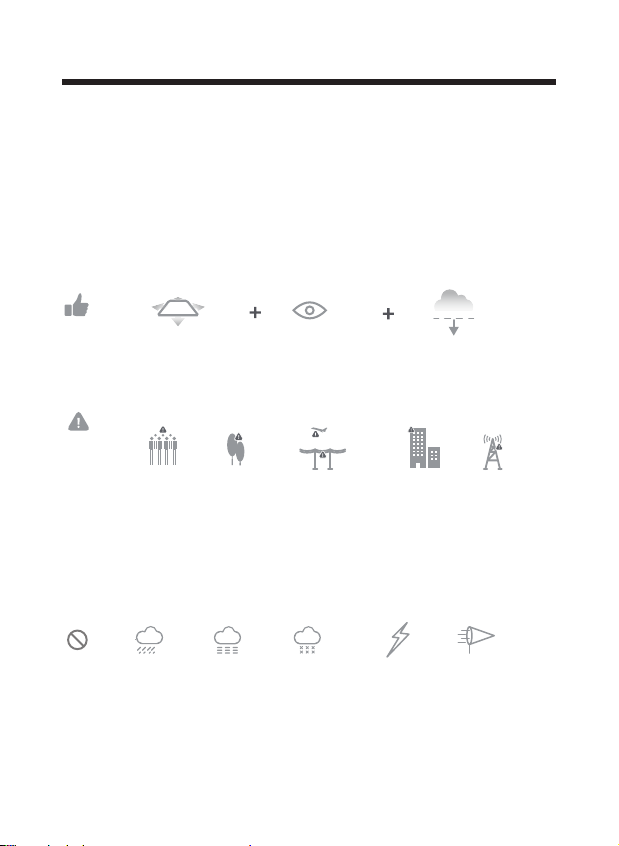
Aovo PRO User manual

PRO
Instructions For Use
(Please keep and read this manual carefully before using this product)
www.aovotoys.com
4

-01-
1. Please read this Disclaimer & Warning and Safety Guidelines carefully
before using our product. This product is not recommended for people
under the age of 14. By using this product, you hereby agree to this
disclaimer and signify that you have read it fully. You agree that you are
responsible for your own conduct and any damage caused while using this
product, and its consequences. You agree to use this product only for
purposes that are proper and in accordance with local regulations, terms
and all applicable polices and guidelines aovo may make available.
2. When using this product, please be sure to strictly abide by the specifica-
tion requirements and safety guidelines stated in this document. Any
personal injury property damage, legal disputes and all other adverse
events caused by the violation of the safety instructions or due to any other
factor, WILL NOT be aovo’s responsibility.
DISCLAIMER & WARNING
SAFETY GUIDELINES
Check Before Using:
① This product is a high precision drone that integrates various electronic
stability and control mechanisms. Please be sure to set up this drone careful-
ly and correctly to ensure safe, accident-free operation.
② Please be sure that the batteries of the drone and controller are clean,
undamaged and, fully charged.
③ Please be sure that all the propellers are undamaged and are installed in
the correct orientation.

-02-
④Please do a thorough check of the product before each use. Inspect the
integrity of the parts, any signs of cracks and wear of the propeller, battery
power and effectiveness of the indicator, etc. If after doing a complete
check any issues are found, please refrain from using the product until the
issue has been resolved.
Flight Environment:
Fly in Open Areas Maintain Line
of Sight
Fly Below
390 feet (120 m)
- - - - - - - - - - - - - - - - - - - - - - - - - - - - - - - - - - - - - - - - - - - - - - - - - - - - - - - - - - -
Avoid flying over or near obstacles, crowds, high voltage power lines, trees,
South Pole and North Pole, base station.
DO NOT fly near strong electromagnetic sources such as power lines and
base stations as it may affect the onboard compass.
- - - - - - - - - - - - - - - - - - - - - - - - - - - - - - - - - - - - - - - - - - - - - - - - - - - - - - - - - - -
Don’t use this drone in adverse weather conditions such as rain, snow, fog,
and wind.

-03-
Operation Requirements:
①Please don’t use this product to follow any moving vehicles.
②During the flight, only turn off the motor in case of an emergency.
③As battery becomes low return the drone back to your starting point.
④This product should not be used while drinking alcohol, if you are feeling
fatigued, taking medicine, or feeling any physical discomfort.
⑤Beware of the noise volume the drone produces. Keep your distance to
avoid ear damage.
Use of Battery:
①Please ensure batteries are fitted in the correct orientation as shown in
the instruction manual.
②Avoid short circuits by fitting the batteries incorrectly, and do not crush
or squeeze the batteries as this could carry the risk of an explosion.
③Do not mix new and old batteries as this can lead to a poor performance
of the product.
④Dispose used batteries carefully. Do not litter.
⑤Please keep dead batteries away from heat and fire.
⑥If the device is not going to be used for an extended period of time,
remove batteries to prevent potential damage from battery leakage.
⑥Stay away from the rotating
propellers and motors.
⑦Don’t fly in the No-Fly Zone.

-04-
⑦It is recommended to only use the USB charging cable that comes with
the drone to charge the battery.
⑧Don't connect the battery directly to wall outlets or car cigarette lighter
sockets.
⑨Don't attempt to disassemble or modify the battery in any way.
⑩Don't use the battery if it gives off an odor, generates heat, becomes
discolored, deformed, or appears abnormal in any way. If the battery is in
use or being charged, remove it from the device or charger immediately
and discontinue use.
Don't pierce the battery casing with a nail or other sharp object, break it
open with a hammer, or step on it!
Always charge the batteries in a fireproof container and away from
combustible materials. Don't charge on surfaces that can catch fire. This
includes: wood, cloth, carpet, or in the application's device.
Don't immerse the battery in water or allow it to get wet.
Don’t solder battery terminal directly.
Keep battery out of reach of children or pets.
Don't short-circuit the battery by connecting wires or other metal object
to the positive(+) and negative(-) terminals.
11
12
13
14
15
16
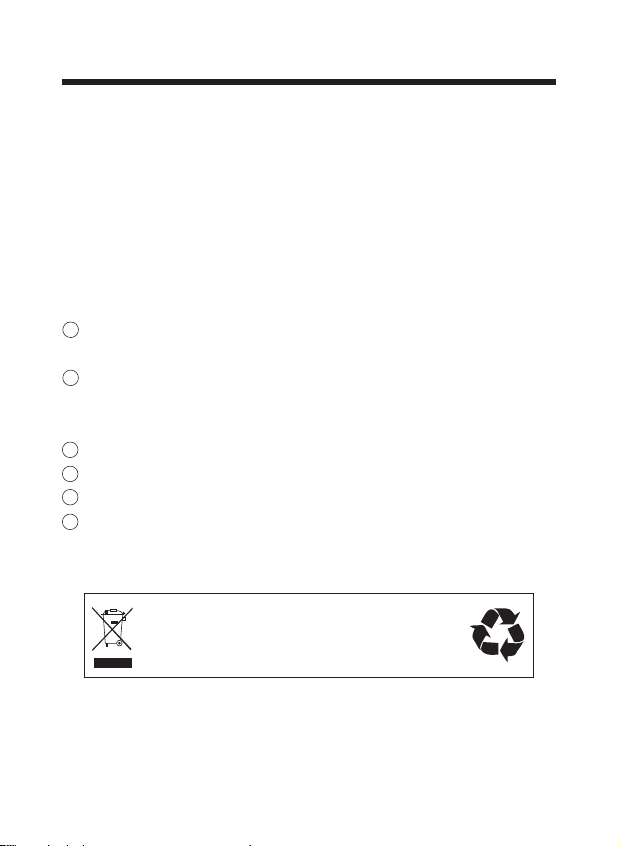
Li-Po Battery Disposal & Recycling
Waste Lithium-polymer batteries must not be placed with household trash.
Please contact local environmental or waste agency or the waste agency
or the supplier of your model or your nearest Li-Po battery recycling center.

-05-
×1 ×1 ×2
×8 ×1 ×1
MAINTENANCE
①Clean the product after each use with a clean, soft cloth.
②Avoid prolonged exposure to direct sunlight and avoid buildup of heat
on the drone.
③ This device is not waterproof and must not be submerged in water
under any circumstance. Failure to maintain the device completely dry will
result in the failure of the unit.
④Check the charging plug and other accessories for signs of damage
frequently. If any part of the device is damaged, refrain from flying until
maintenance can be carried out.
Drone Controller Drone Battery
Propeller USB Charging
Cable Screwdriver
PACKAGE CONTENTS

-06-
DRONE’S DETAILS
TOP
BOTTOM
Lights
Vision Positioning Lens
Battery
Propeller B
Propeller B
Propeller A
Propeller A
HD Camera
Power Switch

-07-
TOP
BACK
FRONT
CONTROLLER DETAILS
Controller Functions
- - - - - - - - - - - - - - - - - - - - - - - - - - - - - - - - - - - - - - - - - - - - - - - - - - - - - - - - - - -
- - - - - - - - - - - - - - - - - - - - - - - - - - - - - - - - - - - - - - - - - - - - - - - - - - - - - - - - - - -
Left Joystick
Unlock
Gyroscope calibration
Return to Home
Right Joystick
Speed
Antenna
Phone Holder
Camera Angle
Adjustment
GPS Mode Switch
Record Video
Take Photos
Charge
+
-
CHA

+
-
+
-
-08-
•Return to Home
Press the button to start the RTH. The controller emits a “beep-beep”
sound every 1.5 seconds as the drone flies back to the recorded Home
Point.
Press the RTH button again to exit RTH procedure and regain control of
the drone.
•Photo/Video
•Speed Switch
Press the button “ ” on the Controller and you will hear a “beep”,
indicating the drone is at low speed.
Press the button “ ” again and you will hear two beeps, indicating
the drone is at high speed.
•GPS Mode Switch
•Unlock/Lock
Press the button and the camera icon “ ” on the Controller, the
camera takes one photo.
Press the same button, the video icon “ ” on the Controller, the
camera will take the video. Press again will exit shooting.
When turning on the controller, the default mode is the GPS Mode. Turn off
GPS by pressing GPS switch.
Low speed is the default setting.
Press the button ” “ then the motor will rotate.
Pull the Left Joystick to the bottom position. The motor will stop rotating and
the drone will be locked.

- - - - - - - - - - - - - - - - - - - - - - - - - - - - - - - - - - - - - - - - - - - - - - - - - - - - - - - - - - -
-10-
INSTALLATION
Installation: Push the battery into the battery compartment of the drone.
Make sure it “clicks” into place indicating the battery is firmly installed.
Attention:
The battery should be installed firmly. Failure to do so may affect the flight
safety of your drone. The drone may crash due to a power-cut during
flight.
Removal: As shown above, press and hold the locks on both sides of the
battery at the same time to remove the battery.
Drone Battery

- - - - - - - - - - - - - - - - - - - - - - - - - - - - - - - - - - - - - - - - - - - - - - - - - - - - - - - - - - -
-11-
1. Connect the USB cable to a USB socket such as a mobile power supply.
2. Connect the controller with the USB cable. Solid green LED's indicate
charging status. Charging is completed when LED's are no longer on.
Note: Use an power supply with standard output voltage 5V and current
greater than or equal to 2A, otherwise there is a risk of overloading the USB
cable and Battery. A full charge takes approximately 45 mintutes.
Install TF Card
Controller Battery
Tips: Please turn off the controller before charging.
5V
As shown in the above figure, please push the camera module out and
insert the TF card (needs to be purchased separately )into TF card slot. A
“click” signifies it is inserted correctly. Push the camera module into the
specified position of drone.
1. Please operate carefully to avoid damaging the camera module.
2. The original pixel-sized pictures and videos will be stored on the TF card.
TF

- - - - - - - - - - - - - - - - - - - - - - - - - - - - - - - - - - - - - - - - - - - - - - - - - - - - - - - - - - -
AB
B A
-12-
Propellers
The drone will not fly unless the correct propeller is installed on the correct
motor shaft. See illustration above. An “A” or “B” is printed on the back of
each propeller. Lock the propeller to the motor shafts with screws rotating
each screw clockwise.
Installation
HEAD
Removal
For propeller removal use screwdriver (provided) to rotate counter-clock-
wise and remove propellers.

-13-
Phone Holder
①Separate the Mobile Device Holder by pulling out from of
controller.
②Adjust the Mobile Device Holder for a tight grasp of your phone.
2 1
1
2

2
1
-14-
CHARGING
①Connect the USB cable to a USB socket such as a mobile power supply
(Use a power supply with standard output of 5V and current equal to but
no greater than 2A). Connect battery with the USB cable. The battery's
LED's begin flashing. When all four LED's become solid, full charging is
completed.
②The charging time of a single battery is 4~6 hours.
· Before charging, please carefully review the “ Use of Battery” section
contained in “ SAFETY GUIDELINES”.
· This product is only equipped with a single battery, you can choose to buy
another battery to experience a longer flight.
· Use an power supply with standard output voltage 5V and current greater
than or equal to 2A, otherwise there is a risk of overloading the USB cable
and Battery.
USB Adapter
(5V/2.0A)

-15-
Download APP
OPERATION GUIDE
Scan the QR code, corresponding to either App Store™ or Google™ Play
Store and download the “ W - GPS ” application for free.
Required Operating Systems: iOS v8.0 and later / Android v4.3 and later
iOS Android APP on Google play
HEAD
To unfold the drone follow the steps below.
Step 1: Unfold the front arms.
Step 2: Unfold the rear arms and place drone on a flat, level surface. Head
should face forward.
Unfolding the Drone
CONTACT US
Please do not hesitate to contact us if you need further support.
Tips: Please use a smartphone that can support receiving 2.4G and 5G WiFi
signals.

-16-
Connect to Wi-Fi
① First, press the Power Switch and quickly release. Then, press again and
hold for approximately 2 seconds. The drone will emit a sound and the
battery LED's will brightly illuminate indicating it is now powered up. Place
drone on a flat, level surface with the head facing forward.
Connect your smart phone to the Wi-Fi network created by the drone.
Check the drone’s status in the ”W - GPS” App.
②Your smartphone will launch a search of the available Wi-Fi networks:
③Select the Wi-Fi network: W PRO-4K-******.
④Wait for several seconds until your smartphone connects to the drone's Wi -Fi
network.
This connection is generally represented by the Wi-Fi logo appearing on
your smartphone’s screen.
⑤Launch the W - GPS application.
> The connection between your smartphone and the drone will be
established automatically.
W PRO-4K-******

-17-
Calibrating the Compass
After successful pairing, the drone LED lights flash rapidly. You can now
begin compass calibration.
Step 1:
Now, the APP interface displays the above diagram. Hold the drone
horizontally and rotate the drone in approximately 3 complete circles.
When completed, the controller emits a “beep” sound and the drone's
LED lights flash slowly.
- - - - - - - - - - - - - - - - - - - - - - - - - - - - - - - - - - - - - - - - - - - - - - - - - - - - - - - - - - -
Front lights
Rear lights
flash rapidly flash slowly
+
-
Pairing
After a Wi-Fi signal has been established between your smartphone and the
drone, turn on the switch on the controller by sliding it to the right. Once the
controller emits a "beep" sound it confirms that the drone and controller are
now successfully paired.

3 S
-18-
HEAD
Gyroscope calibration
Step 2:
Now, the APP interface displays the diagram. Hold the drone vertically and
rotate the drone in 3 complete circles. When completed, the controller
emits a “beep” sound and the drone's LED lights become solid.
Attention:
· When the indicate “Equipment connected (GPS Model)” in the APP
interface, means is the drone received the GPS signal. Now, the rear LED's
of the drone will flash twice per second.
·Every time the drone is powered on the compass calibration should be
performed.
- - - - - - - - - - - - - - - - - - - - - - - - - - - - - - - - - - - - - - - - - - - - - - - - - - - - - - - - - - -
Slide right to confirm
Front lights
Rear lights
Now, the APP interface displays the diagram. Place the drone on a flat
level surface and . The LED lights of the drone will
flash rapidly for about 3 seconds. When completed, the front and rear
lights turn solid. Or press the Gyroscope calibration switch “ ” on
the controller. The LED lights of the drone will flash rapidly for about 3
seconds. When completed, the front and rear lights turn solid.
flash slowly Solid
flash rapidly Solid

+
-
+
-
-19-
Unlocking the Motor
Locking the Motor
Pull the Left Joystick to the lower position. The motor will stop rotating and
the drone will be locked. (Pic.1)
Pic. 1
Please unlock the motor before take-off.
Press the red button “ ” , the motors rotate.
- - - - - - - - - - - - - - - - - - - - - - - - - - - - - - - - - - - - - - - - - - - - - - - - - - - - - - - - - - -
①Unlocking the motor
1) Indoor Mode:
The drone default Mode is GPS, however app shows “Equipment connected
(Indoor Mode)” change Controller to activate Indoor Mode by long pressing
the GPS button on Controller. After completing calibration long press the GPS
button and then the red Unlock button.
2) GPS Mode:
Please unlock the motor while the indicate “Equipment connected (GPS Model)”
in the APP interface.
②If you do not perform any operation approximately 10 seconds after unlocking
the drone, the motors will stop rotating.

①②
90°
-20-
- - - - - - - - - - - - - - - - - - - - - - - - - - - - - - - - - - - - - - - - - - - - - - - - - - - - - - - - - - -
One Key Takeoff/Landing
① After unlocking the drone, press the “ ” button in the APP interface,
then “ ” and the drone will automatically take off
and hover at 1.5m altitude. Or press the button “ ” again for take off
after unlocking the motors.
②When drone is flying, press the “ ” button, the drone will fly back
to the Home Point and automatically land on the ground.
Landing
Take-off
Tips:
Before flying, make sure the GPS Mode is turned on in case the drone gets
lost!
Camera Angle Adjustment
FUNCTION DETAILS
During flight, you can dial the wheel left/right to tilt the camera
up/down. (The gimbal has a 90° tilt range.)
Slide right to confirm
Please do not touch the camera gimbal directly. Doing so may cause damage!
Table of contents
Other Aovo Quadcopter manuals