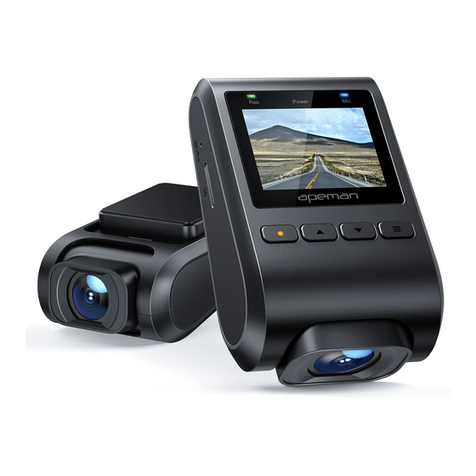
Apeman C420D Operating and maintenance manual

- 0 -
APEMAN C420D Detailed User Guide
Contents
1. How to Install the Dash Cam C420D............................................1
2. Prepare a Compatible Memory Card............................................. 2
A. Get a Right MicroSD Card......................................................... 2
B. How to Format a New MicroSD Card Using Your PC...... 2
C. How to format the MicroSD card on the Dash Cam....... 5
3. Getting to Know the Camera Body................................................5
A. Interfaces........................................................................................ 5
B. Indicator Lights & Buttons........................................................7
C. Icons on the Screen.................................................................... 8
4. Getting to Know the Operations................................................... 10
A. Camera Settings & System Settings.................................. 10
1. About Camera Settings........................................................ 10
2. About System Settings........................................................ 12
B. How to Start Recording........................................................... 14
C. How to change display mode................................................ 15
D. How to turn off the recording sound..................................15
E. How to manually lock the recording video....................... 15
F. How to Stop Recording.............................................................15
G. How to Switch to Photo Mode............................................... 15
H. How to playback the front and rear video....................... 17
Clarification: This document is a detailed operating instruction,
which is different from the physical user manual in the box.
- 1 -
1. How to Install the Dash Cam C420D
Please visit the YouTube Channel and watch this video on how to
install the Dash Cam. It will get you through setting up the C420D and
will cover the basics.
Channel: Youtube
Video Title: Apeman C420D dash camera with rear cam unboxing
for 2019 RAV4
2. Prepare a Compatible Memory Card
A. Get a Right SD Card
We offer a qualified 32GB MicroSD card in the box for your
immediate use. If you want to use a larger MicroSD card. If possible,
we suggest you purchase a 128GB MicroSD card because there are
few questions on it.
Requirements for card specifications:
Type: MicroSD
Capacity: 32GB is recommended; 64/128 GB can be used as long
as the card can be formatted to FAT32 file system on PC
Speed Class: 10 or above

- 2 -
B. How to Format a New MicroSD Card Using Your PC
If you have just purchased a New MicroSD Card to use with the Dash
Cam, we recommend attempting to format it on your computer first
even though in most of the time the new card is completely empty.
Some new MicroSD Cards have files from the manufacturer and they
also need to be formatted.
Follow the instructions below to format the MicroSD card on your
computer.
Windows:
1. Insert the MicroSD card into your computer. You may need a card
reader for this.
2. Open File Explorer and locate the drive letter for your MicroSD
card. Right-click the drive and select Format.
3. Set the File System to FAT32. Select Start to begin.
4. Select OK to begin formatting the card.

- 3 -
MAC:
1. Insert the MicroSD card into your computer. You may need a card
reader for this.
2. Open Disk Utility. To do this, click on the magnifying glass in the
top-right corner of your computer screen. Type “disk utility” in the
search box that opens, then click on the “Disk Utility” application that
comes up.
3. Find the card in the left side of the window.
4. Click the ERASE tab in the middle of the window.

- 4 -
C. How to format the MicroSD card on the Dash Cam
If this MicroSD card is not used for the first time, you can simply
format it on the Dash Cam for your convenience. Although formatting
the MicroSD card on your computer is recommended for better
results.
Follow the instructions below.
1. Insert the MicroSD card into the Dash Cam. Please only insert the
card into the slot before turning on the Dash Cam.
2. Turn on the Dash Cam and make sure it is not recording at the
time.
3. Press the menu button twice to enter the System Settings.
4. Press the DOWN button to scroll down the menu until you see the
"Format" option.
5. Press the POWER/OK button, and press DOWN button and the
POWER/OK button again to select Confirm.

- 5 -
3. Getting to Know the Camera Body
A. Interfaces
There are 5 interfaces:
Hard Reset Hole: If your camera doesn't turn on while charging,
you can insert the pin provided into the pinhole for about three
seconds. This will hard reset the camera. If the camera can be
turned on, you can reset it in the menu.
MicroSD Card Slot: Slide the compatible card into the slot in the
right direction (with the metal contact going into the slot first and
away from you) until it clicks into place. If you feel the MicroSD
card cannot be inserted into the place, please use your fingernail
to push the card in.
Rear Cam: Please make sure to connect the original car charger,
confirm you set the Display Mode as Split-screen or Picture in
picture. Then unplug your rear camera and re-connect it to your
dash cam if the rear camera not showing on the screen.
Mic: Microphone
Micro USB Port: This should be connected to the micro USB
connector of the car charger cable provided in the package. The
other end of the car charger cable is connected to the cigarette
lighter.

- 6 -

- 7 -
B. Indicator Lights & Buttons
There are 1 indicator lights, bottom left of the screen:
POWER: The Power light (red light) is on when the camera is
connected to a power source.
There are 4 buttons, from top to bottom:
UP
MENU: also for Mode Switch or Manual Lock
DOWN
POWER: also the OK button

- 8 -
C. Icons on the Screen
Please note that the enabled functions shown on the screen
below are just to show you the icon of each function. The
settings of the dash cam below are not our recommended
settings. We have set the recommended settings for this
product as default.

- 9 -
In a counterclockwise direction, these icons are:
1Recording Mode
2Loop Recording (the blue figure is 3 means the recording time
period is 3 minutes)
3Motion Detection (this is shown when the function is turned
on)
4Exposure
5G-sensor(recommend set it as low)
6Audio (red slash means the audio is turned off if there are
cross symbols)
7Date & Time
8MicroSD Card (this is shown when the card is inserted and
read)
9Video Resolution
10 Time of Recording
11 Parking Guard (this is shown when the function is turned on)
12 Locked Video (this is shown if the video is locked)
13 License Plate
14 Headlight Warning

- 10 -
4. Getting to Know the Operations
A. Camera Settings & System Settings
The menu of this product consists of two menus:
Camera Settings (a.k.a. Function Settings)
System Settings
1. About Camera Settings
Turn on the Dash Cam, press the MENU Button ONCE to enter the
Camera Settings.
Below is how the Camera Settings Menu looks like. You are able to
change the settings for the following functions by entering the camera
menu:

- 11 -
Resolution: 1080P / 720P / VGA
Loop Recording: OFF / 1 Minute / 3 Minutes / 5 Minutes
Display Mode: Picture in picture / Front camera / Rear camera /
Split-screen
WDR: OFF / ON
Exposure: 0 / +1 / +2 / +3
Motion Detection: OFF / ON
Audio: OFF / ON
Timestamp: OFF / ON

- 12 -
Gravity Sensor (a.k.a. G-sensor): OFF / Low / Medium / High
Parking Guard: OFF / ON
Headlight Warning: OFF / ON
2. About System Settings
The System Settings is the menu to the right of the Camera Settings.
As shown below.
Date/Time: (Press OK/POWER Button to save changes)
Auto Power Off: OFF / 1 Minute / 3 Minutes
Beep Sound: OFF / ON

- 13 -
Startup Sound: OFF / ON
Language: 简体中文 /繁体中文 / Deutsch / English / Français /
Italiano / Espanol / 日本语
Frequency: 50Hz / 60Hz
Screensaver: OFF / 1 Minute / 3 Minutes
Note: If the Screensaver is set to 1 or 3 Minutes, the screen will go
black if there is no manual operation for 1 or 3 minutes. As long as the
REC Light is flashing, the camera is still recording.
License Plate
This is where you input your license plate number.
Format
This is where you can format your MicroSD card on the Dash Cam.
Default Settings
This set of settings is our recommended setting. We strongly
recommend that you use the default settings.
The default/recommended settings are:
Loop Recording: 3 Minutes
Gravity Sensor: Low
Parking Guard: OFF
Motion Detection: OFF
The Parking Guard and Motion Detection functions should be turned
off while driving, because they are used for parking monitoring.
Version
When you have firmware/software upgrade related queries, it would
be helpful to provide us with this version number.

- 14 -
B. How to Start Recording
If the Dash Cam has been successfully installed in the car, it will
automatically turn on and start recording when the engine starts (for
most cars on the market).
If your Dash Cam does not automatically start and start recording
when the engine starts (this usually depends on your car model),
please press the POWER/OK button to turn on the camera manually.
Then press this button again to start recording.
When the Dash Cam is recording, REC Light in the bottom left corner
of the camera flashes, and a flashing Red Dot appears in the upper left
corner of the screen. As shown below.
C. How to change Display Mode
When the Dash Cam is recording, press the UP button ( this is a
shortcut in this state) to switch between these mode “Picture in

- 15 -
picture” ”Split-screen” “Front camera” and “Rear camera” .
D. How to turn off the recording sound
When the Dash Cam is recording, simply press the the DOWN button
to stop recording sound.
E. How to manually lock the recording video
When the Dash Cam is recording, press the the MENU button
to lock the currently recorded video.(it will be locked and not
overwritten by new video if you press the menu button to manually
lock this video which recording now).
F. How to Stop Recording
When the Dash Cam is recording, simply press the the POWER/OK
button to stop recording. For most cars (this also depends on the
model), the camera will automatically stop recording and shut down
when the engine goes off.
G. How to Switch to Photo Mode
The MENU button is also a MODE SWITCH button. Turning on the
Dash Cam, then long press the MENU button to enter the Photo
Mode. You can take photos from here by pressing the POWER/OK
button.
Under the Photo mode, short press the MENU button to enter its
Camera Settings and System Settings (which are different from
the mentioned Camera Settings and System Settings under the Video
Mode). The two settings menus are shown below.

- 16 -

- 17 -
Under the Photo mode, long press the MENU button to access to the
photos that have been taken. Then you are able to delete or
manually lock it by short pressing the MENU button from there.
H. How to playback the front and rear video on Dash
Cam
a. Front video: Turning on the Dash Cam, then long press the
MENU button to enter the Photo Mode as show below. Long Press it
again to access to your video recordings. The operations of Delete or
Manually Lock videos are the sames as the Photo Mode. If you would
like to delete a locked video, you must unlock it manually from there
first.

- 18 -
Short press the UP and DOWN button to check out the FRONT VIEW
videos you recorded. And short press the Start/OK button for play. As
shown below.
b. To playback REAR VIEW videos: Long-press the UP button to
find the rear view videos and short press the Start/OK button to play.
As Shown below.

- 19 -
Further questions are very welcome
Any advice would be appreciated
APEMAN official email: kt.support@apemans.com
Table of contents
Other Apeman Dashcam manuals

Apeman
Apeman C370 Operating and maintenance manual

Apeman
Apeman C560 User manual

Apeman
Apeman SS200 User manual

Apeman
Apeman C860 User manual

Apeman
Apeman C860 User manual

Apeman
Apeman C450 A Series User manual

Apeman
Apeman C770 Operating and installation instructions

Apeman
Apeman C420 User manual

Apeman
Apeman C550 User manual

Apeman
Apeman C570 User manual