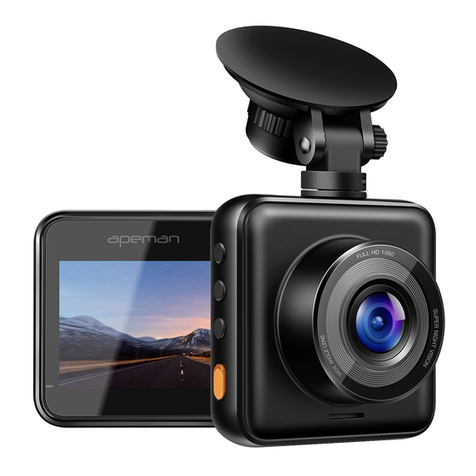
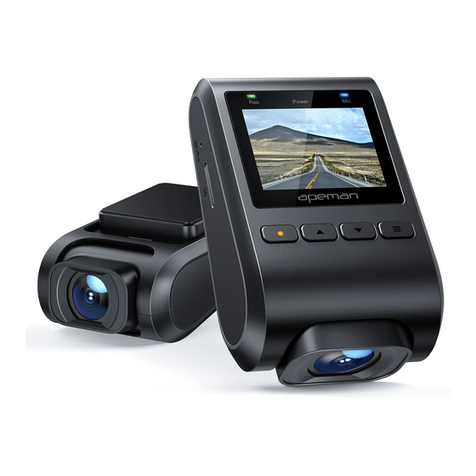
Apeman C570 User manual

C570
Dash Camera
User Manual


Menu
1English
18
Deutsch
36
Français
55Italiano
73Español
90
日本語

Dear Customer,
Thank you for purchasing product from Apeman. Please read and follow
this user manual carefully and keep it in a safe place for future reference.
Apeman consistently attaches great importance to product quality and high
customer satisfaction. We sincerely hope you can make a few suggestions
during your use to help us improve our products. Your precious sugges-
tions will help us shape our business to perfectly fit your standards. We'll
soon introduce series of new products for our valued customers, please
share this with your friends.
Just let us know if you encounter any problem during your use. Our
support team will provide you our best solution without any delay. And all
items purchased from Apeman are covered by 1 year warranty.
You can find our contact information below:
America: [email protected]
Europe: [email protected]
Japan: [email protected]
Look forward to bringing you more great products in the future.
Kind regards,
Apeman Support Team
YouTubeFacebook

Contents
Warning
Product Description
Package contents
Product introduction
Button and Interface introduction
Operation Introduction
Startup
Basic operation instructions
Menu setting instructions
Specifications
Solutions of common problems
Warranty
2
3
7
12
13
17
1

Please do not disassemble the machine yourself so as to avoid damaging
the internal components.
Please do not place the machine under strong sunlight or high tempera-
ture. This may damage the shell and internal parts.
When inserting or removing the memory card, please keep the machine in
a power off state. If not, the card and the data may got damaged.
The machine may be heated after working for a period of time, which is a
normal phenomenon.
Please use lens cleaner or professional tools to clean the lens.
.
.
.
.
.
Warning
2

Product Description
Package contents
3
54
21 3
1. Car Recorder
4. Car Charger 5. Mini USB Cable
2. Adhesive Mount 3. Suction Mount

18
9
10
11
5
13 1516
6 7
12
2
3
4
12 14
1. TF Card Slot
2. Up Button
3. Menu Button
4. Down Button
5. Reserved interface
6. Mount Interface
USB Interface
OK button
Mode
Lock
Power
Lens
13. Display screen
14. Speaker
15. MIC
16. Reset
7.
8.
9.
10.
11.
12.
4
Product introduction

Button and Interface introduction
Instructions
Power
Button name
Reset
OK Button
Mode
Button function
Power on/power off
Reset function
Start/stop video
recording/Confirm/
photographing/
playback
Switch different modes
1. Power on: Long press Power
Button until Power indicator lights
on.
2. Power off: Long press Power
Button until Power indicator lights
off.
Short press this Button to restart
the machine under abnormal
conditions.
1. Video recording mode: Short
press to start video recording,
short press again to stop video
recording.
2. Menu mode: Confirm settings.
3. Photo mode: Short press to
start photographing.
4. Playback mode: Short press to
playback files.
short press it to switch video/
photo/playback mode
5

USB interface
Lock
1. Connect a computer with USB
cable to enter the storage, so you
can view video and photo.
2. Connect with the car charging
cable for auto power on.
Locked videos won’t be covered/
overwritten
TF card slot
Mount
Interface
Storage card slot
For installing the
holder
Insert TF card as shown on the
machine
Used to install the holder
Up Button
Down Button
Select upward
1. Menu mode: Short press to select
upward
2. Playback mode: Select a file
upward
1. Menu mode: Select downward
2. Playback mode: Select a file
downward
3. Video recording mode: Short
press to turn on /off audio record
Menu Button short press it to
switch video/photo
/playback mode
Select downward /
Turn on/ off audio
record
Car charging
interface/storage
interface
Manually lock video
being recorded
6
1. Video mode: short press to
switch to video recording settings;
2. Photo mode: Short press to
switch to photographing settings;
3. Playback mode: Short press to
switch to playback settings.

Startup
1. Installing instructions of the recorder on the car
Auto power on/off: It automatically powers on and starts recording when
the car is on. And stops recording, saves the video and power off when
the car is off.
2. Instructions for manual operation when no car charger is inserted
Manually switching on/off:
Long press Power Button, the Power indicator light goes on and dash cam
enters video mode.
Long press Power Button again, the Power indicator light goes off;
Connect car cigarette lighter with the car charging cable.
Basic operation instructions
Video mode: After being powered on, it enters the video mode and auto-
matically starts recording. The video recording icon is displayed in the
upper left corner of the screen. The red dot at the top of the screen
flashes, indicating that a video is being recorded. Short press OK Button
to stop recording.
Photo mode: After being powered on, it enters the video mode and auto-
matically starts recording. Short press OK Button to stop recording. Press
Mode Button to switch to photo mode. The photographing icon is
displayed in the upper left corner of the screen. Short press OK Button to
take a photo.
Video / photo playback: After being powered on, it enters the video
mode and automatically starts recording. Short press OK Button to stop
recording. Press Mode Button twice to switch to playback mode and the
playback icon is displayed in the upper left corner of the screen.
.
.
Operation Instruction
7

In playback mode, press Up/ Down Button to switch photo / video.
In playback mode, short press Menu Button to select operation on current
file (delete / protect).
In playback mode, short press OK Button to play current video file.
Note:If in video mode, please stop video recording first, and then press
Mode Button twice to switch to playback mode.
Menu setting instructions
Video recording settings
After being powered on, it enters the video mode and automatically starts
recording. Short press OK Button to stop recording. Short press Menu
Button to switch to video recording settings. The screen displays the
settings such as: resolution, loop recording, WDR, exposure, motion
detection, record audio, date stamp, G-sensor. Short press Up/Down
Button to switch to a setting option. Short press OK Button to select the
option.
Video resolution: 1080FHD 1920*1080,720P 1280*720
Loop Recording: The cam will cyclically record new videos under the time
interval you set. Off / one minute / three minutes / five minutes. Default
value: three minutes
WDR: off/ on. Default value: off.
Used to adjust the brightness of the video clips. Suitable for situations like
low light or back light.
Exposure
"+2.0","+5/3","+4/3","+1.0","+2/3","+1/3","+0.0","-1/3","-2/3","-1.0","-4
/3","-5/3","-2.0" (Default exposure value is 0.0)
.
.
.
8

Motion detection: on/off. Default value: off.
It starts recording once it detects moving subjects within 3 meters in front
of the lens, otherwise it stops recording. It automatically starts recording
10s video and stops recording after no dynamic motion appears.
Record Audio: Choose to record audio or not in the video. On/off. Default
value: on.
Date stamp: on/off. Default value: on.
G-sensor: off/ Low/ Medium/ High. Default value: Medium.
The cam automatically locks video that is being recorded once it detects
shaking or collision. Files that are locked won’t be overwritten/ covered.
System Settings
After being powered on, it enters the video mode and automatically starts
recording. Short press Menu Button to switch to video recording settings.
Short press Menu Button again to switch to system setting. The screen
displays the settings such as: Date/time, Auto Power off, Screensavers,
Beep sound, Language, Frequency, License plate stamp, Format, Default
setting, Version.
Date and time: You can set the display order of date and time, such as
Y/M/D. Press OK to enter, press Up or Down to change. After changing
each time, press OK button to switch to the next item. After all items are
changed, press Menu Button to save and exit. (After restoring the factory
settings, the date becomes the factory date)
Auto power off: Off / one minute / three minutes / five minutes. Default
value: three minutes.
Note: If there is no operation on the cam within the set time, the cam will
automatically turn itself off when the cam is not recording.
9

Screensavers: Off / one minute / three minutes / five minutes. Default
value: one minute
Note: If there is no operation on the cam within the set time, the screen
will go black to save power. But the cam still keeps recording.
Beep sound: Turn on / off sound of operation on the camera. On /off.
Default value: on.
Language:English/ traditional Chinese/ simplified Chinese/ Japanese/
French/ German/ Thai/ Italian/ Portuguese/ Russian/ Spanish, etc
Frequency: 50HZ/60HZ. Default value: 50HZ
License plate stamp: Press OK Button to enter it, press Up /Down Button
to change number or letter. After changing each time, press OK button to
switch to the next item. After all items are changed, press Menu Button to
save and exit.
Format: “Cancel” or “OK” may be selected. Select “OK” to delete all files
on the card, otherwise please select “cancel”.
Default setting: “Cancel” or “OK” may be selected. Select “OK” to restore
factory settings, otherwise please select “cancel”.
Version: You can view version information.
Photo recording settings
After being powered on, it enters the video mode and automatically starts
recording. Short press OK Button to stop recording. Press Mode Button
once to switch to photo mode. The photographing icon is displayed in the
upper left corner of the screen. Short press Menu Button to switch to
photo settings. The screen displays the settings such as: resolution, burst
photo, quality, sharpness, white balance, ISO, exposure, date stamp. Short
press Up / Down Button to switch to setting option. Short press OK
10

Button to enter. Short press Up /Down Button to change settings. Short
press OK Button to confirm.
Resolution
VGA640x480/3M(2048x1536)/5M(2592x1944)/8M(3264x2448)/
10M(3648x2736)/ 12M(4032x3024). Default value:12M
Burst photo: on/off. Default value: off. Press OK button once and the cam
can take 5 pictures continuously.
Quality: Fine/Normal/Economy. Default value: Fine.
Sharpness: Strong/Normal/Soft. Default value: Strong.
White balance: auto/daylight /cloudy /tungsten/fluorescent. Default value:
auto.
ISO:Auto/100/200/300/400. Default value: auto.
Exposure:
"+2.0","+5/3","+4/3","+1.0","+2/3","+1/3","+0.0","-1/3","-2/3","-1.0","-4/
3","-5/3","-2.0" (default value +0.0)
Date stamp: off/date /date/time. Default value: date/time
Playback settings
After being powered on, it enters the video mode and automatically starts
recording. Short press OK Button to stop recording. Press Mode Button
twice to switch to playback mode. The playback icon is displayed in the
upper left corner of the screen. Short press Menu Button again to set. The
screen displays the settings such as: delete, protect.
Delete: Delete current/all files. Default value: delete current file.
Protect: Lock current file /unlock current file /lock all files /unlock all files.
11

Specifications
12
Camera Resolution
Seamless Video
Video Resolution
Video Encoding
Video Format
Record Method
Minimum Illuminance
Angle
Lens
Display
Yes
4032×3024、3648×2736、3264×2448、2592×1944、
2048×1536、1920×1080、1280×960、640×480
1920×1080、1280×720
H.264
MOV
Loop recording / Motion Detection
1Lux
170°
650NM lens
3.0" TFT Display

Solutions of common problems
In the process of installing the cam
1. Suction cup falls off/ unstable
Solution:
A: Please tear off the protective film of the suction cup before installation.
B: Please clean the windshield before installation.
C: Check whether the suction cup has been installed in right way. The
suction cup installation of this cam is not simply adsorption. It needs to
install through the black handle on the suction cup.
2. View files on the cam and find that images are blurred
Solution: The front windshield has reflective effect. Please adjust the angel
of the machine according to the installation position of the suction cup.
3. Big difference of videos recorded in daytime and at night
Solution: The transmittance of commonly used can front glass thermal
insulation films is 68%-80%, which will affect the recording effect of
machine.
4. The cam often shut down or can not connected to the power supply
Solution:
A: The interior design varies from car to car. Please adjust the rotation
angel of the vehicle power adaptor properly, and ensure the stable link
between the power supply and machine.
B: The built-in battery of the machine can only last for 10-15 minutes.
When you use it, please connect it to the power supply.
C: Check if there is any damage to the power lead so as to ensure the
power supply of the machine.
D: If the cam can’ t be used in the car, try to connect the cam to other
power source to see whether the power supply of the car cigar lighter is
normal.
13

In the process of turning on/setting the cam
1. The cam can't be turned on
Solution:
A: Confirm whether the indicator of the power adapter is on or not. If
there is no light, please replug the car charger and ensure the power
supply of the cam.
B: The cam can not keep turning on for a long time. The built-in battery
can only be used for about 10-15 minutes. Please connect the cam to
cigarette lighter via the car charger in the package.
C: Press Reset button to reset the cam.
D: Because all of our products are transported to Amazon warehouse
from our factory and then fulfilled by Amazon. So products may stay in
the warehouse for a long time. When you receive the cam, please connect
the cam to power supply and fully charge them.
E: After being connected to power supply. The red light indicator on the
top left of the screen flashes once and then the cam will turn on. The blue
light indicator will keep on during your use. This can help you judge
whether the cam is supplied power normally.
2. The cam freezes. Screen goes black. Buttons do not work
Solution:
A: Check whether your card is class 10, 6-32GB, SDHC TF card
B: Long press the power button to force the shutdown to restart
C: Press Reset button to reset the cam
3. Unable to access menu settings(No response by pressing menu
button)
Solution: The cam will stay in video mode after being turned on and will
start recording automatically if you have inserted a SD card. Press OK
button to stop recording first. Then press menu button to enter settings
4. The screen goes blue and prompts mass storage
Solution: When you connect the cam to computer or power source with
low voltage, it is normal that the cam prompts mass storage. You should
use the USB cable in the package to connect the cam to power supply
with normal voltage.
14

In the process of video recording
1. The cam won't record after being turned on
Solution:
A: Confirm whether a TF card has been inserted. Check the format of the
card (Class 10, no bigger than 32GB)
B: Turn off the cam, remove the card and insert it again
C: Format the card on the cam
2. Abnormal video recording ending
Solution:
A: Format the card
B: Check whether the format of the memory card is correct
C: Change to a correct qualified card to see if it is a card failure
D: There are many poor memory cards in the market. The quality of these
cards is
bad and will affect the use of the cam
3. Screen goes black
Solution:
The screen will go black if there is no operation on the cam within the set
time interval even during recording. You can press any button to wake the
cam up.
4. Videos have no audio
Solution:
A: Check whether the audio recording is turned on. You can check it by
the microphone logo on the screen.
B: Check the volume of the sound. You can adjust the volume by the
up/down button on the left of the screen during recording
15

5. Blurred videos
Solution:
A: Remove the protective film on the lens and clean the lens
B: Remove the protective film on the screen
C: Due to the screen size and influence of resolution, there will be differ-
ence on visual experience between cam and computer.So please transfer
the videos to your computer and view them again
D: Check the resolution of the cam. Choose higher resolution
E: The video mode and photo mode are set independently. Please set the
resolution of video recording and photo shooting separately.
F: Check whether the format of the memory card is correct
6. Video time error
Solution:
A: Update to the right time according to the user manual
B: Video mode and photo mode have their own settings. Please set the time
separately
In the process of connecting the cam to computer
1. Unable to read storage and can't find the connection device
A: Reinsert the USB cable to ensure a stable connection
B: Change to another USB cable and check whether there is something
wrong with the cable
C: Connect the cam to different computers because some computer
systems will prevent the external devices.
16
Table of contents
Languages:
Other Apeman Dashcam manuals

Apeman
Apeman C860 User manual

Apeman
Apeman C420 User manual

Apeman
Apeman C370 Operating and maintenance manual

Apeman
Apeman C560 User manual

Apeman
Apeman C450 A Series User manual

Apeman
Apeman C420D Operating and maintenance manual

Apeman
Apeman C860 User manual

Apeman
Apeman C550 User manual

Apeman
Apeman SS200 User manual

Apeman
Apeman C770 Operating and installation instructions