8
5
(SMPL)
99 Sample
Measurements
(LOG)
99 Log
Measurements
(LOG)
99 Daily Averages
Measurements
Viewable on meter LCD & downloadable Downloadable Only
5) Review Data: Press up/down. To exit and
return to present conditions and the capability
to take measurements, press sample.
6) In LOG mode, every 30 minutes the meter
will average the sixty 30-second measurements
taken and store the average. Ninety-nine
30-minute averaged measurements can be
stored. Every 48 measurements (making a
24-hour period) the meter will also store a
daily total. In addition, 99 daily averages can
be stored and are available for download only.
These measurements are not viewable on the meter LCD. All
measurements taken in LOG mode will continue to be stored
eliminating the oldest measurement.
6
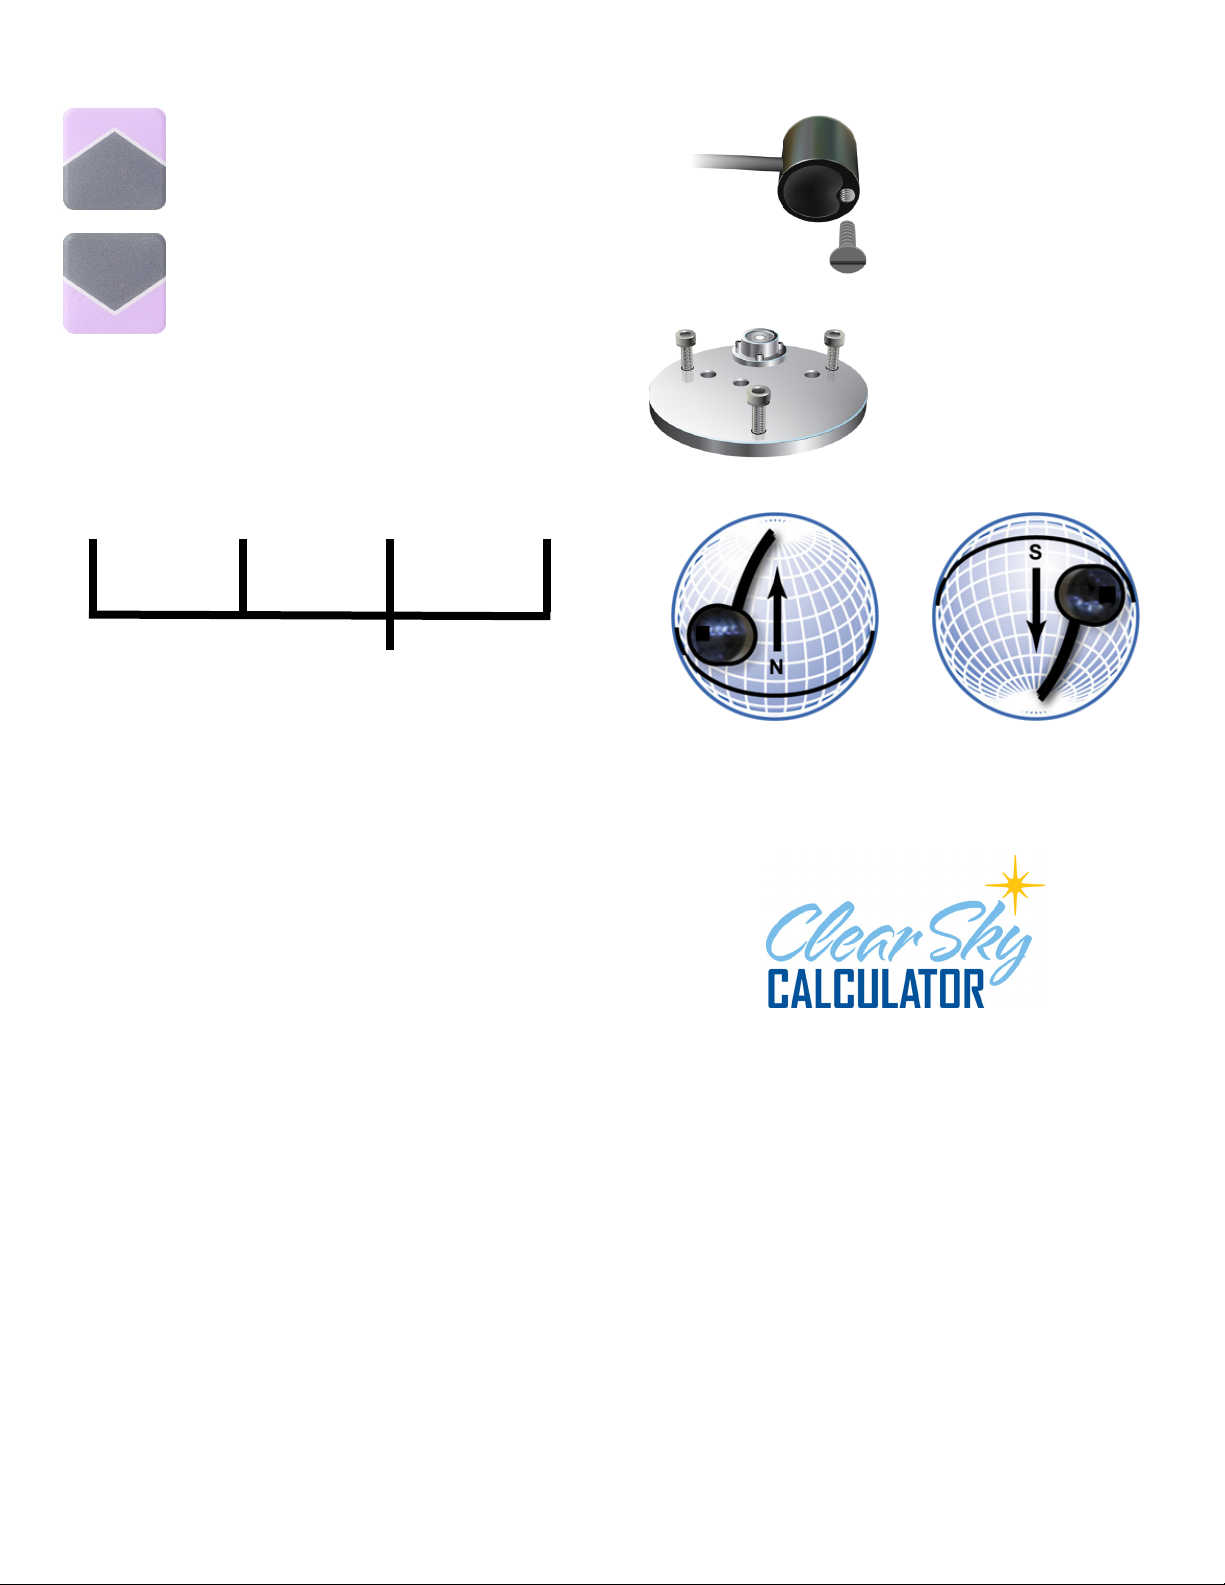
Mounting the Sensor
Mount the sensor to a solid
surface with the nylon mounting
screw.
The sensor should be mounted
level for the most accurate
measurements. We recommend
using our leveling plate (AL-
100). The sensor should be
mounted with the cable pointing
toward true north in the northern
hemisphere or true south in the
southern hemisphere to minimize
azimuth error. The azimuth error
is typically less than 1%.
Nylon Screw:
10-32x3/8
7
The Clear Sky Calculator was designed to determine the need
for radiation sensor recalibration. It determines the intensity
of radiation falling on a horizontal surface at any time of the
day in any location in the world. It is most accurate when used
near solar noon in the summer months.
The calculator is found at www.clearskycalculator.com and
is used by typing conditions into the Clear Sky model and
comparing measured values with the calculated value for a
clear sky. If the output of the sensor over multiple days at
solar noon is consistently less than the model value (by more
than 8%), the sensor should be cleaned and re-leveled. If
the output is still low after a second test, email calibration@
apogeeinstruments.com to discuss test results and the possible
return of sensors. When used near solar noon over multiple
clear, unpolluted days during the spring and summer months,
it is estimated that the accuracy of the model can be ±4% in
all climates and locations around the world.
Cleaning
Debris on the sensor head is a common cause of low readings.
The sensor has a domed head for improved self-cleaning from
rainfall, but salt deposits can accumulate from evaporation
of sprinkler irrigation water and dust can accumulate during
periods of low rainfall. Salt deposits should be dissolved and
removed with vinegar and a soft cloth or q-tip. Dust and other
organic deposits are best removed with water, rubbing alcohol
or window cleaner. Never use an abrasive cleaner on the lens.


