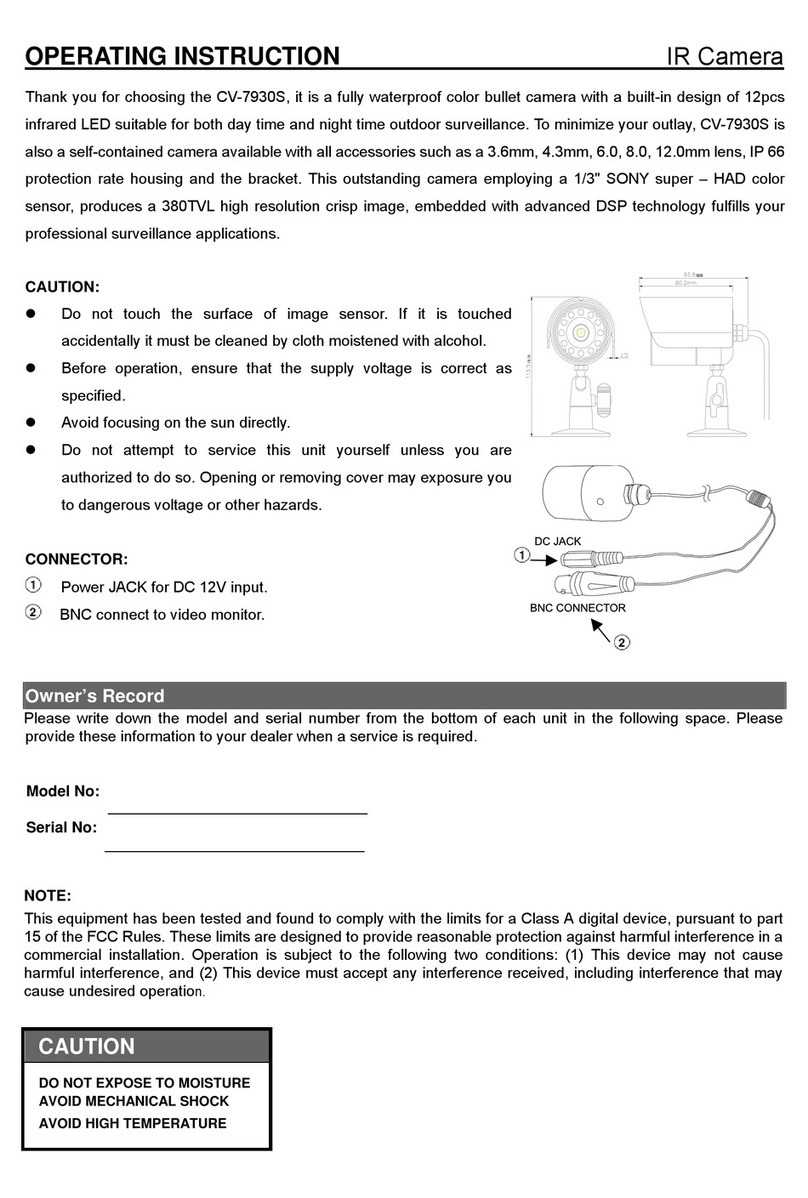
Appro LC-6790 User manual

UserManual
Beforetryingtoconnectoroperatethisproduct,pleasereadthismanualcompletely.

Table Of Contents
1PRODUCT FEATURES..........................................................................4
PRODUCT INSTRUCTIONS...........................................................................4
SURFACE.......................................................5
.....................................................................8
...........................................................................9
....................................................................9
.................................................................................................10
System....................................................................................15
.......................................................................20
NETWORK SETTINGS .................................20
TWARE.......................................................22
G............................................................25
Web Browser................................................29
PRODUCT FEATURES .................................................................................4
2DESCRIPTION OF THE
THE HARDWARE VIEW ...............................................................................5
THE RESET BUTTON .............
THE ALARM WIRING DIAGRAMS ...................................................................8
3INSTALLATION...........
HARDWARE INSTALLATION..........................................................................9
WPS - PUSH BUTTON SETUP
SOFTWARE INSTALLATION ........................................................................10
Where to download..................
Configuration—Android Operating System ............................................................................11
Configuration—iOS Operating
UPDATING SYSTEM SOFTWARE ................................................................19
4Network Configuration
CABLE CONNECTIONS..............................................................................20
CONFIGURE YOUR IP CAMERA
Set IPAddress...........................................................................................................................20
TCP/IP COMMUNICATION SOF
TCP/IP INSTALLATION .............................................................................24
TCP/IP CONFIGURATION SETTIN
CONNECTION TESTING.............................................................................26
5Configuration Using A
1


WEB CONFIGURATION PAGES ...................................................................30
Connecting the IP camera.........................................................................................................30
.................................................................................................33
.........................................................................92
95
...................................................................96
.................................................................................................98
...............................................................................................101
Live Video.................................................................................................................................31
Setup.........................................
6FREQUENTLY ASKED QUESTIONS..................................................89
7SPECIFICATIONS.......
Appendix: The Playback Utility Tool-- CMS............................................95
INTRODUCTION TO THE CMS....................................................................
INSTALL THE CMS IN YOUR PC.................................................................95
START TO USE THE CMS.......
OPERATION.............................................................................................98
Live View.................................
Playback..................................................................................................................................100
Settings.....................................
2


1 PRODUCT FEATURES
Product Instructions
Here's a new series from APPRO -- cameras that act as basic watchguards in your premises --
lightweight, simple formatted, inexpensive, and no fuss to install.
These watchkeepers are the ideal stuff for the safety of your home and office interiors.
Our Pan/Tilt camera brings you dependable video surveillance in a focused & targetted
environment.
This is an easily installable, smart surveillance camera, ideal for low - light settings like your mini
office or living spaces. It combines a high performance Megapixel sensor with a built - in IR LED
that maintains close watch and clear vision in totally dark conditions. The camera has a built - in
mechanical IR - cut filter for day and night applications equally. Its wireless capability means you
can site your camera in any place within range of your wireless network.
The camera sets you up with a swift and dependable wireless connection which will help you see
live video feeds from your camera in any place at anytime. The Site Survey feature helps you easily
see or link up to a wireless network close at hand. The camera's standard Ethernet port gives you
connections to regular wired networks.
The camera's flexible connectivity by way of its input and output ports link you to network devices
like IR sensors, switches and alarm relays.
Smooth to configure and operate, our camera comes with the Universal Plug-n-Play feature which
gets computers running on Windows XP / Vista / 7 to automatically recognize the camera and add it
to the network.
Product Features
Simultaneous H.264 and MJPEG video compressions.
Multi-profile applications: Selectable resolutions, frame rates, video qualities, and
compression.
High performance zoom lens: 10X digital zoom.
Feature with a wide-angle lens- for your full area monitoring.
Advanced motion detection (512 zones, sensitivity: 0~100 %).
Supports ONVIF.
Supports Wi-Fi.
4

2 DESCRIPTION OF THE SURFACE
The Hardware View
The Front View
1
3
6
2
4
5
1. Light Sensor: Detects light levels and adjusts IR-LEDS accordingly.
2. Camera Lens & Focus Adjustment Ring: Records video of the surrounding area. Enables
manual adjustment of the cameras focal length.
3. Microphone: Records audio from the surrounding area.
4. Passive Infrared Sensor: Passive Infrared (PIR) sensor for motion detection.
5. Power/ Network Status LED: Indicates the camera's current status. The LED will be solid red
while the camera boots, performs a self-test, and searches for a network connection. The LED
will switch to solid green when a proper connection has been achieved. The LED will blink
green during data transfer.
6. WPS Status LED: Indicates the WPS connection status of the camera. While connecting, the
blue LED will flash.
5

The Side View
WPS
MICRO SD 2
1
1.
Micro SD Card Slot:
Insert a Micro SD card for local storage including recorded image and
video.
2.
WPS Button:
Press this button, then push and hold another WPS button on your router
for 5 seconds to set up a wireless connection automatically.
6

The Rear View:
RESET
AUDIO ETHERNET 1 2 3 4 5V 2.5A
2
1
3
5
4
6
1. Ethernet Port:
This is a standard RJ-45 connector for 10/100 Mbps Ethernet networks. PoE
(Power over Ethernet) function: Provides power to the device via the same cable as used for
the network connection.
2. Audio:
Speaker: Provides the camera’s audio signal output.
3. Reset Button:
Press and hold this button for 10 seconds to
back to its factory default
settings.
4. DI/DO Connector:
I/O connectors
for connecting with external devices.
5. Power Connector:
A DC 5V inlet that connects to an external power supply.
6. Built-in Speaker:
The speaker can be used in conjunction with the built-in microphone to
enable the camera to acts as an intercom.
7

The Reset Button
You can use the Reset button to reset the camera operations back to default. Press the Reset
button for about 10 seconds. Blue screens of the analog output are displayed, and a text saying
RESETTING… appears.
The Alarm wiring diagrams
This is a 4-PIN connector including the Digital output/input, DC output and GROUND items for
connecting with external devices.
DO DI
5V GND
GND
5V
DI
DO
N.C/N.O
DC Power 5V
100 mA
DC Power 3V~12V
Reed switch
Diode
ALARM
R
+
+
8

3 INSTALLATION
Please follow the instructions and the diagram below to set up the system.
Hardware Installation
RESET
AUDIO ETHERNET 1 2 3 4 5V 2.5A
1. Connect Ethernet cable to the rear panel of the camera.
2. Plug in the power connection to the camera.
3. Confirm the correct network connection status.
WPS - Push Button Setup
To create a WPS connection:
1. Press and hold the WPS button for about 5~6 seconds. The
WPS status LED will flash.
2. Press the WPS button on your router within 60 seconds. The
camera will automatically create a wireless connection to your
router. While connecting, the status LED will flash.After the
connection process is complete, the status LED will turn solid.
WPS
MICRO SD
Note
Please make sure that your router supports WPS, then you can use the WPS button on the
camera to easily create a secure wireless connection to your network.
On some routers, you may need to log in to the web interface and click on an on-screen
button to activate the WPS feature.
9

Software Installation
Before installing the apps to your mobile phone for remote surveillance, make sure that you have
checked the following:
1. Your mobile platform is iOS or Android.
2. You might be charged for Internet access via wireless or 3G/4G networks. For the Internet
access rate details, please check with your local network operator or service provider.
3. Your IP camera is powered on and connected to Internet/ Intranet.
Where to download
App for Android App for iOS
QR-code
QR-code
10

Configuration—Android Operating System
Browse to where AppPro is installed by default on your mobile phone when the installation is
completed. Find AppPro and activate it.
Add Camera Camera List
Two methods to add a new camera.
1. Scan QR code of the camera: You can
just scan the QR code to add a camera.
Select “+” (Add) on the screen to add the
new camera.
2. Manually type in the camera ID and
password: Enter the information needed
to access your device, such as the
DeviceID and Password (default:9999).
Select “+” (Add) on the screen to add the
new camera.
Start to monitor.
1. Choose the camera you want to access
on the camera list. Your mobile phone will
start connecting to your camera.
2. Select the to enter the camera
configuration setting page.
11

Configuration- Setting Configuration- Change Password
Change the settings of resolution, video mode,
video area, FPS, audio mode and enable/disable
audio function. Then click Complete.
You can change the Password here. Click Yes to
activate it. Please use the new password to
connect the camera by using this app next time.
Configuration- Notification Setup Configuration- Media Album
Please set the Sensibility, enable the Video
Motion and the Notification functions first. Then
click ✔.
You can view the saved video clips here.
12

Configuration- Photo Album Delete Camera
Click Yes to delete the camera or click No to
cancel. Select and click Delete to remove the camera on
the list.
Info Live
Set the Video time limit from 1, 3 and 5.
13

Live- the icons Live- Screen Orientation
The function of icons:
Click on the button to record a
video clip.
Click on the button to take a
snapshot.
Click on the button to start/stop
audio out function.
Click on the button to start/stop
two-way audio.
The ePTZ control
panel. Click to control the camera’s
directions.
Mobile devices generally offer two screen orientations:
portrait and landscape. Users can simply rotate the
device to initiate a change from one orientation to
another. And the functions of the icons are the same
with they described above.
14

Configuration—iOS Operating System
Browse to where AppPro is installed by default on your mobile phone when the installation is
completed. Find AppPro and activate it.
Add Camera Camera List
Two methods to add a new camera.
1. Scan QR code of the camera : You
can just scan the QR code to add a
camera. Select “ ” (OK) on the screen
to add the new camera or click on “ ”to
cancel.
2. Manually type in the camera ID and
password: Enter the information needed
to access your device, such as the
DeviceID and Password. Select “ ”
(OK) on the screen to add the new camera
or click on “ ” to cancel.
Start to monitor.
1. Choose the camera you want to access
on the camera list. Your mobile phone will
start connecting to your camera.
2. Select the to enter the camera
function setting page.
3. You can click on the “ ” icon to add a
new camera or select “ ” to delete a
chosen camera.
15

Camera Functions- Revise Password Camera Functions- Photo Album
You can change the Device ID and Password
here. Select “ ” on the screen to activate it.
The snapshots you take will be saved in the
Photo Album. Select “ ” to delete photos.
Camera Functions- Camera Settings Camera Functions- Video Album
Change the settings of resolution, video mode,
video area, FPS, audio mode and enable/disable
audio function. Then click Save.
The video clips will be saved in the VideoAlbum.
Select “ ” to delete videos.
16

Camera Functions- APNS Camera Functions- Notification Setup
Change the settings of resolution, video mode,
video area, FPS, audio mode and enable/disable
audio function. Then click Save.
When push notification is enabled, the user can
receive a push message on their device
whenever motion is detected. Please set the
Sensibility, enable the Video Motion and the
Notification functions first. Then click OK.
Live Live- the icons
The function of icons:
Click on the button to record a video
clip.
Click on the button to start/stop audio
out function.
Click on the button to start/stop
two-way audio.
Click on the button to take a
snapshot.
The ePTZ control panel. Click
to control the camera’s directions.
17

Live- Screen Orientation Info
Mobile devices generally offer two screen orientations:
portrait and landscape. Users can simply rotate the
device to initiate a change from one orientation to
another. And the functions of the icons are the same
with they described above.
Set the Video time limit from 1, 3 and 5.
18

19
Updating System Software
If the system software of the IP Camera needs to be upgraded, please take the following steps to
safely process it.
Important: Before carrying out the following procedures, please ensure the SD card is
working and the file of the system firmware is intact
1. Create a directory named UPGRADE (upper-case or lower-case letters are no difference) in
the SD card if it does not exist.
2. Copy the file of UPDATE.BIN to the UPGRADE -directory.
3. If the IP Camera is running, please power it off first.
4. Insert the SD CARD into the IP Camera.
5. Remove the Ethernet cable from the RJ-45 port and then power on the IP Camera.
6. In 5 to 10 seconds, a message reading "UPDATE PROCESSING" will show up on the screen
on a blue background; if not, please check out steps 1 to 6 carefully or else inform your
technical support while ignoring the following steps.
7. DO NOT power off the IP Camera while this update process is running until the message
"UPDATE OK RESET PLEASE" appears on the screen; it might take 15 to 30 seconds to
appear.
8. If the message "UPDATE NG RESET PLEASE" appears rather than "UPDATE OK RESET
PLEASE", please write down the error messages shown on the screen and inform your
technical support, while ignoring the following steps.
9. Power off the IP Camera when this update process is finished, then remove the SD card from
the IP Camera.
10. Reconnect the Ethernet cable to the RJ-45 port if necessary.
11. Power ON the IP Camera and it will work normally if the entire update procedure goes
correctly.
12. Verify the version of the system software.
WARNING:
You must perform Steps 1 to 2 on a PC.
Ensure you are using the correct UPDATE.BIN file in Step 2, otherwise the IP Camera
will not work properly.
If the power of the IP Camera is suddenly lost in step 7, please remove the SD card first
and turn on the IP Camera next to test its operation. If the IP Camera remains working
normally, please go back to step 3; otherwise, please inform your technical support.
In step 9, if the SD card is not removed and the IP Camera does not get online as well,
the updating process must be repeated again after rebooting the IP Camera.
Make sure that the SD card is inserted in a correct position in step 4, or the IP Camera
will suffer permanent physical damage.
If the message "CSUM ERROR" appears in step 7, it implies a problem in the file of
UPDATE.BIN.
Do not interrupt the process when the unit is updating, or it will crash.
Table of contents
Other Appro IP Camera manuals

Appro
Appro LC-7222E User manual

Appro
Appro LC-7411 User manual

Appro
Appro LC-7244 User manual

Appro
Appro LC-7311 User manual

Appro
Appro LC-7224EP User manual

Appro
Appro CV-7930S User manual

Appro
Appro CV-7930S User manual

Appro
Appro LC-7513 User manual

Appro
Appro LC-7222E User manual

Appro
Appro TMS320DM355 User manual
Popular IP Camera manuals by other brands

IP Camera
IP Camera 5 MEGAPIXEL user manual

Digitus
Digitus DN-16081 Quick installation guide

Cablematic DOS MIL
Cablematic DOS MIL H Series user manual

Inaxsys
Inaxsys IN-DI4MHEM Hardware user manual

INFRARED CAMERAS
INFRARED CAMERAS 9640 Series user manual

Iris Innovations
Iris Innovations IRIS490 user guide