manuals.online logo
Brands
  1. Home
  2. •
  3. Brands
  4. •
  5. aptos
  6. •
  7. Inverter
  8. •
  9. aptos MAC 400 User manual

aptos MAC 400 User manual

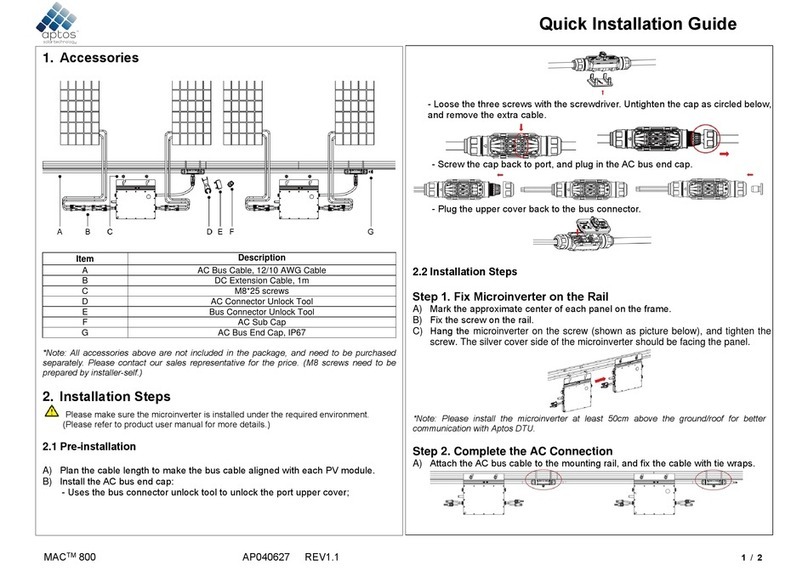
Quick Installation Guide
MACTM 400 AP040626 REV1.1 1 / 2
1. Accessories
Item
Description
A
AC Bus Cable, 12/10 AWG Cable
B
M8*25 screws
C
DC Extension Cable, 1m
D
AC Connector Unlock Tool
E
Bus Connector Unlock Tool
F
AC Sub Cap
G
AC Bus End Cap, IP67
*Note: All accessories above are not included in the package, and need to be purchased
separately. Please contact our sales representative for the price. (M8 screws need to be
prepared by installer-self.)
2. Installation Steps
Please make sure the microinverter is installed under the required environment.
(Please refer to product user manual for more details.)
2.1 Pre-installation
A) Plan the cable length to make the bus cable aligned with each PV module.
B) Install the AC bus end cap:
- Uses the bus connector unlock tool to unlock the port upper cover;
- Loose the three screws with the screwdriver. Untighten the cap as circled below,
and remove the extra cable.
- Screw the cap back to port, and plug in the AC bus end cap.
- Plug the upper cover back to the bus connector.
2.2 Installation Steps
Step 1. Fix Microinverter on the Rail
A) Mark the approximate center of each panel on the frame.
B) Fix the screw on the rail.
C) Hang the microinverter on the screw (shown as picture below), and tighten the
screw. The silver cover side of the microinverter should be facing the panel.
*Note: Please install the microinverter at least 50cm above the ground/roof for better
communication with Aptos DTU.
Step 2. Complete the AC Connection
A) Attach the AC Bus Cable to the mounting rail, and fix the cable with tie wraps.
Quick Installation Guide
AP040626 REV1.1 2 / 2
B) Push the AC connector of microinverter to the trunk cable connector until you
hear “click”.
C) If there is any vacant bus port, please plug the AC sub cap on the vacant plug
to ensure waterproof and dustproof.
*Note: Under the circumstances that need to remove the inverter AC cable from bus port,
please use the AC connector unlock tool and insert the tool into the side of AC port.
Step 3. Install AC End Cable
A) Prepare the AC end cable with the proper length, and insert one side of the cable
into the cap. Match the L, N and Ground line into the slot accordingly. Tighten
the screws, and then tighten the cap back to the port. Plug the upper cover back
to the bus connector.
B) Connect the other side of the AC end cable to the distribution box, and wire it to
the local grid network.
Step 4. Create an Installation Map
A) Peel the removable serial number label from each microinverter (The position of
the label is shown as below.)
B) Affix the serial number label to the respective location on the installation map.
Step 5. Connect PV Modules
A) Mount the PV modules above the microinverter.
B) Connect the PV modules’ DC cables to the DC input side of the microinverter.
Step 6. Energize the System
A) Turn on the AC breaker of the branch circuit.
B) Turn on the main AC breaker of the house. Your system will start to generate
power after about two-minute wait time.
Step 7. Set Up the Monitoring System
Refer to the DTU User Manual or DTU Quick Install Guide, and Quick Installation
Guide for Aptos Online Registration to install the DTU and set up your
monitoring system.
Product information is subject to change without notice. (Please download reference
manuals at www.aptossolar.com.)
MACTM 400

Other aptos Inverter manuals

aptos MAC 800R User manual

aptos

aptos MAC 800R User manual

aptos MAC 800R User manual

aptos

aptos MAC 800R User manual

aptos MAC 800 User manual

aptos

aptos MAC 800 User manual

aptos MAC 800 User manual

aptos

aptos MAC 800 User manual

Popular Inverter manuals by other brands

Sofar solar HYD 5KTL-3PH user manual

Sofar solar

Sofar solar HYD 5KTL-3PH user manual

Solark 60K-3P-N installation guide

Solark

Solark 60K-3P-N installation guide

Delta ESI 120V Specification sheet

Delta

Delta ESI 120V Specification sheet

i-MO HD2 IP Series instruction manual

i-MO

i-MO HD2 IP Series instruction manual

FRO­NIUS Primo 3.8-1 208-240 operating instructions

FRO­NIUS

FRO­NIUS Primo 3.8-1 208-240 operating instructions

Powerline 90355 operating instructions

Powerline

Powerline 90355 operating instructions

Tripp Lite PowerVerter RV Inverter/Charger RV1512UL Specifications

Tripp Lite

Tripp Lite PowerVerter RV Inverter/Charger RV1512UL Specifications

FRO­NIUS Symo Advanced Series installation instructions

FRO­NIUS

FRO­NIUS Symo Advanced Series installation instructions

Sofar solar SOFAR 3KTLM-G3 Installation and operating manual

Sofar solar

Sofar solar SOFAR 3KTLM-G3 Installation and operating manual

PowerWalker 700 PSW quick start guide

PowerWalker

PowerWalker 700 PSW quick start guide

Refu sol 40K Installation and operating manual

Refu sol

Refu sol 40K Installation and operating manual

Qcells Q.PEAK DUO BLK-G6+/AC Installation and operation manual

Qcells

Qcells Q.PEAK DUO BLK-G6+/AC Installation and operation manual

Power Bright CW150 owner's guide

Power Bright

Power Bright CW150 owner's guide

Sofar solar 3.3KTL-X user manual

Sofar solar

Sofar solar 3.3KTL-X user manual

Go Power GP-1750HD GP user manual

Go Power

Go Power GP-1750HD GP user manual

FRO­NIUS Galvo installation manual

FRO­NIUS

FRO­NIUS Galvo installation manual

DECA WELD TIG LIFT instruction manual

DECA WELD

DECA WELD TIG LIFT instruction manual

mundoclima MUPR-H7 Service manual

mundoclima

mundoclima MUPR-H7 Service manual

manuals.online logo
manuals.online logoBrands
  • About & Mission
  • Contact us
  • Privacy Policy
  • Terms and Conditions

Copyright 2025 Manuals.Online. All Rights Reserved.