APURO CD277-A User manual

Meat Slicer
Instruction manual
Model:
CD277-A/CD278-A/CD279-A

1
Safety Tips
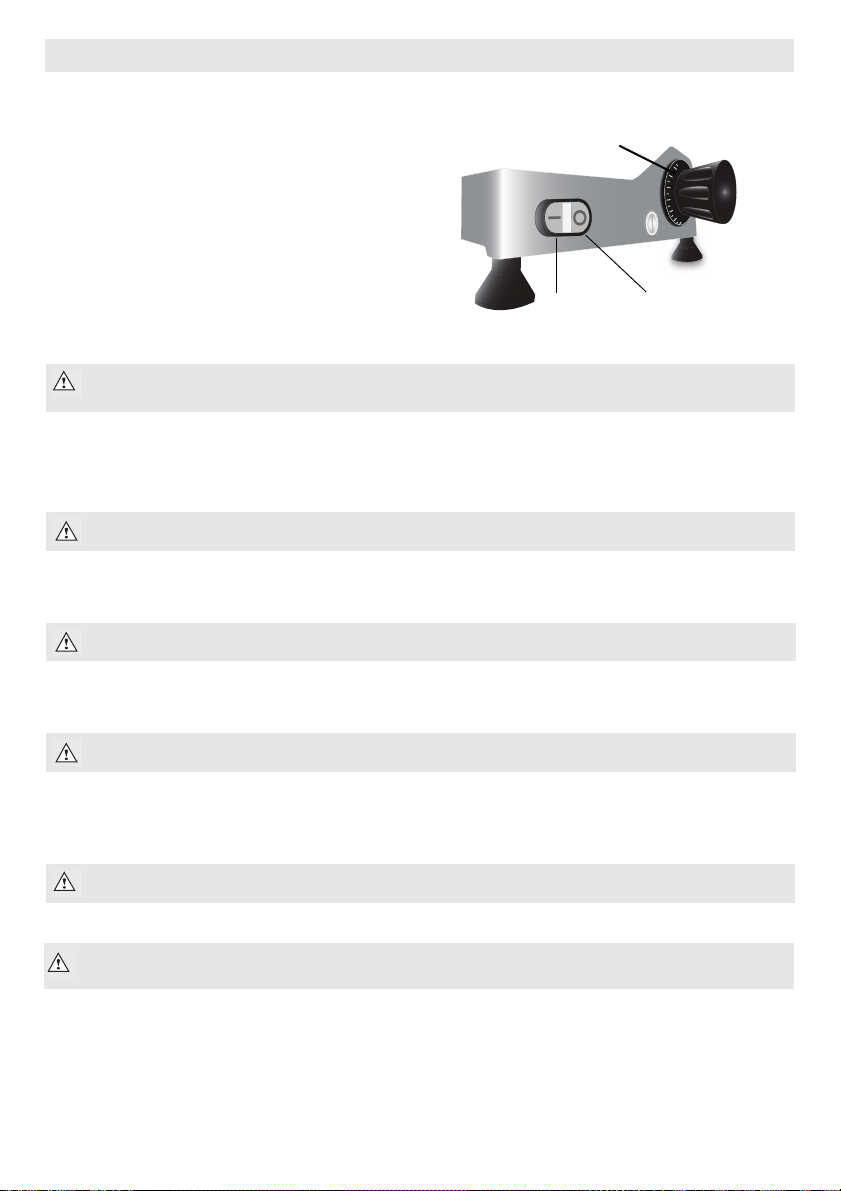
• Position on a flat, stable surface.
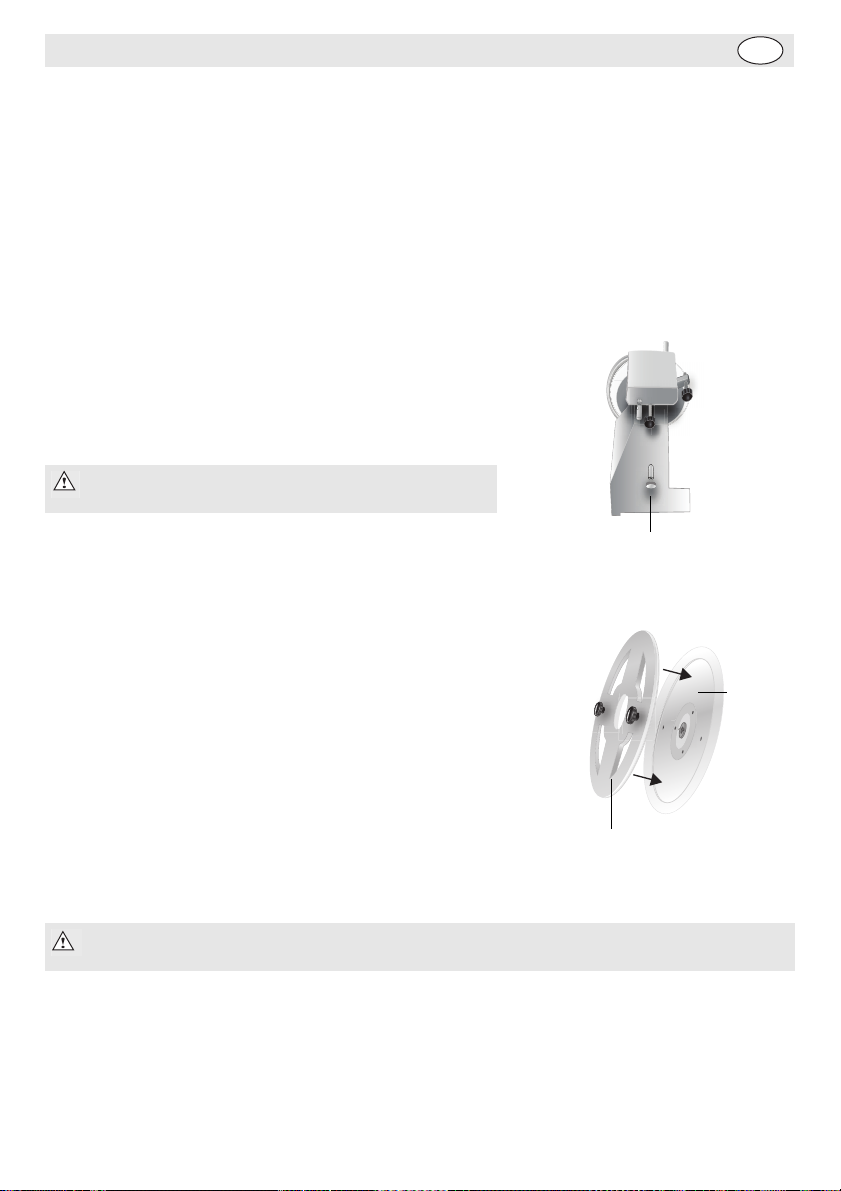
•Aservice agent/qualified technician should carry out installation and any repairs if required. Do not
remove any components on this product.
•Consult Local and National Standards to comply with the following:
• Health and Safety at Work Legislation
•Fire Precautions
•Wiring Regulations
•Building Regulations
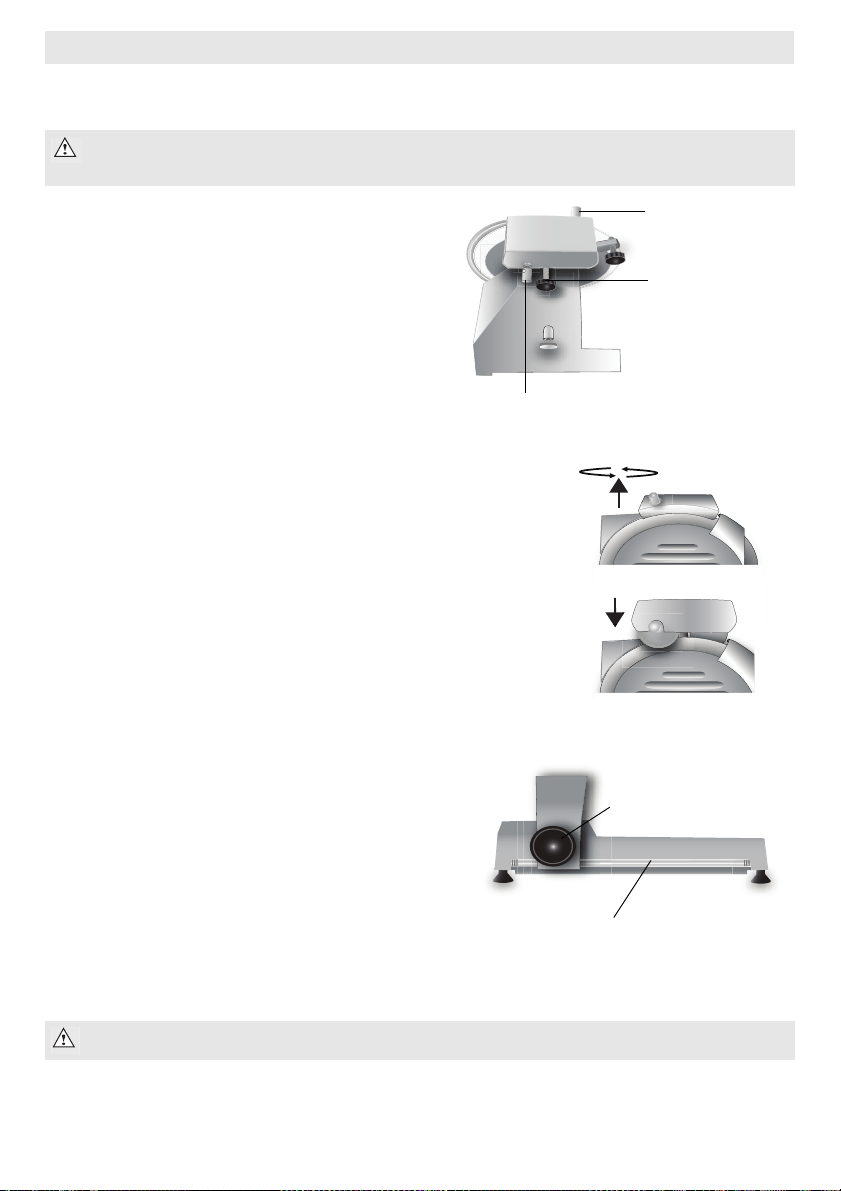
•Always stand BEHIND the safety guard when operating the appliance.
•DO NOT place hands near the blade when in use. This can result in severe injury.
•DO NOT touch the blade edge.
•DO NOT removefood from the appliance until the blade has come to a complete stop.
•DO NOT immerse the appliance in water.
•DO NOT attempt to cut bones or items that have been frozen below -6°C. This can damage the blade.
•Always switch off and disconnect the power supply to the appliance when not inuse.
•NEVER leave the appliance unattended when in use.
•Keep all packaging away from children. Dispose of the packaging in accordance to theregulations of
local authorities.
•If the power cord is damaged, it must be replaced by an Apuro agent or a recommended qualified
technician in order to avoid a hazard.
•This appliance must only be used in accordance with these instructions and by persons competent to
do so.
•This appliance is not suitable for use by children.
•Apuro recommend that this appliance should be periodically tested (at least annually) by a Competent
Person. Testing should include, but not be limited to: Visual Inspection, Polarity Test, Earth
Continuity, Insulation Continuity and Functional Testing.
Product Description
CD277-A - 220mm Blade
CD278-A - 250mm blade
CD279-A - 300mm blade
Introduction
Please take a few moments to carefully read through this manual. Correct maintenance and operation of
this machine will provide the best possible performance from your Apuro product.
THE MEAT SLICER IS ADANGEROUS APPLIANCE AND MUST ONLY BE
USED BY TRAINED PERSONNEL IN ACCORDANCE WITH THESE INSTRUCTIONS

2
Telephone Helpline: 1300 225 960
Pack Contents
The following is included:
Apuro prides itself on quality and service, ensuring that at the time of packaging the contents are supplied
fully functional and free of damage.
Should you find any damage as a result of transit, please contact your Apuro dealer immediately.
Assembly
The plastic safety guard has been removed from the appliance to prevent damage during transit.
Apuro accept no responsibility for any injury caused by operation of this appliance without the guard
installed or correctly fitted.
1. Fit griphandle support tube (2) over grip handle axle. Fit grip handle (1) to support tube.
2. Fit Blade guard (3) and Carriage handle (4) to carriage using screws(5) and allen key supplied.
WARNING: The safety guard MUST be fitted before using this appliance .
•Apuromeatslicer
•Blade removal tool
• Safety guard assembly kit
•AllenKey
• Instruction manual
•Griphandle
Carriage
Grip handle Axle
Telephone Helpline: 1300 225 960 AU

3
4. Place the meat in the cradle and secure in place with the Grip handle.
5. Switch On the power [I]. .
6. Holding the carriage and grip handles, push the carriage backwards and forwards across the blade.
7. After slicing the desired amount press the Off [O] button to turn Off the appliance.
8. Remove the sliced food from the catchment area.
Note: It is important to set the Plate fixing bolt as failure to do so can result in
inaccurate thicknesses when slicing.
WARNING: NEVER use your hands to secure the meat when slicing.
WARNING: The blade starts immediately.
WARNING: The blade continues to turn for a few seconds after switching off.
Note: Always disconnect the meat slicer from the mains powers supply when not in use.
WARNING: This unit is not suitable for slicing water rich product such as Tomatoes and
Cucumbers, meat withbones or frozen food
Operation.
1. Connect the appliance to the power supply.
2. Set the thickness to the desired level by turning
the Thickness knob anti-clockwise.
3. Turn the Plate fixing bolt clockwise so the fixing
head touches the plate. ON switch OFF switch
Slice thickness
knob

4
Telephone Helpline: 1300 225 960
Cleaning the Blade and Cover
1. Disconnect the appliance from the power supply.
2. Push the carriage away from the blade.
3. Unscrew the blade cover release bolt.
4. Carefully lift off the blade cover
5. Attach the blade removal tool by placing it over the blade and screwing the two bolts into the
corresponding holes in the blade.
6. Unscrew the 3 screws holding the blade, leaving it sat on the slicer.
7. Lift the blade off the slicer using the knobs of the blade removal tool
as handles.
8. Wash the blade by wiping from the centre towards the edge. Keep
the removal tool in place when cleaning.
If necessary, wipe clean the face of the blade once it has been
reattached.
9. Dry thoroughly.
10. Replace the blade and cover, ensuring the blade securing bolt is
securely tightened.
Note: The appliance will not work with the blade
cover release bolt unscrewed.
Note: Apuro recommend the use of cut-resistant or wire mesh gloves when cleaning the
blade.
Blade removal toolBlade removal tool
Blade
Blade cover release bolt
AU
Cleaning, Care & Maintenance
• Always turn off and disconnect the appliance from the power supply before cleaning.
• Always use extreme care when handling the blade.
• Use soapy water and a damp cloth to clean the appliance.
• Clean the appliance regularly.

5
3. Tighten the Sharpener release bolt to secure the sharpener.
4. Start the appliance.
5. Press and hold down the rear sharpening stone button to sharpen
the blade. Do not exceed one minute of constant sharpening.
6. Release the rear stone and press down the front sharpening stone
button for a few seconds to smooth the edge of the blade.
7.
Turn off the appliance and return the sharpener to its original
position, ensuring it is securely tightened.
Lubricating the Pusher Axle
1. Push the carriage to one side and clean the axle with
dry a cloth.
2. Lubricate the axle surface with grease suitable for use
in food preparation areas.
3. Push the carriage backwards and forwards several
times to distribute the grease evenly.
Note: Ensure you use a grease that is suitable for use in a food preparation area.
Carriage knob
Pusher axle
Sharpening the Blade
If the meat slicer begins to produce uneven or broken
slices, it may be blunt and require sharpening.
To sharpen the blade:
1. Unscrew the Sharpener release bolt and lift off the
blade sharpener.
2. Rotate the sharpener 180° and insert it back into
the appliance.
Note: Always clean the edge of the blade before sharpening.
Always wear protective eye wear when sharpening the blade.
Rear sharpening stone button
Front
sharpening
stone button
Sharpener
release bolt

6
Telephone Helpline: 1300 225 960
Troubleshooting
Technical Specifications
Fault Probable Cause Action
The unit is not working The unit is not switched on Check the unit is plugged in correctly
and switched on
Plug and lead are damaged Call Apuro agent or qualified
technician
Power supply Check power supply
Internal wiring fault Call Apuro agent or qualified
technician
Blade cover securing screw is
not properly inserted
Remove plate securing screw and
screw back in
The cradle hits the blade guard The carriage has been
improperly fitted
Unscrew the carriage knob, check the
carriage is properly in place then
replace the carriage knob
The blade is not cutting
properly/accurately
Blade is blunt Sharpen the blade
Plate securing screw is not
touching the plate
Tighten the securing screw
Model Voltage Power Current Slicing
Thickness
Blade
Diameter
Max.
Slicing
Width
Dimensions
w x d x h mm Weight
CD277-A 230V
50Hz
120W 0.9A 0-12.5 mm 220mm 120 X
150mm
445 x 457 x 445 17kg
CD278-A 230V
50Hz
120W 0.9A 0-12.5 mm 250mm 120 X
155mm
452 x 485 x 437 17.5kg
CD279-A 230V
50Hz
180W 1.2A 0-12.5 mm 300mm 120 X
170mm
500 x 585 x 450 26kg
AU

7
Electrical isolation points must be kept clear of any obstructions. In the event of any emergency
disconnection beingrequired they must be readily accessible.
Compliance
The product must not be disposed of as household waste. To helpprevent possible harm to human
health and/or the environment, the product must bedisposed ofinanapproved and environmentally safe
recycling process. For further information on how to dispose of this product correctly, contact the product
supplier, or the local authority responsible for waste disposal in your area.
Apuro parts have undergone strict product testing in order to comply withregulatory
standards and specifications set by international, independent, and federal
authorities.
Apuro products have been approved to carry the following symbol:
All rights reserved. No part of these instructions may be produced or transmitted in any form or by any means, electronic,
mechanical, photocopying, recording or otherwise, without the prior written permission of Apuro.
Every effort is madeto ensure all details are correct at the time of going to press, however, Apuro reserve the right to change
specifications without notice.
Electrical Wiring
The plug is to be connected to a suitable mains socket.
This appliance is wired as follows:
• Live wire (coloured brown) to terminal marked L
• Neutral wire (coloured blue) to terminal marked N
•Earth wire (coloured green/yellow) to terminal marked E
This appliance must be earthed, using a dedicated earthing circuit.
If in doubt consult a qualified electrician.


CD277-A_CD278-A_CD279-A_A5_v5_20201203
This manual suits for next models
2
Table of contents
Other APURO Kitchen Appliance manuals

APURO
APURO CJ373-A User manual

APURO
APURO DM869-A User manual

APURO
APURO GF439-A User manual

APURO
APURO CH133-A User manual

APURO
APURO CN514-A User manual

APURO
APURO CD969-A User manual

APURO
APURO CC039-A User manual

APURO
APURO CD400-A User manual

APURO
APURO CH134-A User manual

APURO
APURO CE225-A User manual