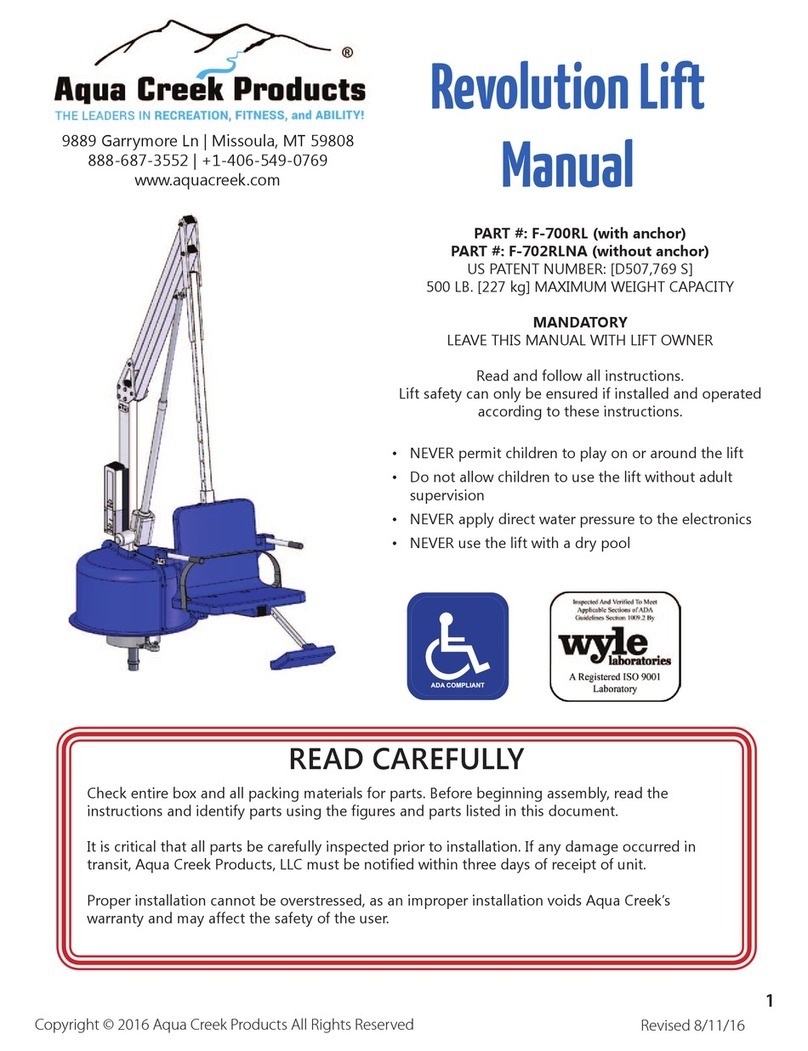
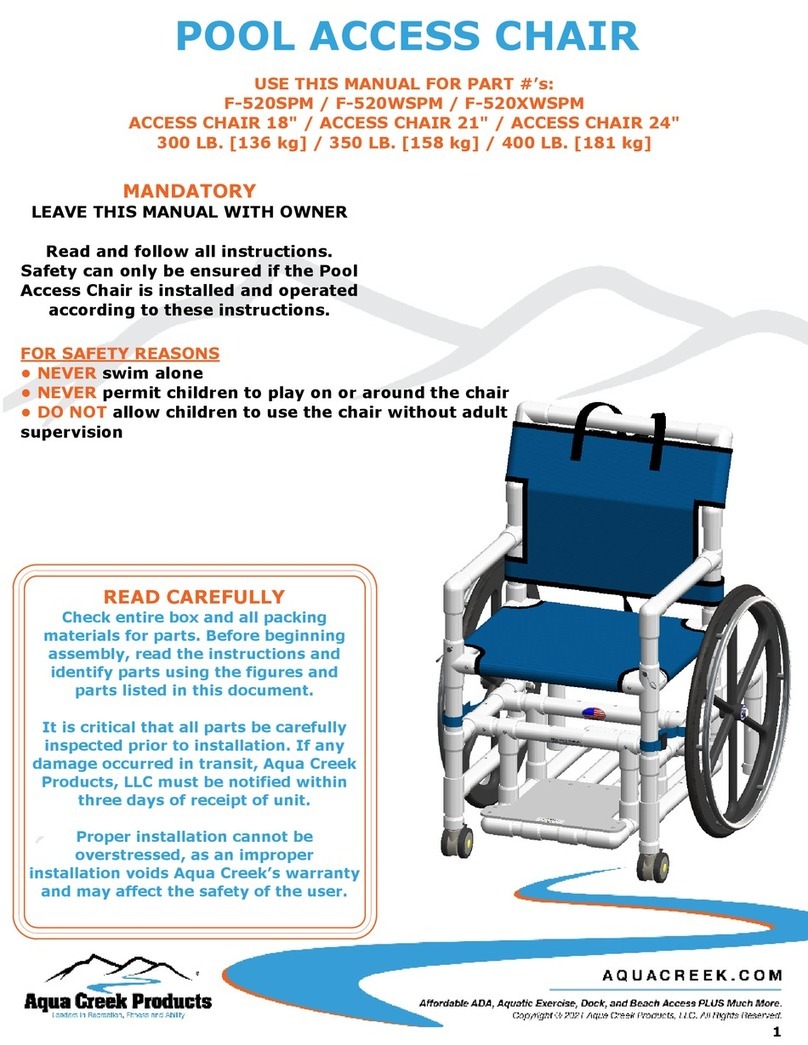
Aqua Creek SPA LIFT User manual

SPA LIFT
PRO SPA 40
US PATENT NUMBER: D507,769 S
400 LB. [181 kg] MAXIMUM CAPACITY
MANDATORY – LEAVE THIS MANUAL WITH LIFT OWNER
AQUA CREEK PRODUCTS
9889 GARRYMORE LANE
MISSOULA, MT 59808
1-888-687-3552
FAX: 406-549-2602
AQUA CREEK, LLC 2015 5/26/15 V.1
- WARNING-
IMPORTANT SAFETY INSTRUCTIONS
1. READ AND FOLLOW ALL INSTRUCTIONS. LIFT SAFETY CAN ONLY BE ENSURED IF THE
LIFT IS INSTALLED AND OPERATED PROPERLY – ACCORDING TO THESE INSTRUCTIONS.
2. TO REDUCE THE RISK OF INJURY, DO NOT PERMIT CHILDREN TO USE THIS PRODUCT
UNLESS THEY ARE CLOSELY SUPERVISED AT ALL TIMES.
3. DO NOT PERMIT CHILDREN TO PLAY ON OR AROUND THIS PRODUCT.
4. NEVER APPLY DIRECT WATER PRESSURE TO THE ELECTRONIC COMPONENTS.
5. SAVE A COPY OF THESE INSTRUCTIONS IN A SAFE AND EASILY ACCESSIBLE PLACE.
PRO
-
SPA 40
SPA LIFT

2
ASSEMBLY INSTRUCTIONS
The lift arrives mostly assembled on a crate. Begin by locating all parts for your lift in the parts
lists below. Refer to page 4 for parts identification.
PARTS LIST
CRATE 1
1. SPA LIFT ASSEMBLY
ITEMS INCLUDED WITH SPA LIFT/ PRO SPA 40 LIFT
1. (1) 24V BATTERY
2. (1) BATTERY CHARGER
3. (1) HAND CONTROLLER
4. (1) SEAT BELT
5. (1) HARDWARE BAG
TOOLS NEEDED:
3/4" Wrench Drill
Hammer Marker/Chalk
1 1/8" Masonry Bit Epoxy or Hydraulic Cement
1.) Locate the 24v battery and wall mount battery charger. Batteries arrive from the factory
partially charged. Charge the battery for 24 HOURS before initial use of the lift.
Determine the location that you want to position the wall mount charger (next to a 110v
AC outlet), and fasten it with the supplied screws. Plug in the charger to the outlet.
2.) Clip the battery to the charger and allow the battery to charge. When the battery is
correctly mounted to the charger, the CHARGE light will illuminate. When the battery
is fully charged, the CHARGE light will GO OFF.
3.) If the anchors have already been installed at this point, skip to page 4. If the anchors
have not already been installed, follow the anchor installation instructions on page 3.
HARDWARE BAG
ITEM # QTY. DESCRIPTION PART USE / LOCATION
1 3 4” DUAL THREADED ANCHOR ANCHOR
2 3 1/2” x 1-1/2” HEX HEAD BOLT S.S. STANDARD ANCHOR BOLT
3 3 1/2” FLAT WASHER S.S. ANCHOR BOLTS

3
ANCHOR INSTALLATION INSTRUCTIONS
TOOLS NEEDED: Hammer, 1 1/8” Masonry Bit, Drill, Marker/Chalk
Before installing the anchors, it is necessary to determine where you want to place the lift on
your deck. You will want to locate the lift as close to the outside wall of your pool/spa as
possible to ensure that the seat arm clears your spa/pool wall. As shown in figure 1 below, the
lift must be a minimum 4” from the front anchor holes to the pool/spa wall. Also, you will want
to allow enough room for the seat arm to swing around away from the pool/spa. Refer to the
specifications for lift dimensions.
1.) The lift is shipped with 4” anchors. If you are installing the anchors and have not
received the lift, use the dimensions from figure 1 below to set the anchor locations.
Make a mark on the deck with a marker or chalk at each anchor location. If you have the
lift and have not installed the anchors, position the lift at the desired location and mark
the concrete at each anchor location.
2.) Using the 1 1/8” [30mm] masonry bit drill a hole in the concrete deck to a depth of 4 ½”
[114mm] at each of the three anchor locations. The holes must be drilled plum, or the lift
bolts will not thread into the anchors. Once the holes have been drilled to the proper
depth, clean debris out of anchor holes.
3.) Check that the holes are deep enough by dropping a 4” anchor into the hole to make sure
it comes out flush with the deck surface. If not re-drill the hole/holes until they are flush.
4.) Fill each hole ½ full with expanding epoxy or hydraulic cement. Thread a 1-1/2” bolt into
each anchor and then insert the anchor into the hole, twisting as you go. Clean off any
excess epoxy from around the hole, and make sure not to get any epoxy on the ½”
threads.
FIGURE 1

4
INSTALLING THE LIFT
1.) Once the anchors have been installed, you can now install the lift. Position the lift over
the anchors as shown in figure 2.
2.) Using the supplied hardware, secure the lift to the deck as shown in figure 2.
3.) Attach the supplied safety belt to the chair by opening each end of the belt and looping
the ends through the slots on either side of the chair as shown in figure 2. The Velcro
ends can be adjusted to suit the users’ needs.
4.) Attach the handset control plug at the base of the control box. Press firmly until plug is
fully seated in the control box. Attach the fully charged battery pack to the control box
as shown in figure 2 below. The battery should “snap” into place.
FIGURE 2

5
ADJUSTING SEAT ANGLE:
The angle of the seat arm is adjustable to provide
additional clearance from the spa wall. Adjust the
angle of the seat arm assembly by loosening the 3/8”
jam nut and adjusting the 3/8” bolt at the base of the
lifting plates (top of lifting arm). As shown in the
diagram to the right, tighten the bolt to increase
clearance, and loosen it to decrease the angle of the
seat arm. When the desired angle is achieved tighten
the jam nut to lock the angle.
OPERATING INSTRUCTIONS SPA LIFT AND PRO SPA 40
NOTE: CHECK ALL NUTS & BOLTS FOR TIGHTNESS BEFORE EACH USE
NOTE (PRO SPA 40 ONLY): CHECK DRIVE BELT FREQUENTLY TO PREVENT
SLIPPAGE AND PROLONG SYSTEM LIFE. (SEE BELOW “BELT TIGHTENING”)
Before attempting to transfer into the chair, check the battery warning light on the 24v battery. If
this light is illuminated, this means the battery is at a low charge.
DO NOT attempt to use the lift if the “low charge” indicator light is on. Remove the battery
from the lift and place it on the wall mount charger until the battery is fully charged before
resuming use of the lift.
If your lift is equipped with a pullout leg-rest it will be
necessary to have the leg-rest engaged in the extended position
with the leg-rest flipped up for pool/spa walls higher than 36”.
For pool/spa walls shorter than 36”, the leg-rest may be flipped
up or down.
You may transfer to the chair from either side, by flipping up the
armrest on the preferred side to allow for easy lateral transfer.
Once you are in the chair, lower the flip-up arm back into its
normal position for operating the lift. If your lift is equipped
with a leg-rest, position your legs comfortably on the leg-rest.
Secure the adjustable lap belt around your waist so that the belt
is snug, but not uncomfortably tight.
You are now seated comfortably in the lift, and ready to move
into the pool or spa. Before you begin the lift’s operating cycle, take a visual check of the deck
area and pool/spa area to ensure a clear operating path.
Figure 5

6
PRO SPA 40 USERS (AUTO-ROTATE)
Now take the handheld controller and press the “up” arrow at the top of the controller. The lift
should start to move up smoothly. Continue holding the “up” arrow button until you have
cleared the pool/spa wall. Once the user has cleared the pool/spa wall vertically, press either of
the lower buttons on the handheld controller to rotate over the pool/spa wall. The PRO SPA is
equipped with a push-button rotate mechanism that allows the lift to rotate 360clockwise, or
counter-clockwise. By pressing either of the lower “rotate” buttons, the user may rotate in and
out of the pool/spa in either direction.
WARNING! THE ROTATE MECHANISM ON THE LIFT IS DESIGNED TO ROTATE
THE LIFT WITH A 400 LB. MAXIMUM WEIGHT CAPACITY. IF THE CHAIR IS
IMPEDED BY AN OBJECT WHILE ROTATING, THE LIFT MAY BEGIN TO CLICK
OR POP. THIS MEANS THAT THERE IS TOO MUCH RESISTANCE ON THE LIFT.
PROMPTLY STOP THE ROTATION AND REMOVE THE RESISTANCE. THE LIFT
SHOULD NOW CONTINUE TO ROTATE SMOOTHLY.
Once the user is positioned over the pool/spa, simply press the “down” arrow to lower the user
into the pool/spa. Release the “down arrow” button once the user has reached the desired depth
in the pool/spa. Now release the lap belt by tugging gently on the top flap of the lap belt. Lift up
the flip-up arm-rest and exit the seat into the pool/spa. The handheld controller can simply rest
on the seat arm when the user is not using the lift. If desired, the user can send the lift chair up
and out of the pool/spa so that the chair is not a hindrance while he or she is in the pool/spa. If
this is desired, the controller must be kept in an accessible location in order to call the lift back.
WARNING: DO NOT ROTATE THE LIFT WHILE IT IS
SUBMERGED IN THE POOL/SPA. THIS MAY RESULT IN INJURY
TO THE USER AND/OR DAMAGE THE LIFT OR POOL.
When the user is ready to return to the lift seat and exit the pool or spa, make sure that the chair
is lowered (submerged) sufficiently to allow the user to easily slide into the chair. You will not
want to attempt to “lift” or raise into the chair. Position your legs onto the leg-rest. Next, re-
secure the adjustable lap belt snugly around your waist. Now take the handheld controller and
apply pressure to the “up” arrow. Maintain pressure on the up button until the lift has cleared the
pool/spa wall vertically. Rotate the lift using either of the lower “rotate” buttons until the chair is
located vertically above the position on the deck that you desire to exit the lift. Press the “down
arrow” until the lift comes to a stop. Finally, release the safety belt, flip up the arm rest, and exit
the chair.

7
SPA LIFT USERS (MANUAL-ROTATE)
Now take the handheld controller and press the “up” arrow at the top of the controller. The lift
should start to move up smoothly. Continue holding the “up” arrow button until you have
cleared the pool/spa wall. Once the user has cleared the pool/spa wall vertically, it will be
necessary for an assistant to manually rotate the user over the pool/spa. This may be done by
pushing the seat arm and seat until the seat arm begins to rotate. Once the user is located above
the pool/spa, press the “down” arrow to lower the user into the pool/spa. Release the “down”
arrow button once you have reached the desired depth.
Now release the lap belt by tugging gently on the top flap of the lap belt. Lift up the flip-up arm-
rest and exit the seat into the pool/spa. The handheld controller can simply rest on the seat arm
when you are not using the lift. If desired, you can send the lift chair up and out of the pool/spa
so that the chair is not a hindrance while you are in the pool/spa. If this is desired, you must
keep the controller in an accessible location in order to call the lift back. The attendant/assistant
should stand bye in case you need to get out of the pool/spa quickly.
When you are ready to return to the lift seat and exit the pool or spa, make sure that the chair is
lowered (submerged) sufficiently to allow you to easily slide into the chair. You will not want to
attempt to “lift” or raise yourself into the chair. Position your legs onto the leg-rest (if equipped
with leg-rest). Next, re-secure the adjustable lap belt snugly around your waist. Now take the
handheld controller and apply pressure to the “up” arrow. Maintain pressure on the up button
until the lift has cleared the pool/spa wall vertically. It will now be necessary for an assistant to
push the seat arm until it rotates over the deck at the desired exit position. Press the “down
arrow” until the lift comes to a stop. Finally, release the safety belt, flip up the arm rest, and exit
the chair.
OPERATING INSTRUCTIONS SPA LIFT LEG REST
NOTE: CHECK ALL NUTS & BOLTS FOR TIGHTNESS AND FOR WORN PARTS
BEFORE EACH USE
If your lift is equipped with a pullout leg-rest it will be
necessary to have the leg-rest engaged in the extended position
with the leg-rest flipped up for pool/spa walls higher than 36”.
For pool/spa walls shorter than 36”, the leg-rest may be
flipped up or down. To extend the leg-rest, simply pull the
leg-rest out to the desired position. Next, grip the front of the
leg-rest, and flip it up so that the leg rest is in the horizontal
position, as shown in figure 4. The leg-rest plate should then
“lock” into place. To disengage the leg-rest, simply lift the
leg-rest plate until you feel it slip out of the locked position,
then allow the plate to fall into the lowered position. Finally,
push the leg-rest back into the seat tube until it reaches a stop
in the “stowed away” position.
NOTE: It will be necessary for an assistant to operate the
lift. Figure 6

8
You may transfer to the chair from either side, by flipping up the armrest on the preferred side to
allow for easy lateral transfer. Once you are in the chair, lower the flip-up arm back into its
normal position for operating the lift. If your lift is equipped with a leg-rest, position your legs
comfortably on the leg-rest. Secure the adjustable lap belt around your waist so that the belt is
snug, but not uncomfortably tight.
You are now seated comfortably in the lift, and ready to move into the pool or spa. Before you
begin the lift’s operating cycle, take a visual check of the deck area and pool/spa area to ensure a
clear operating path.
Now release the lap belt by grasping the end of the belt that is protruding above the lap belt and
tugging gently. Lift up the flip-up arm-rest and exit the seat into the pool/spa. If desired, the
assistant can send the lift chair up and out of the pool/spa so that the chair is not a hindrance
while the user is in the pool/spa.

9
BATTERY SYSTEM OPERATING INSTRUCTIONS
CONTROL BOX HANDHELD
CONTROLLER
The Spa and Pro Spa Battery system come with a 24v sealed rechargeable battery, wall mount
charging unit (with mounting bracket), control box, and a waterproof handheld controller. The
control box is mounted to the liftand has a plug-in socket for the actuator, the rotate motor (Pro Spa)
and the handheld controller. The battery mounts directly above the control box with a quick-release
clip.
To operate the lift, plug in the handheld controller to the control box and push the corresponding
button to raise, lower or rotate the unit. The lift should be able to complete approximately 10-20
full cycles before the low battery indicator tone will sound. The low battery tone indicates that
there is approximately 20% battery life remaining. At this point, DO NOT ATTEMPT TO
OPERATE THE LIFT, remove the battery from the unit and recharge on the wall mounted charging
unit.
To recharge the battery, simply grip the top of the battery and depress the clip on the back of the
battery. This will unclip the battery from the control box bracket and the battery can then be
clipped into the wall mount charger. When the charger is plugged in the green ON light will
illuminate. When the battery is correctly mounted to the charger, the orange CHARGE light will
illuminate. When the battery is fully charged, the CHARGE light will GO OFF and the battery is
ready for use.
WHEN THE BATTERY IS NOT BEING USED IT SHOULD BE STORED ON THE
CHARGER AND NEVER ON THE LIFT. DO NOT LEAVE THE BATTERY ON THE
LIFT WHEN THE LIFT IS NOT IN USE.
WALL MOUNT
CHARGER
24 V SEALED BATTERY

10
BATTERY MAINTENANCE
1. RECHARGE THE BATTERY AS OFTEN AS POSSIBLE. The battery power unit is a sealed
lead acid battery pack. Frequent recharges will prolong the battery life and maintain a high cold
amperage capacity. THE BATTERY CAN BE STORED ON THE CHARGER WHEN NOT IN
USE.
2. Do NOT expose the battery to freezing temperatures.
3. Do NOT expose the battery to prolonged periods of extreme heat or severe cold temperatures.
4. Do NOT expose the battery to long periods of direct sunlight. Heat will shorten your battery life.
Optimum operating temperature is below 20 degrees Celsius (68 degrees F.)
5. Never drop or bump the battery pack. This may result in loose or damaged internal connections, and
may bend the battery terminals.
6. Keep battery terminals clean and free from dirt and corrosion to ensure good contact. The terminals
may be cleaned using Scotch Brite or any similar product. Clean off any corrosion or discoloration
on the very top surfaces of the battery contacts and then apply dielectric grease (supplied with lift) as
shown in the figure below.

11
EXPLODED VIEW PRO SPA 40

12
ITEM # QTY PART NUMBER DESCRIPTION
1 1 SPA/PSPAWM-SA-0904SBA WELDMENT, BASE, SPA/PRO SPA
2 1 40WM-A-1050PSH PRO SPA CYLINDER WELDMENT
3 1 SPA/PSPA-SA-1004SPS PISTON ASSY, SPA/PRO SPA
4 1 SPA/PRO SPA UPPER ARM SPA/PRO SPA UPPER ARM ASSEMBLY
5 1 SPA/PSPA-SA-1050CA SPA/PRO SPA CHAIR ARM WELDMENT
6 1 P-0204SCR-B CONNECTING ROD, SPA/PRO SPA
7 1 SA-0904CA-A 18" CHAIR ASSEMBLY
8 1 F-105LAR LEGREST, PULL OUT
9 1 340461-00 ACTUATOR, LINAK, LA-34
10 1 CBJ2-U023-00 CONTROL BOX, LINAK, 2-PORT
11 1 BAJ1-U022-00 BATTERY, LINAK, 24 VOLT
12 1 MBJ2-01 BRACKET, MOUNTING, T SHAPED
13 1 HB00-U010-00 REMOTE, LINAK, PRO SPA
14 1 P-0204RMS SHROUD, ROTATE MOTOR, SPA/PRO SPA
15 1 48281-I PULLEY, TP P28-8M-20, 3/4 DF, SS KW
16 1 PRO SPA-SA-1004RPC ROTATE PULLEY COLLAR ASSEMBLY
17 1 480-8M-20 ROTATE TIMING BELT
18 1 4175 MOTOR, PARALLEL SHAFT DC GEARMOTOR
19 8 BOLT, 1/4-20 X1/2 BHSCS BOLT, 316 SS, 1/4-20 X1/2 BHSCS
20 9 BOLT, 1/4-20 X1 HCS BOLT, 316 SS, 1/4-20 X1 HCS
21 4 BOLT, 1/4-20 X1 BHSCS BOLT, 316 SS, 1/4-20 X1 BHSCS
22 22 FLAT WASHER, 1/4 SS WASHER, FLAT, 1/4, 316 SS
23 9 NYLOCK, 1/4-20 SS NUT, 316 SS, NYLOCK, 1/4"-20
24 1 BOLT, 3/8 X1 1/4 SHOULDER BOLT, 18-8 SS, 3/8 X1 1/4 SHOULDER, 5/16-18 THREAD
25 2 BOLT, 3/8-16 X3 HCS BOLT, 316 SS, 3/8-16 X3 HCS
26 2 FLAT WASHER, 3/8 SS WASHER, FLAT, 3/8, 316 SS
27 1 NYLOCK, 3/8-16 SS NUT, 316 SS, NYLOCK, 3/8"-16
28 2 NUT, 3/8-16 HEXJAM NUT, 316 SS, HEX, 3/8"-16, JAM NUT
29 1 BOLT, 5/16-18 X4 HCS BOLT, 316 SS, 5/16-18 X4 HCS
30 3 FLAT WASHER, 5/16 SS WASHER, FLAT, 5/16, 316 SS
31 2 NYLOCK, 5/16-18 SS NUT, 316 SS, NYLOCK, 5/16"-18
32 1 BOLT, 1/2-13 X4 HCS BOLT, 316 SS, 1/2-13 X4 HCS
33 2 FLAT WASHER, 1/2 SS WASHER, FLAT, 1/2, 316 SS
34 1 NYLOCK, 1/2-13 SS NUT, 316 SS, NYLOCK, 1/2"-13
35 1 BOLT, 3/8-16 X1 1/4 HCS BOLT, 316 SS, 3/8-16 X1 1/4 HCS
36 2 P-SLE110 SLEEVE, UHMW, FOR SPA LIFT SEAT POLE
37 2 BOLT, 3/8-16 X3/4 HCS BOLT, 316 SS, 3/8-16 X3/4 HCS
PRO-SPA 40 PARTS LIST

13
EXPLODED VIEW SPA LIFT

14
ITEM # QTY PART NUMBER DESCRIPTION
1 1 SPA/PSPAWM-SA-0904SBA WELDMENT, BASE, SPA/PRO SPA
2 1 SPAWM-A-1050SH SPA LIFT CYLINDER WELDMENT
3 1 SPA/PSPA-SA-1004SPS PISTON ASSY, SPA/PRO SPA
4 1 SPA/PRO SPA UPPER ARM SPA/PRO SPA UPPER ARM ASSEMBLY
5 1 SPA/PSPA-SA-1050CA SPA/PRO SPA CHAIR ARM WELDMENT
6 1 A-0204SCR-B CONNECTING ROD, SPA/PRO SPA
7 1 SA-0904CA-A 18" CHAIR ASSEMBLY
8 1 F-105LAR LEGREST, PULL OUT
9 1 P-SLE105 CYLINDER ROTATE CAP
10 1 340461-00 ACTUATOR, LINAK, LA-34
11 1 CBJ2-U022-00 CONTROL BOX, SINGLE PORT, LINAK
12 1 BAJ1-U022-00 BATTERY, LINAK, 24 VOLT
13 1 MBJ2-01 BRACKET, MOUNTING, T SHAPED
14 1 M5 X10MM LPCS BOLT, 316 SS, M5 X10MM LPCS
15 2 BOLT, 10-24 X3/8 SHCS BOLT, 316 SS, 10-24 X3/8", SHCS
16 2 BOLT, 1/4-20 X1/2 BHSCS BOLT, 316 SS, 1/4-20 X1/2 BHSCS
17 1 BOLT, 3/8-16 X3 HCS BOLT, 316 SS, 3/8-16 X3 HCS
18 2 FLAT WASHER, 3/8 SS WASHER, FLAT, 3/8, 316 SS
19 1 NYLOCK, 3/8-16 SS NUT, 316 SS, NYLOCK, 3/8"-16
20 1 BOLT, 1/2-13 X4 HCS BOLT, 316 SS, 1/2-13 X4 HCS
21 2 FLAT WASHER, 1/2 SS WASHER, FLAT, 1/2, 316 SS
22 1 NYLOCK, 1/2-13 SS NUT, 316 SS, NYLOCK, 1/2"-13
23 1 BOLT, 3/8-16 X1 1/4 HCS BOLT, 316 SS, 3/8-16 X1 1/4 HCS
24 3 FLAT WASHER, 5/16 SS WASHER, FLAT, 5/16, 316 SS
25 2 NYLOCK, 5/16-18 SS NUT, 316 SS, NYLOCK, 5/16"-18
26 1 BOLT, 3/8 X1 1/4 SHOULDER BOLT, 18-8 SS, 3/8 X1 1/4 SHOULDER, 5/16-18 THREAD
27 9 BOLT, 1/4-20 X1 HCS BOLT, 316 SS, 1/4-20 X1 HCS
28 18 FLAT WASHER, 1/4 SS WASHER, FLAT, 1/4, 316 SS
29 9 NYLOCK, 1/4-20 SS NUT, 316 SS, NYLOCK, 1/4"-20
30 1 BOLT, 5/16-18 X4 HCS BOLT, 316 SS, 5/16-18 X4 HCS
31 1 NUT, 3/8-16 HEXJAM NUT, 316 SS, HEX, 3/8"-16, JAM NUT
32 1 HB00-U017-00 REMOTE, LINAK, 2 BUTTON
SPA LIFT PARTS LIST

15
ITEM NO. QTY. PART NUMBER DESCRIPTION
1 1 P-901 CHAIR, PLASTIC, 18" BLUE
2 2 P-2100FLA-38 CHAIR II ARMREST TUBE
3 1 P-1208HSB BRACKET, PLASTIC, HANDSET BRACKET
4 2 RUBBER HAND GRIPS GRIP, RUBBER HAND GRIP
5 2 SCREW, #12 X3/4 FHSMS SCREW, 316 SS, #12 X3/4", FHSMS
6 4 FLAT WASHER, 1/4 SS WASHER, FLAT, 1/4, 316 SS
7 2 BOLT, 1/4-20 X3 1/4 BHSCS BOLT, 316 SS, 1/4-20 X3 1/4 BHSCS
8 2 NYLOCK, 1/4-20 SS NUT, 316 SS, NYLOCK, 1/4"-20
9 1 COTTER PIN, 1/4 X3 1/4 PIN, COTTERLESS PIN, 18-8 SS, 1/4 X3 3/4
10 1 LANYARD LANYARD, FOR FOOTREST PIN, SS
11 1 SCREW, #10 X3/4 PHSMS SCREW, 316 SS, #10 X3/4", PHSMS
12 1 F-38SB SEAT BELT, 2" WIDE BLACK W/ VELCRO
13 2 SCREW, #6 X1/2 PHSMS SCREW, 316 SS, #6 X1/2", PHSMS
SEAT ASSEMBLY PARTS LIST

16
CARE OF YOUR LIFT
Routine cleaning is an absolute necessity to ensure the integrity of the lift. Note that the Aqua Creek Pool Lift should
not be stored in a pump room or in a storage room where pool chemicals are kept. Storing the lift near pool chemicals
may cause rusting and other damage to occur. Your Aqua Creek stainless steel lift is powder coated to protect the
stainless steel from rusting. Most rusting will occur at weld points, crevices, under gaskets, rivets or bolt heads.
The choice of a proper cleaning product is up to the consumer and there are many to choose from. Depending on the
type of cleaning and the degree of contamination (rusting), some products are better than others. For routine cleaning
the products most recommended are gentle soaps or detergents or dilute mixtures of ammonia. For stubborn spots and
stains try using soft scrub with some brisk rubbing.
DO NOT USE POOL WATER TO CLEAN USE ONLY FRESH WATER
If the lift is used DAILY make sure to wash the lift at the end of the day. Wash the lift off using a mild soap and a soft
cloth. Make sure to pay special attention to weld points and crevices. Do not use a bristled brush or steel wool to clean
the lift. Check that the lift is working properly and then place the battery on the charger. It is recommended that the
battery be charged after every day of use.
If the lift is used WEEKLY follow the same steps as above. Also be sure to check all of the contact points (terminals)
for damage or corrosion. If you notice corrosion gently clean the terminals. To clean corrosion from the terminals use a
q-tip and some rubbing alcohol. If the corrosion is particularly stubborn try using a 3M scotch brite pad, but be careful
not to damage the terminals. Apply dielectric grease to the terminals after cleaning them. This will help to prevent
further corrosion. Do not leave the battery on the lift. Always store the battery on the charger whenever the lift is not
being used.
If the lift is used MONTHLY follow the same steps as above. Also check the nuts and bolts to make sure they are
securely fastened (this is always a good idea, no matter how often or infrequently the lift is used). Also make sure to
store the battery on the charger and not on the lift. Leaving the battery on the lift for extended periods will significantly
shorten the battery’s lifespan.
If the lift is being STORED for an extended period of time follow all of the steps above. Check for rusting at all
crevice and weld points. If you notice rusting, apply some mild dish detergent to the affected area and take a 3M scotch
brite pad and rub briskly. Afterwards, be sure to rinse the lift with clean water NOT pool water. When storing the lift
make sure it is in a dry area and covered. DO NOT STORE in or around pool chemicals.
SAFETY & MAINTENANCE INSTRUCTIONS
1. Do not play on or around this lift
2. Check the SPA Lift before each use to assure there are no worn parts and that all
hardware is properly tightened. If there are any worn parts, replace them
BEFORE using the SPA Lift. You can call our customer service at 1-888-687-
3552 to order any parts.
3. Aqua Creek Products, LLC shall be grounded per local codes.
4. At least ONCE A WEEK, the SPA Liftmust be cleaned with fresh water. Do not
spray the SPA Lift24v battery unit directly with any pressure. Wipe all surfaces
clean with a damp, non-abrasive cloth. When cleaning the SPA Lift, use non-
abrasive soap and water. Avoid harsh chemicals and disinfectants.
5. Always read the label instructions on any cleaner carefully before applying it to a
surface.
6. The WARNING & INTENDED USE labels on the SPA Lift need to be
maintained in readable fashion. If they become unreadable or faded, please
replace the immediately. Replacement labels are available from AQUA CREEK
PRODUCTS LLC. 1-888-687-3552.

17
BELT TIGHTENING:
The drive belt should be checked periodically to
ensure it is tight, to ensure that the lift rotates
properly. To check the drive belt remove the motor
shroud (see parts section) and check that the drive
belt is snug and does not slip when the lift is rotated.
If the belt slips or does not seem tight, tighten the
belt using a pry-bar and a combination wrench as
shown. Loosen all four bolts, use the pry-bar to
tighten belt and hold it tight while retightening the
bolts.

18
AQUA CREEK PRODUCTS
24V SPA/PRO SPA LIFT TROUBLESHOOTING GUIDE
Before troubleshooting make sure the battery is fully charged.
If the lift doesn’t move when the handset button is pressed:
When you can’t get the lift to move check the following things:
1. Make sure the battery is fully charged:
A. Before charging the battery first make sure the green light on the front of the charger is
illuminated (this means that the charger is on). Then check to make sure the silver contact points
on the battery and charger are not damaged or corroded, and that they are clean. Then place the
battery on the charger and look for the orange charge light to illuminate on the front of the
charger. When the orange light goes off the battery is fully charged.
B. When the battery is correctly installed on the charger or control box you should hear a “click”
indicating the battery is properly seated on the unit. Also note that when the battery is properly
seated there should not be any gaps between the battery and the control box/charger.
The top green light will always be
illuminated indicating that it has
power. When charging the battery the
bottom orange light will illuminate,
until fully charged.
Not attached properly. Note the
white bracket is in front of silver clip,
which will not allow for an electrical
connection.
Properly Attached.
Note that the white bracket is behind the
silver clip. Not allowing movement.

19
If the battery is fully charged and the lift is not moving then:
2. Check all cords:
A. Check that the cords are properly plugged in. Start by unplugging the remote and the actuator
cord from the control box. Once these cords are removed check the ends for corrosion or
damage. Plug the remote cord back in by lining up the raised tab on the plug to the grooved line
on the control box outlet. Note that these cords require some force to plug them in fully. You
will know they a correctly inserted when you here a “popping sound”. The cords will be recessed
into the outlet. If they are flush with the outside of the outlet they are not plugged in fully and the
lift will not function. Make sure you do this for both cords.
If you have checked all the cords and the lift still doesn’t move:
3. Check the contact points:
A. After you have fully charged the battery and checked the cords to make sure they are properly
plugged in, check to make sure the contact points are not corroded or bent. If the contact points
are corroded take some rubbing alcohol and a q-tip and clean off the points. After cleaning the
contact points it is recommended to put some dielectric grease on the contact points (terminals) to
help ensure good electrical contact and prevent corrosion. Then reinstall the battery on top of the
control box. Make sure you hear a “click”, which indicates that the battery is correctly seated.
The lift will not work if the battery is not seated correctly.
NOT inserted fully. Fully inserted.
Silver tabs are the contact
(terminal) points.

20
If the lift stops moving over the water and is stuck:
4. Then try pushing the emergency button:
A. If the lift gets stuck out over the water use a pen or pencil tip and stick it into the emergency
button on the front of the control box to retract the lift. Note the lift will not retract if the battery is
not fully charged or if the control box is not working. The emergency button only overrides the
remote in case it has gone bad. If this does not retract the lift then chances are the remote is fine and
you either have a problem with the battery, the control box, or the cords are damaged or not plugged
in properly.
Use a pen or pencil tip to
push in the small black circle
located next to the word
emergency, on the front of
the control box.
This manual suits for next models
1
Table of contents
Other Aqua Creek Mobility Aid manuals
Popular Mobility Aid manuals by other brands

Drive DeVilbiss
Drive DeVilbiss Cristallo operating instructions

Mobility Designed
Mobility Designed MD10013 M+D Crutch Instructions for use

Otto Bock
Otto Bock 2R30 Instructions for use

MOBB Health Care
MOBB Health Care Bed Assist Rail Instructions for use

Thermor
Thermor BIOS living 56023 quick start guide

Aspire
Aspire Side Folding Frame Aluminium manual