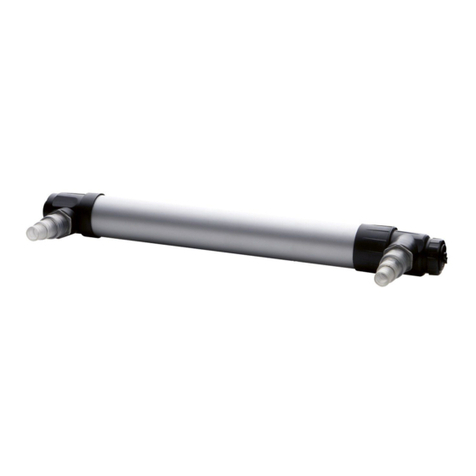
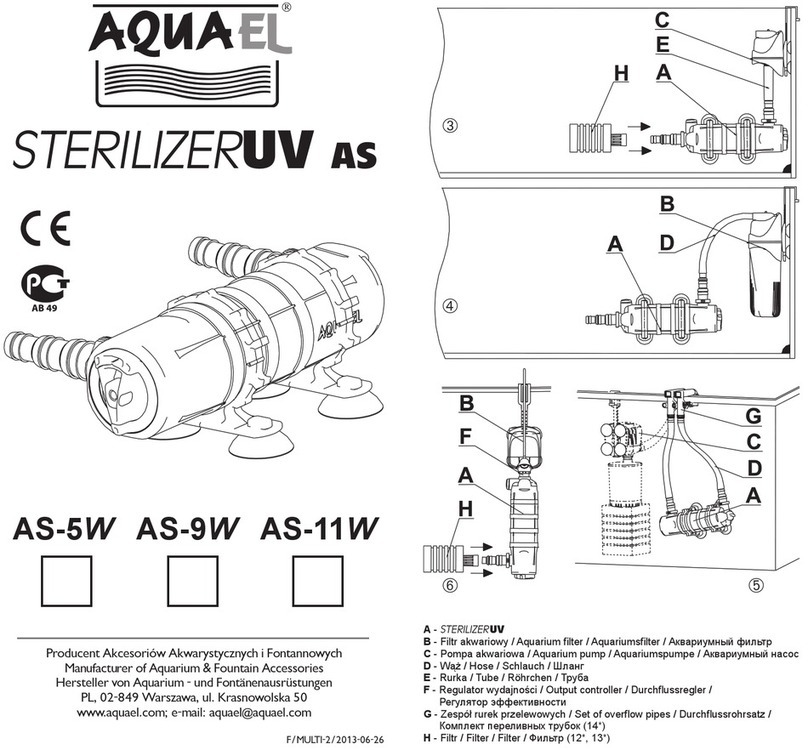
AQUA EL PS-9W User manual

STERILIZER
INSTRUKCJA OBSŁUGI
OPERATING INSTRUCTIONS
GEBRAUCHSANLEITUNG
NOTICE D’UTILISATION
Wydanie: C / MULTI / 2005-04-05
AQUAEL Producent Akcesoriów Akwarystycznych i Fontannowych
AQUAEL Manufacturer of Aquarium & Fountain Accessories
AQUAEL Hersteller von Aquarium - und Fontänenausrüstungen
AQUAEL Fabricant d’aquariums et d’accessoires pour fontaines
02-849 Warszawa, ul. Krasnowolska 50, Poland
www.aquael.pl; e-mail: [email protected]
PS-9WPS-11W
UV-PS_C_MULTI.indd 2005-04-15, 14:581

БЪЛГАРСКИ........................................... 28
Характеристики на уреда....................... 28
Условия за безопасна употреба............ 29
Подготовка за пускане............................ 29
Пускане и употреба ................................ 30
Почистване на стерилизатора............... 30
Смяна на флуорисцентната лампа....... 31
Гаранционни условия............................. 31
MAGYAR.................................................. 32
A készülék tulajdonságai .......................... 32
A biztonságos használat feltételei ............ 33
Az üzembe helyezés előkészítése ........... 33
Üzembe helyezés és használat................ 34
A sterilizátor tisztítása............................... 34
An fénycső kicserélése............................. 35
Garanciafeltételek..................................... 35
PORTUGUÊS........................................... 36
Especicações gerais............................... 36
Condições de utilização segura................ 37
Preparação para instalação...................... 37
Utilização.................................................. 38
Manutenção e substituiçãoda lâmpada
uorescente.............................................. 38
Substituição da lâmpada uorescente...... 39
Condições de garantia.............................. 39
ESPAÑOL ................................................ 40
Lod datos del aparato............................... 40
Las condiciones del uso y de seguridad... 41
Preparación de la puesta en marcha........ 41
La puesta en marcha y el uso .................. 42
La limpieza del esterilizador ..................... 42
El cambio de la lampara uorescente ......43
Las condiciones de garantia..................... 43
ITALIANO................................................. 44
Speciche dell’apparecchio...................... 44
Condizioni per l’utilizzo in piena sicurezza45
Preparazione all’avviamento .................... 45
Avviamento ed utilizzo.............................. 46
Pulizia dello sterilizzatore ......................... 46
Sostituzione della lampada uorescente.. 47
Condizioni di garanzia .............................. 47
SVENSK................................................... 48
Specikationer av apparat........................ 48
Villkor för säker användning ..................... 49
Förberedelse för igångsättning ................ 49
Igångsättning och användning.................. 50
Rengöring av sterilizern............................ 50
Byte av lysrör............................................ 51
Garantivillkor............................................. 51
POLSKI...................................................... 4
Specykacja urządzenia............................. 4
Warunki bezpiecznego użytkowania ..........5
Przygotowanie do uruchomienia ................ 5
Uruchomienie i użytkowanie....................... 6
Czyszczenie sterylizatora........................... 6
Wymiana świetlówki ...................................7
Warunki gwarancji ...................................... 7
ENGLISH.................................................... 8
Device specication.................................... 8
Safe usage conditions ................................ 9
Preparation for launching ........................... 9
Launch and usage.................................... 10
Cleaning the sterilizer............................... 10
Fluorescent lamp replacement ..................11
Warranty conditions...................................11
DEUTSCH................................................ 12
Eigenschaften der einrichtung.................. 12
Sicherheitsvorschriften ............................. 13
Vorbereitung zur inbetriebsetzung............ 13
Inbetriebsetzung und benutzung .............. 14
Reinigung des sterilisators ....................... 14
Austausch der leuchtstofampe ............... 15
Garantiebedingungen............................... 15
FRANÇAIS............................................... 16
Spécication de l’appareil......................... 16
Conditions d’utilisation en sécurité ........... 17
Preparation à la mise en marche.............. 17
Mise en marche et utilisation.................... 18
Nettoyage du stérilisatuer......................... 18
Rechange du tube uorescent.................. 19
Conditions de garantie.............................. 19
ČESKÝ..................................................... 20
Specikace zařízení ................................. 20
Podmínky bezpečného používání ............ 21
Příprava ke zp rovoznění....................... 21
Zprovoznění a používání.......................... 22
Čištění sterilizátoru................................... 22
Výměna výbojky ....................................... 23
Záruční podmínky..................................... 23
РУССКИЙ ................................................ 24
Спецификация устройства..................... 24
Правила безопасной эксплуатации....... 25
Подготовка к подключению ................... 25
Подключение и эксплуатация ............... 26
Очистка стерилизатора ......................... 26
Замена лампочки ................................... 27
Гарантийные условия............................. 27
SPIS TREŚCI / ALLTABLE OF CONTENTS / INHALTSVERZEICHNIS / INDEX
OBSAH / OBSAH ČASTÍ / ОГЛАВЛЕНИЕ / СЬДЬРХФНИЕ / TARTALOMJEGYZÉK
CONTEÚDO / ÍNDICE / INDICE / INNEHÅLL / INHOUDSOPGAVE
UV-PS_C_MULTI.indd 2005-04-15, 14:582

STERILIZER
5
UV-PS_C_MULTI.indd 2005-04-15, 14:583

4
Szanowny Kliencie, gratulujemy trafnego wyboru wysokiej jakości
sterylizatora ultraoletowego przeznaczonego do sterylizacji wody
w oczkach wodnych, stawach ogrodowych i hodowlanych.
SPECYFIKACJA URZĄDZENIA
Woda przepompowywana przez urządzenie przepływa cienką warstwą
bezpośrednio w polu działania promieniowania ultraoletowego UV-C,
które niszczy glony, bakterie i inne chorobotwórcze organizmy. Dzięki
działaniu sterylizatora woda pozostaje cały czas czysta w sensie bio-
logicznym, a ryby i rośliny żyją w komfortowym i zdrowym otoczeniu
– można na zawsze zapomnieć o zielonej wodzie z glonami.
Cechy wyróżniające STERILIZER :
• QUARTZ = 50% UV-C EXTRA – zewnętrzna ścianka aktyw-
nej komory czyszczącej wykonana jest jako lustro na kwarcowym
szkle, które znaczną część promieniowania ultraoletowego, po
przejściu przez wodę, odbija i kieruje z powrotem, generując w ten
sposób powtórne jego działanie,
• całkowita zanurzalność – możliwośc stosowania zarówno wewnątrz
jak i na zewnątrz zbiornika wodnego,
Typ PS – 9WPS – 11W
Napięcie / Częstotliwość V / Hz 230 / 50
TC-S UV-C W9 11
Pobór mocy W12 14
Objętość oczka wodnego m38 10
Max. wydajność pompy l / h 3500
Zalecana pompa AQUAEL PFN 3500
Max. ciśnienie bar 0,5
Max. głębokość zanurzania m1,0
Stopnie ochrony obudowy Oprawa IP X8
Statecznik IP 20
L.p. Nazwa detalu / zespołu PS – 9WPS – 11W
1. Uchwyt mocujący 12113
2. Przyssawka φ34 11529
3. Korek 14191
4. Uszczelka φ17 x 1,5
5. Króciec 14193
6. Obudowa kompletna 14194 14195
7. Osłona kwarcowa kompl. 12456 12457
8. Świetlówka TC-S UV-C 9W11W
9. Uszczelka φ38 x 3,0
10. Oprawa kompletna 14196
11. Uszczelka φ28 x 2,0
12. Uszczelka φ22 x 1,5
13. Uszczelka φ21,95 x 1,78
CZĘŚCI
DANE TECHNICZNE
POLSKI
UV-PS_C_MULTI.indd 2005-04-15, 14:584

STERILIZER
5
• wyłącznik bezpieczeństwa – w momencie wyjmowania oprawy świe-
tlówki z obudowy automatycznie odłącza świetlówkę od zasilania
chroniąc przed promieniami UV-C,
• sygnalizator działania (A) – dioda sygnalizująca działanie świetlówki.
WARUNKI BEZPIECZNEGO UŻYTKOWANIA
Przed instalacją i każdym uruchomieniem urządzenia należy dokła-
dnie zapoznać się z niniejszą instrukcją obsługi i montażu.
Przy uruchamianiu, konserwacji oraz innych pracach w zbiorniku
wodnym, należy odłączyć od sieci poprzez wyciągnięcie wtyczki
z gniazda sieciowego.
Urządzenie wytwarza szkodliwe dla skóry i oczu promieniowanie.
Nigdy nie wolno włączać urządzenia ze zdjętą obudową!
Urządzenie można zasilać tylko z sieci elektrycznej o parametrach
znamionowych (napięcie i częstotliwość) podanych na obudowie
urządzenia z gniazda sieciowego znajdującego się w suchym
miejscu. W sieci zasilającej powinien być zainstalowany wyłącznik
różnicowoprądowy o prądzie upływu 30mA.
W przypadku uszkodzenia należy natychmiast odłączyc je od sieci.
Urządzenie z uszkodzonym przewodem lub osłoną ze szkła kwar-
cowego nie nadaje się do dalszej eksploatacji. Zabrania się doko-
nywania napraw lub wymiany przewodu zasilania sieciowego!
Podczas zagrożenia zamarznięciem sterylizator należy koniecznie
wyłączyć, wylać z niego wodę i przechowywać do wiosny w miejscu
chronionym przed mrozem.
Odnośnie używania sterylizatora w różnych krajach mogą obo-
wiązywać inne specjalne przepisy.
PRZYGOTOWANIE DO URUCHOMIENIA
I. ZAINSTALOWAĆ ŚWIETLÓWKĘ
Przed uruchomieniem sterylizatora należy włożyć świetlówkę, po-
stępując wg. następujących czynności:
1. obrócić uchwyt oprawy (10) zgodnie z ruchem wskazówek zegara,
wg strzałki z napisem „OUT” (rys. ),
2. wyjąć oprawę (10),
3. wcisnąć świetlówkę (8) w oprawę (10) aż do zatrzaśnięcia,
UWAGA Nie dotykać szkła świetlówki, ewentualne ślady usunąć za
pomocą suchej szmatki.
4. umieścić oprawę (10) wraz z zamontowaną świetlówką (8) w osłonie
kwarcowej (7) (w przeciwnym wypadku wyłącznik bezpieczeństwa
uniemożliwi włączenie świetlówki).
II. PODŁĄCZYĆ STERILIZER DO OBIEGU WODY
UWAGA Woda przepływająca przez sterylizator powinna być przel-
trowana mechanicznie (przez ltr wstępny).
Sterylizator należy zasilać przy pomocy pompy. Można go instalować
zarówno wewnątrz (całkowicie go zanurzając) jak i na zewnątrz oczka
wodnego. W przypadku użytkowania sterylizatora w całkowitym zanu-
UV-PS_C_MULTI.indd 2005-04-15, 14:585

6
POLSKI
rzeniu, może on być zainstalowany przed albo za pompą. Natomiast
jeśli sterylizator nie jest zanurzony, należy go podłączyć koniecznie
do wylotu pompy. W obu przypadkach należy zwrócić uwagę, żeby
sterylizatora nie obciążyć nadmiernym ciśnieniem wody (dopuszczalną
wartość podajemy w danych technicznych).
UWAGA W celu bezproblemowego odpowietrzania sterylizator należy
ustawić lekko pochylony, tak aby otwór wylotowy był najwyżej położo-
nym punktem sterylizatora.
Przy zamocowaniu sterylizatora mogą być pomocne uchwyty (1), które
przyssawkami (2) albo wkrętami można przymocować do podłoża.
URUCHOMIENIE I UŻYTKOWANIE
Po wykonaniu powyższych przygotowań, należy najpierw uruchomić
pompę współpracującą ze sterylizatorem. Jeżeli sterylizator umieszczony
na brzegu stawu, należy sprawdzić szczelność przyłączeń, a w przy-
padku przecieków uszczelnić. Dopiero po ustabilizowaniu się przepływu
wody, włączyć sterylizator poprzez włożenie wtyczki do gniazda sieciowe-
go. Dioda (A) sygnalizująca działanie świetlówki powinna się zaświecić.
UWAGA Nie wolno przykrywać statecznika wtyczkowego.
W celu uzyskania optymalnego efektu zaleca się używanie sterylizatora
bez przerwy przez cały sezon od wiosny do późnej jesieni. Przewidywa-
ny okres efektywnego działania świetlówki UV wynosi ok. 7500 godzin,
a więc służyć nam będzie bezproblemowo przez cały sezon. Po upływie
planowanego okresu działania sterylizator UV należy wyłączyć, wycią-
gając wtyczkę z gniazda sieciowego.
Dla pozbycia się glonów ze stawu wystarczy cykliczne używanie steryli-
zatora UV, np. jeden miesiąc pracy i jeden miesiąc przerwy itd.
CZYSZCZENIE STERYLIZATORA
Dla efektywnego działania sterylizatora należy go co kilka tygodni oczy-
ścić wykonując następujące czynności:
1. odłączyć urządzenie i współdziałającą z nim pompę od sieci elek-
trycznej przez wyciągnięcie wtyczki z gniazda,
2. odłączyć urządzenie od obiegu wody i usunąć pozostałą w nim wode,
3. wyjąć oprawę ze świetlówką obracając uchwyt oprawy (10) wg strzał-
ki z napisem „OUT” (rys. ),
4. ostrożnie wyjąć osłonę kwarcową (7), obracając ją wg strzałki z napi-
sem „OUT” (rys. ), i przepłukać ją pod bieżącą wodą oraz starannie
wytrzeć do sucha – szczególnie jej wewnętrzną stronę,
5. wykręcić króćce (5) i korek (3), zdjąć z nich uszczelki i starannie
oczyścić pod bieżącą wodą,
6. oczyścić obudowę,
UWAGA W środku obudowy (6) znajduje się lustro ze szkła kwarco-
wego w kształcie tulei, na które należy zwrócić szczególną ostrożność
podczas czyszczenia obudowy. Nie skrobać, używać jedynie szczotki
do mycia butelek! W przypadku uszkodzenia lustra, należy wymienić
całą obudowę.
UV-PS_C_MULTI.indd 2005-04-15, 14:586

STERILIZER
7
7. zmontować urządzenie w odwrotnej kolejności, wszystkie uszczelki
muszą być prawidłowo ułożone w swoim rowku i posmarowane wa-
zeliną a świetlówka musi być wsunięta w oprawę do oporu.
WYMIANA ŚWIETLÓWKI
Gdy świetlówka UV-C nie działa – dioda (A) przestała świecić – należy
ją wymienić wykonując następujące czynności:
1. odłączyć urządzenie wyciągając wtyczkę z gniazdka,
2. odłączyć urządzenie od obiegu wody oraz usunąć pozostałą w nim
wode i wytrzeć do sucha,
3. obrócić uchwyt oprawy (10) zgodnie z ruchem wskazówek zegara,
wg strzałki z napisem „OUT” (rys. ),
4. wyjąć oprawę,
5. wyjąć świetlówkę z oprawy i wcisnąć nową aż do zatrzaśnięcia,
UWAGA Nie dotykać szkła świetlówki, ewentualne ślady usunąć za
pomocą suchej szmatki.
6. umieścić oprawę (10) wraz z zamontowaną świetlówką (8) w obudo-
wie (w przeciwnym wypadku świetlówka nie będzie świeciła).
WARUNKI GWARANCJI
Producent udziela gwarancji na okres 24 miesięcy, licząc od daty zaku-
pu. Gwarancja obejmuje uszkodzenia powstałe z winy producenta, tzn.
wady materiałowe czy błędy montażowe. Nie obejmuje ona świetlówki
UV-C oraz mechanicznych i innych uszkodzeń powstałych w wyniku
niewłaściwego obchodzenia się z urządzeniem lub przeróbek dokona-
nych przez nabywcę. W celu przeprowadzenia naprawy należy przesłać
urządzenie wraz z wypełnioną przez sprzedawcę kartą gwarancyjną na
adres producenta lub dystrybutora. Data produkcji, wpisana na karcie
gwarancyjnej powinna mieścić się w zakresie datownika wytłoczonego
na stateczniku wtyczkowym. Producent nie ponosi żadnej odpowiedzial-
ności z tytułu niewłaściwego obchodzenia się z urządzeniem.
UV-PS_C_MULTI.indd 2005-04-15, 14:587

8
Dear Customer, we congratulate you on your accurate choice of high
quality ultraviolet sterilizer intended for water sterilization in miniature
ponds, garden ponds and sh ponds.
DEVICE SPECIFICATION
Water pumped through the device ows in a thin layer directly in the eld
of operation of UV-C ultraviolet radiation, which destroys algae, bacteria
and other pathogenic organisms. Due to the sterilizer’s operation, water
in your tank remains pure all the time in a biological sense, and the sh
and plants live in a comfortable and healthy environment – you can for-
get green water with algae forever.
Distinguishing features of the STERILIZER :
• QUARTZ = 50% UV-C EXTRA – the external wall of the
active purifying chamber is made as a mirror on quartz glass, which
reects back a major part of the ultraviolet radiation after it passes
through the water, generating in this way its repeated action,
• total submersibility – possibility of application both inside and outside
the water tank,
Typ PS – 9WPS – 11W
Voltage / Frequency V / Hz 230 / 50
TC-S UV-C W9 11
Power consumption W12 14
Pond volume m38 10
Max pump output l / h 3500
Recommended AQUAEL pump PFN 3500
Max. pressure bar 0,5
Max immersion depth m1,0
Housing protection degrees Housing IP X8
Stabilizer IP 20
No Name of detail / assembly PS – 9WPS – 11W
1. Mounting bracket 12113
2. Suction cup φ34 11529
3. Stopper 14191
4. Gasket φ17 x 1,5
5. Stub pipe 14193
6. Complete housing 14194 14195
7. Complete quartz casing 12456 12457
8. Fluorescent lamp TC-S UV-C 9W11W
9. Gasket φ38 x 3,0
10. Complete tting 14196
11. Gasket φ28 x 2,0
12. Gasket φ22 x 1,5
13. Gasket φ21,95 x 1,78
PARTS
TECHNICAL DATA
ENGLISH
UV-PS_C_MULTI.indd 2005-04-15, 14:588

STERILIZER
9
• safety switch – when the uorescent lamp is removed from its tting,
it automatically disconnects the lamp from the power supply, protect-
ing from UV-C radiation,
• power-on lamp (A) – diode signaling operation of the uorescent lamp.
SAFE USAGE CONDITIONS
Prior to installation and every start of the device, read the present
operating and assembly manual carefully.
Upon launching, maintenance and other work in the water tank,
disconnect the device from the power grid by pulling the plug from
the power supply socket.
The device generates radiation harmful to the skin and eyes. Never
turn on the device with the housing removed!
The device may be powered only from a power grid of nominal pa-
rameters (voltage and frequency) specied on the device housing
from a power supply socket located in a dry place. The power sup-
ply grid should have a differential current circuit breaker of leakage
current of 30mA.
In case of damage disconnect the device from power supply im-
mediately. The device with a damaged power cord or quartz glass
cover may not be operated further. It is not allowed to repair or
replace the power supply cord!
In case of frost risk, the sterilizer must be turned off, drained of
water, and stored until springtime in a place protected from frost.
Other special regulations may be in force regarding the use of
the sterilizer in various countries.
PREPARATION FOR LAUNCHING
I. INSTALL THE FLUORESCENT LAMP
Prior to launching the sterilizer, insert the uorescent lamp, pro-
ceeding as follows:
1. turn the tting grip (10) clockwise, according to the „OUT” arrow
(g. ),
2. remove the tting (10),
3. press the uorescent lamp (8) into the tting (10) until locked,
NOTE Do not touch the uorescent lamp glass; remove possible
marks with a dry cloth.
4. place the tting (10) along with the tted uorescent lamp (8) in the
quartz housing (7) (otherwise the safety switch will prevent operation
of the uorescent lamp).
II. CONNECT THE STERILIZER TO THE WATER CIRCUIT
NOTE Water owing through the sterilizer should be mechanically
ltered (by the preliminary lter).
The sterilizer should be fed by means of a pump. It may be installed both
inside (immersing it totally) and outside the miniature pond. In case of
utilization of the sterilizer in total submersion, it may be installed either
upstream or downstream with respect to the pump. However, if the steril-
UV-PS_C_MULTI.indd 2005-04-15, 14:589

10
ENGLISH
izer is not submerged, it must connected to the outlet of the pump. In
both cases, be careful not to overload the sterilizer with excessive water
pressure (the admissible value is given in the technical data).
NOTE For the purpose of problem-free deaeration, the UV sterilizer
should be positioned slightly inclined, so that the outlet opening is the
highest point of the sterilizer.
In mounting the sterilizer, you may nd handy the brackets (1), which
can be xed to the background by means of suction caps (2) or screws.
LAUNCH AND USAGE
Following the above preparations, you should rst turn on the pump
cooperating with the sterilizer. If the sterilizer is located on the shore of
the pond, check tightness of the connections, and in case of leaks seal
up. Only after stabilizing the water ow, turn the sterilizer on by sticking
the plug in a power outlet. The power-on diode (A) signaling operation of
the uorescent lamp should come on.
NOTE Do not cover the plug stabilizer.
In order to obtain optimum results, it is recommended to use the steril-
izer non-stop for the entire season from spring to late autumn. The an-
ticipated period of effective operation of the UV uorescent lamp is ca.
7500 hours, so it will serve its purpose problem-free for the entire sea-
son. After the lapse of the planned period of operation, the UV sterilizer
should be turned off, by pulling the plug from the power supply socket.
In order to get rid of algae from the pond, it is sufcient to use the UV
sterilizer in cycles, e.g. one month of operation and one month of inter-
val, and so forth.
CLEANING THE STERILIZER
For efcient operation of the sterilizer, it should be cleaned every several
weeks, performing the following actions:
1. disconnect the device and the pump cooperating with it from the
power supply by pulling the plugs from the sockets,
2. disconnect the device from the waster circulation and remove any
water remaining in it,
3. remove the tting with the uorescent lamp by turning the tting grip
(10) according to the „OUT” arrow (g. ),
4. carefully remove the quartz cover (7), turning it according to the
„OUT” arrow (g. ), and rinse it under running water and carefully
wipe dry – particularly its internal side,
5. screw out the stub pipes (5) and stopper (3), remove the gaskets (4)
from them, and carefully clean under running water,
6. clean the housing,
NOTE Inside the cover (6) there is a quartz glass mirror in the shape
of a sleeve, with which particular care should be exercised when
cleaning the housing (cover). Do not scratch, and use only a brush
for cleaning bottles in order not to damage the mirror! In case of dam-
age to the mirror, replace the entire housing (cover).
UV-PS_C_MULTI.indd 2005-04-15, 14:5810

STERILIZER
11
7. assemble the device in reverse order, all gaskets must be properly
placed in their groove and greased with Vaseline, and the uorescent
lamp must be inserted all the way into the tting until refusal.
FLUORESCENT LAMP REPLACEMENT
When the UV-C uorescent lamp does not work – the diode (A) goes off
– it should be replaced as follows:
1. disconnect the device by pulling the plug from the power supply
socket,
2. disconnect the device from the water circulation, remove any remain-
ing water inside and wipe dry,
3. turn the tting grip (10) clockwise, according to the „OUT” arrow
(g. ),
4. remove the tting,
5. remove the uorescent lamp from the tting and press a new one in
until locked,
NOTE Do not touch the glass of the uorescent lamp; remove possible
marks with a dry cloth.
6. place the tting (10) along with the mounted uorescent lamp (8) in
the housing (otherwise the uorescent lamp will not work).
WARRANTY CONDITIONS
The manufacturer grants warranty for a period of 24 months, counting
from the date of purchase. The warranty covers damages arising from a
fault of the producer, i.e. defective materials or workmanship. It does not
cover the UV-C uorescent lamp and mechanical and other damages
arising from improper handling of the device, or alterations made by the
buyer. For the purpose of repair it is necessary to send the device along
with the warranty card lled out by the seller to the address of the manu-
facturer or distributor. The date of manufacture entered in the warranty
card should fall in the scope of the date imprinted on the plug stabilizer.
The manufacturer shall in no way be liable on account of improper han-
dling of the device.
UV-PS_C_MULTI.indd 2005-04-15, 14:5811

12
Sehr geehrter Kunde, herzlichen Glückwunsch für die richtige Wahl
unseres ultravioletten Sterilisators von höchster Qualität. Er ist zur Steri-
lisation des Wassers in Garten- und Fischzuchtteichen bestimmt.
EIGENSCHAFTEN DER EINRICHTUNG
Das Wasser wird mit einer Pumpe durch die Einrichtung getrieben, wo
es in dünnem Schicht unmittelbar vor einer Strahlungsquelle UV-C vor-
beiströmt, und diese Strahlen die Schwebalgen, Bakterien und übrigen
Krankheitskeime vernichten. Dank der Wirkung des Sterilisators bleibt
das Wasser im Teich ständig rein – im biologischen Sinne, und die Fische
und Panzen werden in einem komfortablen und gesunden Milieu leben,
vom grünen Wasser mit Algen kann für immer vergessen werden.
Vorteile der STERILIZER :
• QUARTZ = 50% UV-C EXTRA – die äußere Wand der
aktiven Reinigungskammer ist als Quarzglasspiegel ausgeführt.
Ein bedeutender Teil der UV-Strahlung wird durch diesen Spiegel
– nachdem sie das Wasser einmal schon durchdrungen hat – wider-
spiegelt und zurück zum Wasser für eine zweite Wirkung gerichtet,
Typ PS – 9WPS – 11W
Spannung / Frequenz V / Hz 230 / 50
TC-S UV-C W9 11
Leistungsaufnahme W12 14
Teichvolumen m38 10
Größte Fördermenge der Pumpe l / h 3500
Empfohlene AQUAEL-Pumpe PFN 3500
Höchster Druck bar 0,5
Größte Tauchtiefe m1,0
Schutzarten durch Gehäuse Körper des Sterilisators IP X8
Steckervorschaltgerät IP 20
L.p. Benennung des Teils / Gruppe PS – 9WPS – 11W
1. Befestigungsklammer 12113
2. Saugnapf φ34 11529
3. Blindkappe 14191
4. Dichtung φ17 x 1,5
5. Anschlussstück 14193
6. kompl. Gehäuse 14194 14195
7. kompl. Quarzglashülse 12456 12457
8. Leuchtstofampe TC-S UV-C 9W11W
9. Dichtung φ38 x 3,0
10. kompl. Fassung AS 14196
11. Dichtung φ28 x 2,0
12. Dichtung φ22 x 1,5
13. Dichtung φ21,95 x 1,78
TEILE
TECHNISCHE DATEN
DEUTSCH
UV-PS_C_MULTI.indd 2005-04-15, 14:5812

STERILIZER
13
• die völlige Versenkbarkeit – die Möglichkeit, das Gerät sowohl im
Wasser getaucht, als auch am Ufer des Gartenteichs zu benutzen,
• der Stromunterbrecher – im Moment des Ausnehmens der Fassung
aus der Quarzglashülse wird die Leuchtstofampe von der Strom-
quelle selbsttätig abgetrennt. Dadurch wird eventuellem Kontakt mit
der UV-C Strahlung vorgebeugt,
• das Betriebssignal (A) – eine Diode signalisiert den Betriebszustand
der Leuchtstofampe.
SICHERHEITSVORSCHRIFTEN
Vor Beginn der Installierung und vor jeder Inbetriebnahme der
Einrichtung soll diese Gebrauchs- und Montageanleitung sorgfältig
durchgelesen werden.
Vor Beginn der Installations- oder Wartungstätigkeiten soll der Ste-
rilisator vom elektrischen Netz unbedingt getrennt werden, durch
Ziehen des Steckers aus der Netzsteckdose.
Das Gerät erzeugt eine für die Haut und Augen schädliche Strah-
lung. Das aus dem Gehäuse genommene Gerät darf nie einge-
schaltet werden!
Der Sterilisator darf nur vom elektrischen Netz mit entsprechenden
Nennparametern (Spannung und Frequenz) gespeist werden – sie
sind auf dem Produkt angegeben. Die zum Anschluss benutzte
Netzsteckdose soll sich in einer trockenen Stelle benden. In der
Zuleitung muss eine Fehlerstrom-Schutzeinrichtung – RCD – mit
einem auslösenden Nennstrom bis 30mA installiert sein.
Im Falle einer Beschädigung soll das Gerät unverzüglich von der
Stromquelle abgetrennt werden. Die Einrichtung mit einer beschä-
digter Leitung oder beschädigter Quarzglashülse darf nicht weiter
im Betrieb gehalten werden. Das Anschlusskabel darf weder
ausgetauscht noch repariert werden!
In der Zeit der Frostgefahr soll der Sterilisator unbedingt ausgeschal-
tet und das Wasser aus ihm abgelassen werden. Er soll in einer vor
Frost geschützten Stelle bis zum Frühling aufbewahrt werden.
Hinsichtlich Benutzung des Sterilisators können besondere
Regeln in verschiedenen Ländern geltend sein.
VORBEREITUNG ZUR INBETRIEBSETZUNG
I. INSTALLIERUNG DER LEUCHTSTOFFLAMPE
Vor der Inbetriebsetzung des Sterilisators soll die Leuchtstofam-
pe eingesetzt werden, die folgenden Tätigkeiten ausführend:
1. die Fassung (10) im Uhrzeigersinn, gemäß dem Pfeil mit der Auf-
schrift „OUT“ drehen (Bild ),
2. die Fassung (10) ausnehmen,
3. die Leuchtstofampe (8) in die Fassung (10) drücken, bis zum Ein-
schnappen,
VORSICHT Den Glasteil der Leuchtstofampe nicht berühren, eventu-
elle Spuren mit einem trockenen Lappen entfernen.
4. die Fassung (10) samt mit der Leuchtstofampe (8) in die Glashülse
setzen (7) (sonst macht der Sicherheitsschalter die Aueuchtung der
Leuchtstofampe unmöglich).
UV-PS_C_MULTI.indd 2005-04-15, 14:5813

14
DEUTSCH
II. ANSCHLIEßUNG DES STERILISATORS ZUM WASSERKREISLAUF
ACHTUNG Das durch den Sterilisator strömende Wasser soll mecha-
nisch schon geltert sein (durch einen Vorlter).
Der UV-Sterilisator soll immer mit einer Pumpe gespeist werden. Er
kann sowohl im Inneren (in völliger Versenkung) als auch außerhalb des
Gartenteiches installiert werden. Im Falle der Benutzung des Sterilisa-
tors in völliger Versenkung kann er vor oder nach der Pumpe installiert
werden. Demgegenüber, wird der Sterilisator nicht getaucht, so soll er
unbedingt zum Aususs der Pumpe angeschlossen werden. In beiden
Fällen soll in Acht genommen werden, damit der Sterilisator nicht mit
übermäßig hohen Druck belastet wird (der zugelassene Wert ist in den
technischen Daten angegeben).
ACHTUNG Zwecks einer problemlosen Entlüftung soll der Sterilisator
leicht schräg aufgestellt werden - die Auslauföffnung soll sein höchst-
gelegener Punkt sein.
Für die Befestigung des Sterilisators können die Klammer (1) behilich
sein, die mit den Saugnäpfen (2) oder mit Schrauben zur Grundäche
geankert werden können.
INBETRIEBSETZUNG UND BENUTZUNG
Nach der oben beschriebenen Vorbereitungen soll vorerst die Pumpe in
Betrieb genommen werden, die mit dem Sterilisator zusammenarbeitet.
Ist der Sterilisator am Ufer des Teiches aufgestellt, so soll die Dichtheit
der Anschlüsse an ihm geprüft werden. Wenn Sickerungen bemerkt,
sollen sie gedichtet werden. Erst danach, nach der Stabilisierung des
Wasserdurchusses kann der Sterilisator eingeschaltet werden durch
Einstecken des Steckers in die Netzsteckdose. Die Diode (A) soll auf-
leuchten, den Betriebszustand der Leuchtstofampe signalisierend.
ACHTUNG Das Steckervorschaltgerät darf nicht verdeckt werden.
Um die optimale Wirksamkeit zu erzielen, empfehlt es sich, den Sterili-
sator ständig ohne Pause durch die volle Saison vom Frühling bis zum
Spätherbst zu benutzen. Die Betriebsdauer der ultravioletten Leucht-
stofampe beträgt etwa 7500 Stunden, also wird sie uns dienen pro-
blemlos durch die ganze Saison. Nach dem Ablauf seiner vorgesehenen
Betriebszeit soll der UV-Sterilisator ausgeschaltet werden, den Stecker
des Vorschaltgerätes aus der Netzsteckdose ziehend.
Um die Algen aus dem Teich wegzuschaffen, genügt eine zyklische
Benutzung des ultravioletten Sterilisators, z.B. ein Monat Betrieb und
ein Monat Pause usw.
REINIGUNG DES STERILISATORS
Zur Sicherung der wirksamen Arbeit des Sterilisators soll er etwa monat-
lich einmal gereinigt werden, die folgenden Tätigkeiten ausführend:
1. das Gerät und die mitwirkende Pumpe trennen vom elektrischen
Netz, durch Ziehen der Stecker aus den Steckdosen,
2. das Gerät trennen vom Wasserkreislauf und das Wasser aus ihm
auslassen,
UV-PS_C_MULTI.indd 2005-04-15, 14:5814

STERILIZER
15
3. Die Fassung samt mit der Leuchtstofampe ausnehmen, den Griff
der Fassung (10) gemäß dem Pfeil mit der Aufschrift „OUT“ ausdre-
hend (Bild ),
4. die Quarzglashülse (7) vorsichtig ausnehmen, sie gemäß dem Pfeil
mit der Aufschrift „OUT“ (Bild ) drehend, unter ießendem Wasser
durchspülen und trocken wischen – besonders ihre innere Seite,
5. die Anschlussstücke (5) und die Blindkappe (3) ausdrehen, die Dichtun-
gen von ihnen abnehmen, sorgfältig reinigen unter ießendem Wasser,
6. das Gehäuse reinigen.
ACHTUNG Im Innern des Gehäuse (6) bendet sich ein rohrförmiger
Spiegel aus Quarzglas. Um ihn nicht zu zerbrechen, behandeln Sie ihn
bitte während der Reinigung des Gehäuses mit besonderer Vorsichtig-
keit. Nicht kratzen, nur eine Flaschenbürste benutzen! Falls der Spiegel
zerbrochen wurde, soll das komplette Gehäuse ausgetauscht werden.
7. das Gerät in umgekehrter Reihenfolge zusammenstellen. Alle
Dichtungen sollen in ihren Nuten richtig legen und mit Vaseline
beschmiert werden, und die Leuchtsofampe bis zum Widerstand in
ihre Fassung gesteckt werden.
AUSTAUSCH DER LEUCHTSTOFFLAMPE
Leuchtet die UV-C Leuchtstofampe nicht – die Diode (A) hatte auf-
gehört zu leuchten –, so soll sie ausgetauscht werden, die folgenden
Tätigkeiten ausführend:
1. das Gerät vom Netz trennen, den Stecker aus der Steckdose ziehend
2. das Gerät vom Wasserkreislauf trennen, das Wasser aus ihm auslas-
sen und trocken wischen,
3. den Griff der Fassung (10) im Uhrzeigersinn drehen, gemäß dem
Pfeil mit der Aufschrift „OUT“ (Bild ),
4. die Fassung ausnehmen,
5. die Leuchtstofampe aus der Fassung nehmen und die neue bis zum
Einschnappen eindrücken,
ACHTUNG Den Glasteil der Leuchtstofampe nicht berühren, eventu-
elle Spuren mit einem trockenen Lappen entfernen.
6. die Fassung (10) samt mit der eingesetzten Leuchtstofampe (8) im
Gehäuse anbringen (sonst wird die Leuchtstofampe nicht leuchten).
GARANTIEBEDINGUNGEN
Der Hersteller leistet Ihnen ab Kaufsdatum eine Garantie für 24 Monate. Die
Garantie schließt Schäden ein, die vom Hersteller verursacht worden sind,
das heißt Material- und Montagefehler. Sie erstreckt sich nicht auf die Leucht-
stofampe UV-C und auf mechanische und andere Schäden, die durch un-
sachgemäße Behandlung oder Umbau des Gerätes durch den Benutzer
entstanden sind. Im Garantiefall senden Sie das Gerät samt mit dem vom
Verkäufer ausgefüllten Garantieschein an die Adresse des Herstellers oder
Ihres Großhändlers. Das auf dem Garantieschein geschriebene Herstel-
lungsdatum soll im Intervall der auf dem Steckenvorschaltgerät eingeprägten
Datierscheibe sein. Der Hersteller nimmt keine Verantwortung für eventuelle
Konsequenzen der unsachgemäßen Benutzung dieser Einrichtung auf sich.
UV-PS_C_MULTI.indd 2005-04-15, 14:5815

16
FRANÇAIS
Cher acheteur, nous vous félicitons pour le choix de ce stérilisateur
dastiné à stériliser l’eau des bassin de jardin, d’étangs et d’élevages.
SPÉCIFICATION DE L’APPAREIL
L’eau pompée par l’appareil passe en une couche ne dans le champ
d’action directe du rayonnement ultraviolet UV-C qui détruit les algues,
les bactéries et autres organismes patogènes. Grâce à l’action du stéri-
lisateur l’eau reste pure dans le sense biologique, et les poissons et les
plantes vivent confortablement dans un milieu sain – on peut à jamais
oublier l’eau verte pleine d’algues.
Traits particuliers du STERILIZER :
• QUARTZ = 50% UV-C EXTRA – la surface extérieure de la
chambre d’épuration est faite sous forme d’un mirroir sur du verre
de quartz, qui reéte une grande partie du rayonnement ultraviolet,
après son passage par l’eau et le redirige dans le sense inverse,
générant ainsi une double action,
• submersibilité totale – possibilité d’installation à l’extérieur ainsi qu’à
l’intérieur du reservoir d’eau,
Typ PS – 9WPS – 11W
Tension / Fréquence V / Hz 230 / 50
TC-S UV-C W9 11
Consommation de courant W12 14
Capacité de bassin de jardin m38 10
Débit max. de la pompe l / h 3500
Pompe AQUAEL recommandés PFN 3500
Pression maximale bar 0,5
Profondeur max. d’immersion m1,0
Ments de protection du boîtier Culot IP X8
Stabilisateur IP 20
Produit PS – 9WPS – 11W
1. Attache 12113
2. Ventouse φ34 11529
3. Bouchon 14191
4. Joint φ17 x 1,5
5. Tubulure 14193
6. Boîtier complet 14194 14195
7. Couverture de protection en quartz complète 12456 12457
8. Lampe uorescente TC-S UV-C 9W11W
9. Joint φ38 x 3,0
10. Culot complet 14196
11. Joint φ28 x 2,0
12. Joint φ22 x 1,5
13. Joint φ21,95 x 1,78
PIECES DETACHEES
DONNEES TECHNIQUES
UV-PS_C_MULTI.indd 2005-04-15, 14:5816

STERILIZER
17
• interrupteur de sécurité – au moment de retirer le tube uorescent de
son emplacement, il debranche automatiquement l’alimentation du
tube en vous protégant des rayons UV-C,
• jauge de mise en marche (A) – une diode qui signale la mise en
marche de l’appareil.
CONDITIONS D’UTILISATION EN SÉCURITÉ
Avant l’installation et chaque mise en marche de l’appareil il faut lire
attentivement cette notice d’utiliation
Avant installation et entretien ainsi que pour tous travaux dans le
reservoir d’eau il faut débrancher l’appareil en rétirant la che de la
prise de courant
L’appareil génére un rayonnement nusible pour la peau et pour les
yeux. Ile est interdit de mettre en marche l’appareil avec le couver-
cle enlevé!
L’appareil ne peut être branché qu’au réseau dont les paramètres
nominaux (la tension et la fréquence) indiquees sur le corps de l’ap-
pareil par une prise se trouvant dans un endroit sec. Sur le réseau
deverait être installé un interrupteur différentiel de courant de fuite
avec un courant de fuite de 30mA.
Dans le cas d’une malfonction il faut immédiatement débrancher
l’appareil. L’appareil dont le cable d’alimentation est détérioré ne
peut pas être utilisé. Il est strictement interdit de réparer ou
réchanger le cable d’alimentation!
Si un risque de gel se présente il faut absolument débrancher l’ap-
pareil, le vider et le conserver à l’abri du gel jusqu’au printemps.
En ce qui concerne l’utilisation du stérilisateur dans d’autres
pays, de législations spéciales peuvent être en vigeur.
PREPARATION À LA MISE EN MARCHE
I. L’INSTALLATION DU TUBE FLUORESCENT
Avant de mettre en marche l’appareil il faut installer le tube uore-
scent, en procédant comme suit:
1. tourner la poignée de la monture (10) dans le sens des aiguilles d’une
montre, comme l’indique la féche avec l’inscription „OUT” (g. ),
2. retirer la monture (10),
3. inserrer le tube uorescent (8) dans la monture (10) jusqu’au «click»,
ATTENTION Ne pas toucher le verre du tube uorescent, enlever les
traces eventuelles avec un chiffon sec.
4. mettre la monture (10) avec le tube uorescent (8) dans l’enveloppe
en quartz (7) (dans le cas contraire l’interupteur de securite enpe-
chera la mise en marche du tube uorescent).
II. BRANCHER LE STÉRILISATEUR AU CIRCUIT D’EAU
ATTENTION L’eau passant par le steryliseuer deverait être ltrée
mécaniquement (par un pre-ltre).
Stérilisateur doit être alimenté en eau par une pompe. Il peut installé à
l’intérieur (en l’immergant totalement) ainsi qu’à l’extérieur du basin de
UV-PS_C_MULTI.indd 2005-04-15, 14:5817

18
FRANÇAIS
jardin. Dans le cas de l’utilisation dans l’immersion totale le stérilisateur
peut être installé en amont et en aval de la pompe. Par contre s’il n’est
pas immergé, il faut le brancher en aval de la pompe. Dans les deux cas
il ne faut pas l’exposer à une préssion exc’edente (la valeur admissible
se trouve dans les données techniques).
ATTENTION Pour une désaération sans problèmes il faut incliner le
stérilisateur, an que sa sortie soit le point le plus élevé du stérilisateur.
Pour xer le stérilisateur on peut utiliser les coliers de xation (1), qui
peuvent être xés au support avec le ventouses (2) ou les vis.
MISE EN MARCHE ET UTILISATION
Après avoir effectué les préparations ci-dessus, en premier mettre en
marche la pompe qui alimente le stérilisateur en eau. Si le stérilisateur
est installé au bord du bassin, il faut vérier l’étanchéité des raccorde-
ments, si nécessaire les étancher. Après que le ux devienne stable,
mettre en marche le stérilisateur en mettant la che dans la prise de
courant. La diode (A) signalant le mise en marche du tube uorescent
deverait s‘allumer.
ATTENTION Il est interdit de couvrir la che-stabilisateur.
An d’obtenir un effet optimal, il est conseille d’utiliser le stérilisateur
sans interruption du printemps jusqu’a l’automne. La période prevue de
marche du tube uorescent est de 7500 heures environ, ainsi il servira
toute la saison. Après la periode d’utilisation du stérilisateur il faut l’arre-
ter en retirant la che de la prise de courant
Pour éliminer les algues de l’etang il suft d’utiliser le stérilisateur à une
cadence d’un mois sur deux.
NETTOYAGE DU STÉRILISATUER
Pour obtenir un rendement optimal il faut nettoyer le stérilisateur toutes
quelques semaines en procedant da la maniere suivante:
1. débrancher l’appareil et la pompe qui l’alimente en eau du courant
éléctrique en retirant la che de de la prise,
2. déconnecter l’appareil du circuit d’eau et le vider,
3. retirer la monture avec le tube urescent en tournant la poignée de la
monture (10) comme le montre la eche marquée „OUT” (g. ),
4. délicatement retirer l’enveloppe en quartz (7), en la tournant comme
le montre la eche marquée „OUT” (g. ), et la rincer à l’eau cou-
rante et soigneusement secher avec un chiffon – specialement sa
partie intérieure,
5. dévisser les manchons (5) et le bouchon (3), retirer leur joints et les
nettoyer soigneusement à l’eau courante,
6. nettoyer le corps de l’appareil,
ATTENTION À l’interieur du corps (6) se trouve un mirroir de verre de
quartz en forme de tube, auquel il faut faire particulièrement attention
en nettoyant le corps d l’appareit. Ne pas gratter, utiliser seulement
une brosse à nettoyer les bouteilles! Dans le cas de détérioration du
mirroir il faut remplacer le corps de la pompe entier.
UV-PS_C_MULTI.indd 2005-04-15, 14:5818

STERILIZER
19
7. assembler l’appareil dans l’ordre inverse, tous les joints doivent être
bien placés dans leurs cannelures et graissés avec de la vaseline, et
le tube uorescent doit être inserré jusqu’au bout dans sa monture.
RECHANGE DU TUBE FLUORESCENT
Quand le tube UV-C ne fonctionne pas – la diode (A) a arêtée de briller
– il faut le remplacer en procédant comme suit:
1. débrancher l’appareil en retirant la che de la prise de courant,
2. déconnecter l’appareil du circuit d’eau et le vider et le secher ,
3. tourner la poignée de la monture (10) dans le sens des aiguilles
d’une montre, selon la eche marquée „OUT” (g. ),
4. retirer la monture,
5. retirer le tube uorescent de la monture et insérrer un nouveau tube
jusqu’au «click»,
ATTENTION Ne pas coucher le verre du tube uorescent, enlever les
traces eventuelles avec un chiffon sec.
6. remettre la monture (10) avec le tube uorescent (8) dans le corps de
l’appareil (dans le cas contraire le tube ne fonctionnera pas).
CONDITIONS DE GARANTIE
Le fabricant accorde une garantie pour une période de 24 mois à comp-
ter de la date de l’achat. La garantie couvre les détériorations dues
aux vices de materiaux et de fabrication. Elle ne couvre pas le tube
uorescent UV-C ni les détériorations dues au mauvais maniement ou
remaniement de l’appareil par l’acheteur. An que l’appareil soit réparé
il faut l’envoyer accompagné de la carte de garantie dûment remplie à
l’adresse de fabricant ou distributeur. La date de fabrication inscrite dans
la carte de garantie, doit être comprise dans l’interval du dateur sur le
stabilisateur. Le fabricant ne pourra être responsable du fait du mauvais
maniement de l’appareil.
UV-PS_C_MULTI.indd 2005-04-15, 14:5819

20
Vážený zákazníku, blahopřejeme Vám ke správné volbě našeho vyso-
ce kvalitního ultraalového sterilizátoru určeného pro sterilizaci vody v
jezírkách, zahradních a chovných rybnících.
SPECIFIKACE ZAŘÍZENÍ
Voda přečerpávaná přes toto zařízení protéká v tenké vrstvě přímo
polem ultraalového UV-C záření, které hubí řasy, bakterie a jiné
choroboplodné organismy. Díky působení sterilizátoru zůstává voda
v nádrži po celou dobu z biologického hlediska čistá a ryby a rostliny žijí
v komfortním a zdravém prostředí – na zelenou vodu s řasami můžete
navždy zapomenout.
Charakteristické vlastnosti zařízení STERILIZER :
• QUARTZ = 50 % UV-C záření navíc – vnější příčka aktivní
čistící komory je tvořena křemenným zrcadlem, které značnou část
ultraalového záření, po jeho průchodu vodou, odráží a vrací zpět a
zajišťuje tak maximalizaci jeho účinku.
• možnost plného ponoření – lze jej použít jak vně, tak uvnitř vodní
nádrže,
Typ PS – 9WPS – 11W
Napětí / Frekvence V / Hz 230 / 50
TC-S UV-C W9 11
Příkon W12 14
Objem jeziírka m38 10
Max. výkon čerpadla l / h 3500
Doporučené čerpadlo rmy AQUAEL PFN 3500
Max. tlak bar 0,5
Max. hloubka ponoru m1,0
Stupně ochrany pláště Svítidlo IP X8
Transformátor IP 20
Poz Název součástky / sady PS – 9WPS – 11W
1. Připevňující držák 12113
2. Přísavka φ34 11529
3. Záslepka 14191
4. Těsnění φ17 x 1,5
5. Vývod 14193
6. Kompletní kryt 14194 14195
7. Křemenný plášť kompletní 12456 12457
8. Zářivka TC-S UV-C 9W11W
9. Těsnění φ38 x 3,0
10. Kompletní svítidlo 14196
11. Těsnění φ28 x 2,0
12. Těsnění φ22 x 1,5
13. Těsnění φ21,95 x 1,78
DÍLY
TECHNICKÉ ÚDAJE
ČESKÝ
UV-PS_C_MULTI.indd 2005-04-15, 14:5820
This manual suits for next models
1
Table of contents
Languages:
Other AQUA EL Laboratory Equipment manuals
Popular Laboratory Equipment manuals by other brands

Metrohm
Metrohm 824 Instructions for use

Astell
Astell SWIFTLOCK manual

Hettich
Hettich ZENTRIMIX 380 R operating manual

NEW BRUNSWICK SCIENTIFIC
NEW BRUNSWICK SCIENTIFIC BioFlo CelliGen 115 Guide to operations

Sheldon
Sheldon Shel lab SMO28HP-2 Installation & operation manual

IKA
IKA ULTRA-TURRAX T 18 digital manual