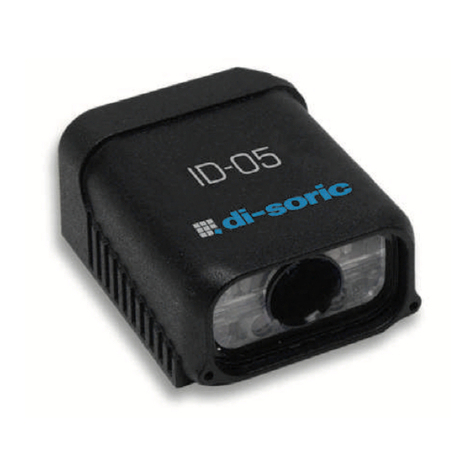
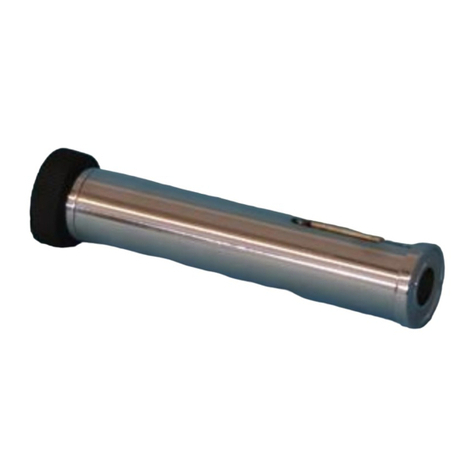
Di-soric ID-06 User manual

Step 1 — Check Hardware
Item Description Part Number
1
ID-06 C-Mount Industrial Imager
ID-06-IXX-00-ES
2
Interface Device
VSID-IB-ES
Note: Additional cordsets and accessories are available in the di-soric Product Catalog.
Caution: Be sure that all connections are secure BEFORE
applying power. Power down BEFORE disconnecting any cables.
Ethernet Standalone
1
2
Quick Start Guide
ID-06 C-Mount
Industrial Imager
P/N 83-116801 Rev A
Step 2 — Connect the System
Important: When connecting cordsets to the ID-06 C-Mount
and VSID-IB-ES, align the pins first and then push the connec-
tor into place. Do not twist the connectors, as this will bend the
pins.
Important: Do not attempt to power more than four imagers
with a single power supply in a daisy chain configuration. Add a
VSID-IB-ES and one power supply for every four additional
imagers in the daisy chain.
RS-232
1. Connect the Serial Communication Cable from “A” on the
ID-06 C-Mount to “2” on the VSID-IB-ES.
2. Connect the host cable from “1” on the VSID-IB-ES to the
host computer.
3. Connect the photo sensor to “T” on the VSID-IB-ES.
4. Connect the power supply to “3” on the VSID-IB-ES.
5. Plug in the power supply.
Ethernet
1. Connect the Ethernet Cable from “B” on the ID-06 C-
Mount to the network.
2. Connect the power supply to “A” on the ID-06 C-
Mount.
3. Connect the photo sensor to “T” on the VSID-IB-ES.
4. Plug in the power supply.
Step 3 — Position the Imager
1. Position the imager at a focal distance of one inch or more from
a test symbol.
2. Tip the imager relative to the symbol to avoid the glare of direct
(specular) reflection. The case parting line should be perpendicular
to the plane of the symbol by either pitching the symbol or the
imager as shown.
3. Symbols can be rotated (tilted) at any angle; however, for best
results symbols should be aligned with the field of view. In the
case of linear symbols, aligning the bars in the direction of their
movement (ladder orientation) will minimize the chances of
blurring and will result in more consistent decodes.
Important: Avoid excessive skew or pitch. Maximum skew is
±30°; maximum pitch is ±30°.
Step 4 —
Install di-soric ID
di-soric ID Software can be found on the di-soric USB-Stick
that is packaged with the ID-06 C-Mount.
1. Follow the prompts to install di-soric ID from the Tools
Drive.
2. Click on the di-soric ID icon to run the program.
Note: di-soric ID can also be installed from the Down-
load Center at www.di-soric.com.
Minimum System Requirements
• 233 MHz Pentium processor
• Windows 7 (32-bit or 64-bit), Vista (32-bit or 64-bit), XP, or
2000 operating system
• Internet Explorer 6.0 or higher
• 128 MB RAM or greater
• 80 MB hard drive space
• 800 x 600 minimum 256 color display (1024 x 768 32-bit color
recommended)
Refer to the ID-06 Industrial Imager User’s Manual for detailed
information about using di-soric ID to configure the ID-06 C-
Mount.

Step 5 — Select Model
When you start di-soric ID, the model menu will appear:
1. Click the button showing the ID-06 C-Mount.
2. Click OK.
Note: You can also simply double-click the button showing
your imager to make your selection.
3. Click Yes when the following dialog appears:
Note: If you need to select another model later, click the
Switch Model button near the top of the screen or use
Model > New Model in the menu toolbar.
Step 8 — Calibrate
Imager settings can be adjusted automatically for optimum
performance by either the EZ Button or by di-soric ID.
During the calibration routine, the imager will flash its Read
Rate percent LEDs and illumination LEDs while searching
camera settings and determining the best configuration for
decoding symbol data. If unsuccessful, the imager will emit 5
short beeps and stop searching.
Calibrate by di-soric ID
1. Click the Calibrate button.
2. The imager will search camera settings to determine the
best configuration for decoding symbol data.
A successful calibration will display a green frame around
the symbol in di-soric ID, and the following message will
appear: “Uploading all reader parameters.” After a moment
the symbol data will be presented in the field below the
image display window.
Calibrate by EZ Button
1. Hold down the EZ Button for about two seconds and
release when you hear two short beeps. The 20% and
40% LEDs will illuminate.
2. The imager will search camera settings to determine the
best configuration for decoding symbol data.
Note: To end all EZ Button functions, press the EZ Button
once and quickly release.
Calibrate by Serial Command
Send <@CAL> from a terminal program to begin auto-calibration.
Step 6 — Connect
To connect using the Connection Wizard:
• Click Connect on the menu toolbar, and then select Connection Wizard.
• Select RS-232 or Ethernet to activate the appropriate display.
•
Configure settings as required by the application, and click Connect.
• When a connection is established, the green indicator in the status
bar at the bottom right of the screen will be visible:
Important: The imager is in Continuous Read Mode by default. For
best connection results, be sure that no decodable symbols are
within the imager’s field of view while attempting to connect.
Step 9 — Test Read Rate
Read Rate indicates the number of successful decodes per second
achieved by the imager.
Test Read Rate by di-soric ID
1. Click the Test button to start the Read Rate test.
If a symbol has been successfully decoded, its data and related
information will be presented in the field below the image display
window. While the symbol is being decoded,
the Read Rate
LEDs will indicate the read rate percentage
on the top of the unit.
2. Click the Stop button to end the Read Rate test.
Note: Read rate can also be tested using the Read Rate interface
in Utilities.
Test Read Rate by EZ Button
1. To start the Read Rate test, hold down the EZ Button about
three seconds until you hear three short beeps. The
20%, 40%,
and 60% LEDs on the top of the unit will illuminate.
While the symbol is being decoded, the Read Rate LEDs will
indicate the read rate percentage on the top of the unit.
2. To end the Read Rate test, press the EZ Button and quickly
release.
Test Read Rate by Serial Command
You can also start a test with the <C> or <Cp> command and end it
with the <J> command.
Step 7 — Locate Symbol
Locate by di-soric ID
• In di-soric ID’s EZ Mode, click the Locate button.
The symbol in the field of view will appear in the video view
beneath the Locate and Calibrate buttons.
• Center the symbol in the imager’s field of view.
Important: The entire symbol should fall within the field of
view (FOV) of the imager. The field of view is what appears in
di-soric ID’s Locate/Calibrate window in EZ Mode.
• Click the Stop button to end the Locate function.
Locate by EZ Button
If you are not connected to a host computer, the EZ Button
allows you to locate the symbol in the imager’s field of view.
• Hold down the EZ Button for about one second and release
when you hear one short beep. The amber 20% LED will
illuminate when the symbol is located.
Note: To end all EZ Button functions, press the EZ Button
once and quickly release.
Step 10 — Configure and Save
Click the App Mode button to make configuration changes.
The following modes are accessible by clicking the buttons at
the top of the screen:
• Click the EZ Mode button to return to EZ Mode.
• Click the Autoconnect button to establish communication.
• Click the Send/Recv button to send or receive commands.
• Click the Switch Model button to open the model menu.
• Click the Parameters button to show the tree controls for
Communication, Read Cycle, Symbologies, I/O Parameters,
Symbol Quality, Matchcode, and Diagnostics.
• Click the Setup button to access the Camera Setup tree
and
the interfaces for Video, Evaluation, Calibration, Window
of
Interest (WOI), Configuration Database, Ordered Output, Output
Format, and Dynamic Setup.
• Click the Terminal button to display decoded symbol data,
and to send serial commands to the imager using text or macros.
•
Click the Utilities button to show the tabbed interfaces for Read
Rate, Counters, Device Control, Differences from Default, Master
Database, and Firmware
.
Saving Options
•Send, No Save. Changes will be lost when power is re-applied
to the imager.
•Send and Save. This activates all changes in current memory
and saves to the imager for power-on.
Other Di-soric Laboratory Equipment manuals
Popular Laboratory Equipment manuals by other brands
Dickey-John
Dickey-John Instalab 600 Series Operator's manual
Endress+Hauser
Endress+Hauser Liquistation CSF48 operating instructions

Agilent Technologies
Agilent Technologies 6850 Series Service information
Beckman Coulter
Beckman Coulter Avanti J-26S XPI Instructions for use

wtw
wtw PB 150/2 operating instructions
Noraxon
Noraxon Ultium EMG System quick start guide
