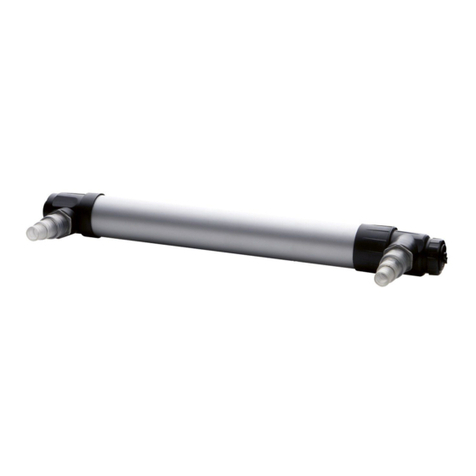
AQUA EL SterilizerUV PS User manual

STERILIZER UV ps
INSTRUKCJA OBSŁUGI
OPERATING INSTRUCTIONS
GEBRAUCHSANLEITUNG
NOTICE D’UTILISATION
F/MULTI-1/2016-04-29
PS-9WPS-11W
AQUAEL Sp. zo. o.
16-400 Suwałki, Dubowo II 35, Poland

БЪЛГАРСКИ........................................... 28
Характеристики на уреда....................... 28
Условия за безопасна употреба............ 29
Подготовка за пускане............................ 29
Пускане и употреба ................................ 30
Почистване на стерилизатора............... 30
Смяна на флуорисцентната лампа....... 31
Гаранционни условия............................. 31
MAGYAR.................................................. 32
A készülék tulajdonságai .......................... 32
A biztonságos használat feltételei ............ 33
Az üzembe helyezés előkészítése ........... 33
Üzembe helyezés és használat................ 34
A sterilizátor tisztítása............................... 34
An fénycső kicserélése............................. 35
Garanciafeltételek..................................... 35
PORTUGUÊS........................................... 36
Especicações gerais............................... 36
Condições de utilização segura................ 37
Preparação para instalação...................... 37
Utilização.................................................. 38
Manutenção e substituiçãoda lâmpada
uorescente.............................................. 38
Substituição da lâmpada uorescente...... 38
Condições de garantia.............................. 39
ESPAÑOL ................................................ 40
Lod datos del aparato............................... 40
Las condiciones del uso y de seguridad... 41
Preparación de la puesta en marcha........ 41
La puesta en marcha y el uso .................. 42
La limpieza del esterilizador ..................... 42
El cambio de la lampara uorescente ...... 43
Las condiciones de garantia..................... 43
ITALIANO................................................. 44
Speciche dell’apparecchio...................... 44
Condizioni per l’utilizzo in piena sicurezza45
Preparazione all’avviamento .................... 45
Avviamento ed utilizzo.............................. 46
Pulizia dello sterilizzatore ......................... 46
Sostituzione della lampada uorescente.. 47
Condizioni di garanzia .............................. 47
SVENSK................................................... 48
Specikationer av apparat........................ 48
Villkor för säker användning ..................... 49
Förberedelse för igångsättning ................ 49
Igångsättning och användning.................. 50
Rengöring av sterilizern............................ 50
Byte av lysrör............................................ 50
Garantivillkor............................................. 51
POLSKI...................................................... 4
Specykacja urządzenia............................. 4
Warunki bezpiecznego użytkowania........... 5
Przygotowanie do uruchomienia ................ 5
Uruchomienie i użytkowanie....................... 6
Czyszczenie sterylizatora........................... 6
Wymiana świetlówki ................................... 7
Warunki gwarancji ...................................... 7
ENGLISH.................................................... 8
Device specication.................................... 8
Safe usage conditions ................................ 9
Preparation for launching ........................... 9
Launch and usage.................................... 10
Cleaning the sterilizer............................... 10
Fluorescent lamp replacement ..................11
Warranty conditions...................................11
DEUTSCH ................................................ 12
Eigenschaften der einrichtung.................. 12
Sicherheitsvorschriften ............................. 13
Vorbereitung zur inbetriebsetzung............ 13
Inbetriebsetzung und benutzung .............. 14
Reinigung des sterilisators ....................... 14
Austausch der leuchtstofampe ............... 15
Garantiebedingungen............................... 15
FRANÇAIS............................................... 16
Spécication de l’appareil......................... 16
Conditions d’utilisation en sécurité ........... 17
Preparation à la mise en marche.............. 17
Mise en marche et utilisation.................... 18
Nettoyage du stérilisatuer......................... 18
Rechange du tube uorescent.................. 19
Conditions de garantie.............................. 19
ČESKÝ ..................................................... 20
Specikace zařízení ................................. 20
Podmínky bezpečného používání ............ 21
Příprava ke zp rovoznění....................... 21
Zprovoznění a používání.......................... 22
Čištění sterilizátoru................................... 22
Výměna výbojky ....................................... 22
Záruční podmínky..................................... 23
РУССКИЙ ................................................ 24
Спецификация устройства..................... 24
Правила безопасной эксплуатации....... 25
Подготовка к подключению ................... 25
Подключение и эксплуатация ............... 26
Очистка стерилизатора ......................... 26
Замена лампочки ................................... 27
Гарантийные условия............................. 27
SPIS TREŚCI / ALLTABLE OF CONTENTS / INHALTSVERZEICHNIS / INDEX
OBSAH / OBSAH ČASTÍ / ОГЛАВЛЕНИЕ / СЬДЬРХФНИЕ / TARTALOMJEGYZÉK
CONTEÚDO / ÍNDICE / INDICE / INNEHÅLL / INHOUDSOPGAVE


4
Szanowny Kliencie, gratulujemy trafnego wyboru wysokiej jakości
sterylizatora ultraoletowego przeznaczonego do sterylizacji wody
w oczkach wodnych, stawach ogrodowych i hodowlanych.
SPECYFIKACJA URZĄDZENIA
Woda przepompowywana przez urządzenie przepływa cienką warstwą
bezpośrednio w polu działania promieniowania ultraoletowego UV-C,
które niszczy glony, bakterie i inne chorobotwórcze organizmy. Dzięki
działaniu sterylizatora woda pozostaje cały czas czysta w sensie bio-
logicznym, a ryby i rośliny żyją w komfortowym i zdrowym otoczeniu
– można na zawsze zapomnieć o zielonej wodzie z glonami.
• urządzenie zewnętrzne – przeznaczone do instalowania na zewnątrz
oczka wodnego (poza wodą)
Typ PS – 9WPS – 11W
Napięcie / Częstotliwość V / Hz 220-240 / 50
TC-S UV-C W911
Pobór mocy W11,5 13
Objętość oczka wodnego m38 10
Max. wydajność pompy l / h 3500
Zalecana pompa AQUAEL PFN 3500
Max. ciśnienie bar 0,5
Stopnie ochrony obudowy Oprawa IP X8
Statecznik IP 20
L.p. Nazwa detalu / zespołu PS – 9WPS – 11W
1. Uchwyt mocujący 12113
2. Przyssawka φ34 11529
3. Korek 14191
4. Uszczelka φ17 x 1,5
5. Króciec 14193
6. Obudowa kompletna 14194 14195
7. Osłona kwarcowa kompl. 12456 12457
8. Świetlówka TC-S UV-C 9W11W
9. Uszczelka φ38 x 3,0
10. Oprawa kompletna 14196
11. Uszczelka φ28 x 2,0
12. Uszczelka φ22 x 1,5
13. Uszczelka φ21,95 x 1,78
CZĘŚCI
DANE TECHNICZNE
POLSKI

STERILIZER UV ps
5
Szanowny Kliencie, gratulujemy trafnego wyboru wysokiej jakości
sterylizatora ultraoletowego przeznaczonego do sterylizacji wody
w oczkach wodnych, stawach ogrodowych i hodowlanych.
SPECYFIKACJA URZĄDZENIA
Woda przepompowywana przez urządzenie przepływa cienką warstwą
bezpośrednio w polu działania promieniowania ultraoletowego UV-C,
które niszczy glony, bakterie i inne chorobotwórcze organizmy. Dzięki
działaniu sterylizatora woda pozostaje cały czas czysta w sensie bio-
logicznym, a ryby i rośliny żyją w komfortowym i zdrowym otoczeniu
– można na zawsze zapomnieć o zielonej wodzie z glonami.
• urządzenie zewnętrzne – przeznaczone do instalowania na zewnątrz
oczka wodnego (poza wodą)
L.p. Nazwa detalu / zespołu PS – 9WPS – 11W
1. Uchwyt mocujący 12113
2. Przyssawka φ34 11529
3. Korek 14191
4. Uszczelka φ17 x 1,5
5. Króciec 14193
6. Obudowa kompletna 14194 14195
7. Osłona kwarcowa kompl. 12456 12457
8. Świetlówka TC-S UV-C 9W11W
9. Uszczelka φ38 x 3,0
10. Oprawa kompletna 14196
11. Uszczelka φ28 x 2,0
12. Uszczelka φ22 x 1,5
13. Uszczelka φ21,95 x 1,78
CZĘŚCI WARUNKI BEZPIECZNEGO UŻYTKOWANIA
Przed instalacją i każdym uruchomieniem urządzenia należy do-
kładnie zapoznać się z niniejszą instrukcją obsługi i montażu.
Przy uruchamianiu, konserwacji oraz innych pracach w zbiorniku
wodnym, należy odłączyć od sieci poprzez wyciągnięcie wtyczki
z gniazda sieciowego.
Urządzenie wytwarza szkodliwe dla skóry i oczu promieniowanie.
Nigdy nie wolno włączać urządzenia ze zdjętą obudową!
Urządzenie można zasilać tylko z sieci elektrycznej o parametrach
znamionowych (napięcie i częstotliwość) podanych na obudowie
urządzenia z gniazda sieciowego znajdującego się w suchym miej-
scu. W sieci zasilającej powinien być zainstalowany wyłącznik róż-
nicowoprądowy o prądzie upływu 30mA.
W przypadku uszkodzenia należy natychmiast odłączyć je od sieci.
Urządzenie z uszkodzonym przewodem lub osłoną ze szkła kwar-
cowego nie nadaje się do dalszej eksploatacji. Zabrania się doko-
nywania napraw lub wymiany przewodu zasilania sieciowego!
Podczas zagrożenia zamarznięciem sterylizator należy koniecznie
wyłączyć, wylać z niego wodę i przechowywać do wiosny w miejscu
chronionym przed mrozem.
Odnośnie używania sterylizatora w różnych krajach mogą obo-
wiązywać inne specjalne przepisy.
Urządzenie zawiera żarówkę UV-C. Przypadkowe użycie urządze-
nia, lub uszkodzenie obudowy może spowodować wydostawanie
się niebezpiecznego promieniowania UV-C. Promieniowanie UV
emitowane przez znajdującą się we wnętrzu sterylizatora żarówkę,
nawet w małych ilościach jest szkodliwe dla oczu i skóry człowieka.
Nie należy uruchamiać urządzenia poza jego obudową ani wpatry-
wać się bezpośrednio w świecącą żarówkę UV-C! Żarówki nie wol-
no łączyć z innymi źródłami zasilania niż przewidział to producent
urządzenia.
Należy przeczytać instrukcję obsługi przed otwarciem urządzenia.
Należy odłączyć urządzenie od zasilania elektrycznego zawsze
przed wymianą żarówki UV-C.
Niniejszy sprzęt może być użytkowany przez dzieci w wieku co naj-
mniej 8 lat i przez osoby o obniżonych możliwościach zycznych,
umysłowych i osoby o braku doświadczenia i znajomości sprzętu,
jeżeli zapewniony zostanie nadzór lub instruktaż odnośnie do użyt-
kowania sprzętu w bezpieczny sposób i zrozumiałe związane z tym
zagrożenia. Dzieci nie powinny bawić się sprzętem. Nie powinno
być wykonywane czyszczenie i konserwacja sprzętu przez dzieci
bez nadzoru.
PRZYGOTOWANIE DO URUCHOMIENIA
I. ZAINSTALOWAĆ ŚWIETLÓWKĘ
Przed uruchomieniem sterylizatora należy włożyć świetlówkę, po-
stępując wg. następujących czynności:
1. obrócić uchwyt oprawy (10) zgodnie z ruchem wskazówek zegara,
wg strzałki z napisem „OUT” (rys. ),

6
POLSKI
2. wyjąć oprawę (10),
3. wcisnąć świetlówkę (8) w oprawę (10) aż do zatrzaśnięcia,
UWAGA Nie dotykać szkła świetlówki, ewentualne ślady usunąć za
pomocą suchej szmatki.
4. umieścić oprawę (10) wraz z zamontowaną świetlówką (8) w osłonie
kwarcowej (7) .
II. PODŁĄCZYĆ STERILIZER DO OBIEGU WODY
UWAGA Woda przepływająca przez sterylizator powinna być przel-
trowana mechanicznie (przez ltr wstępny).
Sterylizator należy zasilać przy pomocy pompy. Można go instalować
wyłącznie na zewnątrz oczka wodnego (poza wodą) Sterylizator należy
podłączyć koniecznie do wylotu pompy. Należy zwrócić uwagę, żeby
nie obciążać urządzenia nadmiernym ciśnieniem wody (dopuszczalna
wartość została podana w danych technicznych).
UWAGA W celu bezproblemowego odpowietrzania sterylizator należy
ustawić lekko pochylony, tak aby otwór wylotowy był najwyżej położo-
nym punktem sterylizatora.
Przy zamocowaniu sterylizatora mogą być pomocne uchwyty (1), które
przyssawkami (2) albo wkrętami można przymocować do podłoża.
URUCHOMIENIE I UŻYTKOWANIE
Po wykonaniu powyższych przygotowań, należy najpierw uruchomić
pompę współpracującą ze sterylizatorem. Należy sprawdzić szczelność
połączeń sterylizatora z wężami, a w przypadku przecieków uszczelnić.
Dopiero po ustabilizowaniu się przepływu wody, włączyć sterylizator po-
przez włożenie wtyczki do gniazda sieciowego.
UWAGA Nie wolno przykrywać statecznika wtyczkowego.
W celu uzyskania optymalnego efektu zaleca się używanie sterylizatora
bez przerwy przez cały sezon od wiosny do późnej jesieni. Przewidywa-
ny okres efektywnego działania świetlówki UV wynosi ok. 7500 godzin,
a więc służyć nam będzie bezproblemowo przez cały sezon. Po upływie
planowanego okresu działania sterylizator UV należy wyłączyć, wycią-
gając wtyczkę z gniazda sieciowego.
Dla pozbycia się glonów ze stawu wystarczy cykliczne używanie steryli-
zatora UV, np. jeden miesiąc pracy i jeden miesiąc przerwy itd.
CZYSZCZENIE STERYLIZATORA
Dla efektywnego działania sterylizatora należy go co kilka tygodni oczy-
ścić wykonując następujące czynności:
1. odłączyć urządzenie i współdziałającą z nim pompę od sieci elek-
trycznej przez wyciągnięcie wtyczki z gniazda,
2. odłączyć urządzenie od obiegu wody i usunąć pozostałą w nim wode,
3. wyjąć oprawę ze świetlówką obracając uchwyt oprawy (10) wg strzał-
ki z napisem „OUT” (rys. ),

STERILIZER UV ps
7
4. ostrożnie wyjąć osłonę kwarcową (7), obracając ją wg strzałki z napi-
sem „OUT” (rys.), i przepłukać ją pod bieżącą wodą oraz starannie
wytrzeć do sucha – szczególnie jej wewnętrzną stronę,
5. wykręcić króćce (5) i korek (3), zdjąć z nich uszczelki i starannie
oczyścić pod bieżącą wodą,
6. oczyścić obudowę,
7. zmontować urządzenie w odwrotnej kolejności, wszystkie uszczelki
muszą być prawidłowo ułożone w swoim rowku i posmarowane wa-
zeliną a świetlówka musi być wsunięta w oprawę do oporu.
WYMIANA ŚWIETLÓWKI
Gdy świetlówka UV-C nie działa należy ją wymienić wykonując nastę-
pujące czynności:
1. odłączyć urządzenie wyciągając wtyczkę z gniazdka,
2. odłączyć urządzenie od obiegu wody oraz usunąć pozostałą w nim
wode i wytrzeć do sucha,
3. obrócić uchwyt oprawy (10) zgodnie z ruchem wskazówek zegara,
wg strzałki z napisem „OUT” (rys.),
4. wyjąć oprawę,
5. wyjąć świetlówkę z oprawy i wcisnąć nową aż do zatrzaśnięcia,
UWAGA Nie dotykać szkła świetlówki, ewentualne ślady usunąć za
pomocą suchej szmatki.
6. umieścić oprawę (10) wraz z zamontowaną świetlówką (8) w obudo-
wie.
WARUNKI GWARANCJI
Producent udziela gwarancji na okres 24 miesięcy licząc od daty zaku-
pu. Gwarancja obejmuje wyłącznie uszkodzenia powstałe z winy produ-
centa, tj. wady materiałowe lub błędy montażowe, nie obejmuje
natomiast uszkodzeń powstałych z winy użytkownika na skutek niewłaś-
ciwego obchodzenia się z urządzeniem lub też wykorzystania go do
celów niezgodnych z jego przeznaczeniem. Uwaga: jakiekolwiek próby
przeróbek lub demontażu sprzętu wykraczające poza zakres jego nor-
malnego użytkowania i konserwacji powodują utratę gwarancji!
W przypadku stwierdzenia nieprawidłowości działania urządzenia należy
przesłać je wraz z wypełniona karta gwarancyjną na adres sprzedawcy
lub producenta. Warunkiem uznania gwarancji jest zgodność daty pro-
dukcji wytłoczonej na produkcie z datą wypisaną na karcie gwarancyj-
nej. Niniejsze warunki nie wyłączają, nie ograniczają ani nie zawieszają
uprawnień kupującego wynikających z niezgodności towaru z umową.
Gwarancja jest ograniczona wyłącznie do naprawy lub wymiany samego
urządzenia. Nie obejmuje ona skutków utraty lub zniszczenia jakichkol-
wiek innych obiektów.

8
Dear Customer, we congratulate you on your accurate choice of high
quality ultraviolet sterilizer intended for water sterilization in miniature
ponds, garden ponds and sh ponds.
DEVICE SPECIFICATION
Water pumped through the device ows in a thin layer directly in the eld
of operation of UV-C ultraviolet radiation, which destroys algae, bacteria
and other pathogenic organisms. Due to the sterilizer’s operation, water
in your tank remains pure all the time in a biological sense, and the sh
and plants live in a comfortable and healthy environment – you can for-
get green water with algae forever.
• this is an external device, designed to be installed outside of the pond
(out of water)
Typ PS – 9WPS – 11W
Voltage / Frequency V / Hz 220-240 / 50
TC-S UV-C W911
Power consumption W11,5 13
Pond volume m38 10
Max pump output l / h 3500
Recommended AQUAEL pump PFN 3500
Max. pressure bar 0,5
Housing protection degrees Housing IP X8
Stabilizer IP 20
No Name of detail / assembly PS – 9WPS – 11W
1. Mounting bracket 12113
2. Suction cup φ34 11529
3. Stopper 14191
4. Gasket φ17 x 1,5
5. Stub pipe 14193
6. Complete housing 14194 14195
7. Complete quartz casing 12456 12457
8. Fluorescent lamp TC-S UV-C 9W11W
9. Gasket φ38 x 3,0
10. Complete tting 14196
11. Gasket φ28 x 2,0
12. Gasket φ22 x 1,5
13. Gasket φ21,95 x 1,78
PARTS
TECHNICAL DATA
ENGLISH

STERILIZER UV ps
9
Dear Customer, we congratulate you on your accurate choice of high
quality ultraviolet sterilizer intended for water sterilization in miniature
ponds, garden ponds and sh ponds.
DEVICE SPECIFICATION
Water pumped through the device ows in a thin layer directly in the eld
of operation of UV-C ultraviolet radiation, which destroys algae, bacteria
and other pathogenic organisms. Due to the sterilizer’s operation, water
in your tank remains pure all the time in a biological sense, and the sh
and plants live in a comfortable and healthy environment – you can for-
get green water with algae forever.
• this is an external device, designed to be installed outside of the pond
(out of water)
No Name of detail / assembly PS – 9WPS – 11W
1. Mounting bracket 12113
2. Suction cup φ34 11529
3. Stopper 14191
4. Gasket φ17 x 1,5
5. Stub pipe 14193
6. Complete housing 14194 14195
7. Complete quartz casing 12456 12457
8. Fluorescent lamp TC-S UV-C 9W11W
9. Gasket φ38 x 3,0
10. Complete tting 14196
11. Gasket φ28 x 2,0
12. Gasket φ22 x 1,5
13. Gasket φ21,95 x 1,78
PARTS SAFETY PRECAUTIONS
Before the installation and every starting of the device, carefully
read this installation and maintenance manual.
When performing any works conducted in the water reservoir (start-
up, maintenance), disconnect the device from the mains by pulling
the plug out of the socket.
The device emits ultraviolet radiation that is harmful to human skin
and eyes. Never operate the device with its housing removed!
The device should only be powered from an electricity network with
the nominal parameters (voltage and frequency) specied on the
housing of the device, using a socket located in a dry place. The
power supply network should be equipped with a residual-current
circuit breaker with a leakage current of 30mA.
If the device is damaged, disconnect it from the mains immediately.
Do not operate the device if its power cord or quartz glass shield is
damaged. Do not repair or replace the power cord!
When there is a risk of freezing, switch off the sterilizer, drain the
water, and store the sterilizer until spring in a place protected from
frost.
Depending on your country, other special regulations may ap-
ply to the use of the sterilizer.
The device employs a UV-C lamp. Accidental use of the device or
damage to its housing may lead to the release of hazardous UV-C
radiation. The UV radiation emitted by the bulb employed in the
sterilizer is harmful to human eyes and skin even in small amounts.
Do not use the device outside of its housing, nor stare directly at
the UV-C bulb when in operation! The bulb should not be used with
power sources other than specied by the device manufacturer. Be-
fore opening the device, read the manual. Always disconnect the
device from the mains before replacing the UV-C bulb.
This device can be operated by children who are at least eight years
of age, by persons with reduced physical or mental capabilities or
persons with no prior experience with the device only under super-
vision or following aninstruction on the safe operation of the device
to ensure that the person is aware of any associated risks. The
device is not a child’s toy! Do not let children to clean or perform
maintenance on the device without supervision.
PREPARATION FOR LAUNCHING
I. INSTALL THE FLUORESCENT LAMP
Prior to launching the sterilizer, insert the uorescent lamp, pro-
ceeding as follows:
1. turn the tting grip (10) clockwise, according to the „OUT” arrow
(g. ),
2. remove the tting (10),
3. press the uorescent lamp (8) into the tting (10) until locked,
NOTE Do not touch the uorescent lamp glass; remove possible
marks with a dry cloth.

10
ENGLISH
4. place the tting (10) along with the tted uorescent lamp (8) in the
quartz housing (7).
II. CONNECT THE STERILIZER TO THE WATER CIRCUIT
NOTE Water owing through the sterilizer should be mechanically
ltered (by the preliminary lter).
The sterilizer should be fed by means of a pump. The device should
only be installed outside of the pond (out of water). The sterilizer must
be connected to the pump outlet. Make sure that the device is not ex-
posed to excessive water pressure (see the data sheet for the maximum
permissible value).
NOTE For the purpose of problem-free deaeration, the UV sterilizer
should be positioned slightly inclined, so that the outlet opening is the
highest point of the sterilizer.
In mounting the sterilizer, you may nd handy the brackets (1), which
can be xed to the background by means of suction caps (2) or screws.
LAUNCH AND USAGE
Following the above preparations, you should rst turn on the pump
cooperating with the sterilizer. Make sure that the hoses are tightly
connected to the sterilizer. If leaks are discovered, tighten up the con-
nections. Only after stabilizing the water ow, turn the sterilizer on by
sticking the plug in a power outlet.
NOTE Do not cover the plug stabilizer.
In order to obtain optimum results, it is recommended to use the steril-
izer non-stop for the entire season from spring to late autumn. The an-
ticipated period of effective operation of the UV uorescent lamp is ca.
7500 hours, so it will serve its purpose problem-free for the entire sea-
son. After the lapse of the planned period of operation, the UV sterilizer
should be turned off, by pulling the plug from the power supply socket.
In order to get rid of algae from the pond, it is sufcient to use the UV
sterilizer in cycles, e.g. one month of operation and one month of inter-
val, and so forth.
CLEANING THE STERILIZER
For efcient operation of the sterilizer, it should be cleaned every several
weeks, performing the following actions:
1. disconnect the device and the pump cooperating with it from the
power supply by pulling the plugs from the sockets,
2. disconnect the device from the waster circulation and remove any
water remaining in it,
3. remove the tting with the uorescent lamp by turning the tting grip
(10) according to the „OUT” arrow (g.),
4. carefully remove the quartz cover (7), turning it according to the
„OUT” arrow (g.), and rinse it under running water and carefully
wipe dry – particularly its internal side,

STERILIZER UV ps
11
5. screw out the stub pipes (5) and stopper (3), remove the gaskets (4)
from them, and carefully clean under running water,
6. clean the housing,
7. assemble the device in reverse order, all gaskets must be properly
placed in their groove and greased with Vaseline, and the uorescent
lamp must be inserted all the way into the tting until refusal.
FLUORESCENT LAMP REPLACEMENT
When the UV-C uorescent lamp does not work it should be replaced
as follows:
1. disconnect the device by pulling the plug from the power supply
socket,
2. disconnect the device from the water circulation, remove any remain-
ing water inside and wipe dry,
3. turn the tting grip (10) clockwise, according to the „OUT” arrow
(g.),
4. remove the tting,
5. remove the uorescent lamp from the tting and press a new one in
until locked,
NOTE Do not touch the glass of the uorescent lamp; remove possible
marks with a dry cloth.
6. place the tting (10) along with the mounted uorescent lamp (8) in
the housing.
WARRANTY CONDITIONS
The manufacturer grants a 24 month guarantee beginning on the date of
purchase. The guarantee covers defects arising from manufacturer fault
i.e. defective materials or assembly errors. It does not cover damage
due to user’s fault caused by improper handling of the device or using
the device for purposes discordant its destination.
Attention: any modication or disassembly attempt exceeding normal
usage and maintenance cause the guarantee void.
In case of noticing improper operation of the device send it with lled out
warranty card to the manufacturer or distributor address. . The conformity
of the production date stamped on the product and written in the guar-
antee card is a prerequisite for accepting the guarantee. The following
warranty conditions do not exclude, limit or suspend user’s rights derived
from discrepancy of the merchandise with the agreement. The guarantee
is limited to repair or replacement of the unit only and does not cover con-
sequential loss or damage to animate or inanimate objects.
4. place the tting (10) along with the tted uorescent lamp (8) in the
quartz housing (7).
II. CONNECT THE STERILIZER TO THE WATER CIRCUIT
NOTE Water owing through the sterilizer should be mechanically
ltered (by the preliminary lter).
The sterilizer should be fed by means of a pump. The device should
only be installed outside of the pond (out of water). The sterilizer must
be connected to the pump outlet. Make sure that the device is not ex-
posed to excessive water pressure (see the data sheet for the maximum
permissible value).
NOTE For the purpose of problem-free deaeration, the UV sterilizer
should be positioned slightly inclined, so that the outlet opening is the
highest point of the sterilizer.
In mounting the sterilizer, you may nd handy the brackets (1), which
can be xed to the background by means of suction caps (2) or screws.
LAUNCH AND USAGE
Following the above preparations, you should rst turn on the pump
cooperating with the sterilizer. Make sure that the hoses are tightly
connected to the sterilizer. If leaks are discovered, tighten up the con-
nections. Only after stabilizing the water ow, turn the sterilizer on by
sticking the plug in a power outlet.
NOTE Do not cover the plug stabilizer.
In order to obtain optimum results, it is recommended to use the steril-
izer non-stop for the entire season from spring to late autumn. The an-
ticipated period of effective operation of the UV uorescent lamp is ca.
7500 hours, so it will serve its purpose problem-free for the entire sea-
son. After the lapse of the planned period of operation, the UV sterilizer
should be turned off, by pulling the plug from the power supply socket.
In order to get rid of algae from the pond, it is sufcient to use the UV
sterilizer in cycles, e.g. one month of operation and one month of inter-
val, and so forth.
CLEANING THE STERILIZER
For efcient operation of the sterilizer, it should be cleaned every several
weeks, performing the following actions:
1. disconnect the device and the pump cooperating with it from the
power supply by pulling the plugs from the sockets,
2. disconnect the device from the waster circulation and remove any
water remaining in it,
3. remove the tting with the uorescent lamp by turning the tting grip
(10) according to the „OUT” arrow (g.),
4. carefully remove the quartz cover (7), turning it according to the
„OUT” arrow (g.), and rinse it under running water and carefully
wipe dry – particularly its internal side,

12
Sehr geehrter Kunde, herzlichen Glückwunsch für die richtige Wahl
unseres ultravioletten Sterilisators von höchster Qualität. Er ist zur Steri-
lisation des Wassers in Garten- und Fischzuchtteichen bestimmt.
EIGENSCHAFTEN DER EINRICHTUNG
Das Wasser wird mit einer Pumpe durch die Einrichtung getrieben, wo
es in dünnem Schicht unmittelbar vor einer Strahlungsquelle UV-C vor-
beiströmt, und diese Strahlen die Schwebalgen, Bakterien und übrigen
Krankheitskeime vernichten. Dank der Wirkung des Sterilisators bleibt
das Wasser im Teich ständig rein – im biologischen Sinne, und die Fische
und Panzen werden in einem komfortablen und gesunden Milieu leben,
vom grünen Wasser mit Algen kann für immer vergessen werden.
• externes Gerät – zur Installation außerhalb des Teiches (außerhalb
des Wassers) vorgesehen
BEDINGUNGEN FÜR DEN SICHEREN GEBRAUCH
Machen Sie sich vor dem Einbau und jeder Inbetriebsetzung genau
mit dieser Montage- und Bedienungsanleitung vertraut.
Bei der Inbetriebnahme, Wartung und anderen Arbeiten im Was-
Typ PS – 9WPS – 11W
Spannung / Frequenz V / Hz 220-240 / 50
TC-S UV-C W911
Leistungsaufnahme W11,5 13
Teichvolumen m38 10
Größte Fördermenge der Pumpe l / h 3500
Empfohlene AQUAEL-Pumpe PFN 3500
Höchster Druck bar 0,5
Schutzarten durch Gehäuse Körper des Sterilisators IP X8
Steckervorschaltgerät IP 20
L.p. Benennung des Teils / Gruppe PS – 9WPS – 11W
1. Befestigungsklammer 12113
2. Saugnapf φ34 11529
3. Blindkappe 14191
4. Dichtung φ17 x 1,5
5. Anschlussstück 14193
6. kompl. Gehäuse 14194 14195
7. kompl. Quarzglashülse 12456 12457
8. Leuchtstofampe TC-S UV-C 9W11W
9. Dichtung φ38 x 3,0
10. kompl. Fassung AS 14196
11. Dichtung φ28 x 2,0
12. Dichtung φ22 x 1,5
13. Dichtung φ21,95 x 1,78
TEILE
TECHNISCHE DATEN
DEUTSCH

STERILIZER UV ps
13
Sehr geehrter Kunde, herzlichen Glückwunsch für die richtige Wahl
unseres ultravioletten Sterilisators von höchster Qualität. Er ist zur Steri-
lisation des Wassers in Garten- und Fischzuchtteichen bestimmt.
EIGENSCHAFTEN DER EINRICHTUNG
Das Wasser wird mit einer Pumpe durch die Einrichtung getrieben, wo
es in dünnem Schicht unmittelbar vor einer Strahlungsquelle UV-C vor-
beiströmt, und diese Strahlen die Schwebalgen, Bakterien und übrigen
Krankheitskeime vernichten. Dank der Wirkung des Sterilisators bleibt
das Wasser im Teich ständig rein – im biologischen Sinne, und die Fische
und Panzen werden in einem komfortablen und gesunden Milieu leben,
vom grünen Wasser mit Algen kann für immer vergessen werden.
• externes Gerät – zur Installation außerhalb des Teiches (außerhalb
des Wassers) vorgesehen
BEDINGUNGEN FÜR DEN SICHEREN GEBRAUCH
Machen Sie sich vor dem Einbau und jeder Inbetriebsetzung genau
mit dieser Montage- und Bedienungsanleitung vertraut.
Bei der Inbetriebnahme, Wartung und anderen Arbeiten im Was-
L.p. Benennung des Teils / Gruppe PS – 9WPS – 11W
1. Befestigungsklammer 12113
2. Saugnapf φ34 11529
3. Blindkappe 14191
4. Dichtung φ17 x 1,5
5. Anschlussstück 14193
6. kompl. Gehäuse 14194 14195
7. kompl. Quarzglashülse 12456 12457
8. Leuchtstofampe TC-S UV-C 9W11W
9. Dichtung φ38 x 3,0
10. kompl. Fassung AS 14196
11. Dichtung φ28 x 2,0
12. Dichtung φ22 x 1,5
13. Dichtung φ21,95 x 1,78
TEILE serbecken muss das Gerät vom Stromnetz getrennt sein und der
Netzstecker aus der Steckdose gezogen werden.
Das Gerät gibt eine für Augen und Haut schädliche Strahlung ab.
Es ist verboten, das Gerät mit abgenommenem Gehäuse in Betrieb
zu nehmen!
Das Gerät darf nur aus einem Stromnetz mit den auf dem Gerä-
tegehäuse angegebenen technischen Nennparametern (Spannung
und Frequenz) über eine an einem trockenen Ort bendliche Netz-
steckdose gespeist werden można. Im Stromversorgungnetz ist ein
Fehlerstrom-/Differenzstrom-Schutzschalter mit einem Leckstrom
von bis zu 30mA zu installieren.
Bei einem Schaden ist das Gerät sofort vom Netz zu nehmen. Ge-
räte mit einem beschädigten Stromkabel oder einer beschädigten
Quarzglashülse dürfen nicht weiter betrieben werden. Das Netzka-
bel darf nicht repariert oder ausgetauscht werden!
Droht ein Einfrieren des Gerätes, ist der Sterilisator unbedingt aus-
zuschalten, von Wasser zu entleeren und bis zum nächsten Früh-
jahr an einem frostgeschützten Ort einzulagern.
Hinsichtlich des Gebrauchs des Sterilisators können in ver-
schiedenen Ländern unterschiedliche Vorschriften gelten.
Das Gerät enthält eine UV-C-Glühbirne. Bei einem unbeabsichtig-
ten Gebrauch des Gerätes oder einer Beschädigung des Gehäuses
kann schädliche UV-C-Strahlung austreten. Die von der im Sterilisa-
tor eingesetzten Birne abgegebene UV-Strahlung ist, auch in gerin-
gen Mengen, schädlich für die Augen und Haut des Menschen. Das
Gerät darf nicht in Betrieb gesetzt werden, wenn es sich außerhalb
des Gehäuses bendet. Schaueb Sie niemals direkt in die leuch-
tende UV-C-Birne! Die Glühbirne darf nicht an andere Stromversor-
gungsquellen als vom Gerätehersteller vorgesehen, angeschlossen
werden. Lesen Sie diese Bedienungsanleitung vor dem Öffnen des
Gerätes aufmerksam durch. Vor dem Austausch der UV-C-Birne ist
das Gerät stets von der Stromversorgung zu trennen.
Diese Vorrichtung ist fur die Bedienung von Kindern unter 8 Jahren
nicht geeignet sowie durch Personen mit geschwachten manuellen,
geistlichen Vermogen, sowie durch Personen mit mangelnder Erfah-
rung im Umgang mit dem Gerat, oder ohne Kenntnis dessen Funkti-
on, es sei, die Konservierung des Gerates nden statt unter Aufsicht
einer geschulten Person, oder sie selbst vorher hinsichtlich der si-
cheren Nutzung geschult und uber die moglichen Gefahren durch
Schulungspersonal unterrichtet wird. Den Kinder ist es untersagt mit
dem Gerat zu spielen. Es darf weder das Reinigen noch Warten
des Gerates durch Kinder ohne Aufsicht bzw. Begleitung einer im
Umgang mit diesem Gerat geschulten Person ausgefuhrt werden.
VORBEREITUNG ZUR INBETRIEBSETZUNG
I. INSTALLIERUNG DER LEUCHTSTOFFLAMPE
Vor der Inbetriebsetzung des Sterilisators soll die Leuchtstofam-
pe eingesetzt werden, die folgenden Tätigkeiten ausführend:
1. die Fassung (10) im Uhrzeigersinn, gemäß dem Pfeil mit der Auf-
schrift „OUT“ drehen (Bild),
2. die Fassung (10) ausnehmen,

14
DEUTSCH
3. die Leuchtstofampe (8) in die Fassung (10) drücken, bis zum Ein-
schnappen,
VORSICHT Den Glasteil der Leuchtstofampe nicht berühren, eventu-
elle Spuren mit einem trockenen Lappen entfernen.
4. die Fassung (10) samt mit der Leuchtstofampe (8) in die Glashülse
setzen (7) .
II. ANSCHLIEßUNG DES STERILISATORS ZUM WASSERKREISLAUF
ACHTUNG Das durch den Sterilisator strömende Wasser soll mecha-
nisch schon geltert sein (durch einen Vorlter).
Der UV-Sterilisator soll immer mit einer Pumpe gespeist werden. Das
Gerät darf nur außerhalb des Aquariumsbeckens installiert werden. Der
Sterilisator ist unbedingt an den Pumpenauslass anzuschließen. Es ist
darauf zu achten, dass dass ein zu hoher Wasserdruck vermieden wird
(Der zulässige Wert in unter Technische Daten angegeben).
ACHTUNG Zwecks einer problemlosen Entlüftung soll der Sterilisator
leicht schräg aufgestellt werden - die Auslauföffnung soll sein höchstge-
legener Punkt sein.
Für die Befestigung des Sterilisators können die Klammer (1) behilich
sein, die mit den Saugnäpfen (2) oder mit Schrauben zur Grundäche
geankert werden können.
INBETRIEBSETZUNG UND BENUTZUNG
Nach der oben beschriebenen Vorbereitungen soll vorerst die Pumpe in
Betrieb genommen werden, die mit dem Sterilisator zusammenarbeitet.
Es ist die Dichtheit der Verbindungen des Sterilisators mit den Schläu-
chen zu prüfen, eventuelle Undichtigkeiten sind abzudichten. Erst danach,
nach der Stabilisierung des Wasserdurchusses kann der Sterilisator ein-
geschaltet werden durch Einstecken des Steckers in die Netzsteckdose.
ACHTUNG Das Steckervorschaltgerät darf nicht verdeckt werden.
Um die optimale Wirksamkeit zu erzielen, empfehlt es sich, den Sterili-
sator ständig ohne Pause durch die volle Saison vom Frühling bis zum
Spätherbst zu benutzen. Die Betriebsdauer der ultravioletten Leucht-
stofampe beträgt etwa 7500 Stunden, also wird sie uns dienen pro-
blemlos durch die ganze Saison. Nach dem Ablauf seiner vorgesehenen
Betriebszeit soll der UV-Sterilisator ausgeschaltet werden, den Stecker
des Vorschaltgerätes aus der Netzsteckdose ziehend. Um die Algen aus
dem Teich wegzuschaffen, genügt eine zyklische Benutzung des ultra-
violetten Sterilisators, z.B. ein Monat Betrieb und ein Monat Pause usw.
REINIGUNG DES STERILISATORS
Zur Sicherung der wirksamen Arbeit des Sterilisators soll er etwa monat-
lich einmal gereinigt werden, die folgenden Tätigkeiten ausführend:
1. das Gerät und die mitwirkende Pumpe trennen vom elektrischen
Netz, durch Ziehen der Stecker aus den Steckdosen,

STERILIZER UV ps
15
2.
das Gerät trennen vom Wasserkreislauf und das Wasser aus ihm auslassen,
3. Die Fassung samt mit der Leuchtstofampe ausnehmen, den Griff der Fas-
sung (10) gemäß dem Pfeil mit der Aufschrift „OUT“ ausdrehend (Bild),
4. die Quarzglashülse (7) vorsichtig ausnehmen, sie gemäß dem Pfeil
mit der Aufschrift „OUT“ (Bild ) drehend, unter ießendem Wasser
durchspülen und trocken wischen – besonders ihre innere Seite,
5. die Anschlussstücke (5) und die Blindkappe (3) ausdrehen, die Dichtun-
gen von ihnen abnehmen, sorgfältig reinigen unter ießendem Wasser,
6. das Gehäuse reinigen.
7. das Gerät in umgekehrter Reihenfolge zusammenstellen. Alle Dichtungen
sollen in ihren Nuten richtig legen und mit Vaseline beschmiert werden, und
die Leuchtsofampe bis zum Widerstand in ihre Fassung gesteckt werden.
AUSTAUSCH DER LEUCHTSTOFFLAMPE
Leuchtet die UV-C Leuchtstofampe nicht, so soll sie ausgetauscht werden,
die folgenden Tätigkeiten ausführend:
1. das Gerät vom Netz trennen, den Stecker aus der Steckdose ziehend
2. das Gerät vom Wasserkreislauf trennen, das Wasser aus ihm auslas-
sen und trocken wischen,
3. den Griff der Fassung (10) im Uhrzeigersinn drehen, gemäß dem
Pfeil mit der Aufschrift „OUT“ (Bild),
4. die Fassung ausnehmen,
5. die Leuchtstofampe aus der Fassung nehmen und die neue bis zum
Einschnappen eindrücken,
ACHTUNG Den Glasteil der Leuchtstofampe nicht berühren, eventu-
elle Spuren mit einem trockenen Lappen entfernen.
6. die Fassung (10) samt mit der eingesetzten Leuchtstofampe (8) im Ge-
häuse anbringen.
GARANTIEBEDINGUNGEN
Der Hersteller leistet Ihnen ab Kaufsdatum eine Garantie für 24 Monate. Die
Garantie schließt bloß Schäden ein, die von dem Schuld des Herstellers
entstanden sind, das heißt Material- und Montagefehler. Sie erstreckt sich
jedoch nicht auf Schäden, die durch Schuld des Benutzers – wie unsach-
gemäße Behandlung oder Benutzung des Gerätes für Zwecke, die nicht mit
seiner Bestimmung übereinstimmen – entstanden sind. Achtung: Jeglicher
Versuch eines Umbaus oder einer Auseinandersetzung der Einrichtung, der
den Bereich ihrer normalen Benutzung und Wartung übertritt, bringt den
Verlust der Garantie zur Folge! Bei Feststellung von Störungen im Betrieb
der Einrichtung, soll sie, samt mit dem vom Verkäufer ausgefüllten Garan-
tieschein an die Adresse des Verkäufers oder des Herstellers versandt wer-
den. Eine Bedingung zur Anerkennung der Garantierechte ist die Überein-
stimmung des auf dem Gerät geprägten Herstellungsdatums mit dem im
Garantieschein eingeschriebenen Datum. Beim Fall, wenn die Ware dem
Vertrag nicht entspricht, werden die daraus folgenden Rechte des Käufers
durch diese Garantiebedingungen weder ausgeschlossen, noch beschränkt
oder ausgesetzt. Die Garantie beschränkt sich ausschließlich auf die Re-
paratur oder Austausch selbst der Einrichtung. Sie erstreckt sich aber nicht
auf die Folgen des Verfalls oder der Vernichtung jeglicher anderer Objekte.
3. die Leuchtstofampe (8) in die Fassung (10) drücken, bis zum Ein-
schnappen,
VORSICHT Den Glasteil der Leuchtstofampe nicht berühren, eventu-
elle Spuren mit einem trockenen Lappen entfernen.
4. die Fassung (10) samt mit der Leuchtstofampe (8) in die Glashülse
setzen (7) .
II. ANSCHLIEßUNG DES STERILISATORS ZUM WASSERKREISLAUF
ACHTUNG Das durch den Sterilisator strömende Wasser soll mecha-
nisch schon geltert sein (durch einen Vorlter).
Der UV-Sterilisator soll immer mit einer Pumpe gespeist werden. Das
Gerät darf nur außerhalb des Aquariumsbeckens installiert werden. Der
Sterilisator ist unbedingt an den Pumpenauslass anzuschließen. Es ist
darauf zu achten, dass dass ein zu hoher Wasserdruck vermieden wird
(Der zulässige Wert in unter Technische Daten angegeben).
ACHTUNG Zwecks einer problemlosen Entlüftung soll der Sterilisator
leicht schräg aufgestellt werden - die Auslauföffnung soll sein höchstge-
legener Punkt sein.
Für die Befestigung des Sterilisators können die Klammer (1) behilich
sein, die mit den Saugnäpfen (2) oder mit Schrauben zur Grundäche
geankert werden können.
INBETRIEBSETZUNG UND BENUTZUNG
Nach der oben beschriebenen Vorbereitungen soll vorerst die Pumpe in
Betrieb genommen werden, die mit dem Sterilisator zusammenarbeitet.
Es ist die Dichtheit der Verbindungen des Sterilisators mit den Schläu-
chen zu prüfen, eventuelle Undichtigkeiten sind abzudichten. Erst danach,
nach der Stabilisierung des Wasserdurchusses kann der Sterilisator ein-
geschaltet werden durch Einstecken des Steckers in die Netzsteckdose.
ACHTUNG Das Steckervorschaltgerät darf nicht verdeckt werden.
Um die optimale Wirksamkeit zu erzielen, empfehlt es sich, den Sterili-
sator ständig ohne Pause durch die volle Saison vom Frühling bis zum
Spätherbst zu benutzen. Die Betriebsdauer der ultravioletten Leucht-
stofampe beträgt etwa 7500 Stunden, also wird sie uns dienen pro-
blemlos durch die ganze Saison. Nach dem Ablauf seiner vorgesehenen
Betriebszeit soll der UV-Sterilisator ausgeschaltet werden, den Stecker
des Vorschaltgerätes aus der Netzsteckdose ziehend. Um die Algen aus
dem Teich wegzuschaffen, genügt eine zyklische Benutzung des ultra-
violetten Sterilisators, z.B. ein Monat Betrieb und ein Monat Pause usw.
REINIGUNG DES STERILISATORS
Zur Sicherung der wirksamen Arbeit des Sterilisators soll er etwa monat-
lich einmal gereinigt werden, die folgenden Tätigkeiten ausführend:
1. das Gerät und die mitwirkende Pumpe trennen vom elektrischen
Netz, durch Ziehen der Stecker aus den Steckdosen,

16
FRANÇAIS
Cher acheteur, nous vous félicitons pour le choix de ce stérilisateur
dastiné à stériliser l’eau des bassin de jardin, d’étangs et d’élevages.
SPÉCIFICATION DE L’APPAREIL
L’eau pompée par l’appareil passe en une couche ne dans le champ
d’action directe du rayonnement ultraviolet UV-C qui détruit les algues,
les bactéries et autres organismes patogènes. Grâce à l’action du stéri-
lisateur l’eau reste pure dans le sense biologique, et les poissons et les
plantes vivent confortablement dans un milieu sain – on peut à jamais
oublier l’eau verte pleine d’algues.
• l’appareil externe – destiné à être installé à l’extérieur de l’étang (en-
dehors de l’eau)
Typ PS – 9WPS – 11W
Tension / Fréquence V / Hz 220-240 / 50
TC-S UV-C W911
Consommation de courant W11,5 13
Capacité de bassin de jardin m38 10
Débit max. de la pompe l / h 3500
Pompe AQUAEL recommandés PFN 3500
Pression maximale bar 0,5
Ments de protection du boîtier Culot IP X8
Stabilisateur IP 20
№ Produit PS – 9WPS – 11W
1. Attache 12113
2. Ventouse φ34 11529
3. Bouchon 14191
4. Joint φ17 x 1,5
5. Tubulure 14193
6. Boîtier complet 14194 14195
7. Couverture de protection en quartz complète 12456 12457
8. Lampe uorescente TC-S UV-C 9W11W
9. Joint φ38 x 3,0
10. Culot complet 14196
11. Joint φ28 x 2,0
12. Joint φ22 x 1,5
13. Joint φ21,95 x 1,78
PIECES DETACHEES
DONNEES TECHNIQUES

STERILIZER UV ps
17
Cher acheteur, nous vous félicitons pour le choix de ce stérilisateur
dastiné à stériliser l’eau des bassin de jardin, d’étangs et d’élevages.
SPÉCIFICATION DE L’APPAREIL
L’eau pompée par l’appareil passe en une couche ne dans le champ
d’action directe du rayonnement ultraviolet UV-C qui détruit les algues,
les bactéries et autres organismes patogènes. Grâce à l’action du stéri-
lisateur l’eau reste pure dans le sense biologique, et les poissons et les
plantes vivent confortablement dans un milieu sain – on peut à jamais
oublier l’eau verte pleine d’algues.
• l’appareil externe – destiné à être installé à l’extérieur de l’étang (en-
dehors de l’eau)
№ Produit PS – 9WPS – 11W
1. Attache 12113
2. Ventouse φ34 11529
3. Bouchon 14191
4. Joint φ17 x 1,5
5. Tubulure 14193
6. Boîtier complet 14194 14195
7. Couverture de protection en quartz complète 12456 12457
8. Lampe uorescente TC-S UV-C 9W11W
9. Joint φ38 x 3,0
10. Culot complet 14196
11. Joint φ28 x 2,0
12. Joint φ22 x 1,5
13. Joint φ21,95 x 1,78
PIECES DETACHEES CONDITIONS D’UTILISATION SURE
Avant l’installation et chaque utilisation, lisez attentivement ce ma-
nuel d’utilisation et de montage.
Lors de la mise en marche, l’entretien et d’autres travaux dans le
réservoir d’eau, débranchez le en tirant la che de la prise.
L’appareil génère le rayonnement nocif pour la peau et les yeux. Ne
jamais faire fonctionner l’appareil avec le couvercle enlevé!
L’appareil peut être alimenté uniquement à partir du réseau élec-
trique aux paramètres nominaux (tension et fréquence) indiquées
sur le boîtier de l’appareil, de la prise située dans un endroit sec. Un
disjoncteur différentiel à courant résiduel de 30mA doit être installé
au réseau d’alimentation.
En cas de dommage, débranchez l’appareil immédiatement du ré-
seau. L’appareil avec un cordon ou la protection en verre de quartz
endommagés ne convient pas pour une utilisation ultérieure.
Il est interdit d’effectuer des réparations ou le remplacement
du cordon d’alimentation!
S’il y a un risque de congélation, débranchez le stérilisateur, drainez
de l’eau et stockez le au printemps dans un endroit protégé du gel.
Les condition d’utilisation du stérilisateur peuvent varier selon
les dispositions particulières en vigeur dans les différents pays.
Le dispositif comprend une lampe UV-C. L’utilisation accidentelle
de l’appareil, ou des dommages au boîtier peut provoquer la libé-
ration de dangereux rayonnement UV-C. Le rayonnement UV émis
par la lampe située à l’intérieur du stérilisateur, même en petites
quantités, est nocive pour les yeux et la peau. Ne pas faire fonc-
tionner l’appareil à l’extérieur du boîtier ou regarder directement la
lampe UV-C luisante! L’ampoule ne doit pas être combinée avec
d’autres sources d’énergie que prévues par le fabricant de l’appa-
reil. Lisez le manuel attentivement avant d’ouvrir l’appareil. Débran-
chez toujours l’appareil de l’alimentation électrique avant de rem-
placer l’ampoule UV-C.
Cet equipement peut etre utilise par des enfants ages de huit ans et
les personnes ayant des capacites physiques et mentales reduites,
ainsi que personnes avec le manque d’experience et de connais-
sances de l’equipement, s’ils seront fournis avec la surveillance
ou l’instruction concernant l’utilisation de l’equipement de facon
securitaire et les risques associes. Les enfants ne devraient pas
jouer avec l’appareil. Le nettoyage et l’entretien de l’equipement ne
doivent pas etre effectues par des enfants sans surveillance.
PREPARATION À LA MISE EN MARCHE
I. L’INSTALLATION DU TUBE FLUORESCENT
Avant de mettre en marche l’appareil il faut installer le tube uore-
scent, en procédant comme suit:
1. tourner la poignée de la monture (10) dans le sens des aiguilles d’une
montre, comme l’indique la féche avec l’inscription „OUT” (g.),
2. retirer la monture (10),
3. inserrer le tube uorescent (8) dans la monture (10) jusqu’au «click»,

18
FRANÇAIS
ATTENTION Ne pas toucher le verre du tube uorescent, enlever les
traces eventuelles avec un chiffon sec.
4. mettre la monture (10) avec le tube uorescent (8) dans l’enveloppe
en quartz (7).
II. BRANCHER LE STÉRILISATEUR AU CIRCUIT D’EAU
ATTENTION L’eau passant par le steryliseuer deverait être ltrée
mécaniquement (par un pre-ltre).
Stérilisateur doit être alimenté en eau par une pompe. Il ne peut être
installé qu’à l’extérieur de l’étang (en-dehors de l’eau). Il est nécessaire
de connectez le stérilisateur à la sortie de la pompe. Faites attention de
ne pas surcharger l’appareil par la pression excessive de l’eau (la valeur
limite est donnée dans les caractéristiques techniques).
ATTENTION Pour une désaération sans problèmes il faut incliner le
stérilisateur, an que sa sortie soit le point le plus élevé du stérilisateur.
Pour xer le stérilisateur on peut utiliser les coliers de xation (1), qui
peuvent être xés au support avec le ventouses (2) ou les vis.
MISE EN MARCHE ET UTILISATION
Après avoir effectué les préparations ci-dessus, en premier mettre en
marche la pompe qui alimente le stérilisateur en eau. Vériez l’étan-
chéité des raccords du stérilisateur avec des tuyaux, et dans le cas de
fuites étanchez les. Après que le ux devienne stable, mettre en marche
le stérilisateur en mettant la che dans la prise de courant.
ATTENTION Il est interdit de couvrir la che-stabilisateur.
An d’obtenir un effet optimal, il est conseille d’utiliser le stérilisateur
sans interruption du printemps jusqu’a l’automne. La période prevue de
marche du tube uorescent est de 7500 heures environ, ainsi il servira
toute la saison. Après la periode d’utilisation du stérilisateur il faut l’arre-
ter en retirant la che de la prise de courant
Pour éliminer les algues de l’etang il suft d’utiliser le stérilisateur à une
cadence d’un mois sur deux.
NETTOYAGE DU STÉRILISATUER
Pour obtenir un rendement optimal il faut nettoyer le stérilisateur toutes
quelques semaines en procedant da la maniere suivante:
1. débrancher l’appareil et la pompe qui l’alimente en eau du courant
éléctrique en retirant la che de de la prise,
2. déconnecter l’appareil du circuit d’eau et le vider,
3. retirer la monture avec le tube urescent en tournant la poignée de la
monture (10) comme le montre la eche marquée „OUT” (g.),
4. délicatement retirer l’enveloppe en quartz (7), en la tournant comme
le montre la eche marquée „OUT” (g. ), et la rincer à l’eau cou-
rante et soigneusement secher avec un chiffon – specialement sa
partie intérieure,

STERILIZER UV ps
19
5. dévisser les manchons (5) et le bouchon (3), retirer leur joints et les
nettoyer soigneusement à l’eau courante,
6. nettoyer le corps de l’appareil,
7. assembler l’appareil dans l’ordre inverse, tous les joints doivent être
bien placés dans leurs cannelures et graissés avec de la vaseline, et
le tube uorescent doit être inserré jusqu’au bout dans sa monture.
RECHANGE DU TUBE FLUORESCENT
Quand le tube UV-C ne fonctionne pas il faut le remplacer en procédant
comme suit:
1. débrancher l’appareil en retirant la che de la prise de courant,
2. déconnecter l’appareil du circuit d’eau et le vider et le secher ,
3. tourner la poignée de la monture (10) dans le sens des aiguilles
d’une montre, selon la eche marquée „OUT” (g.),
4. retirer la monture,
5. retirer le tube uorescent de la monture et insérrer un nouveau tube
jusqu’au «click»,
ATTENTION Ne pas coucher le verre du tube uorescent, enlever les
traces eventuelles avec un chiffon sec.
6. remettre la monture (10) avec le tube uorescent (8) dans le corps de
l’appareil.
CONDITIONS DE GARANTIE
Le fabricant accorde une garantie pour une période de 24 mois à comp-
ter de la date de l’achat. La garantie couvre les détériorations dues aux
vices de matériaux et de fabrication, elle ne couvre pas le détériorations
dues au mauvais maniement de l’appareil par l’utilisateur ou à l’utilisa-
tion autre que celle prévue par le fabricant. Attention : toute tentative de
remaniement ou de démontage de l’appareil au delà de l’utilisation et
l’entretien normal provoquent la déchéance de la garantie. Dans le cas
de la constatation d’un mauvais fonctionnement de l’appareil, il faut l’en-
voyer accompagné de la carte de garantie dûment remplie à l’adresse
du fabricant ou du distributeur. La condition de la reconnaissance de
la garantie est la concordance de la data de fabrication indiquée sur le
produit avec la date indiquée sur la carte de garantie. Les conditions de
garantie ci-dessus ne limitent pas ni suspendent les droits de l’acheteur
découlant du désaccord entre le produit et le contrat d’achat. La garantie
se limite a la reparation ou au remplacement de l’appareil seulement et
ne s’applique pas aux pertes ni aux dommages indirects causes aux
objets animes ou inanimes.
ATTENTION Ne pas toucher le verre du tube uorescent, enlever les
traces eventuelles avec un chiffon sec.
4. mettre la monture (10) avec le tube uorescent (8) dans l’enveloppe
en quartz (7).
II. BRANCHER LE STÉRILISATEUR AU CIRCUIT D’EAU
ATTENTION L’eau passant par le steryliseuer deverait être ltrée
mécaniquement (par un pre-ltre).
Stérilisateur doit être alimenté en eau par une pompe. Il ne peut être
installé qu’à l’extérieur de l’étang (en-dehors de l’eau). Il est nécessaire
de connectez le stérilisateur à la sortie de la pompe. Faites attention de
ne pas surcharger l’appareil par la pression excessive de l’eau (la valeur
limite est donnée dans les caractéristiques techniques).
ATTENTION Pour une désaération sans problèmes il faut incliner le
stérilisateur, an que sa sortie soit le point le plus élevé du stérilisateur.
Pour xer le stérilisateur on peut utiliser les coliers de xation (1), qui
peuvent être xés au support avec le ventouses (2) ou les vis.
MISE EN MARCHE ET UTILISATION
Après avoir effectué les préparations ci-dessus, en premier mettre en
marche la pompe qui alimente le stérilisateur en eau. Vériez l’étan-
chéité des raccords du stérilisateur avec des tuyaux, et dans le cas de
fuites étanchez les. Après que le ux devienne stable, mettre en marche
le stérilisateur en mettant la che dans la prise de courant.
ATTENTION Il est interdit de couvrir la che-stabilisateur.
An d’obtenir un effet optimal, il est conseille d’utiliser le stérilisateur
sans interruption du printemps jusqu’a l’automne. La période prevue de
marche du tube uorescent est de 7500 heures environ, ainsi il servira
toute la saison. Après la periode d’utilisation du stérilisateur il faut l’arre-
ter en retirant la che de la prise de courant
Pour éliminer les algues de l’etang il suft d’utiliser le stérilisateur à une
cadence d’un mois sur deux.
NETTOYAGE DU STÉRILISATUER
Pour obtenir un rendement optimal il faut nettoyer le stérilisateur toutes
quelques semaines en procedant da la maniere suivante:
1. débrancher l’appareil et la pompe qui l’alimente en eau du courant
éléctrique en retirant la che de de la prise,
2. déconnecter l’appareil du circuit d’eau et le vider,
3. retirer la monture avec le tube urescent en tournant la poignée de la
monture (10) comme le montre la eche marquée „OUT” (g.),
4. délicatement retirer l’enveloppe en quartz (7), en la tournant comme
le montre la eche marquée „OUT” (g. ), et la rincer à l’eau cou-
rante et soigneusement secher avec un chiffon – specialement sa
partie intérieure,

20
Vážený zákazníku, blahopřejeme Vám ke správné volbě našeho vy-
soce kvalitního ultraalového sterilizátoru určeného pro sterilizaci vody
v jezírkách, zahradních a chovných rybnících.
SPECIFIKACE ZAŘÍZENÍ
Voda přečerpávaná přes toto zařízení protéká v tenké vrstvě přímo
polem ultraalového UV-C záření, které hubí řasy, bakterie a jiné
choroboplodné organismy. Díky působení sterilizátoru zůstává voda
v nádrži po celou dobu z biologického hlediska čistá a ryby a rostliny žijí
v komfortním a zdravém prostředí – na zelenou vodu s řasami můžete
navždy zapomenout.
• externí zařízení – určené k instalaci na vnější straně jezírka (mimo
vodu)
Typ PS – 9WPS – 11W
Napětí / Frekvence V / Hz 220-240 / 50
TC-S UV-C W911
Příkon W11,5 13
Objem jeziírka m38 10
Max. výkon čerpadla l / h 3500
Doporučené čerpadlo rmy AQUAEL PFN 3500
Max. tlak bar 0,5
Stupně ochrany pláště Svítidlo IP X8
Transformátor IP 20
Poz Název součástky / sady PS – 9WPS – 11W
1. Připevňující držák 12113
2. Přísavka φ34 11529
3. Záslepka 14191
4. Těsnění φ17 x 1,5
5. Vývod 14193
6. Kompletní kryt 14194 14195
7. Křemenný plášť kompletní 12456 12457
8. Zářivka TC-S UV-C 9W11W
9. Těsnění φ38 x 3,0
10. Kompletní svítidlo 14196
11. Těsnění φ28 x 2,0
12. Těsnění φ22 x 1,5
13. Těsnění φ21,95 x 1,78
DÍLY
TECHNICKÉ ÚDAJE
ČESKÝ
This manual suits for next models
2
Table of contents
Languages:
Other AQUA EL Laboratory Equipment manuals
Popular Laboratory Equipment manuals by other brands

Panasonic
Panasonic WEMV180A - VIDEO IMAGER Service manual

Metrohm
Metrohm 774 Instructions for use

Miele professional
Miele professional G 7896 DOS operating instructions

Getinge
Getinge Decomat 4656 installation instructions

DEMA
DEMA 162HCGHT installation instructions

Hanna Instruments
Hanna Instruments HI 93721 instruction manual

Bruker
Bruker BCU05 Technical manual

Quantifi Photonics
Quantifi Photonics LASER 1100 Series user manual

SKC
SKC ULTRA 690-200 operating instructions

N-BIOTEK
N-BIOTEK NB504CIR Operation manual

Nic
Nic Mercury/RH-PE instruction manual

Thermo Scientific
Thermo Scientific Thermo Scientific EASYpure RoDi operating manual