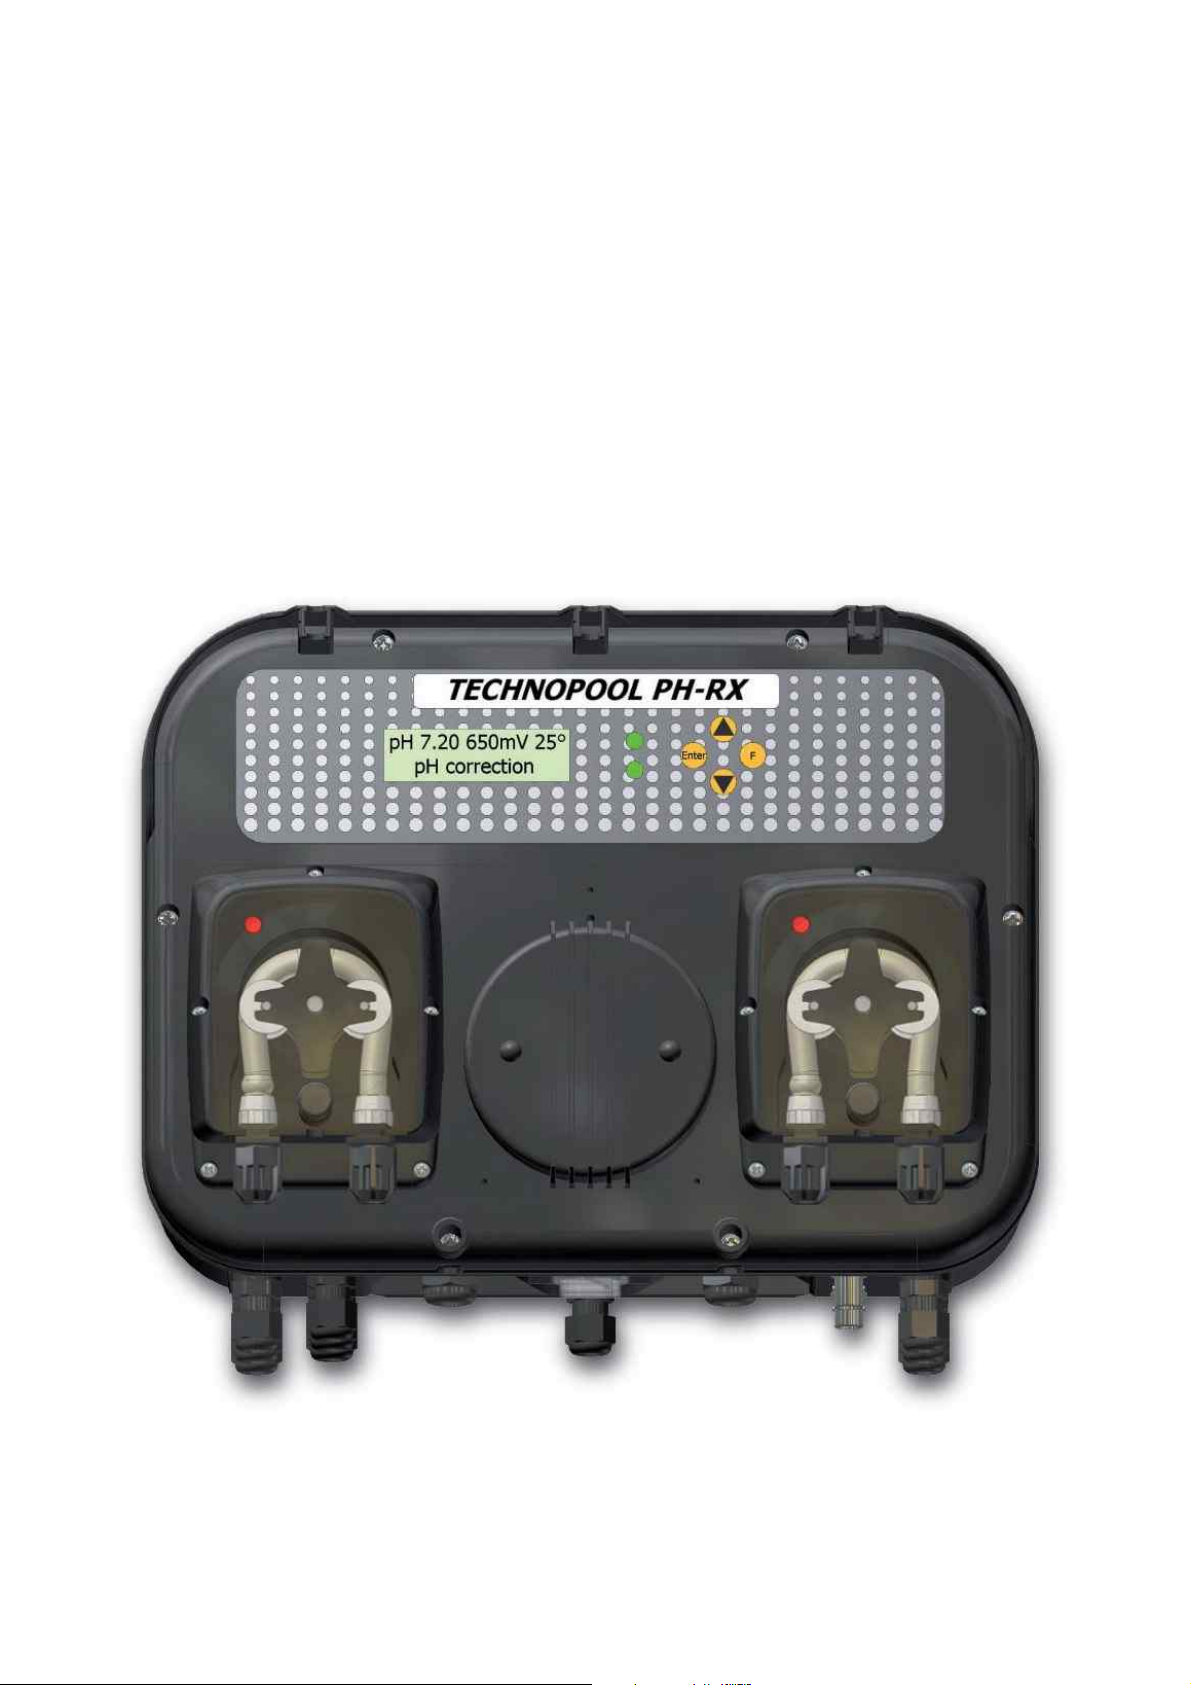
TECHNOPOOL PH-RX 28/06/2010
1.0 General Comments
1.1 Warnings
The aim of the manual is to provide you with all the necessary information for a proper
installation and maintenance in order to give you optimum results whilst in operation.
For this reason it is really important reading with attention the instructions given below
since they furnish all the indications necessary for the sureness of the installation, use and
maintenance
♦This manual has to be preserved with care to be consulted in whatever occasion.
♦At the moment of the receipt you have to check the integrity of the panel and of all
its components, in case of anomalies consult skilled staff before making
interventions.
♦Before the installation of the pump check that all the data on the pump’s label
correspond to those of the electrical plant.
♦Do not operate with bare/naked hands or feet
♦Do not leave the equipment exposed to the action of the atmospheric agents.
♦The equipment has to be operated from skilled person.
♦In case of improper functioning of the panel switch off and contact our technical
assistance for any necessary repairs.
♦For a correct functioning it is necessary to use original spare parts and original
accessories. The producer declines whatever responsibility in reference with break
down due to tampering or the use of not original spare parts and accessories.
♦The electrical plant has to be in conformity with the rules of the country where it is
realised.
♦The room temperature of utilisation can’t over take 45°C
1.2 Design standard
Our products are built according to the actual general directives endowed with CE mark in
conformity with the following European directives:
♦N°89/336/CEE regarding “electromagnetic compatibility”
♦N°73/23/CEE regarding “low voltages”, as also the subsequent modification
N°
193/68/CEE
♦N°2002/95/CE, 2002/96/CE, 2003/108/CE “ RoHs and WEEE directive ”
Granted this we think that in order to obtain an high trustworthiness and a lasting
functioning of the pump it is necessary to follow with attention our manual particularly in
reference with the maintenance.
The Producer declines all responsibility in reference with whatever intervention on
the equipment from not skilled personnel.
2.0 Technical Characteristics
2.1 General rules
Install the panel:
♦In vertical position +/-15°.
♦far from an hot source in dry places at maximum temperature of 45°C and minimum
0°C.
♦In a ventilated place and easily accessible by an operator for periodical
maintenance.
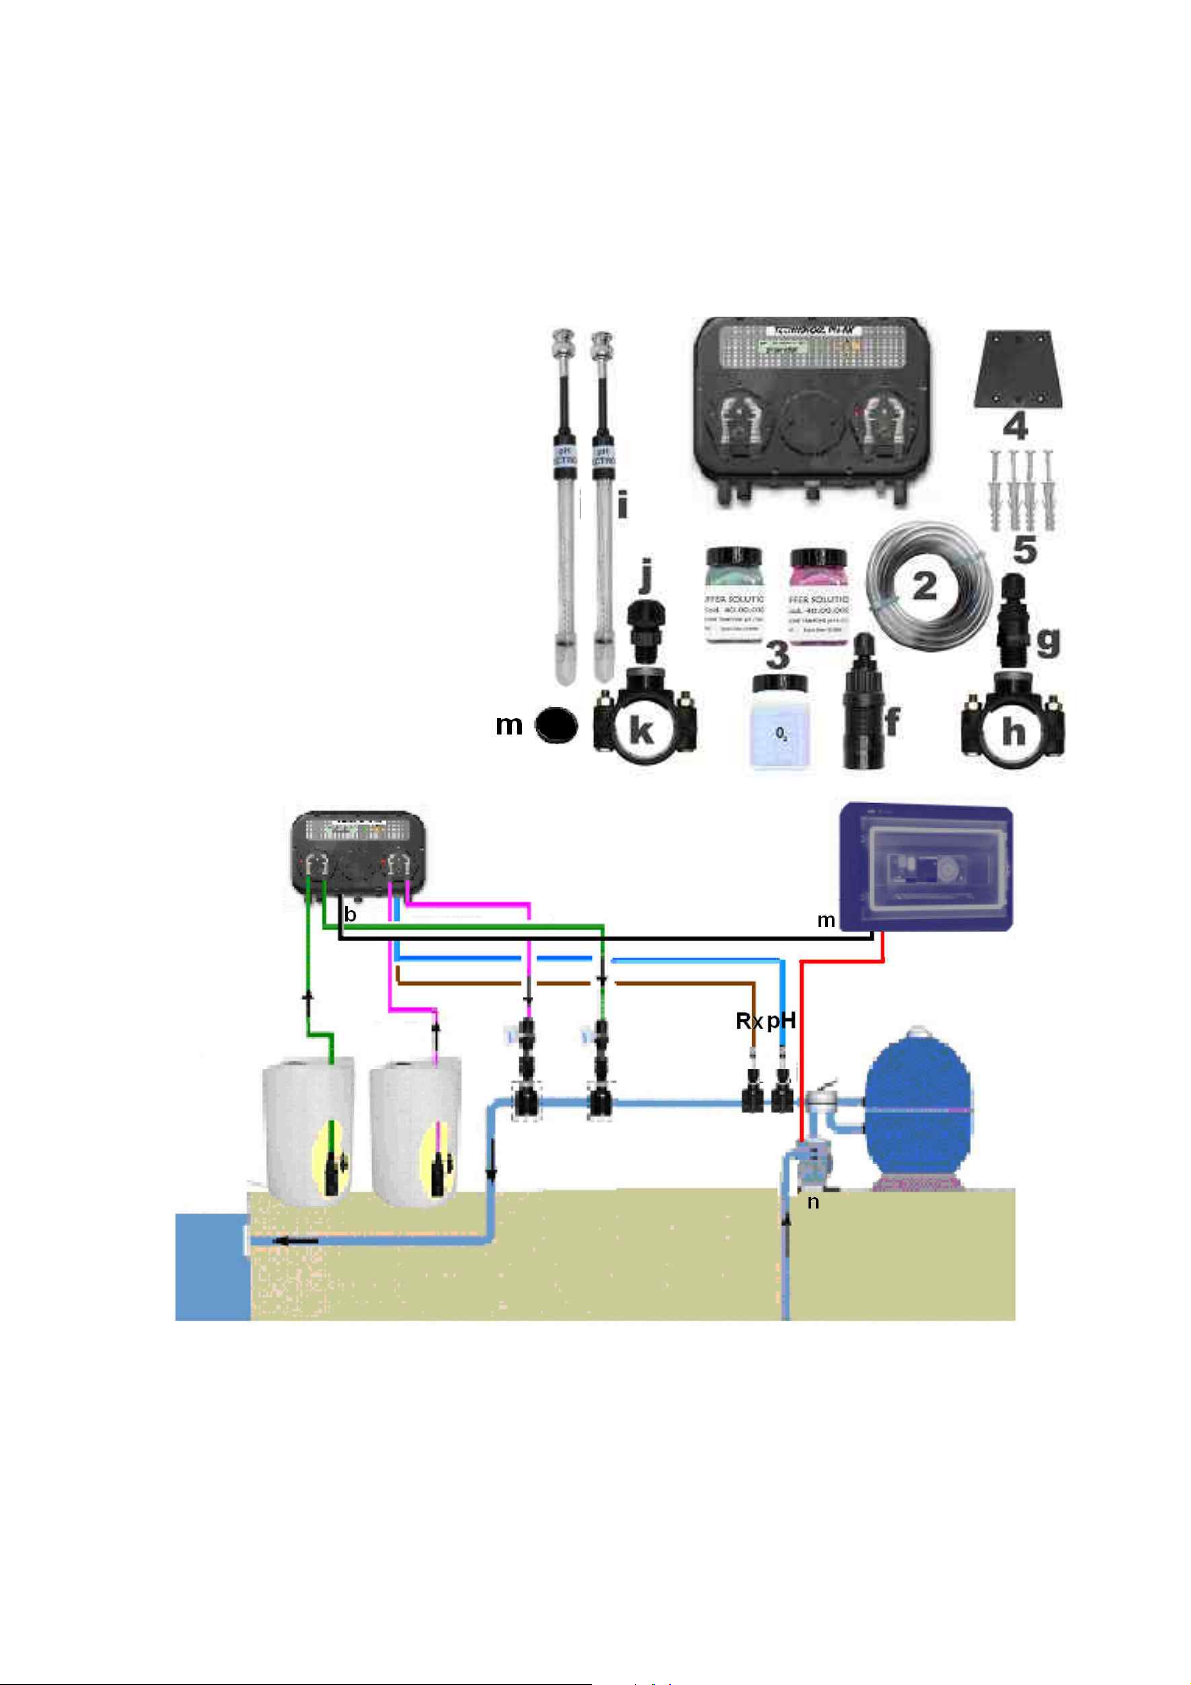
♦At a suitable height above the chemical up to a maximum height of 1.5 meters. If for
exigency