TOOLS REQUIRED
•Screwdriver
•Adjustable spanner
•Drill (1/2" drill bit)
•Sharp scissors or plastic pipe cutters
•Safety glasses
INSTALLATION
Before starting, shut off the main water
supply or the supply to the location where the
unit is to be installed.
1) Identify the location under the sink where
you wish to install the system. Should you
wish the unit to be located at a distance from
the pipe or delivery tap, then extra tubing will
be required.
2) If using the provided tap, locate a position
at the back edge of the sink or the
surrounding worksurface ensuring the spout
hangs into the sink basin. Check that the
chosen position has enough space beneath
the surface to install the tap and attach the
tubing. Drill a 1/2" hole in the chosen location
for the tap (if a hole is not already present).
Note: Sinks made of certain materials are not
suitable for drilling into - seek advice from an
expert, prior to drilling the hole.
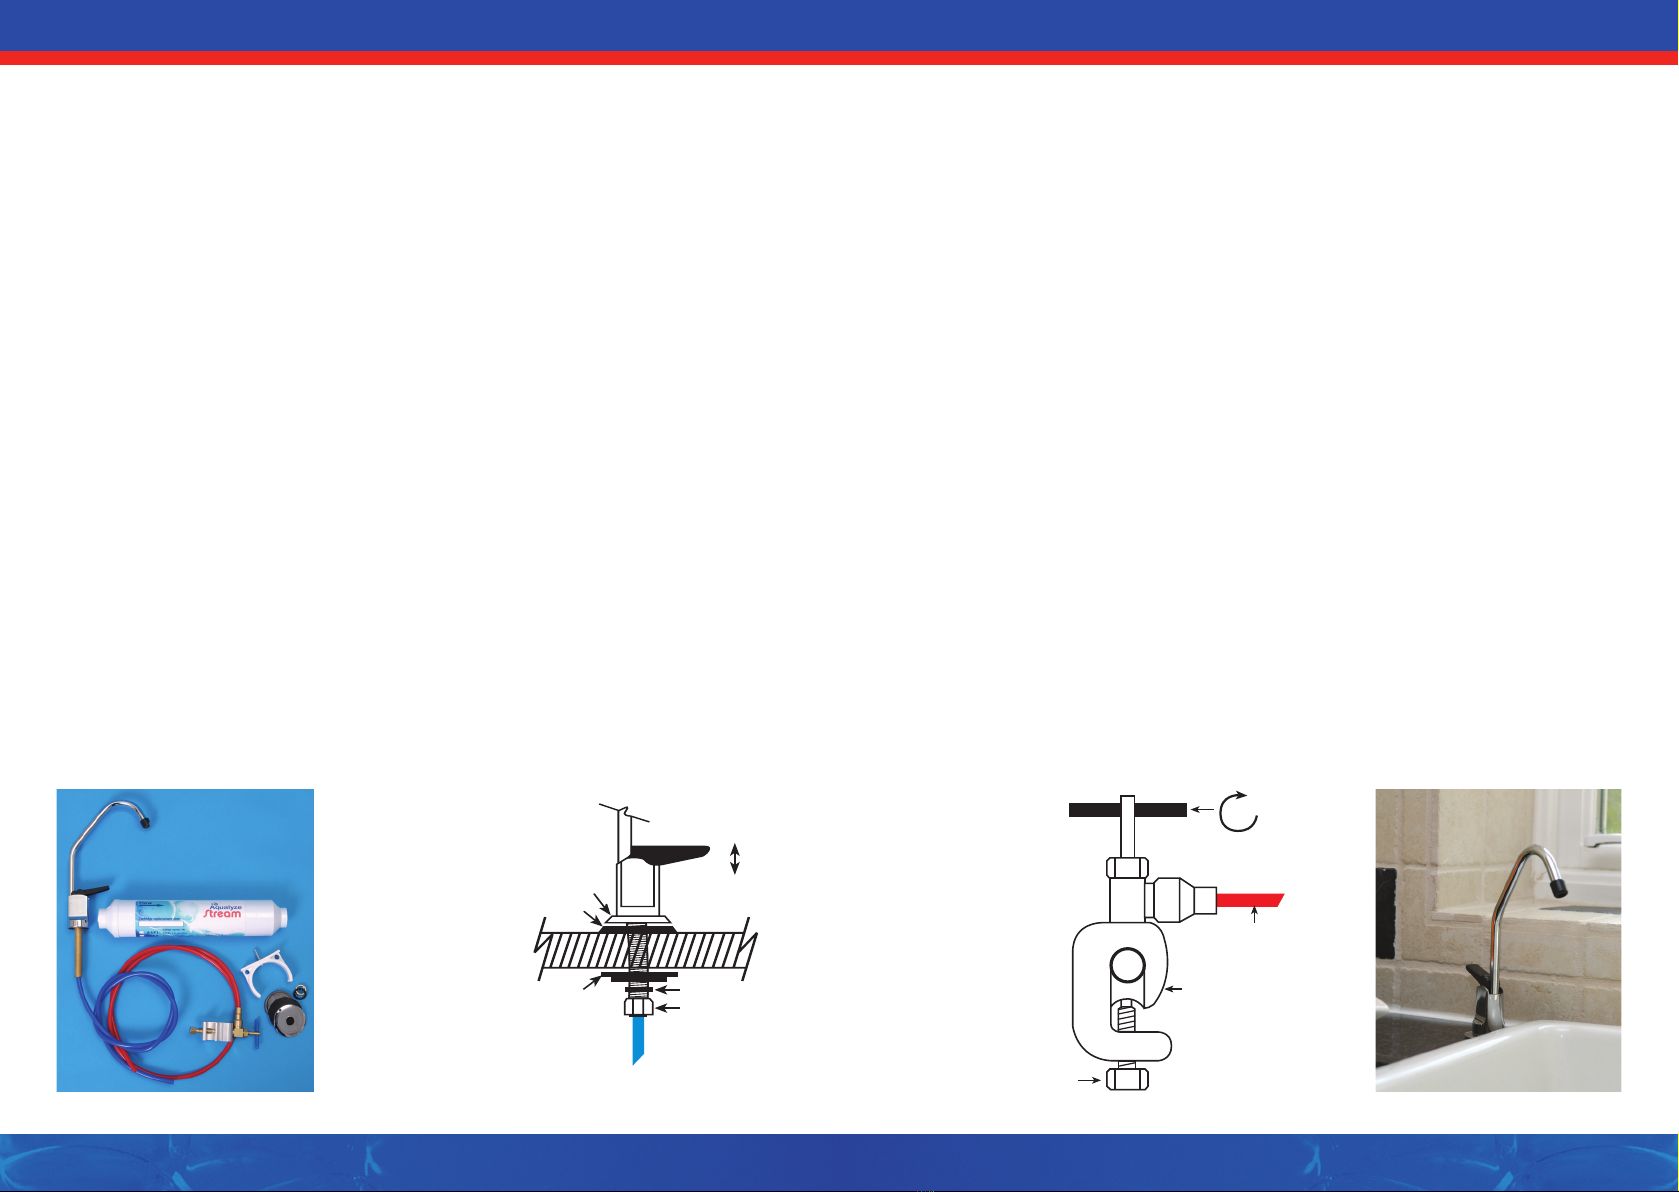
3) Install and secure the tap. See Diagram A.
4) Using the screw provided, fix the cartridge
bracket to the wall or cupboard under the sink
and attach the filter. For maximum efficiency
the filter cartridge should be mounted vertically
- inlet at the top, outlet at the bottom.
5) Locate and attach the saddle valve onto
the incoming mains supply as in Diagram B.
DO NOT TURN THE LEVER AND PIERCE
THE MAINS SUPPLY UNTIL THE SYSTEM IS
FULLY CONNECTED.
6) Cut the red tubing to the correct length to
reach from the saddle valve to the filter
cartridge inlet, allowing for some 'slack'.
Using the 'Flow' arrow on the cartridge as the
guide, connect the red tubing from the saddle
valve into the end of the filter cartridge which
has the 'Flow' arrow pointing away from the
inlet, pushing firmly to ensure the tubing is
'fully' inserted into this hole.
Note: Any cuts made to tubing during this
installation must be square and clean to ensure
its connection within the filter cartridge is
maximised and leakage potential minimised.
7) Take the blue tubing from the tap, measure
it to the correct length, with slack, to fit into the
outlet of the filter cartridge. Cut and insert firmly.
8) Now that the system is connected, the
mains water can be turned back on and the
saddle valve can be engaged. Firstly, lift the
lever on the tap to the 'continuous flow'
position. To engage the saddle valve, turn the
valve lever fully clockwise to pierce the mains
pipe (for future use, this action also closes the
mains water supply to the system), and then
immediately anti-clockwise (to allow the water
flow). Do not 'over turn' the saddle valve lever.
Water should now be flowing from the
mini tap.
Note: Low pressure from the mini tap may
indicate that the saddle valve has not fully
pierced the mains supply or that the valve
lever has not been fully retracted - In this
instance, repeat the procedure.
9) Check the system completely for any
possible leakages, if any are found, turn the
valve lever clockwise to shut-off the water
supply to the system. Any new plumbing
installation should not be left unattended
during its first few hours following installation,
to ensure that preventative measures can be
followed should a leak arise.
10) Before using the water, a newly installed
system should be flushed. See operating
parameters.
SYSTEM GUIDELINES
& PRECAUTIONS
WARNING: Do not use this system with water
that is microbiologically unsafe or of unknown
quality without adequate disinfection before or
after the system.
CAUTION: The filter must be protected
against freezing. Failure to do so will result in
the cartridge cracking and water leakage.
Equally this system should not be located
near a direct source of heat.