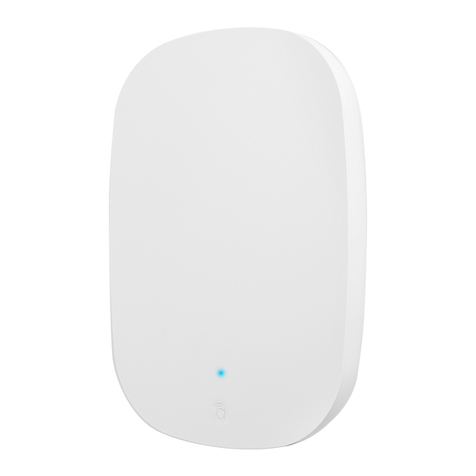
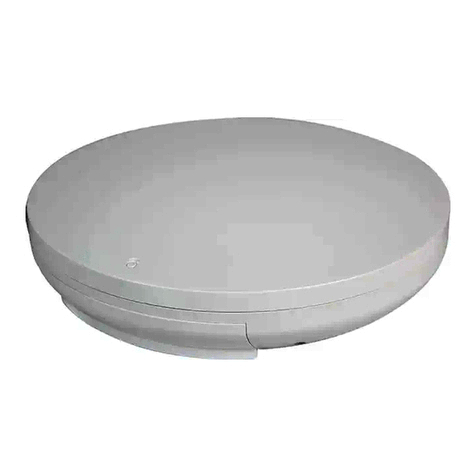
Araknis Networks AN-X20-AP-I User manual

AN-X20-AP-I
Wi-Fi 6 Wireless Access Point
Quick Start Guide

2
Welcome to Araknis Networks™
Thank you for choosing an Araknis™ Wi-Fi 6 Wireless Access Point (WAP). With circular housing, an easy mounting
system, convenient PoE power, and the latest Wi-Fi 6 wireless technologies, these products are ideal as staples in
both residential and commercial applications.
Features
•802.11AX WiFi-6 Certified
•Sleek circular design
•1 x 2.5 Gigabit LAN port w/PoE-IN
•1 x Gigabit LAN port (data only)
•AN-520-AP-I/AN-520-AP-I-1: 2x2 dual-band 802.11AX 3000Mbps
•OvrC enabled AN-520-AP-I
AN-520-AP-I-1

3
Step 1: Unbox
Tile Ceiling
Mounting Hardware
Wood Surface
Mounting Hardware
Wireless Access Point
(WAP)
Mounting Bracket
Male-to-Female
Category Jumper Cable
Tile Ceiling Backing Plate Quick Start Guide
Drywall
Mounting Hardware
Note: This manual uses the 820 WAP for illustrative purposes throughout.

4
Step 2: Install
Ceiling Mount
How to Remove the Cable Bay Cover
Copyright © 2021, Snap One, LLC. All rights reserved.
Push In Release
Push to Release the Cable Bay Cover
Note: Use the ceiling back plate on top of acoustic ceiling tiles to prevent the mounting nuts from pulling
through.

5
Position the Ceiling Mount
Position A Position B
Position 2
Position 1
Ceiling Mount
Center
Line*
Center
Line*
Ceiling
WAP
* Center line of the bracket is not necessarily the center line of the WAP when installed. Use the above guide to
understand the center line of the WAP when installing the bracket.

6
Recommended use of the Jumper Cable
You can mount your access point to the electrical box in one of two positions, shown below. These options are
provided to provide cable bend relief for cables of dierent lengths and thicknesses. Illustrations do not reflect
pre-install steps. Run the wire or jumper prior to connecting the access point.
Position A (820) Position B (520/820)
Note: Jumper is needed when using Cat 6A in Position B.
Center line
Double Gang Box
(not included)
Single Gang Box
(not included)
Cat 5e
Jumper
Cat 6A
Center line

7
Step 3: Connect
Router
Router
Router
Internet
Internet
Internet
WANLAN
PoE Injector
(not included)
WAP
WAP
WAP
PoE Switch
Switch
Switch
DC Power Supply
(not included)
WANLAN
WANLAN

8
Step 4: Operation
LED LED
LED States
AP State LED State Description
Operational
States
No LED The AP is not powered on
Solid White The AP is in a startup process at the uboot stage
Blinking White The AP is in a startup process at the kernel stage
Solid Blue The AP started correctly and is running in an operational state
Blinking Blue The AP is operating but is underpowered
Solid Red The AP is non-functional
Error States
Blinking Orange The AP is not connected to the internet
Blinking Green The AP is performing a firmware update
Solid Orange The AP failed a firmware update and needs to be recovered

9
Reset Procedures
The reset button can be found in the WAP’s cable bay.
Reset Password UI Toggle Reset Button Action LED State Description
Reset Password UI Toggle
Enabled
Reset button held for 1-9
seconds Blinking Green The AP restarts
Reset button held for 10-19
seconds Blinking Orange Only the username and
password are reset
Reset button held for more
than 20 seconds Blinking Red The AP is set to factory
defaults
Reset Password UI Toggle
Disabled
Reset button held for 1-19
seconds Blinking Green The AP restarts
Reset button held for more
than 20 seconds Blinking Red The AP is set to factory
defaults
Reset Button

10
Step 5: Configuration
Araknis WAPs can be configured through OvrC or the local interface. The local interface is accessible using OvrC’s
webconnect feature, typing the WAP’s DHCP address into your browser’s address bar, or using the WAP’s default
IP address.
Configuration Through OvrC
OvrC gives you Wi-Fi management, remote device management, real-time notifications, and intuitive customer
management, right from your computer or mobile device. Setup is plug-and-play, with no port forwarding or
DDNS address required. To add this device to your OvrC account:
1. Connect the WAP to the Internet
2. Log Into OvrC (www.ovrc.com)
3. Add the Device (MAC address and
Service Tag numbers needed for
authentication)

11
Logging in to the Local Interface
1. Log into the WAP using the default credentials:
Username araknis
Password araknis
2. You must update the password after initial login.
Pro Tip: Strong passwords are long and unrelated to the client’s public details. For example, thepeppero-
nipizzas is stronger and easier to remember than P@ssword or thesmiths.

12
Saving and Applying Changes
1. Click the Save button after applying changes to a page. This holds the new settings in the Apply Changes
field.
2. After all desired changes have been made, click the flashing Apply Changes button, at the bottom of the
left menu, to review the new settings. Click Apply to make the changes or Revert to cancel the changes.
Note: Settings take aect after the progress bar completes 100%.

13
Other Access Methods: DHCP IP Address
The WAP is configured to DHCP by default so that the DHCP server can assign an
IP address when the WAP is connected to the network (the DHCP server is usually
the router). This address can be used for accessing the web interface.
Use one of these methods to find the IP address of the WAP:
• Check the device list in OvrC
• Check the client table on your router
• Use a network scanner (e.g. Fing) to scan the network. The Araknis WAP
manufacturer field displays SnapAV
• See the highlighted field in the Fing screenshot to the right for an example of
an Araknis device being identified

14
Other Access Methods: Default IP Address
If the WAP is not given an IP address on the network, or needs to be accessed while not connected to a network,
you can configure your computer’s network connection to access the WAP using the default IP address,
192.168.20.253.
1. Connect your PC to the WAP
using an Ethernet cable.
2. Open the Control Panel and
click Network and Internet.
3. Click Network and Sharing
Center.
Windows 10 screenshots shown for reference.
Computer WAP

15
4. Click Change adapter
settings.
5. Right-click the icon for the
wired network connection,
then left-click Properties.
6. Select Internet Protocol
Version 4 (TCP/IPv4), then
click Properties.
Windows 10 screenshots shown for reference.

16
8. Open a browser
and navigate to
http://192.168.20.253/.
Log in using the default
credentials:
Username araknis
Password araknis
7. In the General tab, click Use
the following IP address:
and enter the IP address and
subnet mask, then click OK.
IP Address 192.168.20.2
Subnet Mask 255.255.255.0
9. Set the IPv4 Properties back
to Obtain an IP address
automatically, then click OK.
Windows 10 screenshots shown for reference.

18
Technical Support
For chat and telephone, visit tech.control4.com/s/contactsupport • Email: T[email protected]. Visit tech.
control4.com for discussions, instructional videos, news, and more.
Warranty and Legal Notices
Find details of the product’s Limited Warranty at snapone.com/legal/ or request a paper copy from Customer Service at
866.424.4489. Find other legal resources, such as regulatory notices and patent and safety information, at snapone.com/
legal/ .
Copyright ©2022, Snap One, LLC. All rights reserved. Snap One its respective logos are registered trademarks or trademarks
of Snap One, LLC (formerly known as Wirepath Home Systems, LLC), in the United States and/or other countries. 4Store,
4Sight, Control4, Control4 My Home, SnapAV, Araknis Networks, and OvrC are also registered trademarks or trademarks
of Snap One, LLC. Other names and brands may be claimed as the property of their respective owners. Snap One makes
no claim that the information contained herein covers all installation scenarios and contingencies, or product use risks.
Information within this specification subject to change without notice. All specifications subject to change without notice.
Version 220113
Part # 200-blah-blah

1800 Continental Blvd. Suite 200 •Charlotte, NC 28273
866-424-4489 •snapone.com
Electrical Safety Advisory
Sécurité électrique consultatif
Important Safety Instructions
Consignes de sécurité importantes
Read the safety instructions before using this product.
Lisez les consignes de sécurité avant d'utiliser ce produit.
1. Read these instructions.
Lisez ces instructions.
2. Keep these instructions.
Conservez ces instructions.
3. Heed all warnings.
Respectez tous les avertissements.
4. Follow all instructions.
Suivez toutes les instructions.
5. Do not use this apparatus near water.
Ne pas utiliser cet appareil près de l'eau.
6. Clean only with dry cloth.
Nettoyez-le uniquement avec un chiffon sec.
7. Do not block any ventilation openings. Install in accordance with the manufacturer’s
instructions.
Ne pas bloquer les ouvertures de ventilation. Installer conformément aux instructions du
fabricant.
8. Do not install near any heat sources such as radiators, heat registers, stoves, or other
apparatus (including amplifiers) that produce heat.
Ne pas installer près de sources de chaleur telles que des radiateurs, registres de
chaleur, poêles, ou autres appareils (incluant les amplificateurs) qui produisent de la
chaleur.
9. Only use attachments/accessories specified by the manufacturer.
Utilisez uniquement des fixations / accessoires spécifiés par le fabricant.
10. Use only with the cart, stand, tripod, bracket, or table specified by the manufacturer, or
sold with the apparatus. When a cart is used, use caution when moving the
cart/apparatus combination to avoid injury from tip-over.
Utilisez uniquement avec le chariot, le socle, le trépied, le support ou la table spécifiés
par le fabricant ou vendu avec l'appareil. Lorsque vous utilisez un chariot, soyez prudent
lorsque vous déplacez l'ensemble chariot / appareil pour éviter des blessures dues au
renversement.

1800 Continental Blvd. Suite 200 •Charlotte, NC 28273
866-424-4489 •snapone.com
11. Refer all servicing to qualified service personnel. Servicing is required when the
apparatus has been damaged in any way, such as power-supply cord or plug is
damaged, liquid has been spilled or objects have fallen into the apparatus, the apparatus
has been exposed to rain or moisture, does not operate normally, or has been dropped.
Confiez toutes les réparations à un personnel qualifié. Une réparation est nécessaire
lorsque l'appareil a été endommagé de quelque façon que ce soit le cordon
d'alimentation ou la fiche est endommagé, du liquide a été renversé ou si des objets sont
tombés dans l'appareil, l'appareil a été exposé à la pluie ou à l'humidité, ne fonctionne
pas normalement, ou s'il est tombé.
12. Protect the power cord from being walked on or pinched particularly at plugs,
convenience receptacles, and the point where they exit from the apparatus.
Protégez le cordon d'alimentation ne soit piétiné ou pincé, en particulier au niveau des
fiches, des prises et au point où il sort de l'appareil.
13. This equipment uses AC power which can be subjected to electrical surges, typically
lightning transients which are very destructive to customer terminal equipment connected
to AC power sources. The warranty for this equipment does not cover damage caused
by electrical surge or lightning transients. To reduce the risk of this equipment becoming
damaged it is suggested that the customer consider installing a surge arrestor. Unplug
this apparatus during lightning storms or when unused for long periods of time.
Cet équipement utilise la puissance AC qui peuvent être soumis à des surtensions
électriques, la foudre généralement transitoires qui sont très destructives envers les
équipements terminaux connectés à des sources d'alimentation CA. La garantie de cet
appareil ne couvre pas les dommages causés par les surtensions électriques ou
transitoires de foudre. Pour réduire le risque de cet équipement devient endommagé, il
est suggéré que le client envisager l'installation d'un limiteur de surtension. Débranchez
cet appareil pendant les orages ou lorsqu'il n'est pas utilisé pendant de longues périodes
de temps.
14. To completely disconnect unit power from the AC mains, remove the power cord from the
appliance coupler and/or turn off the circuit breaker. To reconnect power, turn on the
circuit breaker following all safety instructions and guidelines. The circuit breaker shall
remain readily accessible.
Pour débrancher complètement l'alimentation secteur du réseau secteur, retirez le
cordon d'alimentation du coupleur de l'appareil et / ou éteignez le disjoncteur. Pour
reconnecter l'alimentation, allumez le disjoncteur en suivant toutes les consignes et
consignes de sécurité. Le disjoncteur doit être facilement accessible.
15. This product relies on the buildings installation for short-circuit (overcurrent) protection.
Ensure that the protective device is rated not greater than: 20A.
Ce produit repose sur l'installation des bâtiments pour les courts-circuits (surintensité) de
protection. Assurez-vous que le dispositif de protection est assignée ne dépassant pas:
20A.
16. WARNING – Power Sources, Grounding, Polarization

1800 Continental Blvd. Suite 200 •Charlotte, NC 28273
866-424-4489 •snapone.com
This product requires a properly grounded outlet for safety. This plug is designed to be
inserted into a NEMA 5-15 (three-prong grounded) outlet only. Do not force the plug into
an outlet that is not designed to accept it. Never dismantle the plug or alter the power
cord, and do not attempt to defeat the grounding feature by using a 3-to-2 prong adapter.
If you have a question about grounding, consult your local power company or qualified
electrician.
If a rooftop device such as a satellite dish connect to the product, ensure that the devices’
wires are also properly grounded.
The bonding point can be used to provide a common ground to other equipment. This
bonding point can accommodate minimum 12 AWG wire and should be connected using
the required hardware specified by the other bonding point. Please use termination for
your equipment in accordance with the applicable local agency requirements.
AVERTISSEMENT - Sources d'alimentation, mise à la terre, polarisation
Ce produit nécessite une prise correctement mise à la terre pour des raisons de sécurité.
Cette fiche est conçue pour être insérée dans une prise NEMA 5-15 (trois broches mise à
la terre) uniquement. Ne forcez pas la fiche dans une prise qui n'est pas conçue pour
l'accepter. Ne démontez jamais la fiche ou ne modifiez pas le cordon d'alimentation, et
n'essayez pas de désactiver la fonction de mise à la terre en utilisant un adaptateur 3 à 2
broches. Si vous avez une question sur la mise à la terre, consultez votre compagnie
d'électricité locale ou un électricien qualifié.
Si un appareil sur le toit tel qu'une antenne parabolique se connecte au produit, assurez-
vous que les fils des appareils sont également correctement mis à la terre.
Le point de liaison peut être utilisé pour fournir une masse commune à d'autres
équipements. Ce point de connexion peut accueillir un fil de 12 AWG minimum et doit
être connecté à l'aide du matériel requis spécifié par l'autre point de connexion. Veuillez
utiliser une terminaison pour votre équipement conformément aux exigences des
agences locales applicables.
17. Notice – For indoor use only, Internal components are not sealed from the environment.
The device can only be used in a fixed location such as a telecommunication center, or a
dedicated computer room. When you install the device, ensure that the protective
earthing connection of the socket-outlet is verified by a skilled person. Suitable for
installation in information technology rooms in accordance with Article 645 of the National
Electrical Code and NFP 75.
Avis – Pour une utilisation en intérieur uniquement, les composants internes ne sont pas
scellés de l'environnement. L'appareil ne peut être utilisé que dans un lieu fixe tel qu'un
centre de télécommunication, ou une salle informatique dédiée. Lors de l'installation de
l'appareil, assurez-vous que la mise à la terre de protection de la prise de courant est
vérifiée par une personne qualifiée. Convient pour une installation dans des salles
informatiques conformément à l'article 645 du Code national de l'électricité et NFP 75.
18. This product can interfere with electrical equipment such as tape recorders, TV sets,
radios, computers, and microwave ovens if placed in close proximity.
Ce produit peut interférer avec des appareils électriques tels que les magnétophones,
téléviseurs, radios, ordinateurs et fours à micro-ondes si placés à proximité.
19.Never push objects of any kind into this product through cabinet slots as they may touch
dangerous voltage points or short out parts that could result in fire or electric shock.
N'introduisez jamais d'objets d'aucune sorte dans ce produit à travers les fentes du boîtier car ils
pourraient toucher des points de tension dangereux ou court-circuiter des pièces qui pourraient
entraîner un incendie ou un choc électrique.
Table of contents
Other Araknis Networks Wireless Access Point manuals
Popular Wireless Access Point manuals by other brands

D-Link
D-Link DAP-2553 - Wireless N Dual Band Gigabit Access... Quick installation guide

Advantech
Advantech BB-APXN-Q5420 quick start guide

NETGEAR
NETGEAR Powerline 500 XWN5001 installation guide

ZyXEL Communications
ZyXEL Communications NWA5000 SERIES user guide

TRENDnet
TRENDnet TEW-820AP user guide

EnGenius
EnGenius ENH210EXT user manual