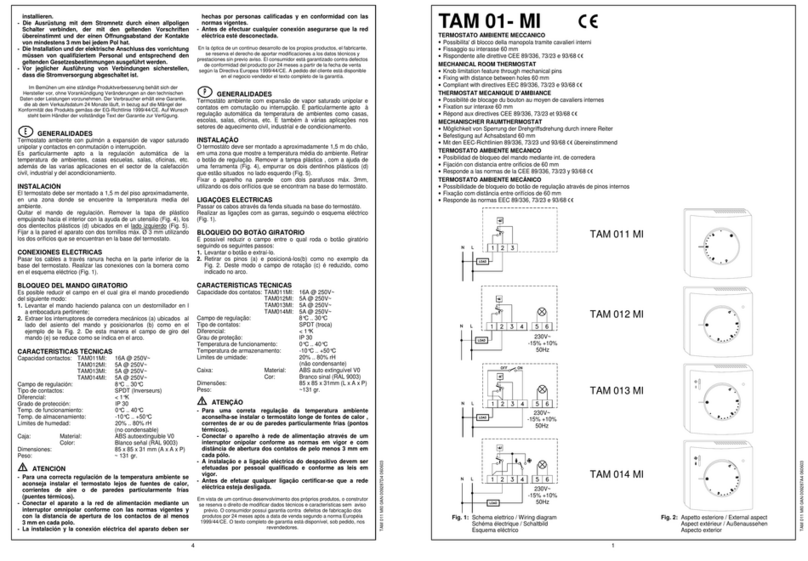
arbo FREETIME PLUS User manual

1
CRONOTERMOSTATO DIGITALE A BATTERIE
BATTERY DIGITAL CHRONOSTAT
DIGITALTHERMOSTAT MIT BATTERIEN
CHRONOTHERMOSTAT NUMÉRIQUE ALIMENTÉ PAR BATTERIES
CRONOTERMOSTATO DIGITAL A BATERÍAS
CRONOTERMOSTATO DIGITAL A BATERIAS

2
DESCRIZIONE DEI COMANDI - DESCRIPTION OF CONTROLS - BESCHREIBUNG DER STEUERUNG -
DESCRIPTION DES COMMANDES - DESCRIPCIÓN DE LOS MANDOS - DESCRIÇÃO DOS COMANDOS
G
F
H
I
M
AB
C
D
L
E
Fig. 1 - Abb. 1

3
LEGENDA - LEGEND - LEGENDE - LÉGENDE - NOTA - LEGENDA
Tasto accensione/spegnimento - On/off button -
Start-Schalter/Stop-Schalter - Touche allumage / extinction -
Botón encendido/apagado - Tecla ligação/desligamento
C
Tasto ora/temperatura/programmazione
Time/temperature/programming button
Stunden Schalter/Temperatur Schalter/Programm Schalter
Touche heure / température / programmation
Botón hora/temperatura/programación
Tecla hora/temperatura/programação
D
Manopola di comfort - Comfort knob - Komfort-Handgriff -
Poignée de la modalité ‘Confort’ - Mando de confort -
Manípulo de conforto
E
Tasto reset - Reset button - Reset Schalter -
Bouton de réinitialisation - Botón reset - Tecla reset
L
Tasto avanti - Forward button - Schalter vorwärts -
Touche ‘Avant’ - Botón hacia adelante - Teclas de avanço
G
Manopola di riduzione - Economy knob - Reduzierungs-Drehgriff -
Poignée de la modalité Réduction - Mando de reducción -
Manípulo de redução
F
Tasto Ok - OK button - Ok Schalter - Touche Ok - Botón OK -
Tecla Ok
I
Tasto indietro - Back button - Schalter zurück - Touche Arrière -
Botón hacia atrás - Tecla de retrocesso
H
Portabatterie - Battery holder - Batterieträger -
Compartiment des piles - Porta pilas - Porta-baterias
M
Tasto manuale - Manual button - Hand Schalter -
Touche mode manuel - Botón manual - Tecla manual
B
Cavalieri per impostazione modalità comfort/riduzione
Switches for setting the comfort/economy mode
Drückrasten für die Einsetzung Modalität Komfort/Reduzierung
Cavaliers pour la configuration des modalités ‘Confort’ / ‘Réduction’
Jumper para ajuste modalidad Confort/Reducción
Contactos para configuração das modalidades conforto/redução
A
Intervallo 0 .. 5
Interval 0 .. 5
Zeitabstand 0 .. 5
Intervalle 0 .. 5
Intervalo 0 .. 5
Intervalo 0 .. 5
Intervallo 6 .. 6.30
Interval 6 .. 6.30
Zeitabstand 6 .. 6.30
Intervalle 6 .. 6.30
Intervalo 6 .. 6.30
Intervalo 6 .. 6.30
Intervallo 9 .. 10
Interval 9 .. 10
Zeitabstand 9 .. 10
Intervalle 9 .. 10
Intervalo 9 .. 10
Intervalo 9 .. 10

4
INSTALLAZIONE - INSTALLATION - INSTALLATION - INSTALLATION - INSTALACIÓN - INSTALAÇÃO
A
E
B
C
D
Fig. 2 - Abb. 2
Fig. 3 - Abb. 3
Fig. 4 - Abb. 4
Fig. 5 - Abb. 5 Fig. 6 - Abb. 6

5
GENERALITÀ
Questo dispositivo è un cronotermostato elettronico giornaliero con
ampio display retroilluminato per la visualizzazione della temperatura
ambiente rilevata o, a scelta, dell’ora corrente.
La regolazione dellla temperatura ambiente in modalità di Riscaldamento
o Raffrescamento avviene su due livelli: Comfort e Riduzione.
Inoltre il dispositivo offre la possibilità di impostare il valore della
temperatura di Antigelo e la regolazione dell’Offset sul sensore
interno.
INSTALLAZIONE
Per installare il dispositivo eseguire le seguenti operazioni:
- Sganciare la piastra a muro innestata sotto la base del cronotermostato
come indicato in Fig. 3.
- Fissare la piastra direttamente sulla parete o su scatole di derivazione
da 3 moduli tramite le due sedi per viti con interasse 60 mm oppure
83 mm (Fig. 4) facendo attenzione a fare passare i cavi nella feritoia
come indicato in Fig. 5.
- Eseguire i collegamenti elettrici seguendo lo schema di collegamento
di Fig. 6.
- Avvicinare il cronotermostato alla piastra a muro facendo dapprima
coincidere i dentini della base con gli appositi fori della piastra e
successivamente esercitare sul dispositivo una pressione verso il
basso fino a far scattare i dentini plastici della piastra.
Il cronotermostato deve essere posizionato a circa 1,5 m dal
pavimento, lontano da fonti di calore, da porte e finestre.
MESSA IN FUNZIONE
Alla prima messa in funzione:
Inserire le pile rispettando le polarità indicate nell’apposito vano
(Fig. 1) ed eseguire l’operazione di reset agendo con un oggetto
appuntito attraverso l’apposito foro (L di Fig. 1). NON USARE AGHI.
I pulsanti presenti sotto lo sportellino inferiore sono 3:
‘OK’: Programmazione/Ora/Conferma (I di Fig. 1);
‘‘: Avanti (G di Fig. 1);
‘’: Indietro (H di Fig. 1);
Regolazione ora corrente
Per regolare l’orologio del cronotermostato eseguire le seguenti
operazioni:
1. Aprire lo sportellino che da’ accesso al vano pile.
2. Premere il pulsante ‘OK’ per almeno 2 secondi.
3. Regolare l’ora con i tasti ‘’ e ‘’.
4. Confermare con ‘OK’.
5. Regolare i minuti con i tasti ‘’ e ‘’
6. Confermare con ‘OK’.
PROGRAMMAZIONE
Impostazione Riscaldamento / Raffrescamento
Premendo per almeno 4 secondi il pulsante ‘’ si attiva la funzione
‘Riscaldamento’ e comparirà sul display il simbolo ‘’ lampeggiante.
Premendo invece per almeno 4 secondi il pulsante ‘’, si attiva la
funzione ‘Raffrescamento’ e comparirà sul display il simbolo ‘’
lampeggiante.
ITALIANODEUTSCHFRANÇAISESPAÑOLPORTUGUÊS ENGLISH

6
impostata su un valore inferiore rispetto a quello della manopola ‘‘.
Impostazione temperatura di Antigelo
La funzione di Antigelo consente di selezionare una temperatura
ambiente minima che viene mantenuta quando il cronotermostato è
spento, in modo tale da non fare ghiacciare l’acqua nelle tubazioni se la
temperatura ambiente scende al di sotto del valore impostato.
Il dispositivo esce dalla fabbrica con l’antigelo impostato a +3°C.
La funzione è attiva solo se il dispositivo è stato impostato in modalità
Riscaldamento.
Per regolare la temperatura di Antigelo eseguire le seguenti operazioni:
- Premere e tenere premuto il pulsante ‘/‘ per più di 20 secondi;
- Il display visualizza ‘X.X°C‘ alternato a ‘X.X°1‘ (dove X.X indica la
temperatura di Antigelo);
- Premere i tasti ‘’ e ‘’ per modificare il valore;
- Premendo nuovamente il tasto ‘/‘ si passa alla regolazione della
temperatura di Offset (vedi paragrafo ‘Impostazione Offset);
- Premendo il tasto ‘OK’ oppure attendendo 10 secondi senza premere
alcun tasto, il dispositivo esce dalla modalità di ‘Impostazione della
temperatura di Antigelo’ confermando il valore impostato.
Impostazione Offset
Con l’Offset è possibile correggere la temperatura rilevata dal dispositivo
di ±5°C in modo da corregere eventuali errori sistematici di lettura.
Il dispositivo esce dalla fabbrica con l’Offset impostato a 0°C.
Per regolare la temperatura di Offset eseguire le seguenti operazioni:
- Premere il pulsante ‘/‘ per più di 20 secondi;
Impostazione modalità Comfort e Riduzione
Il cronotermostato e’ dotato di 24 cavalieri (A di Fig. 1), posti ai lati
del display per selezionare, durante l’arco della giornata, le fasce di
‘Comfort’ o ‘Riduzione’.
Quando si vuole che il cronotermostato funzioni in modalità di comfort,
per esempio durante le ore diurne, sarà necessario spostare tutti i
cavalieri della fascia oraria desiderata verso destra.
Se invece si desidera che il cronotermostato funzioni in modalità di
riduzione, per esempio durante le ore notturne, basterà spostare tutti
i cavalieri della fascia desiderata verso sinistra.
A questo scopo e’ sufficiente ricordare la seguente regola:
Cavalieri posti verso destra: E’ attivata la modalità comfort in
funzionamento automatico.
Cavalieri posti verso sinistra: E’ attivata la modalità di riduzione in
funzionamento automatico.
Ciascun cavaliere si riferisce all’intervallo di tempo compreso tra l’ora
stampata superiormente e quella stampata inferiormente al cavaliere
stesso.
Ad esempio si noti che l’intervallo di tempo dalle 00 alle 05 della mattina
e’ attivato da un unico cavaliere, mentre dalle 05 alle 09 della mattina
e’ possibile intervenire di mezz’ora in mezz’ora. Per tutto il resto della
giornata gli intervalli selezionabili sono di un’ora (A di Fig. 1).
La temperatura di Comfort viene impostata tramite la manopola ‘‘
(Sole), mentre quella di Riduzione viene impostata tramite la manopola
‘‘ (Luna).
Normalmente, per avere una riduzione notturna, la manopola ‘‘ sara’
ITALIANODEUTSCHFRANÇAISESPAÑOLPORTUGUÊS ENGLISH

7
Per tornare al funzionamento secondo il programma giornaliero
impostato premere nuovamente il pulsante ‘‘.
RETROILLUMINAZIONE
L’accensione della retroilluminazione del display si verifica in seguito
alla pressione di un qualsiasi tasto. Lo spegnimento è automatico dopo
20 secondi dall’ultima pressione del tasto.
INDICAZIONE ORA / TEMPERATURA
Premendo il pulsante ‘/‘ si possono visualizzare sul display
alternativamente l’ora corrente o la temperatura ambiente rilevata
(corretta dal valore di Offset impostato).
Il cronotermostato, al fine di ottimizzare la durata delle batterie, rileva
la temperatura ambiente ogni 3 minuti e, di conseguenza, decide
l’attivazione o disattivazione del relè.
SOSTITUZIONE BATTERIE
Il display mostra costantemente lo stato di carica delle batterie tramite
il simbolo ‘ ‘.
La carica delle batterie è massima se all’interno del simbolo tutti e tre
gli indicatori di livello sono accesi.
Al contrario le batterie sono scariche e devono essere sostituite se
lampeggia il simbolo ‘ ‘ completamente vuoto.
Per la sostituzione procedere come segue:
1. Aprire lo sportellino che da’ accesso al vano pile (Fig. 1).
2. Estrarre le pile eventualmente facendo leva con un utensile.
3. Inserire le nuove pile che devono essere alcaline da 1.5V tipo AA.
- Il display visualizza ‘X.X°C‘ alternato a ‘X.X°1‘ (dove X.X sta per la
temperatura di Antigelo);
- Premere nuovamente il pulsante ‘/‘;
- Il display visualizza ‘X.X°C‘ alternato a ‘X.X°2‘ (dove X.X sta per la
temperatura di Offset);
- Premere i tasti ‘’ e ‘’ per modificare il valore;
- Premendo nuovamente il tasto ‘/‘ si passa alla regolazione della
temperatura di Antigelo (vedi paragrafo ‘Impostazione temperatura
di Antigelo);
- Premendo il tasto ‘OK’ oppure attendendo 10 secondi senza premere
alcun tasto, il dispositivo esce dalla modalità di ‘Impostazione della
temperatura di Offset’ confermando il valore impostato.
SPEGNIMENTO - FUNZIONE ANTIGELO
Per disattivare il cronotermostato premere il tasto ‘‘.
Il display mostrera’ la scritta ‘OFF’ ed il simbolo ‘‘.
Se il cronotermostato e’ stato impostato in modalità di riscaldamento
sara’ attiva la funzione antigelo e sul display comparirà il simbolo ‘‘;
in tal caso la temperatura ambiente sarà regolata secondo il valore
impostato per la temperatura di antigelo.
FUNZIONAMENTO MANUALE
Premendo il pulsante ‘‘ sul display compare il simbolo ‘‘ ed il
cronotermostato regolerà la temperatura ambiente nell’arco delle 24 ore
in modalità di comfort. Ciò significa che la regolazione della temperatura
ambiente avviene, indipendentemente dalla posizione dei dip switches,
secondo la temperatura impostata dalla manopola ‘‘.
ITALIANODEUTSCHFRANÇAISESPAÑOLPORTUGUÊS ENGLISH

8
Temperatura di stoccaggio: -10°C .. +50°C
Limiti di umidità: 20% .. 80% RH non condensante
Contenitore: Materiale: ABS V0 autoestinguente
Colore: Calotta: Bianco segnale (RAL 9003)
Base: Grigio antracite (RAL 7016)
Dimensioni: 133 x 87 x 32 mm. (L x A x P)
Peso: ~ 218 gr.
Norme di riferimento EMC: CEI-EN-55014-1 (2000)
CEI-EN-55014-2 (1997)
Norme di riferimento LVD: CEI-EN-60730-1 (1996)
CEI-EN-60730-2-7 (1998)
CEI-EN-60730-2-9 (1997)
ATTENZIONE
- Per una corretta regolazione della temperatura ambiente si
consiglia di installare il termostato lontano da fonti di calore,
correnti d’aria o da pareti particolarmente fredde (ponti
termici).
- Collegare l’apparecchio alla rete di alimentazione tramite
un interruttore onnipolare conforme alle norme vigenti e con
distanza di apertura dei contatti di almeno 3 mm in ciascun
polo.
- L’installazione ed il collegamento elettrico del termostato
devono essere eseguiti da personale qualificato ed in conformità
alle leggi vigenti.
- Prima di effettuare qualsiasi collegamento accertarsi che la
rete elettrica sia scollegata.
4. Eseguire, se necessario, un reset tramite il tasto indicato in L di Fig. 7.
5. Controllare l’esattezza dell’ora e, se necessario, riprogrammare l’ora.
CARATTERISTICHE TECNICHE
Alimentazione: 2 x 1,5V (Tipo AA) alcaline
Durata Batterie: >1 anno
Tempo accensione
retroilluminazione: 20 secondi
Campo di regolazione: comfort: 10°C .. 30°C
ridotta: 10°C .. 30°C
Differenziale: 0.2°C (asimmetrico)
Antigelo: 0.0°C .. 25.0°C. (Default 3.0°C)
Offset: ± 5.0°C. (Default 0.0°C)
Tipo di sensore: NTC 4K7 ohm @ 25°C (Interno)
Precisione: ±1.0°C
Risoluzione: 0.1°C. ( 0.0°C .. 50.0°C)
0.2°C. (-9.9°C .. -0.1°C)
Portata contatti: 5(1)A @ 250V~ SPDT
Grado di protezione: IP 30
Classe di isolamento: II ( )
Numero di cicli manuali: 1.000
Numero di cicli automatici: 100.000
Tipo di azione: 1CU
Indice di tracking: PTI 175
Situazione di polluzione: 2 (normale)
Categoria di sovratensione: II
Temperatura di funzionamento: 0°C .. +40°C
ITALIANODEUTSCHFRANÇAISESPAÑOLPORTUGUÊS ENGLISH

9
Fit the batteries into the compartment provided, observing proper
polarity (Fig. 1). Reset the device by inserting a pointed implement
through the hole provided (L on Fig. 1); DO NOT USE NEEDLES.
There are three control buttons beneath the lower cover 3:
‘OK’: Programming/Time/Confirm (I on Fig. 1);
‘‘: Forward (G on Fig. 1);
‘’: Back (H on Fig. 1);
Setting the current time
To set the timer thermostat clock carry out the following steps:
1. Open the cover of the battery compartment.
2. Press the ‘ OK ’ button for at least 2 seconds.
3. Set the hour using buttons ‘ ‘ and ‘ ‘.
4. Confirm with ‘ OK ’.
5. Set the minutes using buttons ‘ ‘ and ‘ ‘
6. Confirm with ‘ OK ’.
PROGRAMMING
Setting the Heating / Cooling modes
Pressing button ‘ ’ for at least 4 seconds will activate the ‘Heating’
function and the ‘ ’ symbol will appear flashing on the display.
Pressing button ‘ ’ for at least 4 seconds will instead activate the
‘Cooling’ function and the ‘ ’ symbol will appear flashing on the
display.
Setting the Comfort and Economy modes
The timer thermostat has 24 switches (A on Fig. 1), situated alongside
OVERVIEW
This device is an electronic daily timer thermostat with an ample backlit
display for showing the room temperature reading or current time, as
desired.
The room temperature can be set in the Heating or Cooling mode on
two different levels: Comfort and Economy. In addition, the device
offers the option of setting the Antifreeze temperature and adjusting
the Offset value on the internal sensor.
INSTALLATION
To install the device carry out the following steps:
- Release the wall plate fitted under the base of the timer thermostat
as shown in Fig. 3.
- Fix the plate directly to the wall or a 3-module flush connection box
using the two screw fastening holes with centres spaced 60 mm or
83 mm apart (Fig. 4), taking care to thread the wires through the slot
as shown in Fig. 5.
- Make the electrical connections following the connection layout
shown in Fig. 6.
- Bring the timer thermostat near the wall plate, first matching up
the teeth on the base with the holes in the plate, and then pressing
downward on the device until the plastic teeth snap into place.
The timer thermostat must be positioned about 1.5 m above floor
level, away from sources of heat, doors and windows.
STARTING
When operating the device for the first time:
ITALIANODEUTSCHFRANÇAISESPAÑOLPORTUGUÊS ENGLISH

10
temperature which will be maintained when the timer thermostat is
off to prevent water from freezing in the pipes should the temperature
indoors fall below the set value.
The default factory setting for the antifreeze function is +3°C.
The function will be enabled only if the device has been set in the
Heating mode.
To adjust the Antifreeze temperature carry out the following steps:
- Press the ‘ / ‘ button and keep it pressed for more than 20
seconds;
- The display will shown ‘X.X°C‘ in turns with ‘X.X°1‘ (where X.X
stands for the Antifreeze temperature);
- Press buttons ‘ ’ and ‘ ’ to change the value;
- Pressing ‘ / ‘ again will switch the device over to the Offset
temperature setting mode (see ‘Setting the Offset temperature’);
- If you press ‘ OK ’ or let more than 10 seconds pass without pressing
any key, the device will exit the ‘Antifreeze temperature setting’
mode and store the set value.
Setting the Offset temperature
With this parameter it is possible to correct the temperature sensed by
the device by ±5°C.
The default Offset temperature setting is 0°C.
To adjust the Offset temperature carry out the following steps:
- Press the ‘ / ‘ button for more than 20 seconds;
- The display will shown ‘X.X°C‘ in turns with ‘X.X°1‘ (where X.X
stands for the Antifreeze temperature);
the display, for programming operation in the ‘Comfort’ or ‘Economy’
modes at different times of the day.
When you want the timer thermostat to operate in the comfort mode,
for example during the daytime, move all the switches corresponding to
the desired time interval over to the right.
If you want the timer thermostat to operate in the economy mode,
for example during the nighttime, just move all of the switches
corresponding to the desired time interval over to the left.
In this case it is sufficient to remember the following rule:
Switches positioned to the right: The comfort setting is enabled in the
automatic operating mode.
Switches positioned to the left: The economy/night setting is
enabled automatic operating mode.
Each switch corresponds to the interval falling between the times p
rinted above and below the switch itself.
For example, note that the time interval from 00 to 05 is controlled by
a single switch, whereas from 05 to 09 in the morning settings can be
made at half-hour intervals. For the rest of the day, the selectable time
intervals are one hour each (A on Fig. 1).
The Comfort temperature is set by means of knob ‘ ‘ (Sun), whereas
the Economy temperature is set by means of knob ‘ ‘ (Moon).
Normally, in order to have a reduced temperature at nighttime, knob
‘ ‘ will be set on a lower value than knob ‘ ‘.
Setting the Antifreeze temperature
The Antifreeze function allows you to select a minimum room
ITALIANODEUTSCHFRANÇAISESPAÑOLPORTUGUÊS ENGLISH

11
BACKLIT DISPLAY
The display lights up any time a button is pressed. The backlight
automatically goes off 20 seconds after the last button was pressed.
TIME / TEMPERATURE INDICATION
By pressing the ‘ / ‘ button you can display in turns the current
time or the room temperature read by the device, corrected by the set
Offset value. To maximise battery life, the timer thermostat measures
the room temperature every 3 minutes and decides whether to activate
or deactivate the relay.
CHANGING THE BATTERIES
The display constantly shows the battery charge status by means of
the ‘ ‘ symbol.
Batteries are fully charged if all three battery level indicators are lit
up.
If the symbol is completely empty and ‘ ‘ flashes, it means the
batteries are low and need replacing.
To change the batteries proceed as follows:
1. Open the battery compartment cover (Fig. 1).
2. Remove the spent batteries, prying them out with a tool if
necessary.
3. Insert the new batteries, which must be alkaline 1.5V type AA.
4. If necessary reset the device by means of the button as indicated
in L on Fig. 7.
5. Check that the time setting is correct, reprogram the time if
necessary.
- Press ‘ / ‘ again;
- The display will shown ‘X.X°C‘ in turns with ‘X.X°2‘ (where X.X
stands for the Offset temperature);
- Press buttons ‘ ’ and ‘ ’ to change the value;
- Pressing ‘ / ‘ again will switch the device over to the
Antifreeze temperature setting mode (see ‘Setting the Antifreeze
temperature’);
- If you press ‘ OK ’ or let more than 10 seconds pass without pressing
any key, the device will exit the ‘Offset temperature setting’ mode
and store the set value.
SHUTDOWN - ANTI-FREEZE FUNCTION
To switch off the timer thermostat press ‘ ‘.
The display will show the word ‘OFF’ and the ‘ ‘ symbol.
If the timer thermostat was set in the heating mode, the antifreeze
function will be enabled and the ‘ ‘ symbol will appear on the display;
in such a case the room temperature will be controlled according to the
programmed antifreeze temperature set point.
MANUAL OPERATION
Pressing the ‘ ‘ button will cause the ‘ ‘ symbol to appear on the
display and the timer thermostat will control the room temperature
according to the current comfort mode setting selected by means
of knob ‘ ‘, 24 hours a day, irrespective of the position of the
dipswitches.
To revert to operation according to the set daily program, press
‘ ‘ again.
ITALIANODEUTSCHFRANÇAISESPAÑOLPORTUGUÊS ENGLISH

12
Colour: Cover: Signal white (RAL 9003)
Base: Anthracite grey (RAL 7016)
Dimensions: 133 x 87 x 32 mm. (W x H x D)
Weight: ~ 218 gr.
EMC normative references: CEI-EN-55014-1 (2000)
CEI-EN-55014-2 (1997)
LVD normative references: CEI-EN-60730-1 (1996)
CEI-EN-60730-2-7 (1998)
CEI-EN-60730-2-9 (1997)
WARNING
- To adjust properly room temperature, install the thermostat
far from heat sources, airstreams or particularly cold walls
(thermal bridges).
- The appliance must be wired to the electric mains through a
switch capable of disconnecting all poles in compliance with
the current safety standards and with a contact separation of
at least 3 mm in all poles.
- Installation and electrical wirings of this appliance must be
made by qualified technicians and in compliance with the
current standards.
- Before wiring the appliance be sure to turn the mains power
off.
TECHNICAL CHARACTERISTICS
Power supply: 2 x 1.5V alkaline batteries (Type AA)
Battery life: >1 year
Backlight ON time: 20 seconds
Range of settings: comfort: 10°C .. 30°C
economy: 10°C .. 30°C
Differential: 0.2°C (asymmetrical)
Antifreeze: 0.0°C .. 25.0°C. (Default 3.0°C)
Offset: ± 5.0°C. (Default 0.0°C)
Sensor type: NTC 4K7 ohm @ 25°C (Internal)
Precision: ±1.0°C
Resolution: 0.1°C. ( 0.0°C .. 50.0°C)
0.2°C. (-9.9°C .. -0.1°C)
Contact capacity: 5(1)A @ 250V~ SPDT
Protection rating: IP 30
Insulation Class: II ( )
Number of manual cycles: 1.000
Number of automatic cycles: 100.000
Type of action: 1CU
Tracking Index: PTI 175
Pollution situation: 2 (standard)
Impulse voltage rating: II
Operating temp.: 0°C .. +40°C
Storage temperature: -10°C .. +50°C
Humidity limits: 20% .. 80% RH non-condensing
Enclosure: Material: ABS V0 self-extinguishing
ITALIANODEUTSCHFRANÇAISESPAÑOLPORTUGUÊS ENGLISH

13
INBETRIEBSETZUNG
Bei der ersten Inbetriebsetzung:
die Batterien einsetzen, beim Respektieren der Polarität, in den dazu
vorgesehen Raum (Abb. 1), und die Reset-Operation ausführen, indem
man mit einem Spitzen-Objekt durch das vorhandene Loch agiert (L Abb. 1);
MAN DARF KEINE NADELN BENUTZEN.
Die vorhandenen Schalter unter der kleinen Tür sind drei:
‘ OK ‘: Programmation/Stunde/Bestätigung (I Abb. 1);
‘ ‘: Vorwärts (G Abb. 1);
‘ ‘: Zurück (H Abb. 1);
Regulierung der laufenden Stunde
Um die Uhr des Chronothermostates zu regulieren folgende Operationen
ausführen:
1. Die kleine Tür öffnen, welche Zutritt zum Batterie-Raum gibt.
2. Den Schalter ‘ OK ‘ für wenigstens zwei Sekunden drücken.
3. Die Stunde mit den Schaltern ‘ ‘ und ‘ ‘ einstellen.
4. Mit ‘ OK ‘ bestätigen.
5. Die Minuten mit den Schaltern ‘ ‘ und ‘ ‘ regulieren.
6. Mit ‘ OK ‘ bestätigen.
VORPROGRAMMIERUNG
Heizung/Einstellung Einstellung der Abkühlung
Beim Drücken für wenigstens 4 Sekunden des Schalters ‘ ‘, aktiviert
sich die Funktion Heizung. Auf dem Display wird das leuchtende Sinnbild
‘ ‘ erscheinen.
Beim Drücken für wenigstens 4 Sekunden des Schalters ‘ ‘, aktiviert
sich die Funktion Abkühlung und auf dem Display wird das leuchtende
ALLGEMEINES
Diese Vorrichtung ist ein elektronisches Tages-Thermostat mit
breitem Display, bei hinterer Beleuchtung für die Sichtbarmachung der
festgestellten Umwelt-Temperatur sowie, wahlweise, der laufenden
Stunde. Die Regulierung der Umwelt-Temperatur bei der Heizung-
oder Abkühlungs-Modalität geschieht auf zwei Niveaus: Komfort und
Reduktion. Diese Vorrichtung bietet außerdem die Möglichkeit, den Wert
der einfrierverhütenden-Temperatur sowie der Offset-Regulierung auf
dem Innen-Sensor einzustellen.
INSTALLATION
Um die Vorrichtung zu installieren, folgende Operationen ausführen:
- die Wand-Platte, welche unter den Sockel des Chronothermostates
gekuppelt ist, frei machen wie auf Abb. 3 gezeigt.
- Die Platte direkt auf die Wand oder auf eine Abzweige-Schachtel mit
3 Modulen durch die zwei Schrauben-Sitzen fest machen bei einem
Achsabstand von 60 oder 83 mm (Abb. 4), indem man gut aufpasst, dass
die Kabel in die Schlitzscharte frei durchgehen , wie auf Abb. 5 gezeigt.
- Die elektrischen Anschlüsse ausführen, indem man das Verbindungs-
Schema von Abb. 6 befolgt.
- Den Chronothermostat an die Wandplatte näher bringen, indem man
vorher die Verzahnung des Sockels zusammen mit der dazu vorhandenen
Löchern der Platte trifft; hinterher sollte man einen nach unten gerichteten
Druck ausüben, bis die plastischen Zähnchen der Platte losschnellen.
Der Chronothermostat muss 1,5 m vom Fußboden entfernt
positioniert werden, weit entfernt von Wärmequellen, von Türen
und Fenstern.
ITALIANODEUTSCHFRANÇAISESPAÑOLPORTUGUÊS ENGLISH

14
kleiner sein muss als denjenigen des Drehgriffes ‘ ‘.
Einstellung der einfrierverhütenden Temperatur.
Die einfrierverhütende Funktion ermöglicht eine minimale Umwelt-
Temperatur auszuwählen, die eingehalten wird, wenn der
Chronothermostat abgestellt ist, damit das Wasser, welches sich in den
Rohren befindet, nicht einfriert wenn die Umgebungs-Temperatur unter
derjenige des eingestellten Wertes sinkt.
Diese Vorrichtung kommt aus der Firma mit dem einfrierverhütenden
Wert, eingestellt auf +3°C.
Die Funktion ist aktiv, nur wenn die Vorrichtung in Modalität Heizung
eingesetzt wurde.
Um die einfrierverhütende Temperatur zu regulieren, sind folgende
Operationen auszuführen:
- den Schalter ‘ / ‘ drücken und gedrückt halten für mehr als 20
Sekunden;
- das Display macht X.X°C sichtbar abwechselnd mit X.X° 1 (wo X.X
die einfrierverhütende -Temperatur ist);
- die Schalter ‘ ‘ und ‘ ‘ drücken, um den Wert zu verändern;
- indem man den Schalter ‘ / ‘ drückt, kommt man zu der Regulierung
der Offset-Temperatur (siehe Abschnitt ‘ Offset Einstellungen ‘);
- Drücken des Schalters ‘ OK ‘ oder 10 Sekunden warten, ohne jeglichen
Schalter zu drücken; damit tritt die Vorrichtung vom Modus der
Einstellung der einfrierverhütenden-Temperatur aus, und bestätigt
damit den eingesetzten Wert.
Offset Einstellung
Durch diesen Parameter wird es möglich die von der Vorrichtung be
Sinnbild ‘ ‘ erscheinen.
Einsetzung Modalität Komfort und Reduzierung.
Der Chronothermostat ist mit 24 Rasten ausgerüstet (A Abb. 1), welche
sich an beiden Seiten des Displays befinden, um während des Tages
die Banden von “Komfort” und “Minderung” auszuwählen. Wenn man
wünscht, dass der Chronothermostat in Modalität Komfort funktioniert,
zum Beispiel während der Tagesstunden, wird es notwendig sein, alle
Rasten der gewünschten Stundes-Banden nach rechts zu schieben.
Wenn man wünscht, dass der Chronothermostat in Modalität Reduzierung
funktioniert, zum Beispiel während der Nachtstunden, genügt es alle
Rasten der gewünschten Banden nach links zu schieben.
Zu diesem Zweck genügt es sich folgender Norm zu erinnern:
Rasten welche sich rechts befinden: es ist die Modalität Komfort
aktiviert, bei automatischer Funktionierung.
Rasten welche sich links befinden: es ist die Modalität Nacht-Reduzierung
aktiviert, bei automatischer Funktionierung.
Jede Raste bezieht sich an das Zeit-Intervall welches zwischen der oben
gedrückten Uhrzeit bzw. der unter der betreffenden Raste gedrückt ist.
Man merke sich als Beispiel, dass die Zeitspanne zwischen Mittenacht
und 05 Uhr morgens, von einer einzigen Raste aktiviert wird, während von
05 bis 09 Uhr morgens ist es möglich jede Halbe Stunde einzustellen.
Für den Rest des Tages, die auswählbaren Intervallen betragen je eine
Stunde. (A Abb. 1). Die Komfort-Temperatur wird mit dem Drehgriff ‘
‘ (Sonne), während diejenige für die Reduzierung mittels des Drehgriffes
‘ ‘ eingesetzt wird. (Mond). Normalerweise, um eine Nacht-Reduktion
zu erzielen, muss der Drehgriff ‘ ‘ auf einen Wert eingesetzt sein, der
ITALIANODEUTSCHFRANÇAISESPAÑOLPORTUGUÊS ENGLISH

15
die Regulierung der Umwelt-Temperatur geschieht unabhängig von der
Dip Swich Position, mittels der durch den Drehgriff ‘ ‘ eingesetzten
Temperatur. Um an den Betrieb nach dem eingesetzten Tages Programm
wieder zu gelangen, nochmals den Schalter ‘ ‘ drücken.
HINTERE BELEUCHTUNG
Der Start des Displays-Hinteren Beleuchtung geschieht nach dem Drüc-
ken jegliches Schalters. Die Abstellung geschieht automatisch nach 20
Sekunden, nach dem letzten Drücken eines Schalters.
ANGABEN DER STUNDE/TEMPERATUR
Beim Drücken des Schalters ’ / ‘ kann man auf dem Display, abwech-
selnd, die laufende Stunde oder die Umwelt-Temperatur ersehen, welche
korrekt vom eingesetzten Offset-Wert ermittelt wird.
Der Chronothermostat, um die Lebensdauer der Batterien zu erhöhen, er-
mittelt die Umwelt-Temperatur jede drei Minuten und entscheidet dabei
über die Aktivierung oder die Desaktivierung des Relais.
AUSTAUSCH VON BATTERIEN
Das Display zeigt dauernd den Batterie-Status an, durch das Sinnbild
‘ ‘. Die Ladung der Batterien ist maximal wenn auf dem Sinnbild die
drei Niveau-Leuchten vorhanden sind und alle dabei leuchten.
Andererseits sind die Batterien erschöpft und müssen ausgetauscht wer-
den, wenn das Sinnbild ganz leer ist und ‘ ‘ leuchtet .
Für den Austausch wie folgt operieren:
1. Die kleine Tür aufmachen, welche zum Batterie-Raum führt (Abb. 1).
2. Die Batterien herausziehen, indem man mit einem passenden
Werkzeug agiert.
3. Neue Batterien einsetzen. Diese müssen vom alkalinen Typ und von
merkte Temperatur von ±5°C zu berichtigen. Die Vorrichtung kommt
aus der Firma, mit dem Offset Wert, eingestellt auf 0°C.
Um die Offset-Temperatur zu regulieren, sind folgende Operationen
auszuführen:
- den Schalter ‘ / ‘ für mehr als 20 Sekunden drücken;
- das Display macht X.X°C, abwechselnd mit X.X°1 sichtbar (wo X.X
die Offset-Temperatur ist);
- die ‘ ‘ und ‘ ‘ Schalter drücken, um den Wert zu ändern;
- bei einem erneuten Drücken des Schalters ‘ / ‘, bekommt man die
Regulierung der erfrierverhütenden Temperatur (siehe Abschnitt Ein-
stellung erfrierverhütender Temperatur);
- Beim Drücken des Schalters ‘ OK ‘ oder wenn man 10 Sekunden war-
tet, ohne jeglichen Schalter zu drücken, tritt die Vorrichtung von der
Modalität der einfrierverhütenden Offset-Temperatur-Einstellung aus
und bestätigt damit den eingesetzten Wert.
ABSTELLUNG-EINFRIERVERHÜTENDE-FUNKTION
Um den Chronothermostat zu desaktivieren, den Schalter ‘ ‘ drücken.
Das Display wird dann die Schrift ‘ OFF ’ und das Sinnbild ‘ ‘ zeigen.
Wenn der Chronothermostat auf die Modalität Heizung eingestellt wurde,
wird die einfrierverhütende Funktion aktiv und auf dem Display wird das
Sinnbild ‘ ‘ erscheinen; in diesem Falle wird die Umwelt-Temperatur nach
dem für die einfrierverhütende Temperatur eingesetzten Wert reguliert.
FUNKTIONIERUNG MANUELL
Beim Drücken des Schalters ‘ ‘ auf dem Display erscheint das Sinnbild
‘ ‘ und der Chronothermostat wird die Umwelt-Temperatur, im Laufe
der 24 Stunden, bei Modalität Komfort regulieren. Dies bedeutet, dass
ITALIANODEUTSCHFRANÇAISESPAÑOLPORTUGUÊS ENGLISH

16
Funktionierungs-Temperatur: 0°C .. 40°C
Lagerungs-Temperatur: 10°C..+ 50°C
Feuchtigkeitsgrenze: 20%..80% Rh nicht kondensiert
Sockel: Material: ABS V0 selbstlöschend
Farbe: Haube: weiß Signal 8RAL 9003)
Sockel: Anthrazit Grau (RAL 7016)
Abmessungen: 133 x 87 x 32 mm (L x H x T)
Gewicht: za. 218 gr.
Norme di riferimento EMC: CEI-EN-55014-1 (2000)
CEI-EN-55014-2 (1997)
Norme di riferimento LVD: CEI-EN-60730-1 (1996)
CEI-EN-60730-2-7 (1998)
CEI-EN-60730-2-9 (1997)
ACHTUNG
- Zur richtigen Regulierung der Raumtemperatur empfiehlt es
sich den Thermostat weit entfernt von Heizquellen, Zugluft oder
besonders kalten Wänden (Wärmebrücken) zu installieren.
- Die Ausrüstung mit dem Stromnetz durch einen allpoligen
Schalter verbinden, der mit den geltenden Vorschriften
übereinstimmt und der einen Öffnungsabstand der Kontakte von
mindestens 3mm bei jedem Pol hat.
- Die Installation und der elektrische Anschluss des vorrichtung
müssen von qualifiziertem Personal und entsprechend den
geltenden Gesetzesbestimmungen ausgeführt werden.
- Vor jeglicher Ausführung von Verbindungen sicherstellen, dass
die Stromversorgung abgeschaltet ist.
1.5V Art AA sein.
4. Wenn nötig, Reset ausführen durch den Schalter, welcher auf L
Abb. 1 zu sehen ist.
5. Die genaue Stunde nachprüfen und, wenn nötig, die Stunde
neuprogrammieren.
TECHNISCHE EIGENSCHAFTEN
Versorgung: 2x 1,5 V (Art AA) alkalin
Batterie Dauer: > 1 Jahr
Zeit zur Anzündung Hintere-Beleuchtung: 20 Sekunden
Einstellungsbereich: Komfort: 10°C .. 30°C
Reduziert: 10°C .. 30°C
Differential: 0.2 °C (asymmetrisch)
Einfrierverhütende Temperatur: 0.0°C .. 25°C (Default 3°C)
Offset: ± 5°C (Default 0.0°C)
Sensoren-Art: Innerlich NTC 4K7 ohm @25°C
Genauigkeit: ± 1°C
Resolution: 0.1°C (0.0°C .. 50°C)
0.2°C (-9,9°C .. -0,1°C)
Tragfähigkeit Kontakten: 5(1)A @ 250V~ SPDT
Schutz-Grad: IP 30
Isolierungsklasse: II ( )
Anzahl manuelle Zyklen: 1.000
Anzahl automatische Zyklen: 100.000
Art der Wirkung: 1CU
Index Tracking: PTI 175
Situation Verunreinigung: 2 (normal)
Überspannung Kategorie: II
ITALIANODEUTSCHFRANÇAISESPAÑOLPORTUGUÊS ENGLISH

17
En respectant la polarité indiquée, insérer les piles dans le compartiment
correspondant (Fig. 1) et réinitialiser le dispositif à l’aide d’un objet
pointu introduit dans le trou correspondant (L de la Fig. 1) ; NE PAS
UTILISER D’AIGUILLES.
Les boutons présents sous la porte inférieure sont 3 :
‘ OK ‘ : Programmation / Heure / Confirmation (I de la Fig. 1) ;
‘ ‘ : ‘ Avant ‘ (G de la Fig. 1) ;
‘ ‘ : ‘ Arrière ‘ (H de la Fig. 1) ;
Réglage de l’heure courante
Pour régler l’horloge du chronothermostat, effectuer les opérations
suivantes :
1. Ouvrir la porte d’accès au compartiment des piles.
2. Appuyer sur le bouton ‘ OK ‘ pendant au moins 2 secondes.
3. Régler l’heure avec les touches ‘ ‘ et ‘ ‘.
4. Confirmer avec ‘ OK ‘.
5. Régler les minutes avec les touches ‘ ‘ et ‘ ‘.
6. Confirmer avec ‘ OK ‘.
PROGRAMMATION
Configuration des fonctions ‘ Chauffage ‘ / ‘ Refroidissement ‘
En appuyant sur le bouton ‘ ‘ pendant au moins 4 secondes, la
fonction ‘ Chauffage ‘ s’active et le symbole ‘ ‘ s’affichera de manière
clignotante sur l’écran. Par contre, en appuyant sur le bouton ‘ ‘
pendant au moins 4 secondes, la fonction ‘ Refroidissement ‘ s’active et
le symbole ‘ ‘ s’affichera de manière clignotante sur l’écran.
Configuration des modalités ‘ Confort ‘ et ‘ Réduction ‘.
Le chronothermostat est équipé de 24 cavaliers (A de la Fig. 1) placés
GÉNÉRALITÉS
Ce dispositif est un chronothermostat électronique quotidien doté d’un
grand écran rétro-éclairé pour la visualisation de la température ambiante
relevée, ou selon la sélection, de l’heure courante. Le réglage de la
température ambiante en modalité ‘ Chauffage ‘ ou ‘ Refroidissement ‘
se produit en deux niveaux : ‘ Confort ‘ et ‘ Réduction ‘.
En plus, le dispositif offre la possibilité de configurer la valeur de la
température d’antigel et de régler le décalage dans le capteur interne.
INSTALLATION
Pour installer le dispositif, effectuer les opérations suivantes :
- Décrocher la plaque murale enfoncée sous la base du chronothermostat,
tel qu’il est indiqué sur la Fig. 3.
- Fixer la plaque directement sur le mur ou sur des boîtes de dérivation
de 3 modules à travers les deux logements pour vis, avec une distance
de 60 mm ou 83 mm (Fig. 4), en faisant attention à faire passer les
câbles dans la fente, tel qu’il est indiqué sur la Fig. 5.
- Effectuer les raccordements électriques en suivant le schéma de
connexion de la Fig. 6.
- Approcher le chronothermostat à la plaque murale en faisant coïncider
d’abord les ergots de la base avec les trous correspondants de la
plaque et ensuite, sur le dispositif, exercer une pression vers le bas
jusqu’au déclic des ergots en plastique de la plaque.
Le chronothermostat doit être placé à environ 1,5 m du sol, loin
de sources de chaleur, de portes et de fenêtres.
MISE EN MARCHE
Lors de la première mise en marche :
ITALIANODEUTSCHFRANÇAISESPAÑOLPORTUGUÊS ENGLISH

18
minimum qui se maintient lorsque le chronothermostat est éteint, de
façon à ne pas faire geler l’eau des conduits si la température ambiante
descend au-dessous de la valeur configurée. Le dispositif sort de l’usine
avec une température antigel configurée à +3 °C.
La fonction n’est activée que si le dispositif a été configuré en modalité
‘ Chauffage ‘.
Pour régler la température antigel, effectuer les opérations suivantes :
- Presser et maintenir pressé le bouton ‘ / ‘ pendant plus de 20
secondes ;
- L’écran affiche ‘ X.X °C ‘ en alternant avec ‘ X.X°1 ‘ (où X.X
correspond à la température antigel) ;
- Appuyer sur les touches ‘ ‘ et ‘ ‘ pour modifier la valeur ;
- En appuyant encore une fois sur la touche ‘ / ‘, on passe au réglage
de la température de décalage (voir le paragraphe ‘ Configurations du
décalage ‘) ;
- En appuyant sur la touche ‘ OK ‘ ou en attendant 10 secondes sans
appuyer sur aucune touche, le dispositif abandonne la modalité
‘ Configuration de la température antigel ‘ confirmant la valeur
configurée.
Configuration du décalage
À l’aide de ce paramètre il est possible de corriger la température
relevée par le dispositif de ±5 °C.
Le dispositif sort de l’usine avec un Offset configuré sur 0 °C.
Pour régler la température de décalage, effectuer les opérations
suivantes :
- Appuyer sur le bouton ‘ / ‘ pendant plus de 20 secondes ;
aux côtés de l’écran et servant à sélectionner, pendant la journée, les
tranches horaires de ‘ Confort ‘ ou ‘ Réduction ‘.
Lorsqu’on veut que le chronothermostat fonctionne en modalité
‘ Confort ‘, par exemple pendant les heures du jour, il faudra déplacer
tous les cavaliers de la tranche horaire souhaitée vers la droite. Lorsqu’on
souhaite que le chronothermostat fonctionne en modalité ‘ Réduction ‘,
par exemple pendant les heures nocturnes, il faudra déplacer tous les
cavaliers de la tranche horaire souhaitée vers la gauche.
Dans ce but, il suffit de se souvenir de la règle suivante :
Cavaliers placés vers la droite : la modalité ‘ Confort ‘ fonctionne
automatiquement.
Cavaliers placés vers la gauche : la modalité ‘ Réduction ‘ nocturne
fonctionne automatiquement.
Chaque cavalier se rapporte à l’intervalle de temps compris entre
l’heure imprimée au-dessus et celle imprimée au-dessous du cavalier en
question. Par exemple, on remarque que l’intervalle de temps de 00 à
05 est activé par un seul cavalier, tandis que de 05 à 09 du matin il est
possible d’intervenir toutes les demies heures. Pour tout le reste de la
journée les intervalles pouvant être sélectionnés sont d’une heure (A
de la Fig. 1). La température de ‘Confort ‘ est configurée à l’aide de la
poignée ‘ ‘ (soleil), tandis que la ‘Réduction ‘ est configurée à l’aide
de la poignée ‘ ‘ (lune). Normalement, pour avoir une ‘ Réduction ‘
nocturne, la poignée ‘ ‘ sera configurée avec une valeur inférieure par
rapport à celle de la poignée ‘ ‘.
Configuration de la température antigel
La fonction antigel permet de sélectionner une température ambiante
ITALIANODEUTSCHFRANÇAISESPAÑOLPORTUGUÊS ENGLISH

19
Pour retourner au fonctionnement selon le programme quotidien
configuré, appuyer encore une fois sur le bouton ‘ ‘.
RÉTRO-ÉCLAIRAGE
Le rétro-éclairage de l’écran peut être allumé en appuyant sur une
touche quelconque. Son extinction est automatique, 20 secondes après
la dernière pression de la touche.
INDICATION DE L’HEURE ET DE LA TEMPÉRATURE
En appuyant sur le bouton ‘ / ‘ il est possible visualiser sur l’écran, de
manière alternée, l’heure courante ou la température ambiante relevée
correcte de la valeur de décalage configurée.
Le chronothermostat, pour maximiser la durée des piles, relève la
température ambiante toutes les 3 minutes et il décide l’activation ou
la désactivation du relais.
REMPLACEMENT DES PILES
L’écran montre constamment l’état de charge des piles à l’aide du
symbole ‘ ‘. La charge des piles est maximale si à l’intérieur du
symbole les trois indicateurs de niveau sont allumés.
Par contre, les piles sont déchargées et doivent être remplacées si le
symbole est complètement vide et qu’il clignote ‘ ‘.
Pour le remplacement, procéder comme décrit ci-dessous :
1. Ouvrir la porte d’accès au compartiment des piles (Fig. 1).
2. Extraire les piles en faisant levier avec un outil, si besoin.
3. Insérer les nouvelles piles qui doivent être alcalines de 1,5 V type AA.
4. Si nécessaire, réinitialiser à l’aide de la touche indiquée par L Fig. 1.
5. Contrôler que l’heure est exacte et, si nécessaire, la reprogrammer.
- L’écran affiche ‘X.X °C ‘ en alternant avec ‘X.X°1 ‘ (où X.X correspond
à la température antigel) ;
- Appuyer encore une fois sur le bouton ‘ / ‘ ;
- L’écran affiche ‘ X.X °C ‘ en alternant avec ‘ X.X°2 ‘ (où X.X
correspond à la température de décalage) ;
- Appuyer sur les touches ‘ ‘ et ‘ ‘ pour modifier la valeur ;
- En appuyant encore une fois sur la touche ‘ / ‘, on passe au réglage
de la température antigel (voir le paragraphe ‘ Configuration de la
température antigel ‘) ;
- En appuyant sur la touche ‘ OK ‘ ou en attendant 10 secondes sans
appuyer sur aucune touche, le dispositif abandonne la modalité
‘ Configuration de la température de décalage ‘ confirmant la valeur
configurée.
EXTINCTION - FONCTION ANTIGEL
Pour désactiver le chronothermostat, appuyer sur la touche ‘ ‘.
L’écran affichera le message ‘ OFF ‘ et le symbole ‘ ‘.
Si le chronothermostat a été configuré en modalité ‘ Chauffage ‘, la
fonction antigel sera activée et le symbole ‘ ‘ s’affichera sur l’écran.
Dans ce cas, la température ambiante sera réglée selon la valeur
configurée pour la température antigel.
FONCTIONNEMENT MANUEL
En appuyant sur le bouton ‘ ‘, le symbole ‘ ‘ s’affichera sur l’écran et
le chronothermostat réglera la température ambiante durant 24 heures
en modalité ‘ Confort ‘. Ceci signifie que le réglage de la température
ambiante se produit à travers la température configurée par la poignée ‘
‘, indépendamment de la position des commutateurs DIP.
ITALIANODEUTSCHFRANÇAISESPAÑOLPORTUGUÊS ENGLISH

20
Boîtier : Matériel : ABS V0 auto-extinguible
Couleur : Couvercle : Blanc signal (RAL 9003)
Base : Gris anthracite (RAL 7016)
Dimensions : 133 x 87 x 32 mm (L x H x P)
Poids : ~ 218 g.
Normes de références EMC: CEI-EN-55014-1 (2000)
CEI-EN-55014-2 (1997)
Normes de références LVD: CEI-EN-60730-1 (1996)
CEI-EN-60730-2-7 (1998)
CEI-EN-60730-2-9 (1997)
ATTENZIONE
- Pour un réglage correct de la température, il est conseillé
d’installer le thermostat éloigné des sources de chaleur,
courants d’air ou des parois particulièrement froides (ponts
thermiques).
- Brancher l’appareil au réseau d’alimentation avec un
interrupteur omnipolaire conforme aux normes en vigueur et
avec une distance d’ouverture des contacts d’au moins 3 mm à
chacun des pôles.
- L’installation et le branchement électrique du dispositif doivent
être réalisés par un personnel qualifié et en conformité aux lois
en vigueur.
- Avant d’effectuer tout type de branchement, s’assurer que le
réseau électrique soit hors tension.
CARACTÉRISTIQUES TECHNIQUES
Alimentation : 2 x 1,5 V (Type AA) alcalines
Durée des piles : >1 an
Temps d’allumage rétro-éclairage : 20 secondes
Plage de réglage : ‘Confort ‘ : 10 °C .. 30 °C
‘Réduite ‘ : 10 °C .. 30 °C
Différentiel : 0,2 °C (asymétrique)
Antigel : 0,0 °C .. 25,0 °C. (Défaut 3,0 °C)
Décalage : ±5,0 °C (Défaut 0,0 °C)
Type de capteur : NTC 4K7 ohm @ 25 °C
(Interne)
Précision : ±1,0 °C
Résolution : 0,1 °C. (0,0 °C .. 50,0 °C)
0,2 °C. (-9,9 °C .. -0,1 °C)
Capacité des contacts : 5(1)A @ 250 V~ SPDT
Degré de protection : IP 30
Classe d’isolement : II ( )
Nombre de cycles manuels : 1.000
Nombre de cycles automatiques : 100.000
Type d’action : 1CU
Indice de tracking : PTI 175
Niveau de pollution : 2 (normal)
Catégorie de surtension : II
Temp. de fonctionnement : 0 °C .. +40 °C
Température de stockage : -10 °C .. +50 °C
Limites d’humidité : 20 % .. 80 % RH sans condensation
ITALIANODEUTSCHFRANÇAISESPAÑOLPORTUGUÊS ENGLISH
Table of contents
Languages:
Other arbo Thermostat manuals
Popular Thermostat manuals by other brands
Honeywell
Honeywell FOCUSPRO TH6320R operating manual
nvent
nvent Raychem T-M-10-S/+x+y manual
Johnson Controls
Johnson Controls T25 user manual
ICM Controls
ICM Controls SC 3801 owner's manual
Honeywell
Honeywell T8700B Product data
American Standard
American Standard Town Square T555740 installation instructions
