manuals.online logo
Brands
  1. Home
  2. •
  3. Brands
  4. •
  5. Regin
  6. •
  7. Thermostat
  8. •
  9. Regin TM1-P User manual

Regin TM1-P User manual

TM1-P
2037G DEC 06
Box 116
428 22 KÅLLERED SWEDEN
Tel +46 (0)31 720 02 00 Fax +46 (0)31 720 02 50
30
86
86
!
VIKTIGT: Läs denna instruktion
innan produkten monteras och
ansluts.
INSTRUKTION INSTRUCTIONS
Enstegs rumstermostat
TM1-P är en enstegs rumstermostat med ett växlande relä för
värme- eller kylreglering. Termostaten kan dock ej användas för
samtidig styrning av både värme och kyla.
TM1-P kan användas med inbyggd eller extern givare.
Installation
Tag av frontlocket genom att med en skruvmejsel trycka in den
fjädrande tungan mitt på nedergaveln. Se fig 1.
Fäst TM1-P på väggen. Skruvfickorna har c:c avstånd 60 mm för att
passa på väggdosa.
Skall TM1-P användas med den inbyggda givaren bör den placeras
c:a 1,5m över golvet på plats med för rummet representativ tempe-
ratur.
Anslut matningsspänning, belastning och, i de fall då sådan
används, den externa givaren.
Sätt bygeln bredvid givarplinten i rätt läge för det valda
givaralternativet.
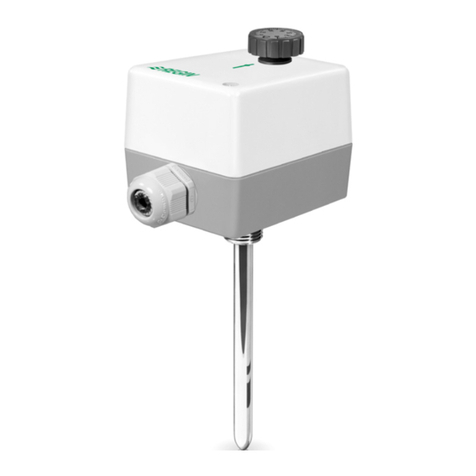
Som extern givare skall givare ur Regins TG-serie användas.
Tekniska data
Matningsspänning 230 VAC +/-15%, 50-60Hz.
Relä 16A 230V AC växlande.
Inställningsområde 0...30°C.
Kopplingsdifferens 1K.
Skyddsklass IP30.
Plintanslutningar
1. 230 VAC matningsspänning.
Byglas normalt till plint 3.
Skall reläet användas potentialfritt kopplas inkommande
matning direkt till plint 1.
2. Matningsnolla.
3. Relä gemensam pol.
4. Reläkontakt värme.
5. Reläkontakt kyla.
G-G Anslutning extern givare.
EMC emission och immunitet standard
Produkten uppfyller kraven för gällande Europeiska EMC standard
CENELEC EN50081-1 och EN50082-1 och är CE-märkt.
LVD, lågspänningsdirektivet
Produkten uppfyller kraven för gällande Europeiska LVD standard
IEC 730-1 och IEC 730-2-1.
Teknisk hjälp
Hjälp och råd på telefon: 031 - 720 02 30
IMPORTANT: Read these
instructions before using the
product.
!
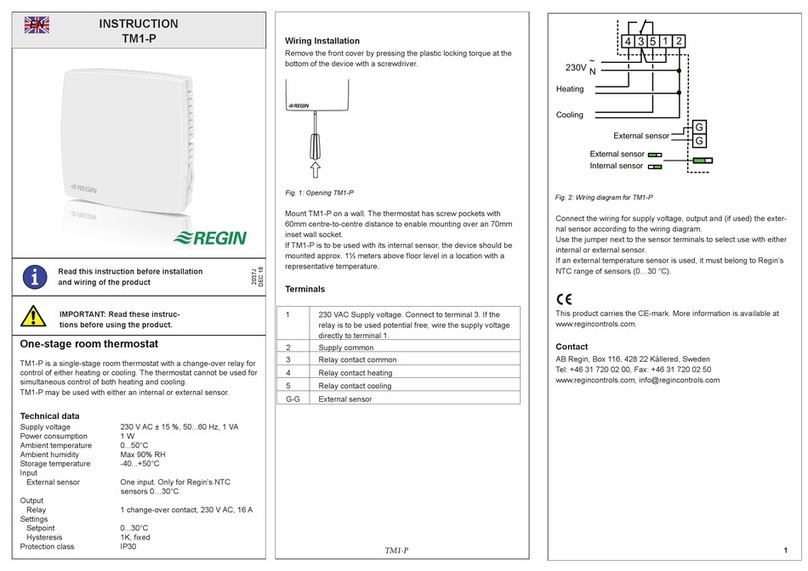
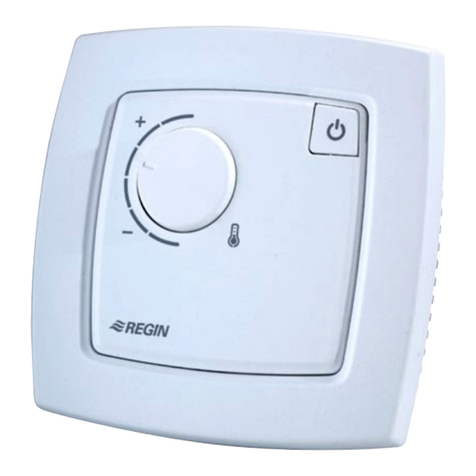
One step room thermostat
TM1-P is a single-step room thermostat with a change-over
relay for either heating or cooling. The thermostat can not
however be used for simultaneous control of both heating and
cooling.
TM1-P may be used with the internal or an external sensor.
Installing
Remove the front cover by depressing the plastic tongue in the
middle of the lower edge with a screwdriver. See fig 1.
Mount the TM1-P on the wall. The screw pockets have a c:c
distance of 60mm to fit on a wallbox.
If the TM1-P is to be used with the internal sensor it should be
mounted approx. 5 ft above floor level at a location with a
representative temperature.
Connect the wiring for the supply voltage, the output and, when
used, the external sensor according to the wiring diagram.
Set the jumper next to the sensor terminals to the position
indicated for the choice of sensor you have made.
As external sensor a Regin TG-type sensor must be used.
Technical data
Supply voltage 230 VAC +/-15%, 50-60Hz.
Relay 16A 230V AC change over.
Setting range 0...30°C.
Switching differential 1K.
Protection class IP30.
Wiring
1. 230 VAC Supply voltage.
Connect to terminal 3.
If the relay is to be used potential free, wire the
supply voltage directly to terminal 1.
2. Supply common.
3. Relay contact common.
4. Relay contact heating.
5. Relay contact cooling.
G-G External sensor.
EMC emissions & immunity standards
This product conforms with the requirements of
European EMC standards CENELEC EN 50081-1 and
EN 50082-1 and carries the CE mark.
LVD
This product conforms with the requirements of
European LVD standards IEC 730-1 and IEC 730-2-1.
Ext. sensor
230V
Extern. sensor
Intern. sensor
G
G
N
˜
534 21
Värme/
Heating
Kyla/
Cooling
TM1-P
2037G DEC 06
Box 116
428 22 KÅLLERED SWEDEN
Tel +46 (0)31 720 02 00 Fax +46 (0)31 720 02 50
30
86
86
Einstufen Raumthermostat
Der TM1-P ist ein Einstufen Raumthermostat mit einem
Wechselkontakt für kühlen oder heizen. Das Thermostat kann
nicht gleichzeitig zur Heiz- und Kühlungssteuerung verwendet
werden. Das TM1-P kann mittels internem oder externem Fühler
verwendet werden.
Einbau
Entfernen Sie die Frontabdeckung indem Sie die Plastikzunge in
der unteren Mitte mittels einem Schraubendreher drücken. siehe
fig 1.
Montieren Sie den TM2-24HC an der Wand. Die
Montageschrauben haben einen Abstand von 60mm zum Einbau
in einer UP-Dose. Wird der TM1-P mit internem Fühler verwendet
sollte er ca. 2m über dem Boden montiert werden.
Verbinden Sie die Versorgungsspannung, den Ausgang und wenn
verwendet den ext. Fühlereingang lt. Verdrahtungs-schema.
Stellen Sie den Jumper neben den Fühlerklemmen in die Position
je nach verwendetem Fühler.
Als externer Fühler muß ein Regin TG-Typ verwendet werden.
Technische Daten
Versorgungsspannung 230 VAC +/-15%, 50-60Hz.
Relais 16A 230V AC Wechselkontakt
Sollwertbereich 0...30°C.
Schaltdifferential 1K.
Schutzart IP30.
Verdrahtung
1. 230 VAC Versorgungsspannung.
Verbinden mit Klemme 3.
Wird das Relais potentialfrei verwendet, verbinden Sie
die Versorgungsspannung direkt an Klemme 1.
2. Versorgung gemeinsamer Pol.
3. gemeinsamer Relaiskontakt.
4. Relaiskontakt heizen.
5. Relaiskontakt kühlen.
G-G Externer Fühler.
EMC emissions & immunity standards
Dieses Produkt entspricht den Anforderungen der Euro-päischen
Standards CENELEC EN50081-1 und EN50082 - 1 und trägt das
CE Zeichen.
LVD
Dieses Produkt entspricht den Anforderungen der European LVD
Standards IEC 730-1 und IEC 730-2-1.
BEDIENUNGSANLEITUNG
!
WICHTIG: Lesen Sie diese
Anweisung vor Montage und
Anschluß des Produktes.
Ext. sensor/
sonde ext.
230V
Ext. sensor/sonde ext.
Int. sensor/sonde int.
G
G
N
˜
534 21
Heitz./
Chauff.
Kühl./
Refr.
Thermostat d’ambiance à 1 étage
TM1-P est un thermostat d’ambiance 1 étage doté d’un relais
inverseur pour la régulation de chauffage ou de refroidissement.
Le thermostat n’est toutefois pas conçu pour la régulation
simultanée de chauffage et de refroidissement.
TM1-P peut être utilisé avec la sonde intégrée ou avec une sonde
externe.
Installation
Enlever le capot de la face en appuyant la languette en plastique
située au milieu du bord inférieur avec un tournevis (voir ill. 1).
Monter le TM1-P sur un mur. Les poches de vis ont une distance
entre axes de 60 mm pour aller dans un boîtier mural.
Si le TM1-P doit être utilisé avec la sonde intégrée, il doit être
monté à environ 1,5 m du sol dans endroit ayant une température
d’ambiance représentative.
Brancher la tension d’alimentation, la sortie et l’éventuelle sonde
externe selon le schéma de câblage. Mettre le cavalier situé à côté
des bornes de la sonde à la position qui correspond au choix de
sonde.
Seules les sondes de la série Regin TG doivent être utilisées
comme sondes externes.
Caractéristiques techniques
Tension d’alimentation 230 VAC +/-15%, 50-60Hz.
Relais 16A 230V AC inverseur.
Place de réglage 0...30°C.
Hystérésis 1K.
Indice de protection IP30.
Raccordement
1. 230 VAC tension d’alimentation.
Connecter à la borne 3.
Si le relais doit être utilisé libre de potentiel, brancher la
tension d’alimentation directement à la borne 1.
2. Neutre d’alimentation.
3. Contact relais commun.
4. Contact relais chauffage.
5. Contact relais refroidissement.
G-G Sonde externe.
Emissions EMC et standards d’immunité
Ce produit est conforme aux exigences des standards EMC
européens CENELEC EN 50081-1 et EN 50082-1. Certifié CE.
LVD
Ce produit est conforme aux exigences actuelles des standards
LVD européens IEC 730-1 och IEC 730-2-1.
!
IMPORTANT: Lire ces instruc-
tions avant le montage et le
raccordement de ce produit.
INSTRUCTIONS

Other Regin Thermostat manuals

Regin MTIB User manual

Regin

Regin MTIB User manual

Regin Regio Mini Series User manual

Regin

Regin Regio Mini Series User manual

Regin MTIS Series User manual

Regin

Regin MTIS Series User manual

Regin RU-DFO User manual

Regin

Regin RU-DFO User manual

Regin RCF-230CD User manual

Regin

Regin RCF-230CD User manual

Regin MTIBL90H User manual

Regin

Regin MTIBL90H User manual

Regin RCF-230D User manual

Regin

Regin RCF-230D User manual

Regin MTIBL90H User manual

Regin

Regin MTIBL90H User manual

Regin REGIO RU-DFO User manual

Regin

Regin REGIO RU-DFO User manual

Regin TM1-50 User manual

Regin

Regin TM1-50 User manual

Regin REGIO RC-O User manual

Regin

Regin REGIO RC-O User manual

Regin RCFD-230C User manual

Regin

Regin RCFD-230C User manual

Regin ED-T43L-V User manual

Regin

Regin ED-T43L-V User manual

Regin RCFM-230D User manual

Regin

Regin RCFM-230D User manual

Regin Floorigo FL1TP User manual

Regin

Regin Floorigo FL1TP User manual

Regin RCF-230D User manual

Regin

Regin RCF-230D User manual

Regin MTIR30S User manual

Regin

Regin MTIR30S User manual

Regin REGIO RC-TO User manual

Regin

Regin REGIO RC-TO User manual

Regin PULSER User manual

Regin

Regin PULSER User manual

Regin TM1-P User manual

Regin

Regin TM1-P User manual

Regin DTTH User manual

Regin

Regin DTTH User manual

Regin AL230A User manual

Regin

Regin AL230A User manual

Regin RCFD-230C User manual

Regin

Regin RCFD-230C User manual

Regin RRT025A User manual

Regin

Regin RRT025A User manual

Popular Thermostat manuals by other brands

ensto ECO920 Installation and operation instructions

ensto

ensto ECO920 Installation and operation instructions

Honeywell t8034c installation instructions

Honeywell

Honeywell t8034c installation instructions

Schell VITUS 016040699 Assembly and installation instructions

Schell

Schell VITUS 016040699 Assembly and installation instructions

Honeywell RTH4300B1000 installation guide

Honeywell

Honeywell RTH4300B1000 installation guide

Protherm Thermolink P installation instructions

Protherm

Protherm Thermolink P installation instructions

Ventair Ultecon UT-M1 installation instructions

Ventair

Ventair Ultecon UT-M1 installation instructions

White Rodgers 1F72-151 Configuration and terminal outputs

White Rodgers

White Rodgers 1F72-151 Configuration and terminal outputs

Momentum Meri user guide

Momentum

Momentum Meri user guide

Vemer ECO user manual

Vemer

Vemer ECO user manual

Carrier Performance EDGE owner's manual

Carrier

Carrier Performance EDGE owner's manual

Honeywell CM707 installation guide

Honeywell

Honeywell CM707 installation guide

EPH Controls CRTP2 operating instructions

EPH Controls

EPH Controls CRTP2 operating instructions

Eurotronic SPARmatic ZERO user manual

Eurotronic

Eurotronic SPARmatic ZERO user manual

Bticino Smarther SX8000 manual

Bticino

Bticino Smarther SX8000 manual

Verano VER-24 s user manual

Verano

Verano VER-24 s user manual

Hunter Energy Monitor AC 42205 owner's manual

Hunter

Hunter Energy Monitor AC 42205 owner's manual

Seltron ST2 user manual

Seltron

Seltron ST2 user manual

Regulus TP18 LCD quick start guide

Regulus

Regulus TP18 LCD quick start guide

manuals.online logo
manuals.online logoBrands
  • About & Mission
  • Contact us
  • Privacy Policy
  • Terms and Conditions

Copyright 2025 Manuals.Online. All Rights Reserved.