ITALIANO
DESCRIZIONE PRODOTTO E SPECIFICHE TECNICHE
WPT OT SL è un cronotermostato con programmazione settimanale compatibile sia in abbinamento a dispositivi con comando
di tipo ON/OFF che per il controllo remoto di caldaie modulanti esclusivamente con comunicazione di tipo OPENTHERM.
Prima dell’utilizzo di WPT OT SL nella modalità OPENTHERM si raccomanda di verificarne la compatibilità con la caldaia:
protocolli di comunicazione BUS diversi da OPENTHERM potrebbero pregiudicare il corretto funzionamento dell’impianto.
Questo prodotto è realizzato secondo le norme EN 60730-1, EN60730-2-9, EN60730-2-7, in conformità con le direttive CE
applicabili ed è interamente fabbricato in Italia.
Per il corretto utilizzo del dispositivo si raccomanda di leggere con attenzione il presente manuale e di conservarlo per ogni
futura consultazione.
Modalità OPENTHERM:
- Alimentazione: 2 cavi bus non polarizzati (collegamento OT a caldaia)
- Classificazione ErP (Reg. EU 811/2013- 813/2013): Classe V; 3%
Modalità relay ON/OFF:
- Alimentazione: 2x Batterie Alcaline 1,5V LR6 Tipo AA
- Portata massima contatti: 5A(1A) 250VAC
Temperatura ambiente massima: 50°C
Campo di visualizzazione temperatura ambiente: 0°C÷39°C
Risoluzione temperatura: 0,1°C
Campo di regolazione temperatura ambiente: 5°C÷35°C
Differenziale temperatura: da 0,1°C a 2,0°C (standard: 0,2°C)
Sensore di temperatura: NTC 100KΩ@25°C
Grado di protezione: IP20
Classe di isolamento: Tipo II (doppio isolamento)
Tipo di azione: 1B
Grado d’inquinamento: 2
Software: classe A
Resistenza al calore ed al fuoco: Categoria D
Temperatura di stoccaggio: -25÷60°C
Tensione nominale di tenuta ad impulso: 2,5kV
Montaggio: a parete
INSTALLAZIONE
ATTENZIONE!
Si raccomanda di eseguire l’installazione del cronotermostato rispettando scrupolosamente le norme di sicurezza e le dispo-
sizioni di legge vigenti. Prima di effettuare qualsiasi collegamento, accertarsi che l’interruttore generale sia stato disattivato.
Il produttore non risponde per l’uso improprio del prodotto.
Installare il dispositivo lontano da fonti di calore e correnti d’aria, a circa 1,5m dal pavimento.
Aprire il dispositivo premendo il dentino posto sul lato destro della base (Fig.1-A), ruotare il frontale verso sinistra (Fig.1-B)
e spostarlo leggermente (Fig.1-C) per sganciarlo. Rimuovere la protezione interna che copre i morsetti svitando le due viti
(Fig.2-D) e ruotando il coperchio verso sinistra.
Fissare la base alla parete, usando un interasse orizzontale (Fig.2, A-A, A-B) o verticale (Fig.2, C-C).
Selezionare la posizione dei ‘’jumper’’ selettori sia sulla scheda relay/OT (Fig.3A) che sulla scheda display (Fig.3B) per il tipo
di modalità di funzionamento desiderata (ON/OFF o Modulante), di fabbrica impostato su ON/OFF:
POS. A: funzionamento relay ON/OFF (fabbrica)
POS. B: funzionamento modulante OPENTHERM
Infilare i cavi attraverso l’apertura sul fondo e collegarli alla morsettiera destinata al tipo di funzionamento prescelto secondo
lo schema (Fig.3A) quindi riposizionare il coperchio interno riavvitando le due viti (Fig.2-D).
SOSTITUZIONE BATTERIE
Quando il simbolo lampeggia (batterie scariche) occorre provvedere alla loro sostituzione. Per aprire l’apparecchio procedere
come indicato nelle istruzioni d’installazione (Fig.1 e Fig.4). Rimontare il coperchio sulla base prima di effettuare qualsiasi
operazione.
DESCRIZIONE COMANDI E FUNZIONAMENTO (Fig. 5)
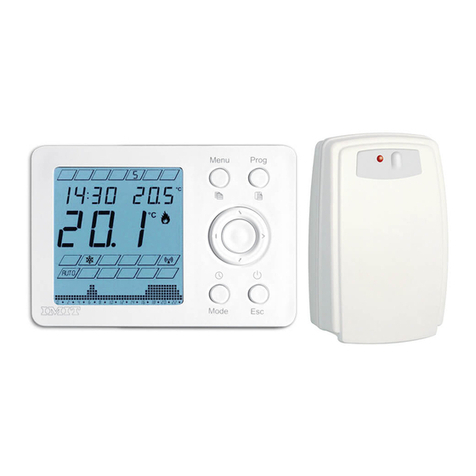
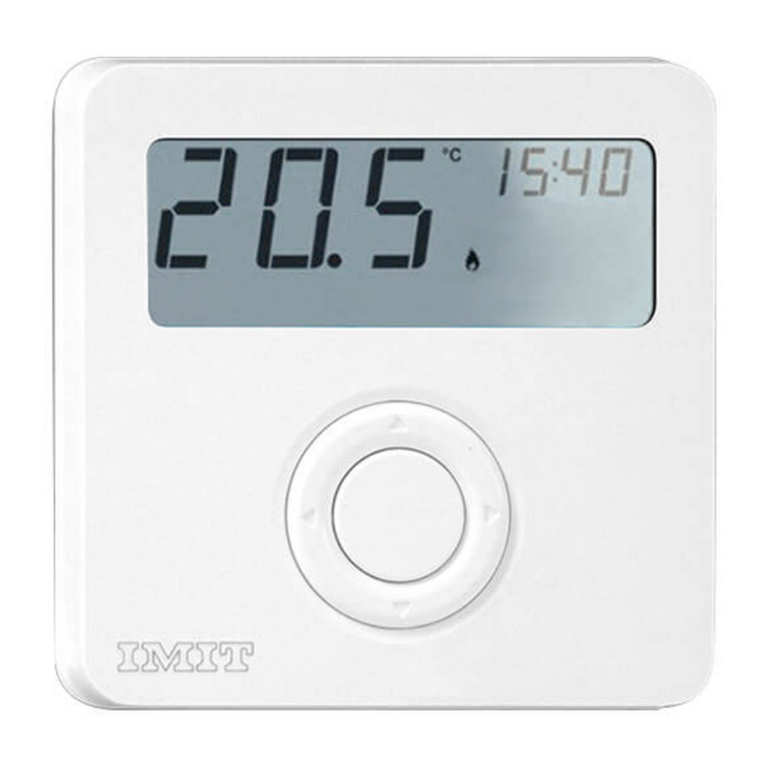
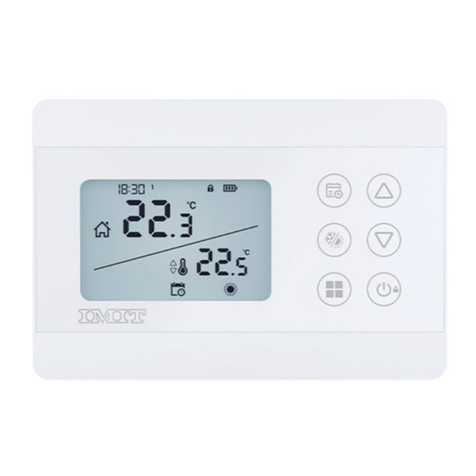
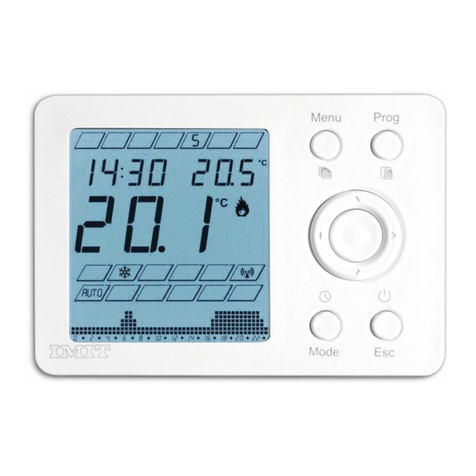
I comandi sono costituiti da un anello a quattro posizioni identificate dalle frecce ◄►▲▼, un tasto centrale OK e quattro
tasti aggiuntivi: Menu (Copia), Prog (Incolla), Mode, Esc. Premere l’anello in corrispondenza delle frecce per attivare un tasto
alla volta. Premere il tasto OK al centro. Usare i tasti freccia per modificare i valori di tempo e temperatura o selezionare le
opzioni. Il tasto centrale OK normalmente conferma le impostazioni.
PRIMA ACCENSIONE
All’atto della prima installazione devono essere effettuare le impostazioni di base. Dopo aver effettuato i collegamenti
elettrici, inserire le batterie all’interno dell’apposito vano (che dovranno essere mantenute se utilizzata la modalità ON/OFF).
All’accensione il dispositivo visualizza in sequenza i parametri impostati di fabbrica con display non retroilluminato.
Premere ▲▼ per impostare la modalità di funzionamento (ON/OFF o OT), poi OK
Qualora venga confermata la modalità di funzionamento ON/OFF, WPT OT avvia la funzione di retroilluminazione del display.
Tale funzione è invece disponibile nella modalità OPENTHERM solamente in abbinamento a caldaie compatibili con tale
funzione.
Impostare l’orologio (Fig. 6)
• Impostare il formato 24H o 12H con ▲▼, poi OK (standard: 24H)
• Impostare l’ora con ▲▼, poi OK.
• Impostare i minuti con ▲▼, poi OK.
• Impostare il giorno con ◄►, poi OK.
Terminate le impostazioni di base, il dispositivo si pone in modo OFF.
ATTENZIONE:
SE IL DISPOSITIVO È STATO PREDISPOSTO PER IL FUNZIONAMENTO NELLA MODALITA’ OPENTHERM LE BATTERIE DO-
VRANNO A QUESTO PUNTO ESSERE RIMOSSE, PROCEDENDO COME DESCRITTO AL CAPITOLO SOSTITUZIONE BATTERIE.
Una volta rimontato, l’apparecchio ripropone la sola impostazione dell’orologio (da effettuare come sopra) e al termine si
pone in modo OFF.
Alla prima installazione e durante la fase di accensione e spegnimento caldaia, potrebbero trascorrere alcuni secondi, neces-
sari sia a garantire la corretta modulazione che per la fase di corretta acquisizione dei dati di funzionamento.
MODO OFF (Fig.7)
Il display visualizza OFF e l’orologio, la funzione ANTIGELO è attiva.
Premere il tasto Esc per passare dal modo OFF al modo attivo e viceversa.
Premere una o più volte il tasto Mode per passare da un modo attivo all’altro (Manuale Comfort, Manuale Economy, Au-
tomatico).
MODO MANUALE COMFORT/ECONOMY (Fig.8)
In queste modalità il dispositivo attiva l’impianto indipendentemente dalle impostazioni orarie quando la temperatura rileva-
ta nell’ambiente è inferiore (modo INVERNO) o superiore (modo ESTATE) alla temperatura impostata.
Premere ▲o ▼per modificare e memorizzare i valori di temperatura (visualizzati in alto a destra):
MAN = temperatura Comfort (standard: INVERNO = 20,0°C / ESTATE = 24,0°C)
MAN ECO = temperatura Economy (standard: INVERNO = 16,0°C / ESTATE = 28°C)
MODO AUTOMATICO (Fig.9)
La temperatura può essere impostata su tre differenti livelli di temperatura: T1 (Comfort), T2 (intermedia) T3 (ridotta)
per periodi minimi di mezz’ora durante la giornata e cambia automaticamente nel corso della giornata a seconda del
programma orario memorizzato.
PROGRAMMAZIONE ORARIA (Fig.10)
Assicurarsi che l’impostazione dell’orologio sia corretta e che il dispositivo sia in modalità AUTO.
• Premere il tasto Prog per accedere alla funzione di programmazione oraria: compare la temperatura impostata alla
mezz’ora attuale, con la scritta PROG e il cavaliere digitale lampeggiante.
• Premere una o piu’ volte il tasto OK per impostare la temperatura desiderata per quella mezz’ora scegliendo tra T1
(Temperatura di Comfort), T2 (Temperatura intermedia) o T3 (Temperatura ridotta-economy).
• Premere ◄► per spostarsi alle ore precedenti o successive e nel caso modificare (come sopra) le impostazioni visualiz-
zate per T1, T2 e T3, fino al completamento della giornata.
• Premere ▲▼ per selezionare un altro giorno della settimana (1=Lunedi, 7=Domenica) ed impostare (come sopra) le
temperature T1, T2 e T3 desiderate per le diverse fasce orarie di ogni giorno.
Per duplicare un programma giornaliero, scegliere il giorno da copiare, premere il tasto MENU (funzione COPIA) quindi
spostarsi sul giorno desiderato e premere il tasto PROG (funzione INCOLLA).
E’ possibile modificare il programma duplicato per variare le impostazioni di temperatura desiderata T1, T2 o T3 (tramite
il tasto centrale OK) di uno o piu’ periodi (scelti spostandosi con i tasti ◄►).
Per visualizzare / modificare i valori delle temperature impostate, T1, T2 e T3
• Premere Mode per visualizzare (e in caso modificare con ▲▼) il valore di T1
• Premere Mode per visualizzare (e in caso modificare con ▲▼) il valore di T2
• Premere Mode per visualizzare (e in caso modificare con ▲▼) il valore di T3
Premere ancora una volta il tasto Mode per tornare alla programmazione oraria. T1 T2 T3
Terminate le impostazioni, premere il tasto ESC per uscire dalla fase di programmazione. L’apparecchio acquisisce i valori
impostati e torna al modo di funzionamento attivo AUTO.
MODO STAGIONE INVERNO
La temperatura Comfort T1 è maggiore della temperatura Economy T3 (T1>T2>T3). Quando la temperatura ambiente
(Tamb) è minore della temperatura impostata (Tset)si attiva il riscaldamento.
(standard: T1 = 20,0°C, T2 = 18,0°C, T3 = 16,0°C).
MODO STAGIONE ESTATE (solo modalità ON/OFF)
La temperatura Comfort T1 è minore della temperatura Economy T3 (T1<T2<T3). Quando la temperatura ambiente
(Tamb) è maggiore della temperatura impostata (Tset) si attiva il raffrescamento (standard: T1 = 24,0°C, T2 = 26,0°C,
T3 = 28,0°C).
MENU IMPOSTAZIONI MODALITA’ OPENTHERM (Fig. 11)
Premere il tasto Menu, per entrare nel menu impostazioni.
Premere ◄► per scorrere le opzioni e visualizzare l’attuale valore impostato.
1. Premere ▲▼ per impostare il modo Riscaldamento + Sanitario (Inverno), solo Sanitario (estate), solo riscaldamento.
2. Premere OK per impostare l’orologio (come prima accensione);
3. Premere ▲▼ per impostare i gradi Celsius/Farhenheit (standard: CELSIUS);
4. Premere ▲▼ per impostare il set-point dell’acqua calda ad uso sanitario (standard 50.0°C);
5. Premere ▲▼ per impostare il set-point dell’acqua calda ad uso riscaldamento (standard 60.0°C);
6. Visualizzazione temperatura di esercizio acqua calda sanitaria;
7. Visualizzazione temperatura di esercizio acqua calda riscaldamento;
8. Visualizzazione pressione di esercizio dell’impianto di riscaldamento (bar);
9. Visualizzazione percentuale di modulazione attuale della caldaia.
Premere il tasto ESC per uscire dal menu e memorizzare i dati impostati.
MENU IMPOSTAZIONI MODALITA’ ON/OFF (Fig. 12)
Premere il tasto Menu, per entrare nel menu impostazioni.
Premere ◄► per scorrere le opzioni e visualizzare l’attuale valore impostato.
1. Premere ▲▼ per impostare il modo stagione Estate/Inverno (standard: INVERNO)
2. Premere OK per impostare l’orologio (come prima accensione);
3. Premere ▲▼ per impostare i gradi Celsius/Farhenheit (standard: CELSIUS);
4. Premere ▲▼ per modificare la luminosità della retroilluminazione del display
(Min/Max: 0-100% - standard: 50%).
Premere il tasto ESC per uscire dal menu e memorizzare i dati impostati.
MENU INSTALLATORE (Fig.13)
In modo OFF, premere 10 secondi OK per entrare nel menu.
Premere ◄► per scorrere le opzioni e visualizzare l’attuale valore impostato.
1. Antigelo = Premere ▲▼ per modificare il valore di soglia della funzione antigelo (Min/Max: 1,0/8,0°C - standard:
6,0°C);
2. Isteresi = Premere ▲▼ per modificare il valore del differenziale di temperatura di intervento (Min/Max: 0,1/2,0°C -
standard: 0,2°C);
3. Calibrazione = Premere ▲▼ per modificare il valore di correzione della temperatura rilevata dal dispositivo (Min/Max:
-5,0/+5,0°C - standard: 0,0°C);
4. Premere ▲▼ per modificare la modalità di funzionamento (ON/OFF o OPENTHERM);
5. Ripristino dei valori di fabbrica. Confermare con il tasto OK sino a reset automatico.
Premere il tasto ESC per uscire dal menu e memorizzare i dati impostati.
ALLARMI E MALFUNZIONAMENTI (MODALITA’ OPENTHERM)
In caso di allarme/malfunzionamento del sistema comparirà sul display di WPT OT SL la sigla generica ‘Alr’.
Per il ripristino riferirsi al manuale istruzioni della caldaia o al relativo Centro Assistenza di riferimento dopo aver iden-
tificato attraverso il pannello della caldaia gli eventuali allarmi o codici presenti.
In caso di mancanza di rete elettrica, l’orologio di WPT OT SL si resetta, è quindi necessario reimpostare orario e giorno
dell’apparecchio, gli altri parametri come la programmazione oraria settimanale ed i vari set point vengono mantenuti
in memoria.
A seguito del reset, in caso di mancanza prolungata di impostazione orologio (dopo 30 minuti) WPT OT SL si pone in
modo MANUALE COMFORT ECO, il display dell’apparecchio mostra l’ora lampeggiante con i caratteri fissi ’00:00’.
NC
C
NO
OT
NC
C
NO
C
NC
NO
OT
A
B
+
+
-
-
A
B
Fig. 1
A
B
C
A-A=83.5mm
A-B=60mm
C
ABA
C
C-C=60mm
D
D
Fig. 3a Fig. 3b
Fig. 4 Fig. 5
Fig. 6 Fig. 7 Fig. 8 Fig. 9
Fig. 10 Fig. 11 Fig. 12 Fig. 13
+
+
-
-
Menu: Copia
Prog: Incolla
Menu Prog
Mode Esc
Fig. 2
IMIT CONTROL SYSTEM s.r.l.
Via Varallo Pombia,19 - Castelletto Sopra Ticino (NO)
Tel (+39)0331941600 - Fax (+39)0331973100
WPT OT SL
Cronotermostato settimanale a parete
Weekly wall-mounted chronothermostat
Cod. 078477 - Rev.0322


