Arcam Solo movie User manual

Handbook Solo movie/music
Manuel Solo movie/music
Handbuch Solo movie/music
Handleiding Solo film/muziek
Manual Solo movie/music
Руководство Solo movie/music
Manuale Solo movie/music
手册 Solo movie/music


Handbook Solo movie / music
English

E-3E-2
English
… and thank you for purchasing the Arcam Solo movie/music.
Arcam has been producing specialist audio equipment of remarkable
quality for over three decades and the new Solo movie/music is the latest
in a long line of award winning Hi-Fi and home cinema products.
We hope that the care and effort we have put into building this product
will be amply demonstrated in its superior performance and reliability,
ensuring that you enjoy many years of ownership.
This handbook is a guide to installing and using the Solo movie/music. Use
the contents list on the next page to guide you to the section of interest.
We hope that your Solo movie/music will give you years of trouble-free
operation. In the unlikely event of any fault, or if you simply require further
information about Arcam products, our network of dealers will be happy
to help you. Further information can also be found on the Arcam website
at www.arcam.co.uk.
The Solo movie/music development team.
welcome... contents
safety E-4
before you begin... E-6
overview E-7
front panel E-8
top panel E-9
rear panel E-10
audio/video connections E-11
other connections E-13
antenna connectors E-14
speakers E-15
disc & file formats E-16
basic operation E-17
remote control E-18
customising the remote E-22
playing a disc E-25
network/usb operation E-26
listening to radio E-27
settings menu E-28
troubleshooting E-34
technical specifications E-36
product guarantee E-38
trademarks E-39

E-5E-4
English
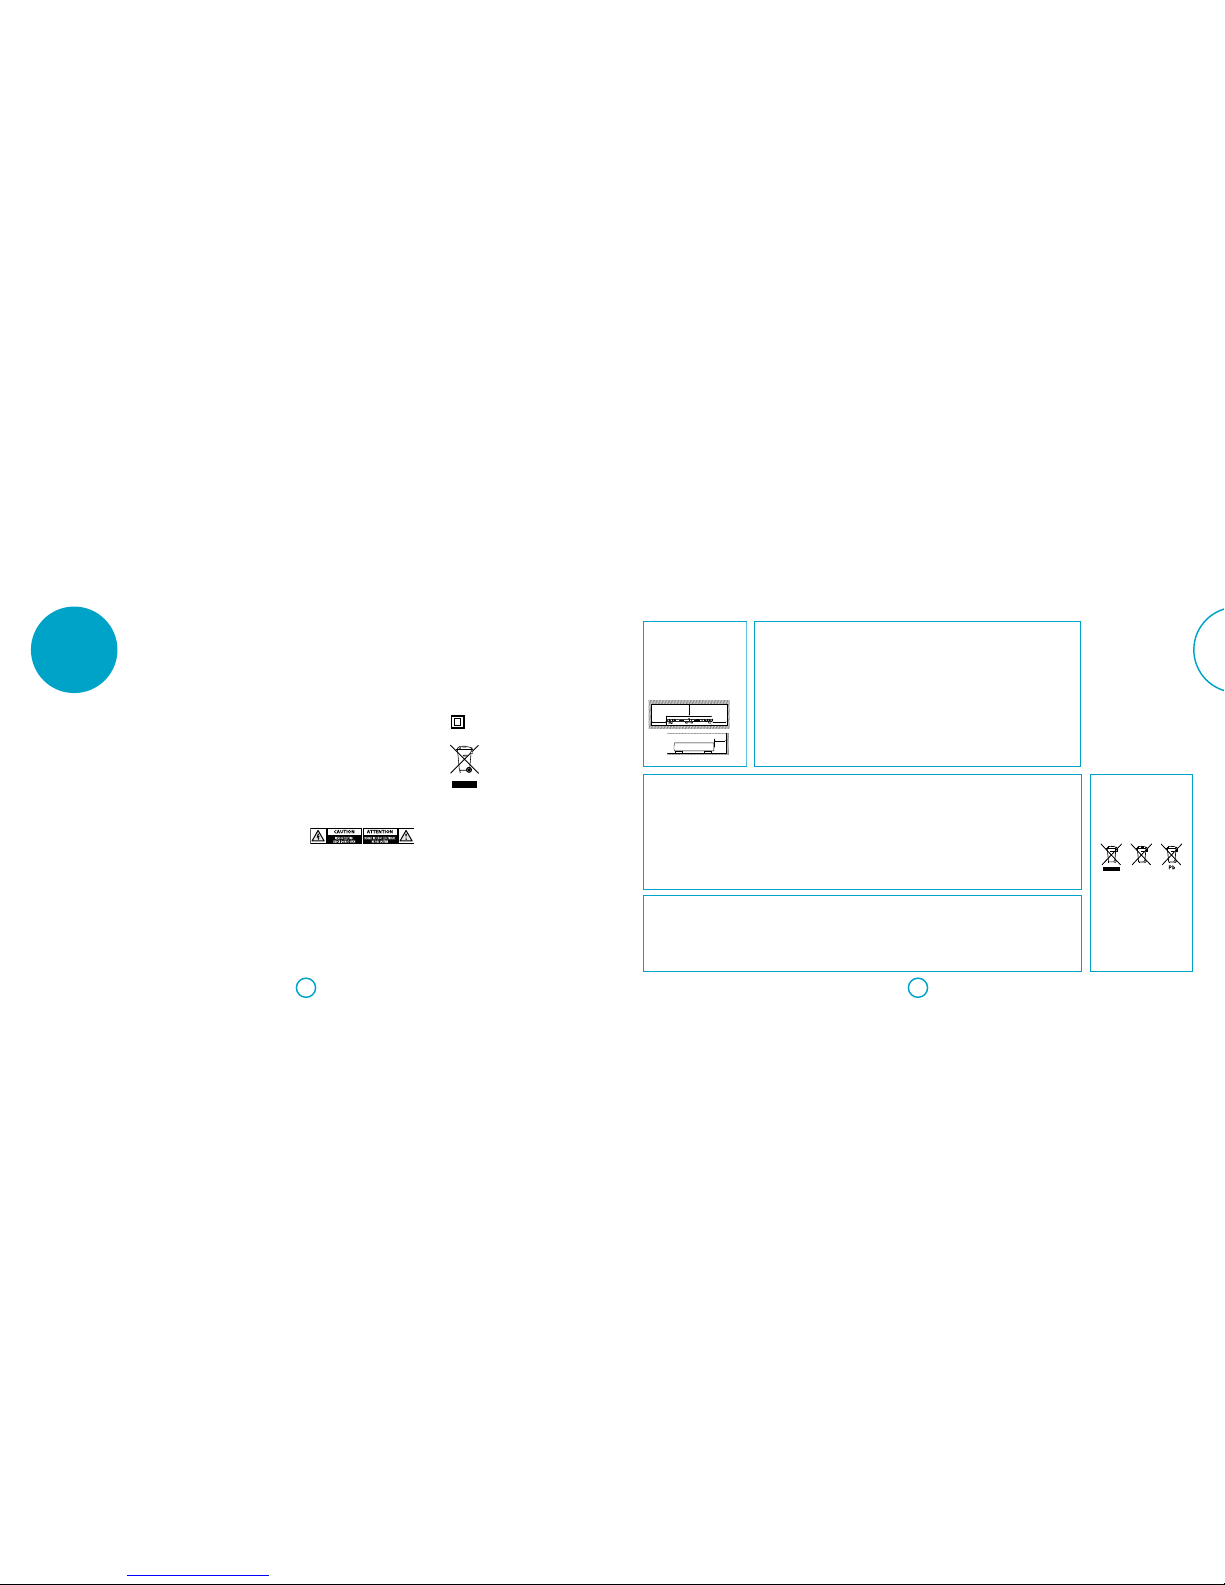
CAUTIONS ON INSTALLATION
For proper h eat dispersal, do not i nstall this
unit in a confine d space, such as a bookcas e
or similar enclosure.
More than 0. 3 m (12 in.) is recommende d
Do not place a ny other equi pment on this
unit
SAFETY INFORMATION FOR
EUROPEAN CUSTOMERS
• Avoid high temperatures. Allow for sufficient
heat disper sion when installe d in a rack
• Handle the p ower cord carefully. Hol d the
plug when unplugging the cord
• Keep the unit f ree from moisture, w ater, and
dust
• Unplug the power cord when not using the
unit for lon g periods of time
• Do not obstruct the ventilation holes
• Do not let fo reign objects into t he unit
• Do not let insecticides, benzene, and thinner
come in contac t with the unit.
• Never disassemble or m odify the unit in any
way
• Ventilation shouldnot b e impeded by
covering the ventilationo peningswith items,
such as newsp apers, tableclo ths or curtains
• Naked flame s ources such as lighted can dles
should not b e placed on the unit
• Observe and follow local regulations
regarding battery disposal
• Do not exp ose the unit to dripping o r
splashing fluids
• Do not place o bjects filled with l iquids, such as
vases, on th e unit.
• Do not handl e the mains cord with wet hand s
• When the sw itch is in the OFF position, t he
equipme nt is not completely swi tched off
from MAINS
• The equip ment shall be installe d near the
power supp ly so that the power suppl y is
easily accessible
FCC/IC INFORMATION FOR US AND
CANADA CUSTOMERS
1. Pro duct
This produ ct complies with Par t 15 of the
FCC Rules/ Industry Canada licence-exempt
RSS standa rd(s). Operatio n is subject to the
followin g two conditions: (1) This device may
not cause har mful interferen ce, and (2) this
device must accept any interference received,
including i nterference that may c ause undesired
operation.
Le présent appa reil est conforme aux CNR
d’Industrie Canada applicables aux appareils radio
exempts de licence. L’exploitationest autorisée
aux deux condi tions suivantes : (1)l ’appareil ne
doit pas produ ire de brouillage, et (2) l’uti lisateur
de l’appareil d oit accepter tout brouilla ge
radioélec trique subi, même si le bro uillage est
susceptibled ’encompromettre le fonctionnement.
Changes or modifications not expressly
approved by th e party respons ible for
compliance could void theuser ’s authority to
operate th e equipment.
2. Important notice: do not modify
this product
This produ ct, when installe d as indicated in the
instruc tions contained in this m anual, meets
FCC requirements.
Modification not expressly approved byARCAM
may void your aut hority, granted by the FCC, to
use the product.
3. Note
This produ ct has been tested an d found to
comply with t he limits for a Class B digi tal
device, per suant to Part 15 of the FCC Rules.
These limits are designed to provide reasonable
protection against harmful inter ference in a
residential installation.
This produ ct generates, uses a nd can radiate
radio frequency energy and, if not installed
and used in accordance with the instructions,
may cause har mful interference to r adio
communications. However, there is no
guarantee that interference will not occur in
a partic ular installation. I f this product does
cause harm ful interference to radio or tele vision
reception , which can be determi ned by turning
the produc t OFF and ON, the user is en couraged
to try to corr ect the interfer ence by one or more
of the follow ing measures:
• Reorient or relocate the receiving antenna.
• Increase the separation between the
equipment and receiver.
• Connect t he product into an outl et on a circuit
different f rom that to which the receive r is
connected.
• Consult the local retailer authorized
to distribu te this type of produ ct or an
experienced radio/TV technician for help.
FDA INFORMATION FOR US
CUSTOMERS
Complies wi th 21 CFR 1040.10 and 1040.11
except for de viations pursuant to La ser Notice
No. 50, dated Ju ne 24, 2007.
CANADA STATEMENT
This produ ct contains IC 9088 -BLR7601HL.
Operati on is subject to the foll owing two
conditions:
(1) this product may not ca use harmful
interence, an d (2) this produc t must accpet any
inteference received, including interference that
may cause und esired operation.
This Class B digital apparatus complies with
Canada ICES-003.
Under Industry Canada regulations, this
radio tran smitter may only oper ate using
an antenna of a t ype and maximum (or
lesser) gain a pproved for the transmi tter by
Industry Canada. To reduce potential radio
interference to other users, the antenna type
and its gain s hould be so chosen that th e
equivalent isotropically radiated power (e.i.r.p.)
is not more tha n that necessary for s uccessful
communication.
Conformément à la réglementation d’Industrie
Canada, le prés ent émetteur radio pe ut
fonctionn er avec une antenne d’un t ype et d’un
gain maximal (ou inférieur)approuvé pour
l’émetteur p ar Industrie Canada. Da ns le but de
réduire les risques de brouillage radioélectrique
à l’intention de s autres utilisateurs, il fa ut
choisir le ty pe d’antenne et son gain de so rte
que la puissance isot rope rayonnée équival ente
(p.i.r.e.) ne dépas se pas l’intensité nécessaire à
l’établissement d ’une communication satisfa isante.
MPE Reminding
To satisfy FCC / IC RF e xposure requireme nts, a
separati on distance of 20 cm or more sh ould be
maintaine d between the anten na of this device
and persons during device operation. To ensure
compliance, operations at closer than this
distance is not recommended.
Les antennes instal lées doivent être située s de
facon à ce que la popu lation ne puisse y être
exposée à un e distance de moin de 20 cm. Installe r
les antennes de fa con à ce que le personnel ne
puisse appro cher à 20 cm ou moins de la positio n
centrale de l’ ante nne. La FCC des éltats-unis stipul e
que cet appare il doit être en tout temps élo igné
d’au moins 20 cm des pe rsonnes pendant son
functionnement.
safety
Important safety instructions
1. Read these instructions
All the safety and operating instructions should be
read before this product is operated.
2. Keep these instructions
The safety and operating instructions should be
retained for future reference.
3. Heed all warnings
All warnings on the appliance and in the operating
instructions should be adhered to.
4. Follow all instructions
All operating and use instructions should be
followed.
5. Do not use this apparatus near water
The appliance should not be used near water or
moisture – for example, in a wet basement or near a
swimming pool.
6. Clean only with dry cloth.
7. Do not block any ventilation openings. Install in
accordance with the manufacturer’s instructions.
8. Do not install near any heat sources such as
radiators, heat registers, stoves, or other apparatus
(including amplifiers) that produce heat.
9. Do not defeat the safety purpose of the polarized
or grounding-type plug. A polarized plug has two
blades with one wider than the other. A grounding
type plug has two blades and a third grounding
prong. The wide blade or the third prong are
provided for your safety. If the provided plug does
not fit into your outlet, consult an electrician for
replacement of the obsolete outlet.
10. Protect the power cord from being walked on
or pinched particularly at plugs, convenience
receptacles, and the point where they exit from the
apparatus.
11. Only use attachments/accessories specified by the
manufacturer.
12. Use only with the cart, stand, tripod, bracket, or
table specified by the manufacturer, or sold with the
apparatus. When a cart is used, use caution when
moving the cart/apparatus combination to avoid
injury from tip-over.
13. Unplug this apparatus during lightning storms or
when unused for long periods of time.
This equipment is a Class II or double insulated
electrical appliance. It has been designed in
such a way that it does not require a safety
connection to electrical earth.
Correct disposal of this product
This product contains electrical or electronic materials.
The presence of these materials may, if not disposed
of properly, have potential adverse effects on the
environment and human health. Presence of this label
on the product means it should not be disposed of as
unsorted waste and must be collected separately. As
a consumer, you are responsible forensuring that this
product is disposed of properly.
Safety compliance
This equipment has been designed to meet the IEC/
EN 60065 international electrical safety standard.
This device complies with Part 15 of the FCC Rules.
Operation is subject to the following two conditions:
(1) This device may not cause harmful interference,
and (2) this device must accept any interference
received, including interference that may cause
undesired operation.
Use of controls or adjustments or performance of
procedures other than those specified herein may
result in hazardous radiation exposure.
14. Refer all servicing to qualified service personnel.
Servicing is required when the apparatus has been
damaged in any way, such as power-supply cord or
plug is damaged, liquid has been spilled or objects
have fallen into the apparatus, the apparatus has
been exposed to rain or moisture, does not operate
normally, or has been dropped.
15. Please keep the unit in a well-ventilated
environment.
WARNING:To reduce the risk of fire or electric shock, do not expose
this apparatus to rain, moisture, dripping or splashing. Objects
filled with liquids, such as vases should not be placed on the
apparatus.
WARNING:The mains plug or appliance coupler is used as a
disconnect device, the disconnect device shall remain readily
operable.
This lightning flash with arrowhead symbol within an equilateral
triangle is intended to alert the user to the presence of non-insulated
‘dangerous voltage’within the product’s enclosure that may be of
sufficient magnitude to constitute a risk of electric shock.
Warning: To reduce the risk of electric shock, do not remove cover
(or back) as there are no user-serviceable parts inside. Refer
servicing to qualified personnel.
The exclamation point within an equilateral triangle is intended to
alert the user to the presence of important operating and maintenance
instructions in the literature accompanying the appliance.
zz
z
Wall
z
A NOTE ABOUT RECYCLING
This produ ct’s packaging ma terials are
recycla ble and can be reused . Please dispose
of any material s in accordance with the loc al
recycling regulations. When discarding the
unit, compl y with local rules or re gulations.
Batteri es should never be throw n away or
incinerat ed but disposed of in acco rdance
with the local regulations concerning battery
disposal . This product and the s upplied
accessories , excluding the batteries,
constitute the applicable product according
to the WEEE dire ctive.
CORRECT DISPOSAL OF THIS
PRODUCT
These mar kings indicate that this p roduct
should not be disposed with other household
waste throughout the EU. To prevent possible
harm to the envi ronment or human health
from uncontrolled waste disposal and to
conserve m aterial resources, thi s product
should be recycled responsibl y.
To dispose of your pro duct, please use
your local return and collection systems or
contact the retailer where the product was
purchased.

E-7E-6
English
before you
begin...
Placing the unit
< Place the unit on a level, firm surface,
avoiding direct sunlight and sources
of heat or damp.
< Do not place the unit on top of a
power amplifier or other source of
heat.
< Do not place the unit in an enclosed
space such as a bookcase or closed
cabinet unless there is good provision
for ventilation. The product is
designed to run warm during normal
operation.
< Do not place any other component
or item on top of the unit as this may
obstruct airflow around the heat-sink,
causing the product to run hot. (The
unit placed on top of the amplifier
would also become hot.)
< Make sure the remote-control receiver
to the left of the front panel display
is unobstructed, otherwise this will
impair the use of the remote-control.
< Do not place your record deck on top
of this unit. Record decks are very
sensitive to the noise generated by
mains power supplies which will be
heard as a background‘hum’if the
record deck is too close.
< The normal function of the unit
may be disturbed by strong
electromagnetic interference. If this
occurs, simply reset the unit with the
power button, or move the unit to
another location.
Power
The amplifier is supplied with a moulded
mains plug already fitted to the lead.
Check that the plug supplied fits your
supply – should you require a new mains
lead, please contact your Arcam dealer.
If your mains supply voltage or mains plug
is different, please contact your Arcam
dealer immediately.
The Solo can be switched for operation
between 220–240V (switch position 230V)
and 110–120V (switch position 115V).
NOTE
Ensure that the Solo is switched off
and the power lead removed before
changing the position of the voltage
range switch. Also ensure that this
selector switch is set to the appropriate
voltage for your region.
Push the IEC plug end of the power cable
into the socket on the back of the unit,
making sure that it is pushed in firmly.
Plug the other end of the cable into your
mains socket and, if necessary, switch the
socket on.
The unit can be turned on using the
POWER switch on the front panel. While
switched on, the power button LED will
glow green.
Standby power
The Solo can be switched into standby
mode using the 2button on the remote
control. While in standby mode the power
button LED will glow red and power
consumption is less than 0.5 Watts.
While in standby mode, it may be possible
to hear a slight residual hum coming
from the mains transformer inside
the amplifier.This is perfectly normal.
However, if the unit is to be left unused for
an extended period, we recommend that
you disconnect it from the mains supply to
save power.
Interconnect cables
We recommend the use of high-quality
screened cables that are designed for the
particular application. Other cables will
have different impedance characteristics
that will degrade the performance of your
system (for example, do not use cabling
intended for video use to carry audio
signals). All cables should be kept as short
as is practically possible.
It is good practice when connecting your
equipment to make sure that the mains
power-supply cabling is kept as far away
as possible from your audio cables. Failure
to do so may result in unwanted noise in
the audio signals.
For information on speaker cabling, please
refer to“speakers”on page E-15.
Radio interference
The Solo is an audio/video device
containing microprocessors and other
digital electronics. Each model has been
designed to very high standards of
electromagnetic compatibility.
environment this product may cause radio
interference, in which case the user may
be required to take adequate measures.
If the Solo causes interference to radio
or television reception (which can be
determined by switching the Solo off and
on), the following measures should be
taken:
< Re-orient the receiving antenna
or route the antenna cable of the
affected receiver as far as possible
from unit and its cabling.
< Relocate the receiver with respect to
the Solo
< Connect the affected device and the
Solo to different mains outlets.
If the problem persists, please contact
your Arcam dealer.
Laser radiation
CLASS 1
LASER PRODUCT
If the built-in disc
player of the Solo is
operated whilst the
outer casing is
removed, invisible radiation could cause
eye damage.
What’s in the box?
< Solo movie/music
< Remote control
< 2 x AAA batteries
< DAB/FM antenna
< Bluetooth antenna
< Wi-Fi antenna
< User manual
< Registration card
< Power cord
overview
The Solo represents a new dimension in
experiencing music and movies.
Solo brings the performance normally
associated with high fidelity separates to
a new audience of style-conscious music
and movie lovers. When coupled with
Arcam’s proprietary decoding techniques,
the resulting picture and sound are simply
world class.
Arcam developed the world’s first DAB
radio and the clarity of reception will bring
hours of musical enjoyment from the
built-in DAB and FM receiver.
Arcam has brought all its experience to
bear to deliver stunning surround-sound
decoding and amplification from high
resolution Dolby True HD, DTS Master
HD decoding modes. The remote control
supplied with the Solo is a back lit
‘universal’controller. It is easy to set up
and can be used to control a complete
system. It can be programmed using a
vast internal code library to control set top
boxes, TVs and audio/video devices.
At last an all-in-one home cinema
system with a level of performance that
will truly bring music and movies to life.
This is a Class B product. In a domestic

E-9E-8
English
front panel
Front panel controls
Input selection
Select the input source connected to the
corresponding internal or external input
INPUT- backwards through input sources
INPUT+ forwards through input sources
The display indicates selected source
Headphones
3.5mm stereo jack socket, intended
for use with a set of headphones
with an impedance rating between
32Ω and 600Ω
Stop/Eject
Press the </1button once for‘pre-stop’;
press again for a‘complete stop’. Once
stopped, pressing again ejects the disc.
NOTE: some discs can’t be ejected in certain
situations (e.g. while the disc is displaying a
copyright notice)
Play/Pause
Press the 4/;button
to start/pause
playback
Skip backward/forward
Press the 0//buttons to skip
backward/forward video chapters on
BD/DVD disc, or audio tracks on an
audio disc
Power
Turn the Solo on
or off
top panel
MUTE
MENU
OK
DISPLAY
Disc/System Menu
Accesses disc menu, if BD/DVD present
Accesses the Solo system menu, if no BD/DVD present
OK
Confirm a selection
Display
Cycles through the dimming
states of the front panel
Mute
Mutes all outputs
Navigation keys
Use the 3,4,5,6keys to
navigate the files and menus on
the screen.
Volume control
Rotate clockwise to increase
volume, anti-clockwise to
reduce it.
Top panel controls
System Menu
Accesses the Solo system menu

E-11E-10
English
rear panel
Rear panel connections
HDMI OUTAV SAT PVR GAME
NET
DAB/FM
TV
USB 5V 500mA
STB LINE SUB
BT
WIFI
SUPPLY
VOLTAGE
115V 230V
~ 50 - 60Hz, 1kW MAX.
SR FR C FL SL
IR IN
AUX
POWER INLET
RS232
8ΩLOAD IMPEDANCE RECOMMENDED
SPEAKER OUTPUTS
LR
AUX
3.5mm stereo jack, used
to connect an analogue
audio source.
See “Aux in”on page E-12
SUB
LFE output, used to connect a
subwoofer.
See “Connecting speakers” on
page E-15
HDMI OUT
Used to connect a TV
and as the Audio Return
Channel (ARC).
See “Connecting digital
devices via HDMI” on page
E-11 for more information.
USB
Insert a USB flash
memory device here.
See “disc & file formats” on
page E-16
Power inlet
Connect the correct
mains cable here.
Voltage select
Ensure that the
voltage selected
matches your local
power supply.
Network connection
Connect to your home
network router.
For more information see
“Network connection” on
page E-13.
RS232
Connect to a third party home automation
system.
See “Serial connection” on page E-13
DAB/FM
Connect the supplied DAB/FM antenna
See “DAB/DAB+ and FM aerial” on page E-14
HDMI inputs
Connect the HDMI outputs of
your devices here.
For information, see “Connecting
digital devices via HDMI” on page
E-11.
TV
Connect to the optical output of
your TV
See “Optical audio in” on page E-12
STB
Connect to the coaxial
digital output of your
settop box
See “Coaxial audio in” on
page E-12
LINE L/R
Connect a stereo phono cable
from an analogue device
See “Line in” on page E-12 IR IN
Connect an external remote
control device
See “Infrared connection” on
page E-13
BT and Wi-Fi
Connect the supplied BT and
Wi-Fi antennae
See “Bluetooth/Wi-Fi antenna”
on page E-14
Speaker outputs
Connect the speakers to
these terminals.
See “speakers” on page E-15
R L
8ΩLOAD IMPEDANCE RECOMMENDED
SPEAKER OUTPUTS
audio/video
connections
Introduction
Before connecting your Solo to your
source components and speakers,
please read through the next few pages
which will explain all the input and
output connectivity that is available. The
“speakers”section explains how to connect
up your speakers to avoid damage to
the amplifier and how to arrange your
speakers for best performance.
General
The inputs are named to make it easier to
reference connected devices (e.g.‘AV’ or
‘SAT ’). They all have the same input circuit,
so there is no reason why you should not
connect a different device to any of the
inputs. For example, if you had two games
consoles and the AV input was not being
used, then the second games console
could be connected to the AV input.
Connecting digital devices
via HDMI
Many digital devices including set-top
boxes, Blu-ray players, DVD players,
games consoles and camcorders can be
connected using an HDMI connection.
Note that when using this method of
connection, the image will be displayed
by your TV and the sound will be played
through speakers attached to your Solo.
No other audio connections are needed.
GAME HDMI OUTPVRSATAV
Camcorder
Personal video recorder
Satellite box Games console
Personal video recorder
Satellite box Games console
Camcorder

E-13E-12
English
Optical audio in
If your TV set does not support ARC,
connect the optical audio output of the TV
to this input
Coaxial audio in
Connect the coaxial audio output of your
set-top box
Digital audio connections Analogue audio connections
Line in
Connect any analogue audio device to
these inputs using a RCA stereo phono
cable
Aux in
Connect any analogue audio device to the
AUX input using a 3.5mm jack lead
other
connections
Bluetooth connection
The Solo has built in Bluetooth wireless
technology for seamless integration with
any Bluetooth enabled device.
Pairing with Bluetooth devices
To place the Solo in pairing mode, select
the Bluetooth input, then press and hold
the OK key on the remote control. Follow
the advice provided in the operation
instructions for your Bluetooth device.
Select SOLO XXXXXX (where XXXXXX
is a unique number assigned to your
Solo) from the list of Bluetooth devices to
complete the pairing. Once the pairing
procedure is finished, it does not need to
be performed again.
USB connection
USB memory devices (flash drives) can be
used for media playback and are necessary
for storage of downloaded BD-Live
content. To enjoy BD-Live content, the
following specification is recommended:
< Capacity 2GB or more
< Formatted FAT32
< USB2.0 high speed (480Mbps)
The Solo can also play files stored on a USB
mass storage device, typically a pen drive,
but any USB device that complies with the
‘mass storage device‘ class is compatible.
The Solo only supports the direct
connection of USB devices and will not
support devices connected through a
hub. If regular access to the USB socket
is required, you may find it convenient
to use a USB extension lead; see ”disc &
file formats”on page E-16 for details of
supported file types.
This connection can also be used for
software upgrades. Please refer to“USB
firmware update”on page E-35 for further
details.
Serial connection
This connector is used with control
devices having an RS232 serial port (for
example, Crestron and AMX touch-screen
controllers).
Network connection
The Solo can be connected to your
network using either a wired or wireless
connection.
Wireless connection
In order to connect to your Wi-Fi network,
the supplied Wi-Fi antenna needs to be
connected to the Solo and the unit’s
wireless settings must be correctly
configured. Please refer to“Bluetooth/
Wi-Fi antenna”on page E-14, for antenna
installation instructions and “Network”on
page E-30 for information on setting up
the wireless network interface.
Infrared connection
The infrared input allows the connection
of external IR receivers, when the Solo
front panel IR receiver is fully or partially
obstructed.The tip is the modulated signal,
sleeve is ground.
A supplier of infra-red receivers and
emitter accessories and systems is
Xantech. See www.xantech.com for more
information, or ask your Arcam dealer
tip: Modulated signal
sleeve: Ground
NOTE
The IR input is designed for modulated
signals. If the external IR receiver
demodulates the IR signal, it will not work.
Also the unit does not provide power for
external receivers on the IR jack, therefore
an external power source will be required.
Wired connection
If an Ethernet cable is connected, the Solo
will automatically attempt to connect to
your network.
You should use CAT5 cable plugged into
the RJ45 socket labelled NET on the rear
panel.
If your network uses static IP addressing
rather than DHCP, you will need to
provide IP address, gateway and DNS; see
“Network” on page E-30 for information
on setting up the network.
STB
SET-TOPBOX
SET-TO P BOX
MP3 Player
RL
MP3 Player MP3 Player
AUX
MP3 Player
Internet
1 2 3 4NET
HDMIOUTAV SAT PVR GAME
NET
DAB/FM
TV
USB5V 500mA
STB LINE SUB
BT
WIFI
SUPPLY
VOLTAGE
115V 230V
~50 - 60Hz, 1kW MAX.
SR FR C FL SL
IRIN
AUX
POWERINLET
RS232
8 LOADIMPEDANCE RECOMMENDED
SPEAKER OUTPUTS
LR
RS232
Network Router Home Automation Device
Internet
Network Router Home Automation Device

E-15E-14
English
antenna
connectors
DAB/DAB+ and FM aerial
The Solo is fitted with an FM and a DAB/
DAB+ receiver module.The type of aerial
you need depends on your listening
preferences and the local conditions.
Your Solo is capable of superb radio
reception, but only if it is receiving a good
quality transmission signal.
Try the aerials supplied with your unit.
If you are in a medium to strong signal
area, these should be adequate for good
reception. In areas with poor signal
strength, you may require a roof or loft
mounted aerial.
Contact your local Arcam dealer or aerial
installation experts for advice about local
reception conditions.
In strong signal areas, the DAB/DAB+/FM
‘T’ wire aerial supplied can be used with
reasonable results. Mount the aerial as
high up as possible on a wall.
In the UK the ‘T’-elements need to be
positioned vertically for DAB/DAB+
reception since broadcasts are vertically
polarised. In other localities, check with
your Arcam dealer or try both horizontal
and vertical positions for best reception.
Bluetooth/Wi-Fi antenna
The Solo is supplied with both a Bluetooth
and Wi-Fi antenna.
The two antennae are identical and need
to be inserted into the connectors labelled
BT and WiFi located at the rear of the Solo.
Try each usable wall of the room to see
which gives best reception and use tacks
or adhesive tape to secure the aerial in a
‘T’ shape, but note that no tacks should
come into contact with the internal wire
of the aerial.
In weak signal areas, a high-gain,
externally-mounted or roof-mounted
aerial is desirable in order to receive the
highest number of services.
In Band III transmission areas (such as
the UK), use a multi-element Yagi aerial
with the elements mounted vertically,
as the transmissions are vertically
polarised. If you are close to more than
one transmitter, use an omnidirectional or
folded dipole aerial.
If the DAB/DAB+ services in your area
are transmitted on L-band, then ask your
dealer for advice for the best aerial to use.
HDMI OUT
SAT
PVR GAME
DAB/FM
SUB
BT
WIFIIR IN
AUX
RS232
speakers
Connecting speakers
The Solo is designed to drive a set of up
to five speakers, rated between 4 and
8 ohms. The unit is fitted with speaker
terminals that can accept either spade
terminals or bare wires.
The speakers are:
< Solo movie: LS (Left Surround), L
(Left), C(Centre), R(Right) and RS
(Right Surround).
< Solo music: L(Left), R(Right)
An active subwoofer may be connected
to the SUB output. See the diagram on
this page for recommended speaker
placement.
Speaker cables
The speakers should be connected to
the Solo using good-quality, high-purity,
copper cables. Solid core cables, or
those with surface-only conductors, are
particularly suitable. Bell wire and very
cheap speaker cables should be avoided,
as they significantly degrade the sound
quality.
Connections to the speaker terminals
should always be tight, whether using
bare wires, spade connectors or“banana”
plugs, but do not use tools such as pliers,
wrenches or spanners to tighten the
connectors as these may cause damage to
the terminals.
Speaker positioning
The advice given here is a general
guideline for setting up speakers. Refer
to the documentation supplied with your
speakers for more precise information.
Visit www.dolby.com for usefuI
information on listening-room layouts.
Room acoustics
Your room’s shape and how it is furnished
will affect the sound you hear. For
instance, too many bare surfaces may
cause a harshness to the sound. Carpets,
wall-hangings and curtains can all help.
If you have a choice of listening rooms,
avoid one that is perfectly square or has
one dimension exactly twice another. Such
a room can aggravate resonances that
colour the sound.
The closer you place a speaker to corners
and the intersection of wall and floor or
wall and ceiling, the stronger the bass
output, which may over-emphasise the
bass. Moving a speaker just a few inches
can sometimes make a big difference
0˚
90˚
110˚
22˚
30˚
C
R
L
LS
RS
SUB
Speaker setup
Proper speaker placement is the key to
achieving the best home theatre sound
(see diagrams). As a rough guide, speakers
should be placed on rigid stands about
15cm from the rear wall and at least 60cm
from any side wall.
Speakers should never be placed on
the floor (unless they are floor-standing
speakers), or in corners. Speaker drivers
should be at, or a little above, ear level
when seated. If possible, centre your
seating area between the surround
speakers.
Sound will depend on the acoustics of
the listening room so experimenting with
speaker positioning is very worthwhile.
Subwoofer
The location of the subwoofer will affect
the overall sound quality. Placing it next
to a wall or in a corner will often boost
efficiency and give a cleaner low bass
sound. However, all rooms react differently
and we recommend that you experiment
with positioning by allowing at least 15cm
clearance between the walls and the unit.
Speaker stands
The more firmly a speaker is held, the
better it will sound. We recommend the
use of rigid metal stands of 40–60cm
height.
Ensure that the stands and/or speakers do
not wobble. Properly damped stands that
do not ‘ring’when tapped with a pencil,
will bring out the best in a speaker.

E-17E-16
English
disc & file
formats
Playable discs
The Solo movie supports the following
disc types:
Blu-ray 3D
Blu-ray Disc
DVD-Video
DVD-R
DVD-RW
CD-Audio
CD-R
CD-RW
Super Audio CD
DVD region
code
Area
1North America
2Europe, Japan, Middle
East, Egypt, South Africa,
Greenland
3Taiwan, Korea, the
Philippines, Indonesia,
Hong Kong
4Mexico, South America,
Central America, Australia,
New Zealand, Pacific
Islands, Caribbean
5Russia, Eastern Europe,
India, most of Africa, North
Korea, Mongolia
6China
All All areas
Symbols indicating disc will play in North
America:
Blu-ray Discs: DVDs:
Symbols indicating disc will play in Europe:
Blu-ray Discs: DVDs:
The Solo music supports the following disc
types:
CD-Audio
CD-R
CD-RW
Super Audio CD
Playback of the followning file formats are
supported (over Disc, USB and network) by
both Solo movie and Solo music:
< FLAC, up to 24 bit, 192 KHz
< WAV, up 24 bit, 192 KHz
< AAC, up to 24 bit, 96 KHz
< AIFF, up to 24 bit, 192 KHz
< OGG, up to 24 bit, 192 KHz
< MP3, up to 320 kbps, 48 KHz
< WMA, up to 192 kbps, 48 KHz
Supported video formats
(Solo movie only)
Video file compatibility with your player is
limited as follows:
< Maximum resolution size: 1920x1080
(W x H) pixels
< File extensions: .wmv, .avi, .mp4,
.mpeg, .mpg, .vob, .mkv (Note: Files
encoded by Divx cannot be played on
this player)
< Playable Audio format: Dolby Digital,
DTS, MP3, WMA, AAC
< Sampling frequency: within 32 to
48kHz (WMA), within 8 to 48kHz (Mp3)
< Bit rate: within 32 to 192kbps (WMA),
within 32 to 320kbps (Mp3)
< Not all of the WMA and AAC Audio
formats are compatible with your
player.
< Blu-ray, DVD, or USB 2.0 are
recommended to play back HD WMA
movie files.
< Your player does not support files that
are recorded with GMC (Global Motion
Compensation) or Qpel (Quarter
pixel). Those are video encoding
techniques in MPEG4 standard, like
DivX.
Region coding (Solo movie
only)
Blu-ray disc players and Blu-ray or DVD
discs are assigned region codes according
to the region in which they are sold. If the
region codes do not match, the disc will
not play.
Blu-ray Disc
region code
Area
ANorth America, Central
America, South America,
Korea, Japan, Taiwan,
Hong Kong and South
East Asia
BEurope, Greenland, French
territories, Middle East,
Africa, Australia and New
Zealand
CIndia, China, Russia,
Central and South Asia
A + B + C All areas
Region Selection
Limited by local law regulations, version
for North America does not have region
selection option.
basic operation
Operating your Solo
Introduction
This section explains the basic opration of
the Solo. Note that it may be necessary to
configure the Solo correctly for optimum
performance. Details regarding system
setttings can be found in“settings menu”
on page E-28.
Switching on
Switch the unit on by pressing the power
button. The status LED glows green when
the unit is powered up. If the power
button is pressed (or power is removed)
whilst in standby, the unit will enter
standby mode when power is re-applied.
Standby
The Solo has a standby mode which can
be entered by pressing 2on the remote
control. When in standby mode, the
display is blank and the POWER LED glows
red.
If the unit is to be left unused for an
extended period, we recommend that you
disconnect it from the mains supply to
save power.
To switch on from standby, press the 2
button on the remote control.
Home screen
Press the button at any time to display
the Solo home screen. The home screen
will allow you to access the following:
Start playing a CD/DVD/
BD disc. See“playing a
disc” on page E-25.
Allows you to play
multimedia files. See
“network/usb operation”
on page E-26.
Access the Solo settings
options. See“settings
menu”on page E-28.
Allows the selection of
various inputs of the Solo
Selecting a source
To select a particular source, press
the INPUT- or INPUT+ buttons on the
front panel until that source is shown
on the front panel display, or press the
corresponding source button on the
remote (see“Device mode / Source keys”
on page E-19).
The following sources are available:
RADIO Internal DAB/FM tuner
BT Internal Bluetooth input
MEDIA
Network input (e.g UPnP
devices), USB solid-state
device (e.g. pen drive) input
DISC Internal disc player
AV Audio-Visual HDMI input
SAT Satellite HDMI input
PVR Personal Video Recorder
HDMI input
GAME Game console HDMI input
LINE Phono jack analogue audio
input
AUX 3.5mm analogue audio input
STB Set Top Box coaxial digital
audio input
TV TV optical audio input
A particular input source can also be
selected using the source option from the
home screen, as described in the previous
section.
Volume control
The volume can be increased or decreased
either by turning the top panel rotary
control (see“Top panel controls”on page
E-9) or by using the volume control
button on the remote control (see“Volume
control”on page E-19).
Headphones
To use headphones with the Solo, plug the
headphones into the phones socket on
the front panel.
When headphones are plugged into the
front panel phones socket, the speaker
and sub outputs are muted and the audio
will be down-mixed to two channels (2.0).

E-19E-18
English
remote control
The Solo universal remote
control
The Solo remote is a sophisticated
‘universal’backlit remote control that
can control up to eight devices. It is pre-
programmed for use with the Solo and
with its extensive built-in library of codes,
it can also be used with thousands of third
party audio-visual components, such as
TVs, satellite receivers, set-top boxes, PVRs,
etc.
The Solo remote is a‘learning’ remote, so
you can teach it almost any function from
an old single-device remote.
Inserting batteries into the remote
control
< Open the battery compartment on
the back of the handset, by removing
its cover.
< Insert two ‘AAA’batteries, as indicated
in the battery compartment.
< Place the battery compartment cover
back firmly into its locked position
with a click.
Using the remote control
Please keep in mind the following when
using the remote control:
< Ensure there are no obstacles
between the remote control and
the remote sensor on the Solo. The
remote has a range of about 7 metres.
(If the remote sensor is obscured, the
IR remote control input jack on the
rear panel is available. Please consult
your dealer for further information.)
< Remote operation may become
unreliable if strong sunlight or
fluorescent light is shining on the
remote sensor of the Solo.
< Replace the batteries when you notice
a reduction in the operating range of
the remote control.
NOTE
< Incorrect use of batteries can result
in hazards such as leakage and
bursting.
< Do not mix old and new batteries
together.
< Do not use non-identical batteries
together – although they may look
similar, different batteries may have
different voltages.
< Ensure the plus (+) and minus (-)
ends of each battery match the
direction indicated in the battery
compartment.
< Remove batteries from equipment
that is not going to be used for a
month or more.
< When disposing of used batteries,
please comply with governmental
or local regulations that apply in
your country or area.
The Solo remote complies with
Part 15 of the FCC rules
This equipment has been tested and
found to comply with the limits for
a class B digital device, pursuant to
part 15 of the FCC Rules. These limits
are designed to provide a reasonable
protection against harmful interference
in a residential installation. This
equipment generates, uses, and can
radiated radio frequency energy and if
not installed and used in accordance
with the instructions, may cause harmful
interference to radio communications.
However, there is no guarantee that
interference will not occur in a particular
installation. If this equipment does
cause harmful interference to radio
or television reception, which can be
determined by turning the equipment
off and on, the user is encouraged to
try to correct the interference by one or
more of the following measures:
< Reorient or relocate the receiving
antenna.
< Increase the separation between the
equipment and receiver.
< Connect the equipment into an
outlet or a circuit different from that
to which the receiver is connected.
< Consult the dealer or an
experienced radio/TV technician
for help.
Useful information
Backlight
A backlight comes on for eight seconds
whenever a key is pressed. This helps
you use the handset in subdued lighting
conditions.
Power LED blinks
Short blinks indicate a valid key press.
Multiple short blinks convey information
(such as a device code) or signal the
beginning and successful completion of a
programming sequence.
The symbol‘*’ is used in the manual to
indicate a power LED blink.
Timeouts and unassigned keys
Time out – After 30 seconds, the remote
exits the programming state and returns
to normal operation.
Stuck key timeout – After any key is
pressed continuously for 30 seconds,
the remote control stops sending IR
transmission to conserve battery life. The
remote control remains off until all keys
are released.
Unassigned keys – the remote ignores any
unassigned key presses for a particular
device mode and does not transmit IR.
Low voltage indicator
When the batteries are running down, the
LED flashes five times whenever you press
a button:
* * * * *
If this happens, fit two new AAA alkaline
batteries as soon as possible.
Device mode / Source keys
As the remote can control your Solo
as well as a range of other equipment,
many of the buttons have more than one
function depending on the ‘device mode’
selected on the remote control.
The device mode keys (shown below)
select the source on the Solo. If one of
these keys is pressed briefly, a command
is transmitted to change the source on
the unit.
RADIO Internal DAB/FM tuner
BT Internal Bluetooth input
MEDIA
Network input (e.g UPnP
devices), USB solid-state
device (e.g. pen drive) input
DISC Internal disc player
AV Audio-Visual HDMI input
SAT Satellite HDMI input
PVR Personal Video Recorder
HDMI input
GAME Game console HDMI input
LINE Phono jack analogue audio
input
AUX 3.5mm analogue audio input
STB Set Top Box coaxial digital
input
TV TV optical audio input
Each device mode changes the behaviour
of many of the remote keys to control the
source device appropriately. For example:
in DISC mode 9plays the previous CD
track, but in AV mode 9issues the TV
‘channel down’command.
The remote control remains in the
last selected device mode, so it is not
necessary to press a device mode key
before every command key if all you are
doing is playing or skipping tracks on a
CD, for example.
Navigation keys
The navigation keys steer the cursor in
setup menus or on-screen menus. They
also replicate the navigation functions
of original remotes supplied with other
home entertainment devices in your
system. The OK key confirms a setting.
Volume control
By default, the remote control is set up so
that the volume control and mute buttons
(VOL 5, VOL 6and MUTE) always control
the volume of the Solo, regardless of
which device mode the remote is currently
set for.This is known as volume ‘punch
through’.
For example, if you are listening to a CD,
you will probably have the Solo in CD
device mode to control the CD player.
You can use the volume controls on the
remote directly to adjust the volume of
the Solo without first having to press the
AMP key to put the remote into AMP
device mode. The volume buttons‘punch
through’the CD device mode on the
remote to the AMP device mode.
Volume‘punch through’can be disabled
individually for any device mode if desired.
Customising the Solo
remote
The remote control offers a code learning
feature that allows you to copy up to 16
functions from an original remote control
onto the remote keypad. For details of
this, and other customisation features, see
“customising the remote”on page E-22.

E-21E-20
English
AMP device mode
The AMP device mode button configures
the remote to control the Solo. Pressing
this button does not affect the currently
selected input on the Solo.
The functionality of the Solo is context
sensitive for the internal sources and is
described in the following table.
2Toggles Solo power between
standby and powered on.
1Open/close disc tray.
0…9
Searches for and plays the
track corresponding to the
key pressed when playing
a CD.
SYNC
Lipsync. Delays may be
introduced into the video
signal by video processing
which causes a mismatch
between the audio and
video timing. You will notice
this by speech sound being
out of synchronization with
the lip movements in the
video. To compensate for
this, you can adjust the lip
sync delay. Press the sync
button and use the <and
>navigation buttons. Press
again to exit the lipsync trim
menu.
INFO
Info cycles through the
information displayed on the
lower left portion of the front
panel display
7Rewind CD, DVD or BD.
8Fast Forward CD, DVD or BD.
9
Skip back to the beginning
of the current/previous track
on CD, DVD or BD.
:
Skip forward to the
beginning of the next track
on CD, DVD or BD.
<Stop playback on CD, DVD
or BD.
4Play content on CD, DVD
or BD.
;Pause playback on CD, DVD
or BD.
MENU Disc menu.
POP UP Activates BD pop up menu, if
available.
RTN Return from menu on BD/
DVD menus.
AUDIO
Selects between the
available audio tracks on a
BD/DVD
Navigate the files and menus
on the screen. OK selects the
highlighted file or enters the
highlighted menus on the
screen - equivalent to‘Enter’
or ‘Select’on some remote
control.
AMP+'Power on from standby
AMP+,Standby from Power on
AMP+>Changes the picture
resolution
Returns navigation to the top
level of the menu (‘Home’).
Toggles the mute function of
the Solo
MODE
Cycles through the available
surround and downmix
modes
DISP
Cycles through the front
panel display’s brightness
options
Increase/decrease amplifier
volume
AMP Resets remote to AMP mode
SUBT
Cycles through subtitle
options, if available on DVD
or BD
RED Red button for BD
GREEN Green button for BD
YELLOW Yellow button for BD
BLUE Blue button for BD
RADIO Internal FM/DAB tuner input
BT Internal Bluetooth input
MEDIA Network, USB media input
DISC Internal disc input
AV AV HDMI input
SAT Satellite HDMI input
PVR PVR HDMI input
GAME Game console HDMI input
LINE Phono plug analogue input
AUX 3.5mm plug analogue input
STB STB digital coaxial audio
input
TV TV optical audio output
SAT device mode
The SAT device mode button selects SAT
as the source. If configured to work with
your satellite reciever, the Solo remote can
subsequently control the device.
2Toggles power between
standby and on.
0…9
Functions as original remote
number key – usually for
channel selection.
INFO
Display INFO or OSD (On
Screen Display) function, if
available.
7Rewind
8Fast forward
9Channel down
:Channel up
<Stop playback
4Play content
;Pause content
Record
MENU Menu
Navigate setup and
programme selection menus.
OK confirms a selection
(equivalent to‘Enter’ or‘Select’
on some remotes).
Returns navigation to the top
level of the menu (‘Home’).
RTN Back
AMP Resets remote to AMP mode
RED RED button for Satellite
GREEN GREEN button for Satellite
YELLOW YELLOW button for Satellite
BLUE BLUE button for Satellite
Bluetooth commands
The Bluetooth audio input is selected by
pressing BT in AMP device mode on the
remote control. When connected to an
audio streaming device, the keys below
are used to navigate music tracks.
9/:Selects the previous/next
track in the current playlist.
4Play current track.
<Pause current track.
Network media /USB commands
When using the network client, the keys
below are used to navigate music files in
AMP device mode.
Navigates the files on
screen. OK selects/plays the
highlighted file.
9/:Selects the previous/next
track in the current playlist.
4Play current track.
;Pause current track.
<Stops playback.
Returns navigation to the top
level of the network client
menus (‘Home’).
PVR device mode
The PVR device mode button selects PVR
as the source.
If configured to work with your personal
(hard disc) video recorder or similar device,
the Solo remote can subsequently control
the device.
2Toggles Solo power between
standby and powered on
0…9
Functions as original remote
number key – usually for
channel selection
INFO
Display INFO or OSD (On
Screen Display)function, if
available
MODE Selects the Library or Media
function
7Rewind
8Fast forward
9Channel down
:Channel up
<Stop playback
4Play content
;Pause content
Record
MENU
Opens the EPG (Electronic
Program Guide) on some
satellite and cable set top
boxes
Navigate setup and
programme selection menus.
OK confirms a selection
(equivalent to‘Enter’ or‘Select’
on some remotes)
Returns navigation to the top
level of the menu (‘Home’)
AUDIO Selects the Help function
SUBT Cycles through subtitle
options, if available
AMP Resets remote to AMP mode
RED RED button for PVR
GREEN GREEN button for PVR
YELLOW YELLOW button for PVR
BLUE BLUE button for PVR
STB device mode
The STB device mode button selects STB
as the source.
If configured to work with your set top box
decoder or similar device, the Solo remote
can subsequently control the device.
2Toggles Solo power between
standby and powered on
0…9 Functions as original remote
number key – usually for
channel selection
INFO Display INFO or OSD (On
Screen Display)function, if
available
MODE Selects the Library or Media
function
7Rewind
8Fast forward
9Channel down
:Channel up
<Stop playback
4Play content
;Pause content
Record
MENU
Opens the EPG (Electronic
Program Guide) on some
satellite and cable set top
boxes
Navigate setup and
programme selection menus.
OK confirms a selection
(equivalent to‘Enter’ or‘Select’
on some remotes)
Returns navigation to the top
level of the menu (‘Home’)
AUDIO Selects the Help function
SUBT Cycles through subtitle
options, if available
AMP Resets remote to AMP mode.
RED RED button for set top box
GREEN GREEN button for set top box
YELLOW YELLOW button for set top
box
BLUE BLUE button for set top box
TV device mode
The TV device mode button configures the
Solo remote to control the functions of a
television or other display device. Pressing
this button also selects TV as the source.
2
Toggles power between
standby and on. (Some TVs
require you to use a number
key to turn them on).
0…9
Functions as original remote
number key – usually for
channel selection
INFO
Display INFO or OSD (On
Screen Display)function, if
available
9Channel down
:Channel up
INFO Displays picture information;
this function is TV specific.
MENU Guide
Navigate setup and
programme selection menus.
OK confirms a selection
(equivalent to‘Enter’ or
‘Select’ on some remotes)
Returns navigation to the top
level of the menu (‘Home’)
SUBT Cycles through subtitle
options, if available
AMP Resets remote to AMP mode
RED RED key for TV
GREEN GREEN key for TV
YELLOW YELLOW key for TV
BLUE BLUE key forTV
AV, GAME, LINE and AUX
device modes
The AUX, AV, GAME and LINE device
mode buttons select AUX, AV, GAME and
LINE as the source.

E-23E-22
English
customising the
remote
NOTE
On the following pages, a single‘blink’ of
the remote’s power LED is indicated by
the symbol *.
Code learning
The supplied remote comes with a
complete library of pre-programmed
codes. After you have set up the remote
for your device, you may find that there
are one or more functions on your original
remote which do not have a place on
the keypad. For convenience, the remote
offers a Code Learning feature that allows
you to copy up to 16 functions from an
original remote control onto the remote
keypad.
Before you start, make sure that:
< The original remote control is working
correctly.
< The remotes are not pointing at your
device.
< The remotes have fresh batteries.
< The remotes are not in direct sunlight
or under strong fluorescent lights.
NOTE
Learned functions are mode-dependent.
You could assign up to eight different
functions to a single key – a separate
learned function for each mode.
Direct code setup (Method 1)
The first method is to program the remote
with the 3-digit code number for the
device you wish to control – see“device
code tables”. Make a note of the suggested
number or numbers – the most popular
code is listed first. Now power on the
device.
1. Press the Device key for the product
you want to set up, together with the
1key. Hold down both buttons for
three seconds until the LED stays lit.
2. You are now in setup mode, and you
can release the buttons.
3. Enter a 3-digit code for the device.
4. If the 3-digit code number you
entered is correct for the device, it will
turn off. If it doesn’t turn off, enter the
next code number from your list until
the device does turn off.
5. Once you have found the correct
code, press the Device key again.
The LED blinks three times ***
to confirm that the code has been
successfully stored.
Library search setup (Method 2)
Library search allows you to scan through
all the codes contained in the remote’s
memory. It can take a lot longer than the
previous method, so only use this method
if:
< Your device does not respond to the
remote after you have tried all the
codes listed for your brand.
< Your brand is not listed at all in the
Device Code tables.
1. Press the Device key for the product
you want to set up, together with the
1key. Hold down both buttons for
three seconds until the LED stays lit.
2. Point the remote control at the
product you wish to control and
press the 'or ,button on the
navigation pad. Each time the 'or
,button is pressed, the code counts
up (or down) one code number with a
signal to power off the device.
3. Continue pressing the up or down
button, in approximately one second
intervals, until the device turns off.
(DO NOT alternate the up and down
button – you need to move in only
one direction.)
4. To store the correct code, press the
Device key again. The LED blinks three
times *** to confirm that the
code has been successfully stored.
Learning setup (Method 3)
The third method involves‘teaching’ the
Arcam remote from the original remote
for the device. The two remotes should be
facing each other, approximately 10 cm
apart.
1. Press the Device key for the product
you want to set up, together with the
3key. Hold down both buttons for
three seconds until the LED stays lit.
2. Press the button on the Arcam remote
that you want to assign a command
to. The LED blinks once *indicating
that the remote is ready to learn the
command.
3. Press and hold the appropriate key on
the other remote until the LED blinks
twice **. This indicates the Arcam
remote has learned the command
from your other remote.
4. Continue learning the commands
from your other remote by pressing
the next button on the remote and
repeating steps 2 and 3.
5. Once the remote has learned all the
selected commands, press and hold
the Device key you used to enter
learning together with the Numeric 3
key to store the learned commands.
NOTE
If the Arcam remote LED blinks five times
***** there was an error in the
learning process.
The AMP and RADIO keys do not learn
commands.
Important notes
< Once you start a Code Learning
session, you have approximately ten
seconds to conduct each step. Any
longer, and a timeout means that
you’ll have to start the process again.
< The Learning feature is mode-specific
– you can copy one feature per mode
onto a key
< The remote can learn approximately
16 functions in total.
< To replace a learned function, simply
assign a new function to the same key.
< Learned functions are retained when
you change batteries.
< If Code Learning fails, try altering the
distance between the two remotes;
make sure that the ambient light is
not too bright.
Deleting the learned data
To delete all the learned data for a
device:
1. Press the Device key for the product
you want to set up, together with the
3key. Hold down both buttons for
three seconds until the LED stays lit.
2. Press and hold down the Device key
for the product that you want to erase,
together with the 4key for three
seconds until the LED blinks twice
**.
3. If any further key press is not made for
30 seconds after the LED blinks twice
**, the remote leaves erase mode
without deleting the learned data.
4. If you press the Device key one more
time within 30 seconds after LED
blinks twice **, you can finish
the erase mode deleting all the data
learned on the Device. The LED blinks
three times *** to confirm.
To delete the learned data for a key for
a device:
1. Press the Device key for the product
you want to set up, together with the
3key. Hold down both buttons for
three seconds until the LED stays lit.
2. Press and hold down the key on which
you want to delete the data for three
seconds. The LED blinks twice **.
If any further key press is made, the
remote escapes from erase mode
without deleting the learned data.
3. If any further key press is not made
for 30 seconds, the LED blinks twice
**, the remote get out of the erase
mode automatically without deleting
the learned data.
4. If you press the Device key together
with the 3key again within 30
seconds after the LED blinks twice,
all the data learned for that Device is
deleted and you leave erase mode.
The LED blinks three times ***
in confirmation.
Reading stored code
numbers
1. Press the Device key for the product
that you want to set up together with
the 4key. Hold down both keys for
three seconds until the LED blinks.
2. Press the INFO key and count the
number of blinks (*=1, **=2,
***=3, etc.). There is a time
gap between digits. (Note that
‘0’is represented by ten blinks:
**********.)
Locking/Unlocking a
specific device mode
When you first unpack your remote and
insert the batteries, it is able to control
certain Arcam components automatically
(e.g. Amplifiers, Tuners and Disc Players).
We achieve this by programming specific
Arcam device codes onto the relevant
device mode keys, then locking the device
modes so you don’t reprogram them
inadvertently.
If you want to override these locked
default settings – to control a third-party
amplifier, for example – you will first need
to unlock AMP mode before setting up the
remote using one of the learning methods
described on the previous page.
The factory default settings are:
Device
mode
Default
status
Default
codes
AMP Locked 001 (Arcam
code 16)
AV Unlocked Code
learning only
SAT Unlocked 128 (Sky+)
PVR Unlocked 018 (Humax
9300)
GAME Unlocked Code
learning only
LINE Unlocked Code
learning only
AUX Unlocked Code
learning only
STB Unlocked
030 (Bush,
Goodmans,
Grunding)
TV Unlocked 108 (Philips
TV)

E-25E-24
English
Note that you need to change the system
code on the product you wish to control,
as well as the remote.
1. The device keys that may be Locked or
Unlocked.
2. Lock and Unlock are toggles (they
change from Lock to Unlock to Lock,
etc.).
3. Press and hold the Device and 6keys
together for three seconds.
4. The power LED stays lit, showing that
it is in Lock/Unlock setup mode.
5. If there is no further key input for 30
seconds, the LED goes off and the
remote leaves Lock/Unlock setup
mode.
6. To verify the status of a device, press
the 3 6 9 keys in sequence:
7. f Lock is set, the LED blinks three
times: ***.
8. If Unlock is set, the LED blinks five
times: *****.
9. If you press a valid Device key within
30 seconds, the LED blinks three
times: *** and the remote leaves
Lock/Unlock setup mode.
Controlling the volume of
other devices
By default, the volume keys and mute key
control the amplifier volume.
You can configure these buttons so they
send volume commands to another
device. In the following example, the
volume commands are sent to a linked AV
device (your television, for instance):
1. Press AV+5for three seconds, until the
LED lights and stays on.
2. Press VOL UP.
3. Press AV again. The LED blinks three
times ***.
The volume and mute keys will now send
the volume commands to the TV.
To set the volume buttons to control the
amplifier once more, repeat the above
steps, except press AMP in step 3.
Hidden commands
Command Effect
AMP+'Sends a Power On
command
AMP+,Sends a Power Off
command
Factory default reset
You can reset your remote to the original
factory default settings.
Press and hold both the (HOME)
and MENU keys for about five seconds
until the power LED blinks five times
*****.
All programming and setup codes that
you have entered into the remote are
erased and the remote returns to the
original factory default settings.
Device codes
The tables that begin on“device code
tables”on page DC-1 (at the end of
this user manual) list 3-figure codes for
different manufacturers’devices.
Use these when setting your remote up
to control your devices, as described in
“Direct code setup (Method 1)” on page
E-22.
If more than one code number is listed,
try the first number. If the results are
unsatisfactory, continue trying the
numbers for that manufacturer to get the
best ‘fit’with the functionality required.
If the manufacturer of your equipment is
not listed, you can try “Library search setup
(Method 2)” on page E-22. This method
allows you to scan through every code
contained in the remote’s memory.
playing a disc
Disc information
Press and hold the INFO key on the remote
control to display the information bar at
the top of your TV screen. An example is
given above, but the information shown
depends on the disc type. It usually
includes the disc type, the current track,
the total number of tracks and the elapsed
track time.
Press and hold INFO again to turn this
display off.
Disc menus
Many BD Video and DVDVideo discs
contain a disc menu, top menu or pop-up
menu which guides you through the
available functions in the disc.
The contents of menus and corresponding
menu operations depend on the disc.
Popup Menu: Press POP UP key to display
the ‘Popup’menu on the TV.
Use the remote control cursor keys to
navigate the menus. Highlight an item and
press OK to select it, otherwise, press the
POP UP key to exit the menu.
Soundtrack selection
Some discs contain multiple audio
streams, such as a standard Dolby Digital
5.1 soundtrack and a high definition Dolby
TrueHD surround soundtrack. The audio
stream can be changed during playback.
The secondary audio (e.g. director’s
commentary) of Blu-Ray Discs (if present)
can also be changed if alternatives are
available.
Note: Audio language is changed using
the settings menu: see “Language”on
page E-30.
Press AUDIO to cycle through the
available audio streams.
Subtitles
Some discs contain multiple subtitles. The
subtitles can be changed during playback.
Subtitles for the secondary video (e.g.
director’s commentary) of Blu-Ray Discs
(if present) can also be changed (if
alternatives are available).
NOTE
< The subtitle language is changed
using the setting menu. Refer to
“Language”on page E-30
Press SUBT to display the current subtitle
information: Keep pressing the SUBT
button to cycle throught all the available
disc subtitles.
Bonusview and BD-Live
Bonusview and BD-Live are features of the
Blu-ray Disc format.
Bonusview provides Picture in Picture and
Virtual Package functions for compatible
discs. BD-Live discs additionally provide a
variety of features via the Internet.
Virtual Package/BD-LIVE data must
be saved to a USB memory device
connected to the Solo. To enjoy these
functions, connect a USB memory device
(minimum 1 GB capacity; 2 GB or more
is recommended) supporting FAT 32 and
USB 2.0 High Speed (480 Mbit/s) to the
USB connector. (For details, refer to“USB
connection”on page E-13)
If there is insufficient storage space, the
data is not copied/downloaded. Delete
unneeded contents or use a new USB
memory device.
< If a USB memory device containing
other contents (previously recorded)
is used, the video and audio may not
play back properly.
< If the USB memory device is
disconnected from this unit during
playback of Virtual Package/BD-LIVE
contents, playback of the disc will
stop.
< Some time may be required for the
contents to load (read/write).
NOTE
< It may not be possible to use
the BD-LIVE functions if there
is insufficient space on the USB
memory device. In this case, refer to
“System”on page E-32 for erasing
the Virtual Package contents and
the BD-LIVE contents in the USB
memory device.
< Operation of all USB memory
devices is not guaranteed.
< Plug the USB memory device
directly into the USB connector –
do not use an extension cable or
multiple connector socket.
Virtual Package
Blu-ray discs supporting Virtual Package
allow for extra content to be automatically
transferred from the disc or from the
Internet to USB storage for interactive
viewing. Features available include
secondary video and audio, subtitles and
movie trailers.
NOTE
< Playback methods are disc-
dependant – refer to the disc
manual.
< Playback operations may require
use of the colour-coded keys on the
remote control.
BD-Live
The Solo is compatible with BD-Live,
allowing for a variety of functions when
used with BD-Live compatible discs.
BD-Live allows content such as the latest
movie trailers and BD-J interactive games
to be downloaded from the Internet to
USB storage.
Available BD-Live functions are entirely
dependant on the Blu-ray disc being
played. Consult the disc manual for
operational information.
NOTE
< TheSolo must have an active
Internet connection to use BD-Live
functions. Refer to “Network” on
page E-30
< BD-Live Internet access can be
disabled using the BD-Live Internet
access setting in the System menu.
See “Network”on page E-30
< Playback operations may require
use of the colour-coded keys on the
remote control.

E-27E-26
English
Playing media files
The MY MEDIA icon is shown on screen
when the Solo is first switched on. To
play video, image files (e.g. photographic
slideshows) or audio files, highlight the
MY MEDIA icon and press OK.
Video and audio files can be played from
the uPnP Network, USB media or CD-R/
RW discs. For a list of supported audio and
video file formats, see“disc & file formats”
on page E-16
To play media files, insert the USB device
or data disc into the player.The MY MEDIA
menu is displayed with music, video and/
or picture file symbols:
To play all available files without making
any selection, press <to go to the Play
menu, described below.
To select particular files, use the '/,
cursor keys on the remote control to
highlight the media device to navigate
the MY MEDIA menu. Press OK to select
the media device and display the file and
folder contents.
NOTE
When there are no playable files or
folders within the selected media or
folder,‘Empty’ is displayed.
You can play a single file or playlist
(containing up to 100 selected files). Use
the '/,cursor keys on the remote
control to highlight a file or playlist and
press OK to select it. The 7and 8keys
can be used to skip one page up or down.
The 9and :keys can be used to skip 10
pages up or down.
Play a music file
Use the '/,cursor keys to highlight
a music file and press OK or 4to start
playback.
Play a video file
Use the '/,cursor keys to highlight
a video file and press OK or 4to start
playback. Press DISPLAY to view relevant
video file playback information.
Rapid playback
Press 7or 8during playback to activate
rapid reverse or forward playback. Further
button presses change the playback
speed. Speeds of 2x, 4x, 8x, 16x and 32x
normal speed are available. Press 4to
resume normal playback.
MusicLife App
MusicLife enables you to control your Solo
product from your iOS device.
It can be used to stream music to your
product from a UPnP server such as a NAS
drive, or music stored locally on the iOS
device.
Additionally, the app features a remote
control interface, which contains the most
common features of the infrared remote
control, as well as useful information
such as the current input, volume, audio
decoder and the units IP address
NOTE
The Solo will need to have the“Network
Media”option enabled. For instructions
on how to do this, please refer to
“System”on page E-32.
Minimum OS requirements for the app: iOS 7
Downloading the app
Download the app from the App Store
SM
.
For your convenience, you can scan the
following QR code into your phone to
download the app.
network/usb
operation
App displays the status of the Solo
Display shows basic information such as input,
volume, audio decoder, unit IP address.
listening to radio
The Solo is fitted with a FM, DAB/
DAB+ (digital radio) tuners. DAB/DAB+
broadcasts are not available in all
locations.
This section deals with tuner operation, for
information on setting up the tuner and
installing aerials see “DAB/DAB+ and FM
aerial” on page E-14.
When a tuner input is selected, the OSD
shows a list of radio presets plus an
information panel giving all available
information about the current frequency
(for FM) or station (for DAB/DAB+).
The front panel will also give the same
information, pressing the INFO key
will cycle through the various items of
information:
FM
< Programme type (if available)
< Radiotext (if available)
< Audio format
< Signal strength
DAB/DAB+
< Programme type
< Radio text (if available)
< Bit-rate and CODEC of transmission
< Audio format
< Signal quality
Tuning/Channel selection
When switching to the internal tuner
source, the Solo enters the last used tuner
band, be it FM or DAB/DAB+. Repeatedly
pressing RADIO cycles through the
available tuner bands on your Solo.
FM analogue radio
Incremental frequency tuning on FM radio
is done using the 9and :buttons on the
remote control in RADIO device mode.
You can scan to the next (or previous)
strong signal by using the <and >.You
can stop a scan at any time by pressing
either 9or :button.
In Europe, the internal FM radio is capable
of receiving RDS (Radio Data System)
radiotext signals that are transmitted
on some stations. The RDS information
typically includes the radio station name,
the music or speech genre as well as
additional information related to the
current programme. On music stations
this is often information on the currently
playing track.
DAB/DAB+ digital radio
Digital Audio Broadcasting
(DAB/DAB+) radio is becoming
more widely available. See
www.worlddab.org/country-information
for information on DAB/DAB+ availability.
You will need to scan for available stations
before being able to listen to them.
To scan for DAB/DAB+ stations, first select
the DAB/DAB+ tuner then press and hold
the OK key. The Solo will then scan all the
DAB/DAB+ radio frequencies and compile
a list of the stations that are available.
When the scan is complete, you can scroll
through the station list using the <and
>buttons on the remote control.To listen
to the currently displayed station press
the O. If you do not press Owithin
two seconds, the display will revert to
displaying the currently playing station.
Saving and selecting
presets
Preset selection uses the 'and ,keys
on the remote to browse and Oto select
the preset when the remote is in RADIO
device mode.
The Solo is capable of storing up to 50
presets. Pressing the OK key causes
the next available preset number to be
displayed, then pressing the OK key again
stores the current frequency/channel in
that preset. If a different preset number is
required, press the 'or ,keys until
the desired number is displayed before
pressing the OK key for a second time.
Deleting presets
When in tuner browse mode (using '
and ,to scroll through the presets), the
yellow button on the remote is used to
delete the currently highlighted (but not
playing) station or frequency.

E-29E-28
English
settings menu
The Settings menus allow you to configure
all aspects of your Solo. The next few
pages will go through the menu items and
explain their function. The Settings menus
may look daunting if you are new to
setting up home cinema, but the majority
of them need only be configured once
when you first install the system.
The best way to view the Settings
menus is on your display device (TV or
projector), using the on-screen display
(OSD) capability of the Solo. This is highly
recommended when setting up the Solo
movie. To view the OSD for the system
setup, connect the video output to your
display device. However, setting up the
Solo music may be performed using the
Solo front panel display only, should an
external display device is not available. The
diagrams in this section will aid you with
navigating through the settings menu and
all the available options
Entering the settings menu
The SETTINGS icon is shown on the screen
when the Solo is first switched
on.
If the main menu is not
currently displayed, press
on the remote control to display it.
Note that during the playback of
music, video or JPEG files, further button
presses may be required to exit the folder
structure.
With the SETTINGS icon highlighted,
press Oto enter the Settings menu
Navigating the menus
The Solo menus can be navigated by using
the cursor (arrow) keys on the remote
control.
1. Use the 'and ,keys to navigate
up and down the main headings in
the left-hand panel.
2. With the main section you require
highlighted, use the Ekey to enter
the middle column.
3. Use the 'and ,keys to navigate
up and down the options in the
middle column. Some options may
be greyed out because they are not
currently selectable.
4. Pressing >selects a setting: use the
'and ,keys to change the
setting.
5. Press Oto confirm the setting. Go
back to step 4 to adjust any other
settings in the current section.
6. Press <or RTN to return to the
previous screen if you want to select
another section to adjust.
Press the button to return to the home
screen at any time.
Display
With the SETTINGS icon highlighted on
your display, press Oto show the‘Display’
options.
Press Eto move to the options in the
second column.
TV Aspect Ratio – Set the aspect ratio
(shape) of your display. Press Eto move to
the options in the third column.
< 16:9 Normal: Use with widescreen
TVs. 4:3 material is zoomed to fit the
wide screen.
< 16:9 Full: Use with widescreenTVs.
4:3 material is displayed in its original
aspect ratio, with vertical black bars at
the sides.
< 4:3 Pan&Scan: Use with 4:3 non-
widescreen TVs. 16:9 widescreen
content is displayed with the left- and
right-hand sides of the image cropped
to fit the screen (no black bars). The
aspect ratio is maintained (the image
is not stretched).
< 4:3 Letterbox: Use with 4:3 non-
widescreen TVs. 16:9 widescreen
content is displayed with black bars at
the top and bottom.
Resolution – Set the video resolution of
the HDMI output (applies to the internal
disc player only):
< Auto: Sets the TV’s preferred
resolution.
< 4K2K: Ultra HD video.
< 1080p: Full HD progressive video.
< 1080i: Interlaced HD video.
< 720p: Progressive HD video.
< 480p/576p: 480 lines (NTSC) or 576
lines (PAL) progressive video
< 480i/576i: 480 lines (NTSC) or 576
lines (PAL) Standard Definition
interlaced video.
TV System – Set the video signal format. If
the colour or picture quality of analogue
video appears incorrect, change this
setting. It should not need to be adjusted
in normal use. You can select NTSC (the
USA and Canada video standard), PAL
(the Europe, Australia and China video
standard) or AUTO which will output the
frame rate required by theTV.
HDMI Color Space – ‘Colour Space’refers
to the number of individual colors that
can be displayed on the screen. If you
know the color space capability for
the connected TV, you can match it
by selecting one of these options. We
recommend you select‘Auto’.
HDMI Deep Color – sets the level of Deep
Colour processing applied to the HDMI
video output. You can select ‘Auto’or ‘Off’.
If this option is set to Auto and your TV
supports Deep Color, the screen displays
colours at 30-, 36- or 48-bit accuracy
(compared to the 24-bit accuracy of
standard colour).
Check the documentation that came with
your TV to see if your TV supports Deep
Colour. All system HDMI interconnect
cables must be Deep Colour compatible in
order to use Deep Colour signals.
HDMI 1080p 24Hz – You can select ‘Auto’ or
‘Off’. Movies are recorded on film at a rate
of 24 pictures (frames) per second. Many
of the movies on Blu-ray Discs are placed
on the discs at this frame rate. If your TV
supports 24 frames per second, but you
would prefer to view the video at a higher
frame rate, you should turn off HDMI
1080p 24Hz.
NOTE
< The connected equipment (AV
receiver,TV/projector) must be
1080/24p compatible
< The output resolution must be set to
1080p or HDMI Auto
HDMI 3D – To turn the 3D feature (if
available) on or off.You can select‘Auto’
or‘Off’
Audio
Audio DRC – Selects the Audio Dynamic
Range Control mode to‘Off’, ‘On’. or‘Auto’
Dynamic Range is the range between the
loudest sounds and the quietest ones. If
set to‘On’you can listen to a movie at a
lower volume without losing sound clarity.
< Off – No dynamic range compression
< On – Dynamic range compression
< Auto – DRC is selected by the source
material
Speaker Setting – sets the number of
speakers and the level, distance and size.
You can select:
< 2 Channels – L(Left), R(Right)
< 3 Channels – L(Left), C(Centre), R
(Right)
< 4 Channels – L(Left), R(Right), LS
(Left Surround), RS (Right Surround)
< 5 Channels – L(Left), R(Right), C
Centre), LS (Left Surround), RS (Right
Surround)
Please refer to the“speakers”on page E-15
for speaker naming and placement.
For each of the speaker configuration you
can set the following:
< Subwoofer presence (On or Off). If
the subwoofer presence is set to On,
then the following subwoofer settings
can be adjusted: level, distance and
crossover
< Size - Large (capable of full frequence
range reproduction) or Small (not
capable of full frequency range
reproduction at the low frequency
end). Note that most of the home
cinema speakers are small.
< Level - calibration settings for the
test noise signal level through the
loudspeakers and measured at the
listening position
< Distance - calibration settings for the
distances between the loudspeakers
and the listening position
< Crossover - set the frequency at which
the Solo starts to redirect bass signals
to the subwoofer
Prologic II
Dolby Pro Logic II decoding is designed to
produce five-channel output from two-
channel source material.
There are three different options available
for this setting: Off, Movie or Music. The
Movie and Music modes are intended
for use as their names suggest. Due to
the different recording methods used for
movies and music it is recommended that
the correct decoding mode for your source
material is used to obtain best results.
< Movie mode: This mode provide a
surround sound effect from a stereo
input.
< Music mode: This mode is similar
to the movie mode, but with less
emphasis on the surround channels,
in order to preserve the original stereo
image.
SACD Priority – Selects the SACD track
used. (Solo movie only). You can select:
< Multi-ch – Multi-channel track
< 2-ch – Stereo track
Subwoofer – Specify whether or not a
subwoofer is connected to the unit. If the
subwoofer presence is set to On, then
the following subwoofer settings can be
adjusted:
< Level - calibration settings for the
test noise signal level through the
loudspeakers and measured at the
listening position
< Crossover - set the frequency at which
the Solo starts to redirect bass signals
to the subwoofer
Settings Menu
Display
Display
TV System
TV System
[select option]
B C
B C
B
C
B
C
B
C
OK
E
D
Display
Resolution
Display
HDMI Colourspace
Resolution
[select option]
HDMI Colourspace
[select option]
E
D
E
D
Auto
YCbCr
YCbCr422
Full RGB
RGB
xvYCC
NTSC
PAL
Auto
Auto
4K2K
1080p
1080i
720p
480p/576p
480i/576i
Settings Menu
Audio
Audio
Subwoofer Out
Subwoofer Out
[select option]
B
C
OK
E
D
Off
On
Audio settings diagram applies to
Display settings diagram applies to

E-31E-30
English
Ethernet
WiFi
Language
/
OSD – Select one language to be used for
the On Screen Display (OSD).
Disc Menu – Set the language used for
the Disc Menu and Pop-up Menu. The
available languages depend on the disc.
‘Auto’ sets the priority language of the
disc.
Disc Audio – Set the language for the
soundtrack. The available languages
depend on the disc.‘Auto’ sets the priority
language of the disc.
Disc Subtitle – Set the language used for
the subtitles. The available languages
depend on the disc.‘None’ prevents the
display of subtitles.
Network
/
An active, configured Internet connection
is required if you wish to use BD-Live
websites and downloaded content, as
well as access network media devices. See
“Network connection”on page E-13 for
network connections.
Network Standby – Enables or disables
the control of the Solo while the unit is in
standby.
Connection Type – Select the type of
network connection required. The options
are:
< Wired. Connect a network cable to the
Ethernet jack and into a wired router,
as shown on page E-13.
< Wireless. Please follow the on-screen
instructions for all the steps required
to connect to a wireless network. The
Solo can connect to a Wi-Fi network
using using three different methods,
which are briefly described below.
Note that you must have the following
information readily available: the
network name (also called SSID or AP
Name), network security mode and
the network security key.
Scan. This method will search all available
wireless networks. Choose the desired
network to connect to (shown under“AP
Name”) and enter its network key using
the on-screen keyboard.
Manual. Choose this method if you know
the name of the access point you would
like to connect to. Once this is entered, you
will be prompted for the security mode of
the access point. If the network chosen is
a secure network, you will be prompted
to enter the network security key on the
next screen.
Settings Menu
Language
Language
OSD
OSD
[select option]
B
C
E
D
English
French
Spanish
Dutch
German
Russian
Chinese
Settings Menu
Network
Network
Network Standby
Network Standby
[select option]
DNLA
Enable
Proxy
[select option]
B C
B C
B C
B C
B C
B
C
B
C
B
C
OK
E
D
Network
Network Setup
Network
Network Information
Network
DLNA
Network
Proxy
Network
Net Test
Select Interface
[select option]
E
D
E
D
E
D
E
D
None
WEP
WPA-PSK(TKIP)
WPA2-PSK(AES)
WPA/2-PSK(AUTO)
Enter IP
Enter Subnet
Enter Gateway
Enter DNS1
Enter DNS2
Enable
Disable
Enable
Disable Proxy Host
Proxy Port
Manual Input
Scan
DCHP On
(Auto)
DCHP Off
(Manual)
Select SSID
Enter Password
Enter SSID
Security
OK
Auto. This last method allows the Solo to
automatically connect to a wireless router
which supports either Wi-Fi Protected
Setup (WPS) or by entering a unique PIN
into the access point. Please consult your
router’s user manual on instructions on
how to enable WPS or how enter the
required PIN.
Information – Select and press OK to view
or set the network connection parameters:
Connection Test – When your player tests
your Internet connection, it sends (pings)
an IP address.
Press OK to run a network test. This will
also configure the wired network settings
automatically if they have not been
configured and if automatic configuration
(DHCP) is supported by the network.
If this test fails, check the connections
to your home network. Make sure your
network cable is securely attached to your
router and the unit. Check that your router
is connected to your cable or DSL modem
correctly. There may be an issue with your
router or Internet Service Provider (ISP):
contact your ISP for more help
IP Setting – You can set your player to
automatically obtain an IP address when
it connect to your ISP. Some providers
require that you enter a fixed IP address
that does not change: this must be
entered using the‘Manual’ setting.
Highlight ‘Auto’ or‘Manual’, then press OK.
The following settings are only available
when IP Setting is set to Manual:
IP Address – Use the cursors to navigate
between segments and use the 0-9 keys
on the remote to enter the IP address
assigned to your unit by your network
Connection Type
SSID
BSSID
Signal Strength
Channel
Security
Address Type
IP Address
Subnet Mask
Default Gateway
DNS1
DNS2
administrator. Press OK to save the setting
Subnet Mask – Use the cursors to navigate
between segments and use the 0-9 keys
on the remote to enter the subnet mask of
your network. Press OK to save the setting.
Default Gateway – Use the cursors to
navigate between segments and use
the 0-9 keys on the remote to enter the
Internet gateway address. Press OK to save
the setting.
DNS1 – Use the cursors to navigate
between segments and use the 0-9 keys
on the remotel to enter the IP address of
your Primary DNS server. Press OK to save
the setting.
DNS2 – Use the cursors to navigate
between segments and use the 0-9 keys
on the remote to enter the IP address of
your Secondary DNS server. Press OK to
save the setting.
BD-Live Connection – To set the BD-Live
Internet access level.
The access levels are:
< Permitted: All BD-Live discs are
allowed access to BD-Live websites.
< Partial Permitted: Allows Internet
access to BD-Live content with valid
certificates only.
< Prohibited: Prohibit all BD-Live discs
from accessing BD-Live websites.
NOTE
< The available on-line functions are
disc-dependent.
< Refer to the BD-Live disc
instructions for information about
accessing on-line content.
< The Solo must be connected to
the Internet and set up correctly
to allow access to on-line content.
See “Network connection”on page
E-13 for network connections
and “Network”on page E-30 for
network settings.
/
Proxy Setting – If you are accessing the
network using a proxy server, enter its
settings here.
Network settings diagram applies to
Language settings diagram applies to

E-33E-32
English
System
Screen Saver –sets the duration of a static
image display before the screen saver is
shown. The options are: 5/10/15/20/25/30
Minutes or Off. Pressing any button on
the unit or remote deactivates the screen
saver.
/
Disc Auto Playback – controls whether
an optical disc (e.g. BD, DVD, CD) will play
automatically after it has beed loaded or
after the Solo is turned on.
< On: Optical discs will play
automatically.
< Off: play must be pressed to play a
disc.
CEC – The Consumer Electronics Control
(CEC) option is used to allow all supported
devices connected by HDMI to work
together as a single system.
CEC may be turned‘On’or ‘Off’, to link or
unlink the supported devices.
Firmware Update – If the Solo is
connected to the Internet, you can check
for an upgrade to your unit’s firmware by
selecting this menu item and pressing
OK to highlight‘Network’, then press OK
again.
A message appears if no new firmware is
available, otherwise follow the on-screen
instructions. A message tells you when the
upgrade is complete.
Load Defaults – Press OK with this item
highlighted to reset all system settings
to factory defaults (including parental
controls, radio presets, paired device, etc.).
You are asked to confirm that you want to
load the factory default settings. For‘No’
press OK; for‘Yes’press <then OK.
System Information – Highlight this
option and press OK to display system
information.
The System Information panel shows
information about your unit, such as the
product name, firmware version, MAC
addresses and support information.
BD-Live Storage – This option allows you
to review or delete BD-Live data stored on
an external USB drive.
The options are:
< Information: Highlight and press
OK to show file information on the
BD-Live data.
< Erase data: Highlight and follow the
on-screen instruction to erase BD-Live
storage data.
/
NETWORK MEDIA – The Solo is capable of
playing UPnP content. Note that the Solo
movie will paly both audio and video files,
whereas the Solo music will play audio
content only.This features can be disabled
by setting it to Off.
Security/Parental Control
Change Password – Sets or changes the
4-digit password. Press the 0–9 buttons for
the current password (the initial password
is 0000), then press OK.
Enter the new password to confirm, then
press OK.
Parental Control – Parental control
settings can be used to prevent the
viewing of material inappropriate for
children. According to the level set, a disc
may be stopped or have certain scenes
cut or substituted with alternative scenes,
depending on the disc.
To set the parental control level:
1. Select ‘Settings’ >‘Security >
’Parental Control’>
2. Enter your pasword using the remote
control numeric buttons. The default
password is 0000.
3. Once the Parental Control menu is
accessed, press the '/,cursor
buttons and press OK to select the
desired parental control level
Parental Level – Set the degree of disc
restriction. The lower the value, the stricter
the limitation.
Off All discs are played back
KID SAFE Suitable for children
GAll children and general
audience
PG Parental guidance suggested
PG-13 Unsuitable for children under
13
PGR Parental guidance
recommended
RRestricted; cinemas require
children under the age of 17 to
have an accompanying adult
parent or guardian
NC-17 Cinemas do not admit anyone
younger than 17 years old
ADULT Adult rating; discs of any rating
(Adult/General/Children) can
be played back
NOTE
< If the parental control level is set
and you try to play a disc with
a level higher than the current
parental level, a password panel
opens.
< If an attempt to change the parental
control or parental level is made, a
password panel opens.
Cinavia Notice
This product uses Cinavia technology to
limit the use of unauthorised copies of
some commercially-produced film and
videos and their soundtracks. When a
prohibited use of an unauthorised copy is
detected, a message will be displayed and
playback or copying will be interrupted.
More information about Cinavia
technology is provided at the Cinavia
Online Consumer Information Centre at
www.cinavia.com. To request additional
information about Cinavia by mail, send a
postcard with your mailing address to:
Cinavia Consumer Information Centre,
P.O. Box 86851,
San Diego,
CA, 92138
USA
Settings Menu
System
System
Auto Standby
System
Load Defaults
Auto Standby
[select option]
B C
B C
B C
B C
B C
B
C
OK
E
D
System
Disc Auto Play
System
System Info
System
Firmware Update
System
Network Media
Disc Auto Play
[select option]
Load Defaults
[select option]
Network Media
[select option]
E
D
E
D
E
D
E
D
5 minutes
10 minutes
15 minutes
20 minutes
25 minutes
30 minutes
Off
Software Version
WiFi MAC
Wired MAC
IP Address
B
C
B
C
B
C
On
Off
Cancel
OK
On
Off
System settings diagram applies to

E-35E-34
English
troubleshooting
Problem Check that...
There are no lights on the unit < the power cord is plugged into the Solo
and the mains socket it is plugged into is
switched on.
< the unit is powered up.
< if a red LED is present, the Solo is in
standby mode. Press any button on the
front panel or remote control.
The unit responds erratically or not at all
to the remote control
< there are fresh batteries in the remote
control.
< the front panel window is visible and
you are pointing the remote control
towards it.
The front panel display is blank < the display hasn’t been turned off. Press
the DISPLAY button on the front panel
or remote control.
No picture is being produced < your viewing device is turned on and
switched to display your Solo.Test by
pressing the HOME button on the Solo
or on the remote and look for the main
menu screen on your display device.
< the correct video input is selected on
the Solo.
< the video source is on, is operating
normally, and is in‘play’ mode if
appropriate.
There are bright edges or‘ghosts’on the
picture
< ensure the‘sharpness’control on your
display device is switched off or set to
near minimum.
< for HDMI connections, try using a shorter
cable or alternatively a different brand.
No sound is produced < the correct input has been selected.
< the correct input has been selected. See
“Device mode / Source keys”on page
E-19.
< the source equipment is on, is operating
normally and is in ‘play’ mode if
appropriate.
< the volume is turned up to a reasonable
level and the Solo is not in mute mode.
The sound is poor or distorted < you have selected the correct size of
speakers to suit your system in the setup
menu.
Problem Check that...
Sound only comes from some of the
speakers
< you have an appropriate surround
source selected and playing.
< the BD/DVD disc is encoded in the
appropriate format, and the correct
format has been selected in the disc start
menu of the BD player (if applicable).
< the display window indicates that the
disc you are playing is a multichannel
recording (you may need to press the
INFO key several times until you get to
the ‘incoming format’display).
< all the speakers are correctly connected
to the speaker terminals and are secure.
< you have configured the Solo to include
all the speakers in your system.
Unable to select decoding modes The Solo can only apply decoding to sources
which have been encoded in the same
format. Check that:
< digital source is selected and connected.
< the source is playing appropriately
encoded material.
< the BD/DVD disc is encoded in the
appropriate format and that the correct
format has been selected in the disc start
menu of the BD player (if applicable).
When playing a BD/DVD, the Solo
selects Dolby Pro Logic
< sometimes BD/DVD discs contain
material at either the beginning or the
end of the main movie that is not in full
5.1 format, but in two-channel or Dolby
Pro Logic decoding.
Hum on the analogue input < all cables are making a good connection.
If necessary withdraw the cable from the
connector and plug it fully in again (turn
the power off before doing this).
< the connections inside the source cable
connector are not broken or badly
soldered.
< if the hum originates only when
one particular source component is
connected, that an aerial cable, or dish
connection to this source is ground
isolated. Contact your installation
contractor.
Problem Check that...
There is radio or television reception
interference
< where the interference is coming from.
Switch off each source component in
turn, then any other equipment. Most
electronic equipment does generate low
levels of interference.
< try re-arranging cabling from the
nuisance source away from other
cabling.
< ensure that the cabling used is high
quality, specified for its purpose, and is
properly screened.
< if the problem persists, contact your
dealer.
The source switching changes randomly
or freezes on one source
< there are no static or impulse
interference problems caused by
nearby power equipment switching,
e.g., heating or air conditioning
control. Switch the Solo off, wait ten
seconds, then switch it on again to
clear an operating problem. Contact
your installer if the problem returns or
persists.
< there is no direct sunlight shining on the
infra-red detector behind the front panel
display.
When a USB memory device is
connected,‘USB’ is not shown in the
network client’s list of folders
< a USB memory device is connected that
conforms to the mass storage class.
< a USB hub is not being used.
If files on a USB memory device cannot
be played:
< the USB device is formatted in FAT16 or
FAT32.
< the USB device does not have multiple
partitions.
< the files are in a compatible format.
If files on a computer cannot be played < the files are in a compatible format.
< the computer is connected via a network
and not USB – the Solo USB port cannot
be used for a direct connection to a
computer
Problem Check that...
If you cannot connect to a wired
network
< the Ethernet cable you are using is
correctly connected between the Solo
and the network hardware.
< the network is set up for fixed IP
addressing and you have the Solo set to
use DHCP.
< the network is set up for DHCP and
you have the Solo set to use fixed IP
addressing.
USB firmware update
The firmware in your Solo can be updated from a USB flash drive containing firmware
update files. You can download the latest firmware file, together with upgrading
instructions, from the Arcam website (www.arcam.co.uk)
This manual suits for next models
1
Table of contents
Languages:
Other Arcam Receiver manuals

Arcam
Arcam Solo movie 5.1 User manual

Arcam
Arcam DiVA AVR250 User manual

Arcam
Arcam AVR200 User manual

Arcam
Arcam AVR500 Installation guide

Arcam
Arcam AVR200 User manual

Arcam
Arcam AVR200 User manual

Arcam
Arcam DiVA AVR100 Quick start guide

Arcam
Arcam AVR600 User manual

Arcam
Arcam DiVA AVR300 User manual

Arcam
Arcam AVR350 User manual