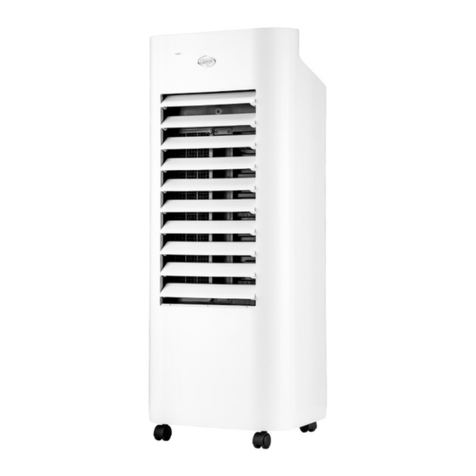
Argo POLIFEMO BEAR User manual

11
V 02/22
POLIFEMO BEAR
OPERATING INSTRUCTIONS
Read the instructions carefully before operating the appliance or carrying out maintenance operations.
Observe all the safety instructions; failure to observe the instructions may lead to accidents and/or
damage. Keep these instructions in a safe place for future reference.
EVAPORATIVE AIR COOLER
EN

12
V 02/22
GENERAL SAFETY INFORMATION
•Only use this appliance as described in this manual. Any other
use not recommended by the manufacturer may cause fire,
electric shock or injury to people.
•Do not use this appliance outdoors, this product is for indoor use
only.
•Make sure that the type of mains power complies with the
electrical requirements of the appliance (220-240V~/50 Hz).
•It is necessary to use a qualified socket that has been checked,
and that meets the requirements.
•This appliance can be used by children aged from 8 years and
above and people with reduced physical, sensory or mental
capabilities or lack of experience and knowledge if they have
been given supervision or instruction concerning use of the
appliance in a safe way and understand the hazards involved.
•Children shall not play with the appliance.
•Cleaning and user maintenance shall not be made by children
without supervision.
•This product is not a toy. Children should be adequately
supervised to ensure that they do not play with the appliance.
•Do not use the appliance if the cord or plug is damaged. If the
power supply cable is damaged, it must be replaced by the
manufacturer or its technical assistance service, or in any case by
a person with similar qualifications, in order to prevent any risk.
•The appliance must be installed in accordance with national wiring
regulations.
•Disconnect the mains power when the appliance is not used or for
cleaning operations.
•Unplug the appliance during filling and cleaning.
•Do not touch the power plug with wet hands, there is a danger of
electric shock.
•When unplugging the power cord, do not pull on the cord.
•Do not bend the power cord or place heavy objects on it. Do not
use extension cables.
•Do not place the appliance under a power socket, do not use the
appliance in a bathroom or near a swimming pool.
•During use, make sure that the power cord plug is free from
foreign bodies and fully insert the plug into the power outlet.

13
V 02/22
•In case of anomalies, switch off the appliance immediately,
do not try to repair it, and take it to the local technical
assistance center.
•Do not disassemble or replace the parts by yourself, this may
affect the safety of the product.
•If, during operation, an abnormal smell or sound comes out of the
product, immediately turn off the appliance and disconnect the
power supply.
•Do not block the air inlet and outlet grilles and do not insert
objects, they could cause leaks, short circuits and damage to the
product.
•Do not expose the cooler to direct sunlight, because the color of
the materials could be altered and the appliance overheating.
•Do not use insecticides, oils, detergents, flammable or
explosive sprays or spray paints around the appliance; do
not use aggressive chemical detergents to clean the casing:
this could damage the finish and color.
•Do not spill water on the product: risk of short circuit and damage
to the appliance.
•Do not ingest battery, Chemical Burn Hazard.
•This product contains batteries. If the battery is swallowed, it can
cause severe internal burns in just 2 hours and can lead to death.
•Keep new and used batteries away from children.
•If the battery compartment does not close securely, stop using the
product and keep it away from children.
•If you think batteries might have been swallowed or placed inside
any part of the body, seek immediate medical attention.
•The batteries contain materials, which are hazardous to the
environment; they must be removed from the appliance before it
is scrapped and that they are disposed of safely.
•Be aware that high humidity levels may encourage the growth of
biological organisms in the environment.
•Do not permit the area around the humidifier to become damp or
wet. If dampness occurs, turn the output of the humidifier down. If
the humidifier output volume cannot be turned down, use the
humidifier intermittently. Do not allow absorbent materials, such
as carpeting, curtains, drapes, or tablecloths, to become damp.
•Never leave water in the water tank when the appliance is not in
use.

14
V 02/22
•Empty and clean the humidifier before storage. Clean the
appliance before next use.
•Non lasciare a lungo la mandata dell’aria diretta verso un
bambino: non è salutare.
•Do not leave the air flow directed towards a child for a long time: it
is not healthy.
•After adding water to the tank, do not tilt or bump the product
when placing or moving it, to avoid splashing. If the tank has been
emptied but there is water in the machine, unplug it immediately
and wait 24 hours before turning it on.
•The water level in the water tank must not exceed the maximum
level line. When the cooling and humidification functions are
activated, the water level in the water tank must not be below the
minimum level line.
•When the tank is full of water, do not grab the handle to lift the
whole machine, otherwise the water in the water tank may flow
out, push gently to move the product using the handle. After
making sure there is no water in the tank, lift the whole machine.
•During humidification, it is strictly forbidden to disassemble and
assemble the filter and the evaporative panel, as water drops
could escape from the air outlet.
DESCRIPTION OF PARTS
FRONT VIEW REAR VIEW

15
V 02/22
HOW TO USE THE APPLIANCE
The appliance does not need to be installed.
Position the unit on a flat, stable surface and connect the power cord to a suitable power socket (220-240 V~ 50Hz): the
appliance can be switched on using the ON/OFF button and you will hear a sound.
When you move it, use the handle on the back. Do not use this cooler in an area with high humidity, rich in dust or with a
temperature above 40 °C.
This product can be used either as a fan, with 3 modes (Normal, Natural and Sleep) and 3 fan speed options (low,
medium and high), or as a cooler/humidifier: in this case the rear tank should be filled with demineralized water, up to
but not exceeding the maximum level as indicated. When the water in the tank falls below the minimum level, marked on
the tank, LED COOL on control panel will flash to indicate the leak of water.
The fan takes in air from the room and passes it through the dust filter and the evaporative panel, which is constantly
humidified thanks to a system which draws water from the tank and sprays it onto the panel. The incoming hot air makes
part of the water contained in the panel evaporate and is therefore cooler when released back into the room, which makes
it feel as though the temperature has dropped.
The buttons on the remote control have the same functions as those on the control panel.
To activate the functions, follow the procedures illustrated on the next page.
Insert 2 batteries into the remote control, respecting the polarities indicated. Use only AAA 1.5V batteries.
Remove the batteries if the remote control is not used for a month or longer.
Do not try to recharge the batteries.
Replace all the batteries at the same time.
Do not throw the batteries into fire: they could explode.
Replacing the batteries of remote control
1. Remove the cover from the compartment containing the batteries.
2. Insert the batteries (AAA, LR03, 1,5V - not supplied) into the remote control, respecting the polarities indicated.
3. Put the lid back on.
4. Point the remote control at the receiver on the air cooler.
5. The remote control should be placed within 6 meters of the receiver.
6. There must be no obstacles between the remote control and the receiver.
7. Do not drop or throw the remote control.
8. Do not put the remote control under strong sunlight or heating devices and other heat sources.
9. Remove the battery from the remote control when it is not used for a long time.
10. Exhausted batteries must be disposed of properly.
REMOTE CONTROL
ON/OFF button
Mode button
+ - buttons
Swing button

16
V 02/22
INFORMATION FOR CORRECT DISPOSAL OF THE BATTERIES PURSUANT TO EUROPEAN DIRECTIVE 2006/66/EU
and modifications by Directive 2013/56/EU
Replace the batteries when depleted. At the end of their working life, batteries must be disposed of separately from unsorted
waste. They must be must be delivered to appropriate separated waste disposal plants or to dealers that provide a similar
service. Separate waste disposal of batteries prevents potential negative effects on the environment and human health
resulting from inadequate disposal, and also allows the materials from which it is made to be recovered and recycled in order
to achieve significant savings in terms of energy and resources. The separate disposal obligation is underlined by the crossed-
out dustbin symbol appearing on the battery. Illegal disposal of the product by the user is subject to administrative penalties as
per current regulation.
CONTROL PANEL
ON/OFF BUTTON
Press this button on the control panel to turn the unit on or off.
The default operating mode is low ventilation (red LED) and Normal mode.
SPEED BUTTON
When the appliance is on, press this button on the panel to select the fan speed, the LED corresponding to the button
changes color depending on the selected speed:
Low - Red LED
Medium - Yellow LED
High – Green LED
The SPEED function is not present on the remote control.
TIMER BUTTON
Timer off function: With the unit on, press this button to select the appliance turn off timer, each press of the button allows
you to set the turn off interval from 1 to 7 hours, the LEDs on the control panel will light up based on your selection. Once
the selected interval is reached, the unit will turn off automatically.
To disable the Timer setting, press this button several times until all the corresponding LEDs on the unit control panel turn
off.
MODE BUTTON
When the unit is on, press this button on the control panel to select the desired ventilation mode between Normal,
Natural and Sleep. The corresponding LEDs on the control panel will light up according to your selection.
On the remote control, by pressing the mode key it is possible to switch from one function to another and then, once the
desired function has been reached, with the +/- button it is possible to select the fan speed, the number of hours of the
timer, the operating mode.
Each time you press the LEDs on the control panel light up according to your selection.

17
V 02/22
COOL BUTTON
Press this button on the control panel to activate the cooling function. When the COOL LED flashes on the control panel,
it means that the water level in the tank is below the minimum, therefore it is necessary to add water into the tank.
SWING BUTTON
Press this button on the control panel or on the remote control to activate the automatic vertical oscillation of the air flaps.
To deactivate this function, press this button again. It is possible to manually adjust the flaps horizontally, to direct the air
flow where desired.
THE TANK MUST BE FILLED WITH DEMINERALIZED WATER FOR THE APPLIANCE TO
OPERATE IN COOLER/HUMIDIFIER MODE.
The water is inserted directly into the rear tank. Before introducing the water, check that there are no water residues inside
the water pump, to prevent its leakage.
Fill the tank up to the maximum level marked on the water indicator, without exceeding the water level limit, this could cause
water leakage.
If you wish to keep the water in the tank below room temperature in order to maximize cooling in warmer months, leave the
two synthetic ice packs supplied in the freezer until solid, then add them to the water in the tank.
The ice will absorb heat from the water.
With the unit off, place the ice packs directly in the tank in the position shown in the figure, inside the tank there is a special
space where to place the ice packs. Make sure that the tank can be pulled out normally.
We recommend continuous use of the ice for optimal cooling capacity.
Ice packs can be used repeatedly.
The first time it is used, you may detect a smell or the water may turn an unusual color: this does not constitute a health risk.
MAINTENANCE AND STORAGE
WARNING: ALWAYS UNPLUG THE APPLIANCE BEFORE CLEANING OR MAINTENANCE
PROCEDURES. IMPORTANT: DO NOT SUBMERGE THE PRODUCT IN WATER
Cleaning the outside surface of the appliance
Use a soft cloth to remove any dust from the product.
If this is not enough, use a soft cloth dampened with water and a mild detergent at a temperature not exceeding 50°C. Let
the appliance dry completely before using it.
Do not use corrosive detergents or solvents such as petrol. Do not wash the appliance with water. Do not use oils, chemical
substances or other items that may damage the surface to clean it.
Use a vacuum cleaner to remove dust from the air inlet/outlet grilles.
When the appliance is used for a long time, the tank, the tank filter, the honeycomb filter and the dust filter may have
accumulated dust, this could affect the air flow and the effect of cooling. It is therefore advisable to clean these parts every
two weeks.
FILLING THE WATER TANK

18
V 02/22
Pic.1
Pic.2
Cleaning the dust filter and the honeycomb filter
Remove the filter assembly by detaching it from the unit by pressing on the opening hook. Once removed, gently remove the
honeycomb filter by sliding it under the hooks, remove the dust filter, always sliding it off the hooks. To assemble again,
insert the dust filter in its holder and then insert the honeycomb filter.
Make sure all components are perfectly dry and properly installed to avoid damaging them.
Cleaning the water tank
1.Rotate the locking hook of the water tank in the horizontal direction, see Pic.1.
2.Remove the tank following the direction of the arrow as shown in Pic. 2 to have a space for disassembling the pump.
3. Remove the water pump from the tank by pressing the 2 tabs positioned on the pump (Pic.3), then completely remove the
tank for cleaning.
4.For descaling of the water tank, pour in water and vinegar or an anti-limescale product, leave it on for a sufficient time and
rinse with water, then use a soft, dry cloth to clean it.
5. Reposition the water tank without forgetting to put the pump back into the tank by pressing again on the two tabs positioned
on the pump, then hooking it to the tank.
It is recommended to clean the water tank weekly.
STORAGE
If the appliance is not used for prolonged periods, disconnect the power cord and store the appliance with this manual in its
original packaging, in a cool and dry place.
Before packaging, the honeycomb filter and dust-proof filter should be dry, and there is no water in the tank.
Pic.3

19
V 02/22
POSSIBLE OPERATING PROBLEMS AND SOLUTION
If the appliance has any operating anomalies, consult the table below to resolve any anomalies. If they persist, contact an
authorized service center to repair the appliance.
PROBLEM
POSSIBLE CAUSE
SOLUTION
The appliance does not work
The power cord is not connected or is not
connected properly
The appliance is off
Internal wiring is loose
Connect it correctly
Put the water in the tank
Contact a service center
It does not humidify / the
water pump makes an
abnormal sound
There is no water in the tank or the
amount of water is below the minimum
water level
The hole in the honeycomb filter is
blocked
The water pump is damaged or the
internal connections are missing
After turning off the unit, add water to the
tank up to the maximum level indicated
Clean the honeycomb filter
Contact a service center
Abnormal sound of the unit
The device is not placed on a stable and
flat surface
There may be dust residues in the
appliance
The air delivery flaps have not been
opened
Problem with the motor of the air flaps
Place the device on a flat and stable
surface
Remove the honeycomb filter and eliminate
the accumulation of dust inside the unit
Manually open the air delivery flaps
Contact a service center
INFORMATION FOR THE CORRECT DISPOSAL OF T
HE PRODUCT IN ACCORDANCE WITH
EUROPEAN DIRECTIVE 2012/19/EU
This appliance may not be scrapped with domestic waste at the end of its life cycle. We call your attention to the crucial
role played by the consumer in the re-use, recycling and other forms of recovery of such waste.
The appliance must be scrapped by a sorted waste disposal centre or by returning it to the retailer (no charge is levied
for this service), when you purchase a new equivalent appliance.
Sorted disposal of electric and electronic equipment prevents the negative effects on the environment and human
health resulting from improper scrapping, and also allows the materials from which it is made to be recovered and
recycled, with significant savings in terms of energy and resources. The sorted disposal requirement is indicated by the
crossed waste bin label affixed to the appliance.
www.argoclima.com
Table of contents
Other Argo Air Conditioner manuals

Argo
Argo ADICS10 User manual

Argo
Argo KENNY EVO User manual

Argo
Argo AFSI ECO 120HL User manual

Argo
Argo Ecolight Dual 14000 UE Operating manual

Argo
Argo NEWAGE 12000 UI User manual

Argo
Argo GR9FI140R7I Series User manual

Argo
Argo SDIAS8DC User manual

Argo
Argo ADS22MH User manual

Argo
Argo Ulisse 10-13A User manual

Argo
Argo AE2MI56AH User manual
Popular Air Conditioner manuals by other brands

Panasonic
Panasonic CS-YS9TKV operating instructions

Mitsubishi Electric
Mitsubishi Electric MXZ-2D33VA-E1 Service manual

Haier
Haier HW-18LMA03(T3) Operation manual

Mitsubishi Electric
Mitsubishi Electric MS-D30VC operating instructions

Samsung
Samsung AS U Series User & installation manual

Mitsubishi Electric
Mitsubishi Electric MSZ-GS25VFD installation manual