ARI Eliptix R-30ME User manual

R-30 ME .IOM.ENG01
R-30 ME
Electrically Controlled ON/OFF Valve
3 Way
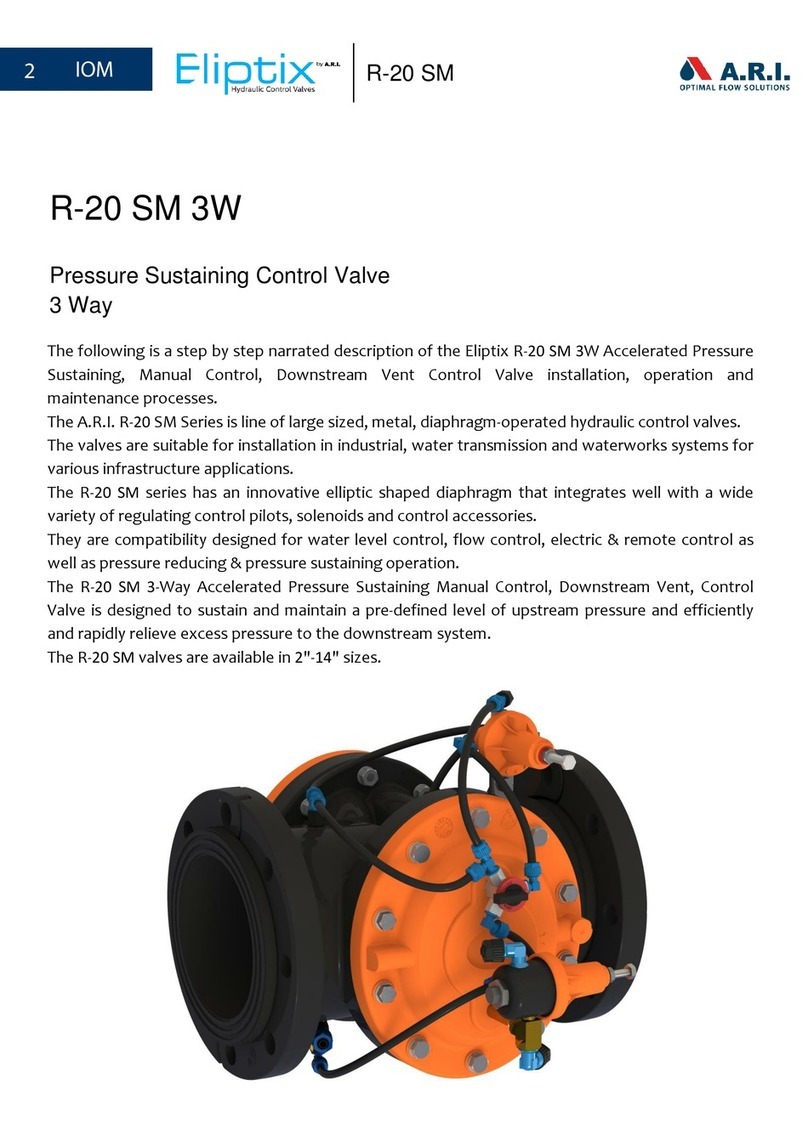
The following is a step by step narrated description of the Eliptix R-30ME 3W Electrically Controlled
ON/OFF Valve installation, operation and maintenance processes.
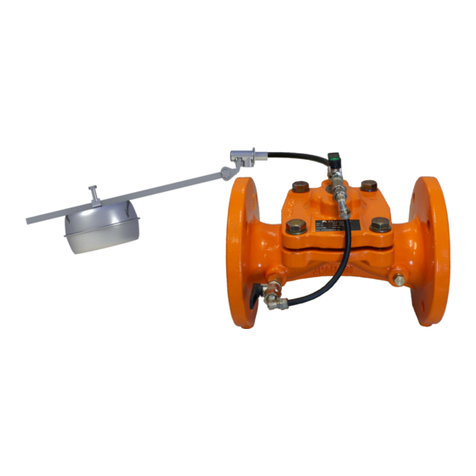
The A.R.I. R-30 Series is a line of metal, diaphragm-operated, hydraulic control valves.
The valves are suitable for installation in agriculture, water transmission and waterworks systems
for irrigation, landscape and infrastructure applications.
The R-30 series has an innovative elliptic shaped diaphragm that integrates well with a wide variety
of regulating control pilots, solenoids and control accessories.
They are compatibility designed for water level control, flow control, electric & remote control as
well as pressure reducing & pressure sustaining operation.

R-30 ME
TABLE OF CONTENTS
1. SAFETY INSTRUCTIONS ........................................................................................................................ 4
General..........................................................................................................................................................................4
Handling........................................................................................................................................................................4
Installation ....................................................................................................................................................................5
Commissioning and Operation ....................................................................................................................................5
Maintenance.................................................................................................................................................................5
Before returning to regular operation ........................................................................................................................6
2. INSTALLATION .......................................................................................................................................7
2.1. Pre installation requisites......................................................................................................................................7
2.2. Installation procedure...........................................................................................................................................8
2.3. Initial Start-up - The Control Valve........................................................................................................................9
2.4. Initial Set-up - The Pressure Reducing Application ............................................................................................10
3. OPERATION INSTRUCTIONS................................................................................................................11
4. MAINTENANCE..................................................................................................................................... 12
4.1. Periodic Inspection..............................................................................................................................................12
4.2. Storing the valve .................................................................................................................................................12
5. TROUBLESHOOTING............................................................................................................................13
6. DISMANTLING AND ASSEMBLING THE VALVE................................................................................... 14
6.1. Preparation..........................................................................................................................................................14
6.2. Disassembling the control loop..........................................................................................................................14
6.3. Disassembling the valve:.....................................................................................................................................15
6.4. Cleaning the Finger Filter: ...................................................................................................................................17
6.5. Reassembling the valve: .....................................................................................................................................17
6.5. Reassembling the Control loop: .........................................................................................................................17
6.6. Recommendation:...............................................................................................................................................17
7. DIMENSIONAL DRAWING....................................................................................................................18
8. SOLENOIDS DATASHEETS ...................................................................................................................... 18
9. A.R.I. LIMITED WARRANTY ................................................................................................................. 21

R-30 ME
Disclaimer
This document is an Installation, Operation and Maintenance (IOM) manual for A.R.I. Flow Control Accessories Ltd. (A.R.I.) products.
The information enclosed herein contains restricted, privileged, proprietary and confidential information, intended only for usage by
authorized A.R.I. technicians. If you are not a qualified technician, you must not take any action in reliance upon this document,
unless otherwise permitted in writing by A.R.I.
A.R.I. has made every effort to ensure that this document is accurate; A.R.I. disclaims liability for any inaccuracies or omissions that
may have occurred.
All the procedures, drawings, pictures and/or any other information provided in this document are presented as general information
only; they can be altered, removed or changed without A.R.I.'s prior written approval. A.R.I. makes no commitment to update or
keep the information in this document current and/or up-to- date, and reserves the right to make improvements, alterations and/or
modifications to this document and/or to the products described in this document, at any time without providing any notice with
respect thereto. Nothing in this Disclaimer derogates in any way whatsoever from the confidential nature of any document enclosed
hereto, including for avoidance of doubt, any mistake or clerical error or other error. None of the procedures provided in this
Disclaimer and/or in any document enclosed hereto may be used in any form or by any means without the prior written consent from
A.R.I. If you received this Disclaimer and/or in any document enclosed hereto in error or by mistake or if this Disclaimer and/or in any
document enclosed hereto is not intended for you, please notify A.R.I. in writing immediately.
A.R.I. assumes that all users understand the risks involved within this Disclaimer and/or in any document enclosed hereto.
A.R.I. accepts/assumes no liability whatsoever, whether caused by: accessing and/or relying upon this Disclaimer and/or in any
document enclosed hereto including without limitation any links, procedures or materials.
A.R.I. shall NOT assume any liability for any costs, direct or indirect, including loss of income, loss of profits and/or goodwill, legal
actions and/or damages of any kind whatsoever including any, damages accidents, equipment damage or bodily injury resulting from
and/or related to any of the following:
product has not been duly installed and thereafter maintained in strict compliance with its designated Maintenance
Instructions and/or any other installation and operation manuals provided by A.R.I. for the product and/or applicable
ordinances and/or codes;
Repairs made in and to the products by personnel not authorized by A.R.I.
Maintenance or repairs using parts or components other than those specified by A.R.I. and in their original condition.
Operating the products in ways other than the operating procedures described in the manuals provided by A.R.I., or resulting
from not following the cautionary remarks and warnings in the product manual.
Improper storage, workplace conditions and environmental conditions which do not conform to those stated in the Product
manual.
Fires, earthquakes, floods, lightning, natural disasters, or acts of God.
A.R.I. does not warrant and hereby disclaims any express or implied warranties that the product will work properly in environments
and applications other than its original design purpose, and makes no warranty and representation, either implied or expressed, with
respect to the quality, performance, merchantability, or fitness for any other particular purpose.
Except as provided herein and to the full extent permitted by law, A.R.I. shall not be responsible and/or liable for direct, special,
incidental or consequential damages or loss resulting from any breach of the above or under any other legal theory.
This document does not replace any certified drawing, procedure or information provided by A.R.I. in reference to a specific
customer, site or project.
All rights reserved.
R-30 ME
1. SAFETY INSTRUCTIONS
General
1.
A.R.I. products always operate as components in a larger system. It is essential for the system designers, installers,
operators and maintenance personnel to comply with all the relevant safety standards.
2.
Installation, operation or maintenance of the product should be done only by qualified workers, technicians and/or
contractors using only good engineering practices, complying with and observing all conventional safety
instructions in order to minimize risk and/or danger and/or hazard to workers, the public or to property in the
vicinity in accordance with all relevant local standards.
3.
Extra safety considerations should be taken with hot and hazardous liquids or in hazardous environments'
applications to avoid bodily/physical harm and damage to public or private property.
4.
All individuals installing operating and/or handling the products including all workers should at all times adhere to
the occupational safety and health (OSH) instructions and wear safety helmets, goggles, gloves, and any other
personal safety equipment required by the local standards and regulations.
5.
Use only appropriate standard tools and equipment operated by qualified operators when installing, operating
and maintaining the product.
6.
Prior to installation, operation, maintenance or any other type of action carried out on the product, read carefully
the safety, installation and operation instructions of the product.
7.
Please note:
-
Pressurized fluid and/or gas may be discharged from the product without prior warning. Make sure that allproducts'
outlet ports arenot directed toward electrical elements (pumps) orpeople.
8.
Always open and close valves slowly and gradually.
9.
Please note that the maximum working pressure indicated at the product’s specifications table doesn't include
pressure changes caused by water hammer and pressure surge effects. Use the product only according to its
designated pressure rate specifications.
10.
Use the product only for its intended use as designed by A.R.I. Any misuse of the product may lead to undesired
damages and may affect your warranty coverage. Please consult with A.R.I. prior to any non-regular use of this
product and make no change or modification to the product without a prior written consent to be provided by
A.R.I. at A.R.I.'s sole discretion.
11.
Please note that A.R.I. shall NOT assume any liability with respect to any damage losses and/or expenses caused to
any person and/or property whatsoever unless the product has been duly installed and thereafter maintained in
strict compliance with its designated maintenance Instructions and/or any other installation and operation
manuals provided by A.R.I. for the product and/or applicable ordinances and/or codes.
Handling
1.
Shipping and handling the product must be done in a safe and stable manner and in accordance with the relevant
standards and regulations.
2.
Storage should be in the original delivery crates or cases. Storage should be off the ground in a clean, dry indoor
area.
3.
For lifting and positioning the product, use only approved lifting equipment operated by authorized employees
and contractors.
4.
Prior to the installation visually verify that the product was not damaged during shipment to the installation site.

R-30 ME
Installation
1.
Install the product according to the detailed Installation Instructions provided with it by A.R.I. and according to the
description given in this manual.
2.
The user should install manual Isolation Valves at the valve's upstream and downstream ports.
3.
In all installation sites, the user should enable good visibility and verify that the work and auxiliary equipment used
are done in accordance with the relevant local authorized standards. Extra safety considerations should be taken
on hazardous environment sites.
4.
Check and re-tighten the bolts connecting the product to the pipeline during commissioning and before operating
the product for the first time.
Commissioning and Operation
1.
Read carefully the operation instructions prior to any attempt to operate the product.
2.
Observe the safety stickers on the product (when exist) and never perform any operation contradicting the
instructions given.
3.
In order to achieve maximum performance and smooth operation of the product, it is crucial to perform the
startup and first operation procedures exactly as described in this manual.
4.
In cases where formal commissioning procedure is required, it should be done by an authorized A.R.I. technician
prior to the first operation of the product.
Maintenance
Before any maintenance or non-regular operation, please read the following:
1.
Servicing the product should be done only by qualified technicians for this type of work.
2.
Make sure that you know the exact type of the system fluid. Act accordingly and comply with all the relevant
standards and regulations set for handling this type of fluid.
3.
Before disconnecting the product from the system and before releasing the residual pressure do NOT:
-
loosen or unscrew the product bolts;
-
removeanyprotectioncover;
-
Open any service port.
4.
Before any maintenance or non-regular operation, shut off the Isolation valves and release the residual pressure:
A.
For control valves with a pressure release outlet, slowly open the pressure release plug or the ball valve and make
sure that all pressure is released.
B.
For control valves without a pressure release outlet, slowly unscrew the flange bolts until all the pressure is
released from the valve.
5.
Make sure the control valve is empty of all liquid prior to commencing maintenance.
6.
Remove the product from the line only after ensuring that internal pressure has been released.
7.
Place warning signs around the work area as required by the local standards and procedures.
8.
Inspect the product’s safety stickers and replace any damaged or faded sticker.
9.
Manual cleaning of the product and/or its components using high water pressure or steam should be performed in
accordance with its specific cleaning instructions, the local standards and regulations and without endangering the
operator or the vicinity.
10.
Manual cleaning of product and/or its components using acid or other chemical agents should be performed in
accordance with the specific cleaning instructions, the relevant safety instructions for using that chemical as given
by its supplier, the local standards and regulations and without endangering the operator or his vicinity.
11.
For products used in potable water systems, if it is required to disinfect the product, do so according to the local
water authority standards and regulations before putting the product into service.

R-30 ME
Before returning to regular operation
1.
Re-assemble any protection covers or protection mechanisms removed during service or maintenance operations.
2.
Make sure that all the tools, ladders, lifting devices, etc. used during the maintenance procedures are taken away
from the product area and stored.
3.
Remove grease and fat material residues in order to avoid slipping.
4.
In order to return the product to regular operation, follow the First Start-up Operation instructions as detailed in
your user manual.

R-30 ME
2. INSTALLATION
2.1. Pre installation requisites
1.
Important: Before performing any work on the valve make sure that all workers on site are familiar with the safety
instructions and the relevant local and general safety instructions and work regulations.
2.
Before installing the valve, flush the pipeline to remove scale, dirt and other particles that might affect the valve
performance.
3.
Carefully remove the valve from the shipping package. Unload all valves carefully to a sturdy and leveled surface
taking care not to drop them.
4.
Valves fitted with hoist rings should only be lifted and conveyed using these hoist rings.
5.
It is recommended that the valve be easily accessible and clearly marked to prevent damage.

R-30 ME
2.2. Installation procedure
1.
Install the valve as indicated by the arrow on the valve bonnet, indicating flow direction [1].
2.
In addition of the control valve it is recommended to install the following valves:
Isolation valves upstream and downstream of the control valve [2] & [2A].
Air valves upstream and downstream of the control valve [5].
3.
Close the 3-way selector [3] to its "CLOSE" position
4.
Turn on the water supply to the valve.
5.
Check for leaks; tighten bolts & fittings, if necessary.
6.
Close the 2isolation valves [2] & [2A].

R-30 ME
2.3. Initial Start-up - The Control Valve
1.
Make sure that the upstream and the downstream isolation valves are closed [2] and [2A].
2.
Gradually open the upstream isolation valve [2].
3.
Check for leaks; tighten bolts & fittings, if necessary.
4.
For Normally Open Valve - Energize the solenoid [4] (use the PLC's or the Controller's HMI screen).
5.
Turn the 3-way selector [3] to its “AUTO” position.
6.
For Normally Open Valve - De-energize the solenoid [4] (use the PLC's or the Controller's HMI screen)
7.
For Normally Close Valve - Energize the solenoid [4] (use the PLC's or the Controller's HMI screen)
8.
Gradually open the downstream isolation valve [2A].

R-30 ME
2.4. Initial Set-up - The ON/OFF Application
1.
The following is a general description of the ON/OFF Application:
This ON/OFF Electrically Operated Valve is an automatic control valve designed to be opened and closed by an
electrical command sent to its solenoid valve by an external controller.
The valve can be controlled either by a Normally Open (N.O.) or Normally Close (N.C.) solenoid.
For N.O. valve when the solenoid is energized water from the valve's upstream port flows into the control
chamber and the valve closes. When the solenoid is de-energized water from the control chamber is released to
the atmosphere and the valve fully opens.
For N.C. valve when the solenoid is energized water from the control chamber is released to the atmosphere and
the valve opens. When the solenoid is de-energized upstream water from the valve's upstream port flows into the
control chamber and the valve closes.
No.
Description
QTY.
1
Main Valve
1
2
Finger filter
1
3
Manual selector, ball valve, 3-Way
1
4
Solenoid valve, 3-Way
1
5
Solenoid manual override lever
1

R-30 ME
3. OPERATION INSTRUCTIONS
1. To manually open the valve, turn the manual 3-way selector [3] to its "OPEN" position.
To manually close the valve, turn the manual 3-way selector [3] to its “CLOSE”
2. To maintain downstream preset pressure, open inlet and outlet ball valves (3), (3A).

R-30 ME
4. MAINTENANCE
Under regular operation A.R.I's valves require minimal maintenance and no lubrication, however in
freezing climates the valve should be dismantled and drained for the winter months.
Make sure the solenoid valve is disconnected from its power supply before attempting to do any
maintenance.
4.1. Periodic Inspection
1.
Every 6months visually inspect the valve's diaphragm for any tears.
2.
Every 12 months inspect the valve's operation and clean the Finger Filter.
3.
Check the downstream pressure; adjust if required.
4.2. Storing the valve
It is not recommended to store the valve or its spare parts for long periods (years); under improper storage conditions
rubber parts can harden, have ozone cracking, grow mold bloom and heat aging.
It is recommended to order new rubber parts when required.

R-30 ME
5. TROUBLESHOOTING
Problem
Cause
Check
Solution
Valve does not open
1. The inlet pressure is
too low
1. Check the inlet
pressure
1. Make sure water supply and/or
pump is on.
2. The 3-Way selector
(3) is set to "close".
2. Check the position of
the 3-way selector (3)
2. Turn the 3-Way selector (3) to
"Auto".
3. Blocked pilot
3. No water is coming
out through the
pilot's #2port.
3. Contact A.R.I.’s field service
Valve does not close
1. Debris on the sealing
seat
1. The valve is constantly
discharging small
amount of water
1. Turn the 3-way selector (3) to
"open" for 5 seconds, and then to
"close".
If the problem continues, turn off
the water supply to the valve.
Remove the bonnet and
diaphragm, remove the foreign
object, and check that the
diaphragm, body and cover are not
damaged.
2. The Diaphragm is
damaged
2. Constant flow
through the solenoid
(4) vent, when valve is
set to open
2. Turn off the water supply to the
valve. Remove the bonnet and
replace the diaphragm.
Valve does not respond
to remote command
1. The Solenoid's
manual override lever
(5) is turned.
1. Solenoid manual
override lever (5)
position
2. 1. Turn the solenoid manual override
lever to its "Auto" position.
2. Controller
malfunction
2. Touch the solenoid
while command is
given; movement
should be felt.
2. See the controller's user manual.
3. Solenoid malfunction
3. Manually opening and
closing the valve
3. Replace the solenoid.

R-30 ME
1
6. DISMANTLING AND ASSEMBLING THE VALVE
6.1. Preparation
1.
Required tools:
Standard hand tools:
14 mm spanner open at one end and ring at the other
16 mm spanner open at one end and ring at the other
19 mm spanner open at one end and ring at the other
20 mm spanner open at one end and ring at the other
24 mm spanner open at one end and ring at the other
2.
Release Pressure - Make sure that the water supply to the valve is switched off, release any residual pressure and
isolate the valve from the pipeline by closing the upstream and the downstream isolation valves.
6.2. Disassembling the control loop
1.
Disconnect the control tube from the solenoid's T connector [A] & [B].
1
1

R-30 ME
6.3. Disassembling the valve:
1.
Using a 24mm spanner, release the 4bolts of the valve's bonnet in a diagonal manner [A] - [D].
2.
Un-screw the bonnet's bolts' [E] & [F] and remove the bonnet from the valve's body [G] & [H].
1
1
1
1
2
2
2
2

R-30 ME
3.
Remove the valve's spring [I] & [J].
4.
Remove the valve's diaphragm [K] & [L].
6.4. Cleaning the Finger Filter:
1.
Disassemble and clean the finger-filter; using a 20mm spanner, release the upstream 2-way manual valve [A], [B].
Then using a 19mm spanner release the finger-filter and clean it [C], [D].
3
3
4
4
1
1
1
1

R-30 ME
6.5. Reassembling the valve:
1.
Make sure that all the valve's components are in good condition, clean and free from sediments.
2.
Check the diaphragm for any wear and tear; if necessary replace it with a new one.
3.
Make sure that the finger-filter is clean.
4.
Reassemble the valve in reverse order of the above described disassembling steps.
5.
While reassembling the valve, make sure that the bonnet is evenly seated and tightened in all directions, parallel to the
valve's body.
6.6. Reassembling the Control loop:
1.
Make sure that all the control loop components are in good condition and clean.
2.
Clean the control tubing entry holes.
3.
Reassemble the control loop in reverse order of the above described disassembling steps.
6.7. Recommendation:
Replacement of the diaphragm and some internal parts is recommended after about three years of
operation, please see chapter 6for instructions:
1.
Remove the cover of the valve.
2.
Clean the valve body from sediments.
3.
Clean the control tubing entry holes.
4.
Install a new Diaphragm and Elastomers.

R-30 ME
7. DIMENSIONAL DRAWING

R-30 ME
8. SOLENOIDS DATASHEETS

R-30 ME
Table of contents
Other ARI Control Unit manuals

ARI
ARI Eliptix W-31 Series User manual

ARI
ARI ELIPTIX R-30 Series Owner's manual

ARI
ARI VB-060 User manual

ARI
ARI S-050 Owner's manual

ARI
ARI 1108 Installation instructions

ARI
ARI PALTRA-V User manual

ARI
ARI Eliptix R-20-SM 3W User manual

ARI
ARI D-060 Installation and operating instructions

ARI
ARI Eliptix R-20 SM Series User manual

ARI
ARI Eliptix R-30-X User manual
Popular Control Unit manuals by other brands

PXM
PXM PX178 user manual

Synventive
Synventive eGate Instruction Manual / Installation Guide

Caleffi solar
Caleffi solar 2523 Series manual

American Valve
American Valve 3700 Ball Valve Installation, Maintenance & Operating Guide

IFM Electronic
IFM Electronic AS-i AC2505 installation instructions

AERMEC
AERMEC VCZ41 installation manual