Arkray PocketChem UA User manual


PU-4010 i
Thank you for purchasing our compact urine analyzer, the PocketChem UA PU-4010.
This manual contains important information on the functions of the PocketChemTM UA
PU-4010.
This manual is issued by ARKRAY, Inc.
Read carefully prior to starting up the unit.
It is recommended to retain this manual for future use.
Intended Purpose
The PocketChem UA PU-4010 is intended for the qualitative and/or semi-
quantitative measurement of several physiological markers in urine: Glucose,
Protein, Bilirubin, pH, Blood, Urobilinogen, Ketones, Nitrite, Leukocytes, Creatinine,
Albumin, Specific Gravity, P/C (Ratio of Protein to Creatinine) and A/C (Ratio of
Albumin to Creatinine).
These measurements are used for screening of kidney disease, liver disease,
diabetes mellitus and urinary tract infection in general screening populations.
This instrument is automated. For in vitro diagnostic use and professional use only.
This instrument is not intended for near-patient testing use.
This product conforms to the EMC Standard IEC61326-2-6:2012.
Class of emission: CISPR 11 Class A
This instrument is an IVD medical instrument.
This product conforms to European Regulation (EU) 2017/746.
This instrument has been tested and found to comply with the limits for a Class A
digital device, pursuant to part 15 of the FCC Rules. These limits are designed to
provide reasonable protection against harmful interference when the instrument is
operated in a commercial environment. This instrument generates, uses and can
radiate radio frequency energy and, if not installed and used in accordance with the
instruction manual, may cause harmful interference to radio communications.
Operation of this instrument in a residential area is likely to cause harmful interference
in which case the user will be required to correct the interference at his own expense.
The electromagnetic environment should be evaluated prior to operation of the
device. Do not use this device in close proximity to sources of strong
electromagnetic radiation, as these may interfere with the proper operation.
1 Premise

PU-4010 ii
Read this manual thoroughly before using the instrument. This manual gives an overview of
the instrument and the proper procedures for operation and maintenance. Also, keep this
manual in an easily accessible place near the instrument.
If you have had or could have had any serious incident related to the device, please report it
directly to the manufacturer or through the authorised representative and to your local
regulatory authority.
For the purchase of reagents, consumables or other optional items, contact your distributor.
3
© 2005 ARKRAY, Inc.
• It is strictly prohibited to copy any part of this manual without the expressed consent of
ARKRAY, Inc.
• The information in this manual is subject to change without notice.
• ARKRAY, Inc. has made every effort to prepare this manual as best as possible. Should you
discover anything strange, incorrect or missing, contact your distributor.
2 Introduction
• BE CAREFUL WHEN HANDLING URINE. This instrument uses urine
as sample. Urine may be contaminated by pathogenic microbes
that can cause infectious diseases. Improper handling of urine may
cause infection to the user or other individuals by pathogenic
microbes.
• This instrument is to be operated by qualified persons only. A
qualified person is one having adequate knowledge of clinical
testing and the disposal of infectious waste. Thoroughly read this
manual before use.
• Never touch the test strip holder or other parts where the sample
may adhere with unprotected hands. During cleaning or
maintenance of these parts, wear protective gloves to prevent
exposure to pathogenic microbes.
• Discard used samples, test strips and protective gloves in
accordance with local regulations for biohazardous waste.
• This instrument may become infectious in the course of use.
Discard the instrument in accordance with local regulations for
biohazardous waste.
Each measurement result includes a patient ID so that the result can
be associated with its personal health information. Measurement
results should be viewed, printed, output or deleted by authorized
persons only and always handled with extreme care by every
operator. The authorized persons mentioned above do not require
any special IT skills or training, but should read the operating
manual before first use for a proper understanding.

PU-4010 iii
The following symbols are used in this manual and labels on this instrument to call your
attention to specific items.
For Your Safety
For Optimal Performance
REFERENCE: Additional explanations that help you make the best use of the instrument and
information on related functions.
3 Symbols and Signages
Follow the instructions given here to prevent exposure to
pathogenic microbes.
Follow the instructions given here to prevent injury and property
damage.
IMPORTANT: Follow the instructions given here to obtain accurate measurement
results.
NOTE: Information useful for preventing damage to the instrument or parts and other
important information you should keep in mind.

PU-4010 iv
Before installation of the instrument, read the instructions in this section and always take
proper safety precautions.
4 Installation Precautions
7 cm
(3 inches)
7 cm
(3 inches)
For the test strip holder to move freely,
leave at least 7 cm (3 inches) of space to
the right and left sides of the instrument.
Remove old batteries. Also, remove
batteries before long periods of non-use.
1 hour
or more
Temperature: 10-30°C
Humidity: 20-80%
If the instrument is subjected to sudden
temperature changes, allow instrument to
adjust to room temperature for 1 hour
before testing.
Use the instrument where temperature and
humidity can be maintained between 10°C
and 30°C and between 20% and 80% RH.
To run the instrument on AC power,
connect the instrument to an AC receptacle
using the AC adapter that came with the
instrument.
If you detect abnormal noise, odors or
smoke, immediately turn off the power,
unplug the AC adapter and contact your
distributor.

PU-4010 v
Install the instrument in a place not
exposed to direct sunlight or wind.
Install the instrument on a level, vibration-
free sturdy platform.
DO NOT install the instrument near places
that store chemicals or near equipment that
generates corrosive gas or electrical noise.
DO NOT disassemble or modify the
instrument. Doing so may cause damage to
the instrument and consequently lead to
personal injury.
Remove the AC adapter when the
instrument is not in use.
Keep the instrument away from magnetic
sources such as magnets and speakers.
Keep the instrument away from liquids.
Penetration inside may cause damage to
the instrument.
DO NOT expose the instrument to physical
shocks or impacts.

PU-4010 vi
1 Premise ..........................................................................................................i
2 Introduction.................................................................................................... ii
3 Symbols and Signages................................................................................. iii
4 Installation Precautions ................................................................................ iv
5 Table of Contents ......................................................................................... vi
Chapter 1 Before Use 1-1
1-1 Outline of the PocketChem UA .......................................................... 1-1
1-1-1 Features.............................................................................................. 1-1
1-1-2 Specifications...................................................................................... 1-3
1-1-3 Measurement Principle ....................................................................... 1-5
1-1-4 Rank Table.......................................................................................... 1-6
1-2 Unpacking............................................................................................ 1-8
1-3 Components ........................................................................................ 1-9
1-3-1 Instrument and Printer......................................................................... 1-9
1-4 Instrument Setup............................................................................... 1-10
1-4-1 For Battery Operation........................................................................ 1-10
1-4-2 For Use with the Printer .................................................................... 1-11
1-4-3 For AC-Power Operation................................................................... 1-12
1-4-4 Loading Printer Paper ....................................................................... 1-13
1-4-5 Changing the Direction of the Test Strip Feeding ............................. 1-15
1-5 Basic Operations............................................................................... 1-16
1-5-1 Display .............................................................................................. 1-16
1-5-2 Operator Panel.................................................................................. 1-17
Chapter 2 Measurement 2-1
2-1 Operation Flow Chart.......................................................................... 2-1
2-2 Cautions in Measurement .................................................................. 2-2
2-2-1 Handling Samples............................................................................... 2-2
2-2-2 Handling Test Strips............................................................................ 2-3
2-3 Start Up ................................................................................................ 2-4
2-3-1 Turning On the Power......................................................................... 2-4
2-3-2 Turning Off the Power......................................................................... 2-4
2-4 Test Conditions Setup ........................................................................ 2-5
2-4-1 Selecting Test Strip Type.................................................................... 2-5
2-4-2 Setting Measurement Number ............................................................ 2-6
2-4-3 Setting Patient ID ................................................................................ 2-7
5 Table of Contents
PU-4010 vii
2-4-4 Preparing Samples.............................................................................. 2-9
2-4-5 Preparing Test Strips .......................................................................... 2-9
2-4-6 Testing Samples ............................................................................... 2-10
2-5 Check Measurement ......................................................................... 2-13
2-6 Examples of Results ......................................................................... 2-15
2-6-1 On the Display................................................................................... 2-15
2-6-2 On Printouts ...................................................................................... 2-16
Chapter 3 Auxiliary Operations 3-1
3-1 Setting the Date ................................................................................... 3-2
3-2 Setting the Time .................................................................................. 3-3
3-3 Reviewing Results .............................................................................. 3-4
3-4 Deleting a Specific Result from Memory .......................................... 3-5
3-5 Clearing All Results from Memory .................................................... 3-6
3-6 Transferring a Specific Result to an External Device...................... 3-7
3-7 Transferring All Results to an External Device ................................ 3-8
3-8 Reprinting a Specific Result .............................................................. 3-9
3-9 Reprinting All Results....................................................................... 3-10
3-10 Customizing the Instrument............................................................. 3-11
Chapter 4 Maintenance 4-1
4-1 Daily Cleaning: Test Strip Holder, Holder Base and Guide Rails ... 4-1
4-2 Cleaning the Reading Unit ................................................................. 4-4
4-3 Exterior Cleaning ................................................................................ 4-5
Chapter 5 Troubleshooting 5-1
5-1 When an Error Occurs ........................................................................ 5-1
Chapter 6 Appendix 6-1
6-1 Addendum ........................................................................................... 6-1
6-2 Performance Characteristics ............................................................. 6-2
6-2-1 Analytical Performance ....................................................................... 6-2
6-2-2 Clinical Performance........................................................................... 6-2

PU-4010 1-1
Chapter 1 Before Use
1-1-1 Features
• Compact, lightweight portable analyzer
The instrument alone weighs 180 g*. With the printer attached, it is a light 360 g*. The
instrument can run on batteries.
*Not including batteries or printer paper.
• Simple operation. Just press the start button.
Measurement is performed by simply pressing the start button and placing a test strip. Test
results can be simultaneously viewed on the display and printed out from the printer.
• Corrective features for obtaining accurate test results
Highly accurate readings can be obtained by eliminating the effects of chromaturia using the
color correction test pad, by compensating measurements for the temperature of the
surrounding environment using a built-in temperature sensor and by correcting specific
gravity based on pH readings.
• Auto detection of test strip type
When using self-identifiable test strips, the instrument can automatically detect the type of
strip during measurement.
• Hassle-free daily maintenance
The only maintenance required on a daily basis is to wash the test strip holder. And the holder
can be easily detached for cleaning without any special tools. The instrument also uses an
LED light source, so there is no need to change lamps.
• Store results for up to 100 samples. Output results to external devices.
Test results for up to 100 samples can be stored in memory. Stored results can be viewed,
printed and sent to an external device using an RS-232C at any time after measurement. As
results are recorded beyond the 100th entry, the new data overwrites the old data.
For more information, contact your distributor.
• Detachable printer
Attaching the printer to the instrument enables test results to be printed after measurement.
1-1 Outline of the PocketChem UA

PU-4010 1-2
• Supports “AUTION Sticks” test strips for versatile urine testing
The instrument uses “AUTION Sticks” test strips that enable visual determination as well as
a maximum of 10 simultaneous tests in a single measurement. You can select the type of test
strip for the measurements you need to do.

PU-4010 1-3
1-1-2 Specifications
Instrument Specifications
Product Compact Urine Analyzer PocketChem UA PU-4010
Configuration Instrument (analyzer) and accessories
Sample Urine
Test strips AUTION Sticks / Uriflet S (9UB)* / AUTION SCREEN
* Except devices with 10V specifications
Measurement items GLU (glucose), PRO (protein), BIL (bilirubin), URO (urobilinogen),
S.G. (specific gravity), BLD (blood), PH (pH), KET (ketones),
NIT (nitrite), LEU (leukocytes), CRE (creatinine) and
ALB (albumin).
Measurement principle Test strip: Dual wavelength reflectance method.
(one wavelength for BLD measurement)
Measurement wavelengths 3 wavelengths LED (565, 635, 760 nm)
Sample supply method Manual dipping
Measurement capacity 50 tests per hour
Test strip reaction time About 60 seconds per test
Measurement types Normal measurement and check measurement
Display Custom LCD that displays information including type of test strip,
measurement number (up to 4 digits), patient ID (up to 13 digits)
and test results.
Operator panel Panel sheet that provides 14 buttons including numeric buttons and
start button.
Memory capacity Test results for 100 samples
Temperature correction Automatically corrected between 10°C to 30°C by internal
temperature sensor
Specific gravity correction Automatically corrected based on pH readings
Chromaturia correction Automatically corrected by color correction test pad
External output Compliant with RS-232C
Operating environment Temperature: 10 to 30ºC; Humidity: 20 to 80% R.H.
(non-condensing)
Measurement environment Temperature: 10 to 30ºC; Humidity: 30 to 60% R.H.
(non-condensing)
*Temperature correction function used
Storage environment Temperature: 1 to 30ºC; Humidity: 20 to 80% R.H.
(non-condensing)
Environment during
transport
Temperature: -10 to 60 ºC; Humidity: 20 to 80% R.H.
(non-condensing)
Sound pressure level Less than 85 dB
Dimensions 124 (W) × 81 (D) × 36 (H) mm
Weight 180 g (without batteries)

PU-4010 1-4
Printer Specifications
Power supply Instrument only: Two AA alkaline batteries or AC adapter
Instrument with printer: AC adapter 7.5 V 3 A
Power consumption 3 W
Site location Indoor use only
Altitude Up to 2000 m/ 6560 feet
Pollution degree 2
Overvoltage category II
Test strip direction Selectable between feeding from “right” or “left” by button operation
Expected life 5 years from first use (installation) of instrument (according to
company data)
The manufacturing date is included in the serial number as shown
below.
• 2nd and 3rd digits of the serial number:
The last 2 digits of the manufacturing year
• 4th and 5th digits of the serial number:
The manufacturing month
Printer Thermal recording printer
Printer paper High color development thermal paper (W58 mm × Ø26 mm)
Dimensions 125 (W) × 133 (D) × 36 (H) mm
Weight 180 g (without printer paper)
Power supply AC adapter 7.5 V 3 A
Power consumption 20 W
Attachment One-touch attachment
Connection Contact
Expected life 5 years from first use (installation) of instrument (according to
company data)

PU-4010 1-5
1-1-3 Measurement Principle
Measurements using double or single wavelength reflection are made, using test strips
designed for the PocketChem UA.
Measuring with Test Strips
Dip a test strip in the sample for 2 seconds and place it on the test strip tray. Reagents in the
test strip react and change color within 70 seconds after dipping and the reflectance is
measured in the photometric section.
In the photometric section, LEDs shine dual-wavelength light upon the test strip and
reflections are received at the detector. Different combinations of light are applied for each
measurement item. Furthermore, photometric measurements carried out in the color tone
correction section adjust for variability in the amount of reflected light and sample coloring.
The reflectance is obtained using the following equation.
R = Tm · Cs / Ts · Cm
R: Reflectance
Tm: Amount of reflected light at the measuring wavelength at the test section (Pad area)
Ts: Amount of reflected light at the reference wavelength at the test section (Pad area)
Cm: Amount of reflected light at the measuring wavelength in the color tone correction
section
Cs: Amount of reflected light at the reference wavelength in the color tone correction
section
The BLD measurement item alone is calculated
using the following equation and single
wavelength measurement.
R = Tm / Cm
The reflectance R is compared with the
calibration curve for the instrument and is output
as the measurement result.
Additionally, in order to eliminate the influence
of ambient temperature fluctuation upon
measurements, temperature corrections are
applied as follows.
Rt = R + A · (T-26) · R2 · (1-R)2
Rt: Reflectance after temperature correction
A: Correction coefficient for the measurement items
T: Internal ambient temperature of the instrument during measurement
• Measurement wavelength of each
measurement item
Measurement
Item
Measurement
wavelength (nm)
Reference
wavelength (nm)
GLU 635 760
PRO 635 760
BIL 565 760
URO 565 760
PH 635 760
S.G. 635 760
BLD 635 ---
KET 565 760
NIT 565 760
LEU 565 760
ALB 565 760
CRE 635 760

PU-4010 1-6
1-1-4 Rank Table
Please see the table below for the unit and qualitative sign of each measurement item. Default
settings are highlighted with . You can change the settings of units and qualitative sign.
• GLU (Glucose)
• PRO (Protein)
• BIL (Bilirubin)
• URO (Urobilinogen)
• PH (pH)
• S.G. (Specific Gravity)
• BLD (Blood)
Qualitative – ± 1+ 2+ 3+ 4+
– ± + ++ +++ ++++
Semiquantitative (mg/dL) 50 100 200 500 1000
Semiquantitative (mmol/L) 2.8 5.6 11 28 56
Qualitative – ± 1+ 2+ 3+ 4+
– ± + ++ +++ ++++
Semiquantitative (mg/dL) 15 30 100 300 1000
Semiquantitative (g/L) 0.15 0.3 1 3 10
Qualitative – 1+ 2+ 3+ 4+
– + ++ +++ ++++
Semiquantitative (mg/dL) 0.5 2 6 OVER
Semiquantitative (µmol/L) 8.5 34 100 OVER
Qualitative NORMAL 1+ 2+ 3+ 4+
NORMAL + ++ +++ ++++
Semiquantitative (mg/dL) 2 4 8 OVER
Semiquantitative (µmol/L) 34 70 140 OVER
Semiquantitative 5.0 5.5 6.0 6.5 7.0 7.5 8.0 8.5 9.0
Semiquantitative <1.005 1.010 1.015 1.020 1.025 >1.030
Qualitative – ± 1+ 2+ 3+
– ± + ++ +++
Semiquantitative (mg/dL) 0.03 0.06 0.2 1
Semiquantitative (mg/L) 0.3 0.6 2 10

PU-4010 1-7
• KET (Ketones)
• NIT (Nitrite)
• LEU (Leukocyte)
• ALB (Albumin)
• CRE (Creatinine)
• A/C (Ratio of Albumin to Creatinine)
• P/C (Ratio of Protein to Creatinine)
*This value can be changed to “<150”. To change the setting, contact your distributor.
Qualitative – ± 1+ 2+ 3+ 4+
– ± + ++ +++ ++++
Semiquantitative (mg/dL) 5 15 40 80 150
Semiquantitative (mmol/L) 0.5 1.5 4 8 15
Qualitative – 1+ 2+
– + ++
Qualitative –
Semiquantitative (Leu/µL) 25 75 250 500
Semiquantitative (mg/L) 10 30 80 150 OVER
Semiquantitative (mg/dL) 10 50 100 200 300 OVER
Semiquantitative (g/L) 0.1 0.5 1.0 2.0 3.0 OVER
Qualitative NORMAL 1+ 2+
NORMAL + ++
Semiquantitative (mg/gCr) <30 100 200 >300 OVER
Qualitative DILUTE NORMAL 1+ 2+
DILUTE NORMAL + ++
Semiquantitative (mg/gCr) <80* 200 400 >500 OVER

PU-4010 1-8
The package should contain the components listed below. Check to see if everything is
included. If anything is missing or damaged, contact your distributor.
*Rating: 125V 7A (A type plug) and 250V 2.5A (C type plug)
Please use the appropriate power cord for your region's power voltage.
1-2 Unpacking
NOTE: Test strips, AA batteries (x2), and urine containers are not included with the
instrument. These items are underlined in the “Prepare:” sections on the later pages.
Instrument PocketChem printer
Power cord *
AC adapter
Operating manual Check strips Printer paper Stylus pen
(Stored in the printer)
After-sales parts and consumables
(For more information, contact your distributor.)
Power cord *AC adapter
Test strip holder Stylus pen
RS-232C cable
Check strips
Printer paper
(W58 mmר26 mm, 5 rolls)

PU-4010 1-9
1-3-1 Instrument and Printer
Components Descriptions
1 Paper slot Printouts of results are ejected from here.
2 Display Results and error codes are viewed here. See “1-5-1. Display” on
page 1-18.
3 Reading unit cover Open this cover to perform testing. Perform test with cover closed if
an error occurs due to strong room light.
4 Printer cover Covers paper roll. Open cover to load printer paper.
5 FEED button Feeds printer paper forward.
6 Operator panel Fourteen operating buttons are provided here. See “1-5-2. Operator
Panel” on page 1-19 for a description of each button.
7 DATA output
terminal
Remove the rubber cap and attach the optional RS-232C cable
here for connection to an external device.
8 Test strip holder Holds test strip in place during testing.
9 Battery cover Open this cover to load two AA batteries.
10 Printer terminal The instrument is electrically connected to the printer via this
terminal.
11 Power input terminal
(instrument)
For AC operation without the printer, connect the plug of the AC
adapter here.
12 Power input terminal
(printer)
For AC operation with the printer attached, connect the plug of the
AC adapter here.
13 Stylus pen Use this pen to press the buttons on the operator panel if it is
difficult for you to do with your fingers.
14 Serial number Serial number of the instrument.
1-3 Components
Instrument with the printer attached
Reading unit
cover opened
13
14
Bottom of the
instrument with
the printer attached
Bottom of the
instrument
1
2
3
4
5
6
7
8
9
10 11
12

PU-4010 1-10
First, set up the instrument. Start with any of the following sections according to your needs.
• For battery operation, see this page.
• For use with the printer, go to page 1-12.
• For AC-power operation without the printer, go to page 1-13.
1-4-1 For Battery Operation
Place two AA alkaline batteries in the instrument. Battery operation is useful when carrying
the instrument with you. Batteries have a use life of about 500 sample tests.
While lightly pressing the battery cover on
the bottom, slide the cover in the direction
of the triangle mark ( ) to remove.
Place two AA alkaline batteries in the
correct direction in the battery
compartment (see the figure).
Slide the battery cover back in position
until it snaps into place.
This completes the setup. Go to “2-1. Operation Flow Chart” on page 2-1.
1-4 Instrument Setup
NOTE: Use alkaline batteries only, not manganese batteries. The printer cannot run on
batteries.
Battery cover
1
2
NOTE: Remove the old batteries before
placing new ones.
3
NOTE: Dispose of old batteries according to your local environmental
regulations.

PU-4010 1-11
About the Battery Icon
1-4-2 For Use with the Printer
Use the following procedure to attach (or detach) the printer to (or from) the instrument.
How to Attach
Place instrument onto the printer at an
angle as shown in the figure.
Press the top of the instrument to snap it
into place.
Make sure the top of the instrument and
printer are horizontally level with one
another and that both units are firmly
locked to each other.
Go to “1-4-3. For AC-Power Operation” on the next page.
Battery power is sufficient or AC power in use.
The battery level has lowered, but testing is still possible.
Immediately replace the batteries with new ones. Measurement may stop in
progress because of insufficient battery power.
A blinking icon indicates the instrument cannot perform testing anymore because
of insufficient battery power. Replace the batteries immediately.
The printer must be directly attached to the instrument in order to
use it. Therefore, the printer can also be contaminated by
pathogenic microbes. Take care when attaching, detaching and
storing the printer to prevent exposure to pathogenic microbes.
NOTE: Turn off the power and disconnect the AC adapter from the AC receptacle before
attaching or detaching the printer. Failure to do so may cause damage to the instrument
and printer. The printer may print nonsense if it is accidentally attached or detached while
connected to the AC receptacle. However, this does not mean that there is something
wrong with the printer.
NOTE: The printer runs on AC power only, not on batteries. Once the printer is attached to
the instrument, connect the instrument through the printer to an AC receptacle.
1
2
1
2
3

PU-4010 1-12
How to Detach
Place the instrument on a level surface
(such as a desk).
While pressing on the casing above the
display at a point aligned with the center of
the display (a), lift up the reading unit
cover from the bottom to detach the
instrument from the printer (b).
1-4-3 For AC-Power Operation
The instrument can run on AC power, instead of batteries. Be sure to use the AC adapter that
came with the instrument for AC-power operation.
Insert the flat connector of the power cord into the AC adapter.
• Use the power cord and AC adapter that came with the instrument.
Insert the plug of the AC adapter into the power input terminal as shown below.
(b)
(a)
1
2
NOTE: The printer runs on AC power only, not batteries. The printer must be correctly
attached to the instrument before connecting the AC adapter to the printer.
1
2
Rear of the instrument Rear of the printer
For use with the instrument only For use with the printer and instrument
Plug the AC adapter to terminal on the
rear of the instrument.
Plug the AC adapter to terminal on the
rear of the printer.
This manual suits for next models
1
Table of contents
Other Arkray Measuring Instrument manuals

Arkray
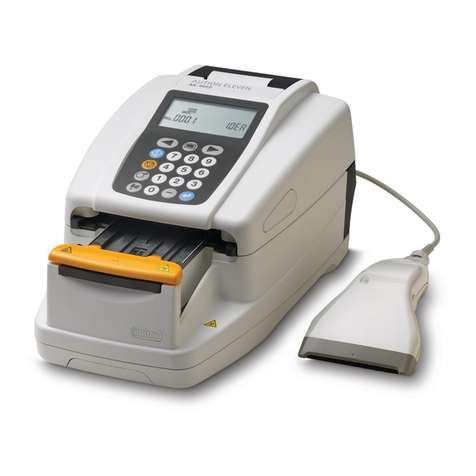
Arkray AUTION ELEVEN AE-4022 User manual

Arkray
Arkray AUTION MAX AX-4030 User manual

Arkray
Arkray Lab 004 User manual

Arkray
Arkray AUTION ELEVEN AE-4022 User manual

Arkray
Arkray Lab 004 User manual

Arkray
Arkray SPOTCHEM EZ SP-4430 User manual

Arkray
Arkray SPOTCHEM EZ Mounting instructions

Arkray
Arkray SPOTCHEM EL User manual