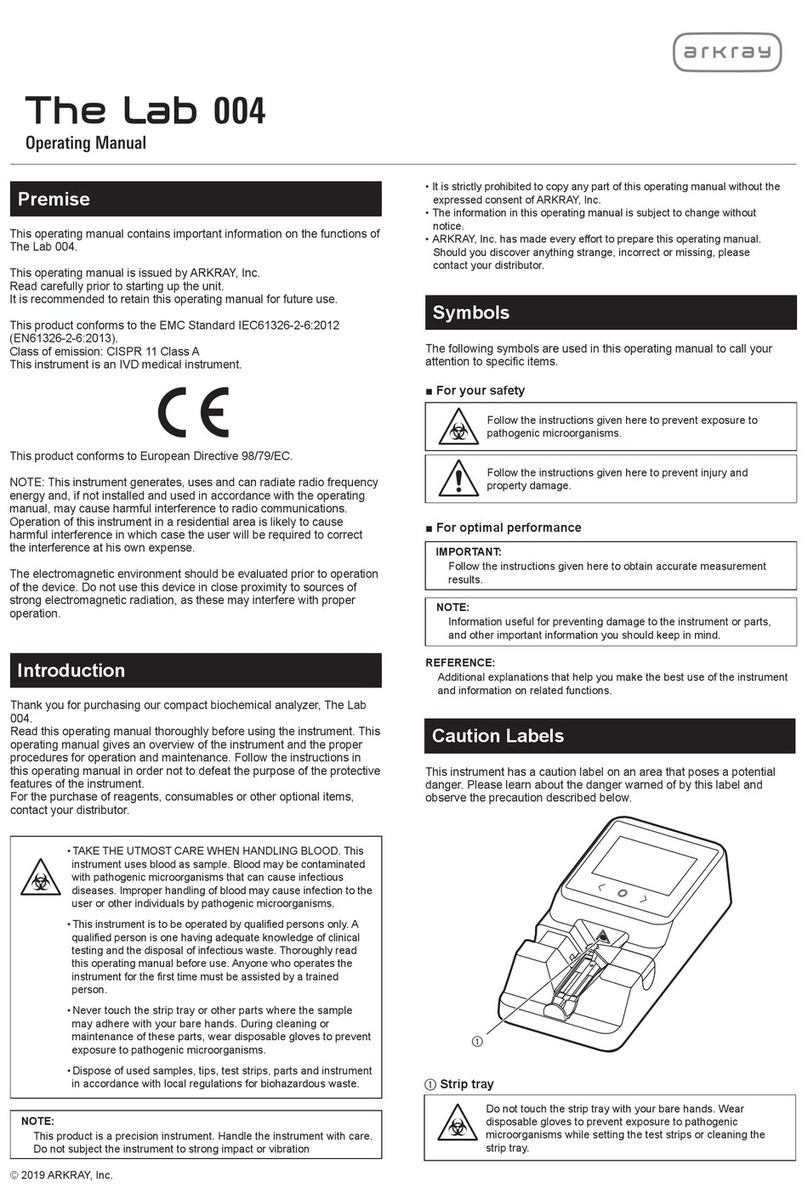
Arkray Lab 004 User manual

© 2019 ARKRAY, Inc.
The following symbols are used in this operating manual to call your
attention to specific items.
■ For your safety
Follow the instructions given here to prevent exposure to
pathogenic microorganisms.
Follow the instructions given here to prevent injury and property
damage.
■ For optimal performance
IMPORTANT:
Follow the instructions given here to obtain accurate measurement
results.
NOTE:
Information useful for preventing damage to the instrument or parts,
and other important information you should keep in mind.
REFERENCE:
Additional explanations that help you make the best use of the instrument
and information on related functions.
Thank you for purchasing our compact biochemical analyzer, The Lab
004.
This operating manual contains important information on the functions of
The Lab 004.
This operating manual is issued by ARKRAY, Inc.
Read carefully prior to starting up the unit.
It is recommended to retain this operating manual for future use.
The Lab 004 (DB-3910) instrument is intended for the quantitative and
automated measurement of several physiological markers in serum and
plasma. This instrument is intended for use with The Lab 004 reagent
strips. For information about the analyte, the function and the target
disease/condition as well as the intended use population, please refer to
the reagent instructions for use. For in vitro diagnostic use and
professional use only.
This product conforms to the EMC Standard IEC61326-2-6:2012
(EN61326-2-6:2013).
Class of emission: CISPR 11 Class A
This instrument is an IVD medical instrument.
This product conforms to Regulation (EU) 2017/746.
This instrument generates, uses and can radiate radio frequency energy
and, if not installed and used in accordance with the operating manual,
may cause harmful interference to radio communications. Operation of
this instrument in a residential area is likely to cause harmful
interference in which case the user will be required to correct the
interference at his own expense.
The electromagnetic environment should be evaluated prior to operation
of the device. Do not use this device in close proximity to sources of
strong electromagnetic radiation, as these may interfere with proper
operation.
Premise
Symbols
Read this operating manual thoroughly before using the instrument. This
operating manual gives an overview of the instrument and the proper
procedures for operation and maintenance. Follow the instructions in
this operating manual in order not to defeat the purpose of the protective
features of the instrument.
If you have had or could have had any serious incident related to the
device, please report it directly to the manufacturer or through the
authorised representative and to your local regulatory authority.
For the purchase of reagents, consumables or other optional items,
contact your distributor.
Introduction
• TAKE THE UTMOST CARE WHEN HANDLING BLOOD. This
instrument uses blood as sample. Blood may be contaminated
with pathogenic microorganisms that can cause infectious
diseases. Improper handling of blood may cause infection to
the user or other individuals by pathogenic microorganisms.
• This product is intended for professional use only and hence
the system is to be operated by qualified persons only. A
qualified person is one having adequate knowledge of clinical
testing and the disposal of infectious waste. Thoroughly read
this operating manual before use.
• Never touch the strip tray or other parts where the sample may
adhere with your bare hands. During cleaning or maintenance
of these parts, wear disposable gloves to prevent exposure to
pathogenic microorganisms.
• Dispose of used samples, tips, reagent strips, parts and
instrument in accordance with local regulations for
biohazardous waste.
For a description of the performance characteristics, reference
intervals, warnings and limitations specific to the reagent, refer
to the reagent product insert.
NOTE:
This product is a precision instrument. Handle the instrument with care.
Do not subject the instrument to strong impact or vibration
• It is strictly prohibited to copy any part of this operating manual without the
expressed consent of ARKRAY, Inc.
• The information in this operating manual is subject to change without notice.
• ARKRAY, Inc. has made every effort to prepare this operating manual.
Should you discover anything strange, incorrect or missing, please contact
your distributor.
84-08673

1.1.1 Features
■ Compact size enables installation in almost any location
This compact instrument is close to A5 in size, and weighs less than 1 kg for
easy carrying. Water supply and drainage equipment is not needed, so the
instrument can be easily installed in any location and used for immediate
testing during physical examinations and in clinics. This instrument can be
used to measure multiple biochemical items that are useful for monitoring
internal disease and other conditions, such as creatinine.
■ Easy calibration by IC-CHIP
Calibration can be performed without the need for a calibrator using the
IC-CHIP provided with each reagent strip. When opening a reagent, simply
read the IC-CHIP into the instrument. This enables automatic calibration, even
for differences between lots.
■ Identification of reagent type by barcode
When measurement is started the type of reagent loaded is automatically
identified. Multiple reagent types can be measured without the need for
additional operation.
1.1 Overview
Chapter 1 Before Use
Name
Configuration
Required sample volume
Number of measurement
samples
Startup time
Operation buttons
External output
Dimensions
Altitude
Pollution degree
Measurement
environment
Storage
environment
Environment during
transport
The Lab 004
Instrument, accessories
Measurement objects Plasma or serum
Supported reagent strips The Lab 004 reagent strips
Measurement items
Measurement ranges
Listed in package insert of reagent
Measurement principle
Listed in package insert of reagent
Dual-wavelength transmitted light measurement
Number of reagent strips
measurable at once
1
Measurement time Listed in package insert of reagent
Approximately 4 μL
Sample consumption Listed in package insert of reagent
1 sample
Approximately 10 minutes
(in environments 25°C and below)
Memory capacity 50 measurements
Display Segment LCD
Flat keypad
Micro USB type B
110 (W) × 225 (D) × 54 (H) mm
Weight Approximately 1 kg
Power requirements 100 - 240 V AC, 50/60 Hz (with AC adapter)
Location of use For indoor use only
Up to 2000 m
2
Power consumption
AC adapter
Maximum 33 VA
5 V DC
Sound pressure level Less than 80 dB
Temperature: 10 - 35°C
Humidity: 20 - 80% RH (No condensation)
Temperature: 1 - 35°C
Humidity: 20 - 80% RH (No condensation)
Temperature: -10 - 60°C
Humidity: 20 - 80% RH (No condensation)
Over voltage category
Expected life
*1: The manufacturing date is included in the serial number as shown below.
• 2nd and 3rd digits of the serial number: The last 2 digits of the
manufacturing year
• 4th and 5th digits of the serial number: The manufacturing month
II
5 years (According to company data)*1
Temporary over voltage Short-term: 1440 V
Long-term: 490 V
1.1.2 Specifications
Caution Labels
This instrument has a caution label on an area that poses a potential
danger. Please learn about the danger warned of by this label and
observe the precaution described below.
aStrip tray
Do not touch the strip tray with your bare hands. Wear
disposable gloves to prevent exposure to pathogenic
microorganisms while setting the reagent strips or cleaning the
strip tray.
a

1.4.1 Precautions for Instrument Installation
Before installation of the instrument, read the following notes and always take
proper safety precautions.
• Determine a location for the instrument and install it in that location. Hold
the bottom of the instrument with both hands when carrying it.
• Install the instrument on a surface with sufficient clearance around the
instrument. Do not block the vents on the back of the instrument.
• Install the instrument where temperature and humidity can be maintained in
the following ranges:
Temperature: 10 - 35°C
Humidity: 20 - 80%
Installation in an environment outside these ranges may cause inaccurate
measurement results.
• Install the instrument on a level, sturdy, vibration-free platform. Operation of
the instrument in an unstable place may cause trouble with or malfunction of
the instrument resulting in personal injury. Do not install the instrument
where it may fall off or topple over.
• Do not use the instrument in a location where dust has accumulated. There
is a risk of current leakage.
• Do not install the instrument near:
- Places that store chemicals
- Equipment that generates corrosive gas or electrical noise or
- Equipment that may bring the instrument out of the operating
temperature and humidity ranges.
These factors may cause trouble with or malfunction of the instrument,
resulting in personal injury, or may otherwise cause inaccurate measurement
results.
• Install the instrument in a place where condensation, intense light such as
direct sunlight or wind can be avoided. These factors may cause inaccurate
measurement results, as well as deformation of or damage to the instrument.
• Apply the correct voltage (100 - 240 V AC ± 10%) and frequency (50/60 Hz)
to the instrument. Improper voltage and frequency may result in fire or
damage to the instrument and consequently lead to personal injury.
• Use the power cord and AC adapter that come with the instrument.
• Connect the AC adapter directly to a single outlet. The power supply for the
instrument is 33 VA. If you use a power strip, make sure it is grounded. Also,
check if the power capacity for the power strip is within the specified range.
• It is possible to use a commercially available mobile battery in place of the
provided AC adapter. Use a battery with a rating of 5 V and 2.0 - 2.4 A.
• Do not disassemble the instrument. Do not modify the instrument.
Disassembly and modification of the instrument may result in exposure to
pathogenic microorganisms or cause fire or damage to the instrument and
consequently lead to personal injury.
1.4.2 Precautions for Instrument Relocation
Before relocating the instrument, read the following notes and always take
proper safety precautions.
• Hold down the button to turn off the power, and then disconnect the
power cable from the instrument.
• Remove the reagent strip from inside the instrument. There is a risk of
pathogenic microbes scattering inside the instrument if the instrument is
moved with a reagent strip still inside.
• If the instrument will be moved a long distance, secure the strip tray and
pipette guide with tape to ensure that neither opens or comes off.
• There is a risk of instrument failure if moved without securing the strip tray
and pipette guide. Place the instrument in the dedicated box together with
the accessories to move.
• Do not subject the instrument to shock or vibration when moving. There is a
risk of instrument failure.
• Before moving the instrument, read “1.4.1 Precautions for Instrument
Installation”.
1.4 Installation
1.2 Unpacking
1.3 Part Names and Functions
1.3.1 Front View
1.3.2 Rear
1.1.3 Measurement Principle
■ Reagent strip measurement
The instrument is equipped with multiple light source LEDs of varying
wavelength. The light is dispersed on the light path and transmitted to the
photometric unit. The dispensed sample fills the photometric cell and reacts
with the reagents in the cell, changing the absorbance and turbidity. The light
source LED shines on the cell, and the light that transmits through is read by
a photodiode (receiver). The amount of transmitted light that is read is
converted to a concentration.
Unpack the box and make sure you have all items listed in this section. If
anything is missing or damaged, contact your distributor.
•Instrument
• Power cord
• AC adapter
• Operating manual
•Pipette
NOTE:
The following items are not included with the instrument:
mobile battery, disposable gloves, tips, reagent strips, control, cotton
swabs, distilled water, soft cloth, alcohol.
The alcohol shown in this manual means 70% isopropyl alcohol.
cPipette guide
attachment rails
aDisplay
bOperation
buttons
dStrip tray
eIC-CHIP
insertion port
fUSB port gPower input
terminal

Chapter 2 Measurement
2.1.1 Precautions for Operation
2.1.2 Precautions for Samples
2.1.3 Precautions for Reagent Strips
REFERENCE:
Purchase of reagent strips:
Reagent strips are not included with the instrument. Purchase reagent
strips before using the instrument. For information on purchasing reagent
strips, contact your distributor.
IMPORTANT:
●Use our company's specified dedicated reagent strips for
measurement.
●Carefully read the package insert that comes with the reagent strips
and use reagent strips before their expiration date.
●Before measurement, remove reagent strips from refrigeration and
allow them to acclimate to room temperature. Measurements using
reagent strips immediately after removing them from refrigeration may
lead to inaccurate measurement results.
●Do not use reagent strips if:
• they are expired, or
• t
he reaction cell is discolored (even before the expiration date).
Using reagent strips of this sort may cause inaccurate measurement
results.
●Take out one reagent strip from its foil pack just before measurement,
and set it on the strip tray. If reagent strip are left out in the open for an
extended period of time, they will absorb water from the air or gather
dust, which may cause inaccurate measurement results.
●Do not touch reagent strip reaction cell with your bare hands. Skin oil
on the reaction cell may result in inaccurate measurement result. Wear
disposable gloves when handling the reagent strips.
●Do not reuse reagent strips. Used reagent strips may cause inaccurate
measurement results.
• This instrument is to be operated by qualified persons only. A
qualified person is one having adequate knowledge of clinical
testing and the disposal of infectious waste. Thoroughly read
this operating manual before use.
• Never touch the strip tray or other parts where sample may
adhere with your bare hands. During cleaning or maintenance
of these parts, wear disposable gloves to prevent exposure to
pathogenic microorganisms.
• Dispose of used samples, tips, reagent strips, parts and
instrument in accordance with local regulations for
biohazardous waste.
• TAKE THE UTMOST CARE WHEN HANDLING BLOOD. This
instrument uses blood as sample. Blood may be contaminated
with pathogenic microorganisms that can cause infectious
diseases. Improper handling of blood may cause infection to
the user or other individuals by pathogenic microorganisms.
• Dispose of used samples in accordance with local regulations
for biohazardous waste.
• When using a sample that has been stored in a refrigerator or
freezer, allow the sample to acclimate to the ambient
temperature (10 - 35°C) prior to measurement.
• Do not store a sample in direct sunlight or a location directly
exposed to air flow from an air conditioner or other source.
• Ensure the instrument is in a proper environment before turning
on the power (see “1.4.1. Precautions for Instrument
Installation”).
• Do not place containers or bottles that contain liquid on the
instrument. Sample or other liquid that gets inside the
instrument may cause trouble.
• Never fail to clean or wash the specified components of the
instrument to maintain measurement quality (see “Chapter 4.
Maintenance”).
• If you detect abnormal odors or noise, immediately unplug the
AC adapter from the outlet. Continuous operation under these
conditions may result in fire or damage to the instrument and
consequently lead to personal injury.
• In case of instrument trouble, contact your distributor for
repairs. Unauthorized servicing or modification may damage
the instrument and consequently lead to personal injury.
2.1 Measurement Precautions
1.4.3 Installing the Instrument
aRemove the fixing tape from the two positions.
bConnect the power cord and AC adapter.
cInsert the power cord into the power input terminal socket on the
instrument.
dPlug the AC adapter into an outlet.
eAttach the pipette guide to the pipette guide attachment rails on the
instrument.
NOTE:
The pipette guide can be attached to either the left side or the right side
of the instrument.
1.4.4 Turning on the Power
aMake sure there is no reagent strip on the strip tray, then insert the strip tray
into the instrument.
bPress and hold for 1 second.
Warm-up will complete in about 10 minutes.
cEnsure that the standby screen is displayed.
If the standby screen does not appear and "RE-ADJ?" is displayed, press
the [ ] button. Automatic adjustment of the optical unit will be performed.
You can also press the [>] button to go to the standby screen without
performing automatic adjustment. In this case, measurement cannot be
performed.
1.4.5 Turning off the Power
aEnsure that the standby screen is displayed.
bPress and hold for 3 seconds.
• The power will turn off.
Pipette guide

IMPORTANT:
Insert the end of the reagent strip into the opening at the end of the groove
on the strip tray and then fit the entire strip into the groove. If the reagent
strip is warped and/or fails to fit into the groove, it may become jammed
inside the instrument or cause inaccurate measurement results.
2.2.3 Measuring the Sample
aFirmly and securely attach the pipette tip to the end of the pipette.
bAspirate the sample with the pipette.
cPress the [ ] button, and then dispense a drop of sample on the reagent
strip. Dispense the sample onto the sample dispense area of the reagent
strip.
Press the pipette button all the way in slowly.
NOTE:
Dispense sample carefully to avoid air bubbles.
dAfter you dispense a drop of sample, immediately press the [ ] button and
insert the strip tray into the instrument. (Insert the strip tray within 10
seconds of pressing the [ ] button in step d.)
eAfter the measurement time elapses, the measurement results appear on
the display.
fCheck the measurement results.
gWithdraw the strip tray and take out the used reagent strip.
Check the reagent strip, and check that the sample has flowed in correctly
and that there are no large air bubbles or foreign matter in the reaction cell.
After checking, discard the reagent strip.
hThe standby screen will appear 5 seconds after withdrawing the strip tray.
2.2.4 Measuring the control
aOn the standby screen, press the [>] button. The control icon will appear.
bDispense a drop of the control onto the reagent strip, and then perform the
same procedure as when measuring a sample.
cThe measurement results are saved as a control measurement.
2.2.5 Understanding results
After measurement, the following information appears on the screen.
Upper line:The item name and measurement number appear alternately.
If you press the button, the display changes to the date and
time.
If there is a status indication (*), the status appears instead of the
measurement number.
Lower line:The measurement result value and units appear. However, if the
status is UNDER or OVER, the measurement range appears.
(*) Status
UNDER Under the lower limit of the measurement range.
Check the conditions. It is possible that drop dispensing failed and
the sample did not enter the reaction cell, or a large bubble
formed.
OVER Over the upper limit of the measurement range.
2.1.4 Precautions for Tips
IMPORTANT:
●Do not touch tip end with your bare hands. Contamination on the tip end
may lead to inaccurate measurement results.
●Do not reuse the tip. The tip has a water repellent finish that may come
off when washed and consequently lead to inaccurate measurement
results.
2.2 Sample Measurement
Measure samples using a reagent strip. Be sure to start with the
procedure in “2.2.1 Before Using Reagent Strips from a New Box”.
• Wear disposable gloves to prevent exposure to pathogenic
microorganisms.
• If sample adheres to the instrument, wipe it off with a cotton
swab or gauze dampened with distilled water. Make sure that
no dirt is left, and then ensure that the surface is disinfected
with alcohol. Leaving the instrument with the sample adhered to
it may cause infection to the user or other individuals by
pathogenic microorganisms.
• Dispose of used samples, tips, reagent strips and disposable
gloves in accordance with local regulations for biohazardous
waste.
• Be careful not to spill samples.
• Alcohol is very flammable. Keep it away from flames or
electrical sparks. Handle with caution. Adequately ventilate the
room during use.
2.2.1 Before Using Reagent Strips from a New Box
Load the reagent information from the IC-CHIP that is included with the
reagent. You only need to perform this step once when you start using a
reagent strip from a new box. Before using a reagent strip from a newly
opened box, be sure to load IC-CHIP on the box.
aInsert the IC-CHIP into the IC-CHIP insertion port on the back of the
instrument.
bPress and hold the [>] button for 1 second.
"READING" appears. After the reagent information is read in from the
IC-CHIP, you will return to the standby screen. If reading of the reagent
information fails, "NO IC" will appear. Press [>] to exit the display, and then
reinsert the IC-CHIP and repeat reading.
■ When the IC-CHIP of the Urea/BUN reagent is to be read for
the first time
aInsert the IC-CHIP. If you press and hold the [>] button for 1 second, the
IC-CHIP can be read.
bWhen the IC-CHIP of the Urea/BUN reagent is to be read for the first time,
an item selection screen (“Urea” or “BUN”) appears.
cSwitch to the item you want to use with the [>] button, and then set the item
name with the [ ] button.
d“READING” is displayed. The reading process is completed when the
display returns to “STANDBY”.
*The item selection screen does not appear when the IC-CHIP is read for the
second time and thereafter.
The set item name is selected automatically, and the processing shifts to d
after the operation described in ais performed.
To change the item name, refer to “When the item name of the Urea/BUN
reagent is to be changed”.
■When the item name of the Urea/BUN reagent is to be
changed
aInsert the IC-CHIP. If you press and hold the [>] button for 1 second,
“READING” is displayed.
bIf you press the [<] button while “READING” is being displayed, the item
selection screen (“Urea” or “BUN”) appears.
cSwitch to the item you want to use with the [>] button, and then set the
item with the [ ] button.
d“READING” is displayed. The reading process is completed when the
display returns to “STANDBY”.
2.2.2 Setting the Reagent Strip
aTear open the foil pack at the notch.
bTake a reagent strip out without touching the reaction cell.
cSet the reagent strip in the groove of the strip tray with the reaction cell
facing upward.
OK NG
Dispensing area
Dispensing area
Reaction cell
Base film

Chapter 4 Maintenance
• Wear disposable gloves to prevent exposure to pathogenic
microorganisms when performing maintenance tasks marked
with a biohazard icon.
• Dispose of used consumables and cleaning tools in accordance
with local regulations for biohazardous waste.
This section lists the parts that require maintenance and the standard
frequency to perform maintenance tasks.
Referring to the below, clean or replace the parts at recommended
intervals.
1 Clean the strip tray <At the end of the day>
When measurement for the day is complete, be sure to clean the strip tray.
Prepare: cotton swabs, distilled water, soft cloth, alcohol and disposable
gloves
For disinfection of the device, lightly wipe the disinfecting area with a cotton
swab or gauze moistened with a disinfectant, then wipe the disinfectant with a
cotton swab or gauze moistened with water, and then wipe it dry. Use 70%
isopropanol as the disinfectant. Contact your distributor if you use another
disinfectant.
2 Cleaning the photometric window (when “E-130” occurs)
Prepare: cleaning pad, distilled water, alcohol and disposable gloves
Clean the photometric window as explained in the leaflet for the cleaning pad.
Alcohol is used for some maintenance of the instrument.
Alcohol is very flammable. Keep it away from flames or
electrical sparks. Handle it with caution. Adequately ventilate
the room during use.
Chapter 3 Auxiliary Operations
On the menu screen, you can perform instrument settings.
■ To access the menu
On the standby screen, hold down [<] for 2 seconds.
■ Options on the menu
2.2.6 Checking the measurement result history
aOn the standby screen, press [<].
The current date and time screen appears.
bPress [>].
The most recent test results appear.
Pressing [>] again displays the measurement results prior to the one
currently displayed.
OVER* Over the upper limit of the measurement range, and the prozone
effect or a reaction abnormality may have occurred.
HIGH The value is higher than the reference value. (only when a
reference value is set)
LOW The value is lower than the reference value. (only when a
reference value is set)
The following shows an example of how the date and time are set.
aOn the standby screen, press and hold [<] for 3 seconds to display the
MENU screen.
"1-0-0" will appear in the sub-screen with the "1" (digit) blinking.
bPress the [ ] button.
The "1" will stop blinking and the middle "0" digit will change to "1" and
start blinking.
cPress the [>] button once.
The middle digit will change to “2”.
dPress the [ ] button.
The MENU No. will be finalized as "1-2" and the screen will transition to
the time setting screen.
eSet the tens digit and the ones digit for the hour, and then set the tens digit
and the ones digit for the minute, in that order.
* Repeat the same steps as above to select and set the values of the other
MENU items.
■ Basic operations in the MENU screen
Change the MENU No. and set values.
[<] button: Moves the position of the selected digit (the digit that is blinking)
back one space.
[ ] button: Finalizes the value that is being set (the value that is blinking),
and move the position of the selected digit forward one space.
[>] button: Increases the value of the blinking digit by one. When the upper
limit of the setting range is reached, the value returns to the
beginning value.
(Example: When the setting range is 0 to 9
0 1 2 • • • 8 9 0)
■ Selecting a MENU item
Enter a MENU No. indicated in the above table to set that item or execute
that function.
● MENU1
Option Description
1. Date Sets the date.
2. Time Sets the time.
3. Date format Sets the date format.
Selectable items: [YMD][MDY][DMY]
4. Sound volume Sets the beeper volume.
Selectable items: 0 to 3
● MENU2
Option Description
MENU No.
1 - 1
1 - 2
1 - 3
1 - 4
2 - ITEMx
2 - ITEMx
2 - ITEMx
2 - ITEMx
2 - ITEMx
2 - ITEMx
3 - 1
3 - 2 - 1
3 - 2 - 2
3 - 2 - 3
3 - 2 - 4
MENU No.
MENU No.
ITEM1 to
ITEM16
Reference value ON/OFF Sets the reference value function to
[ON] or [OFF].
2 - ITEMx
Unit
Sets the unit.
Selectable items: [ ][mmol/L][μmol/L]
[mg/dL][g/dL][U/L]
High reference value Sets the High reference value.
Low reference value Sets the Low reference value.
Reagent in IC-CHIP
Check parameter
reference value
Parameter of reagent in IC-CHIP
User coefficient A
User coefficient B
● MENU3
Option Description
1. Check measurement Performs check measurement.
Checks light intensity of optical
unit LED
Execute this when “E-130” appears.
Sets the threshold for scanning reagent
strip barcodes
2. Optical
unit 1. Check light intensity
2. Light absorbance
blank adjustment
3. Light intensity gain
adjustment
4. Barcode threshold
setting

Remedy
No. Cause
5.2.2 Causes and Remedies
Remedy
No. Cause
Chapter 5 Troubleshooting
When a problem occurs in the instrument, an error code will be displayed as
shown below.
If an error code is displayed, refer to the table below to take appropriate
action. If this does not solve the problem and you were using a mobile
battery, connect the AC adapter and check operation. If you were using the
AC adapter from the beginning or if the problem still occurs after connecting
the AC adapter, contact your distributor.
NOTE:
If action taken to address an error or trouble may impact performance,
perform a control measurement as necessary.
5.1 If a Warning Occurs
5.1.1 From Warning Occurrence to Remedy
The instrument notifies you of a warning by:
• Emitting short beeps.
• Displaying a warning code and message.
If a warning occurs, take the necessary actions to remove the cause (see
“5.1.2. Causes and Remedies”). If the warning persists, turn off the power
and contact your distributor.
5.1.2 Causes and Remedies
5.2 If an Error Occurs
5.2.1 From Error Occurrence to Remedy
The instrument notifies you of an error by:
• Emitting short beeps.
• Displaying an error code and message.
If an error occurs, take the necessary actions to remove the cause (see
“5.2.2. Causes and Remedies”). If the error persists, turn off the power and
contact your distributor.
Remedy
No. Cause
5.3 If Trouble Occurs
5.3.1 From Trouble Occurrence to Remedy
The instrument alerts you of a trouble by:
• Emitting short beeps.
• Displaying a trouble code.
If same as above occurs, take the necessary actions to remove the cause
(see “5.3.2. Causes and Remedies”). If the trouble persists, turn off the power
and contact your distributor.
5.3.2 Causes and Remedies
A problem occurred in
communication with an
external device.
Connect the external device with the
communication cable correctly.
E-102
The date and time
settings are incorrect.
Set the date and time correctly.
E-103
The photometric window
is dirty.
Clean the photometric window.E-122
The ambient temperature
of the instrument is less
than 10°C or over 35°C.
Adjust ambient temperature so as to
create a suitable environment for
measurement (10 - 35°C).
E-123
The reagent strip has
expired.
Use a new reagent strip and repeat
measurement.
E-124
The tray was withdrawn
during measurement.
Press the button to clear the error,
and repeat measurement.
E-126
The measurement count
limit of the inserted
IC-CHIP has been
exceeded.
Insert the IC-CHIP inside of the box
of the reagent strip to be measured
into the port on the back of the
instrument, and repeat measure-
ment.
E-128
Unable to read the
reagent strip barcode.
Press the button to clear the error,
and repeat measurement.
E-129
The photometric window
is dirty.
Press the button to clear the error,
and use a cleaning pad to clean the
photometric window. The cleaning
method is indicated in the leaflet that
is included with the cleaning pad.
E-130
The measurement unit’s
light intensity is abnormal.
Adjust the light intensity gain.
E-131
A different IC-CHIP is
inserted.
Press the button to clear the error,
insert the IC-CHIP inside of the box of
the reagent strip to be measured into
the dedicated port on the back of the
instrument, and repeat measurement.
E-132
IC-CHIP is not inserted. Insert the IC-CHIP inside of the box
of the reagent strip to be measured
into the IC-CHIP insertion port.
NO IC
QC measurement has not
been performed, or the
expiration date of the QC
measurement has
passed.
Perform QC measurement.
PCS
The strip tray is not
inserted.
Insert the strip tray. (The warning will
be automatically cleared.)
TRAY
OUT
The strip tray is still
inserted.
Remove the strip tray. (The warning
will be automatically cleared.)
TRAY IN
The strip tray was not
inserted within 10
seconds of pressing the
button.
Press the button and repeat
measurement from the beginning.
A reagent strip is still in
the strip tray.
Withdraw the strip tray, discard the
reagent strip, and insert the strip tray
again.
T OVER
RGNT
IN
A malfunction occurred
with the optical unit.
Turn off the power and contact your
distributor.
T-201
A malfunction occurred
with the internal
temperature control.
Adjust ambient temperature so as to
create a suitable environment for
measurement (10 - 35°C).
T-221
An internal malfunction
occurred.
Turn off the power and contact your
distributor.
T-222
A malfunction occurred
with the optical unit.
Clean the transmission photometric
holes or photometric window.
If a used reagent strip is still in the
strip tray, remove it.
T-223
An internal malfunction
occurred.
Turn off the power and contact your
distributor.
T-999

ARKRAY Factory, Inc.
If you need to obtain technical assistance,
please contact ARKRAY Europe, B.V.
TEL: +31-20-545-24-50
FAX: +31-20-545-24-59
ARKRAY Europe, B.V.
1480 Koji, Konan-cho, Koka-shi
Shiga 520-3306, JAPAN
https://www.arkray.co.jp/script/mailform/
afc-contact_eng
Prof. J.H. Bavincklaan 2
1183 AT Amstelveen, THE NETHERLANDS
Symbol Description Symbol Description
5.4 Glossary of Symbols
Semi-Automatic dry
biochemical analyzer
RATING
MADE IN
PHILIPPINES
Environment During
Transport
Semi-Auto-
matic dry
biochemical
analyzer
RATING
MADE IN
PHILIPPINES
Storage Environment
Storage
Environment
Environment
During
Transport
This product conforms
to Regulation (EU)
2017/746
In vitro diagnostic
medical device
Manufacturer
Date of manufacture
Authorised
Representative in the
European Community
Importer
84-08673 Issued: 2022.01.12
Batch code
Consult instructions for
use
Catalogue number
Model name
Description
Serial number
Gross weight
Quantity
Temperature limitation
Humidity limitation
Table of contents
Other Arkray Measuring Instrument manuals

Arkray
Arkray PocketChem UA User manual

Arkray
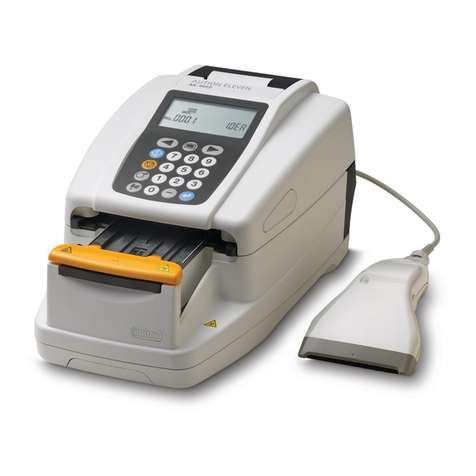
Arkray AUTION ELEVEN AE-4022 User manual

Arkray
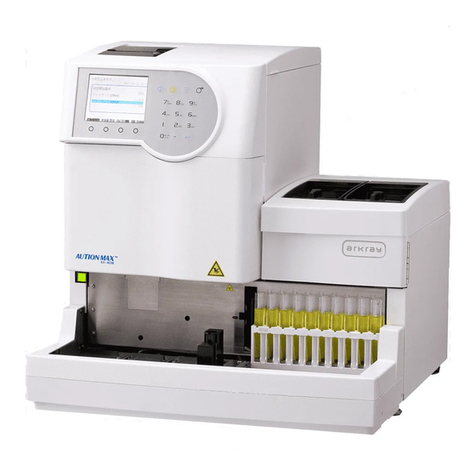
Arkray AUTION MAX AX-4030 User manual

Arkray
Arkray AUTION ELEVEN AE-4022 User manual

Arkray
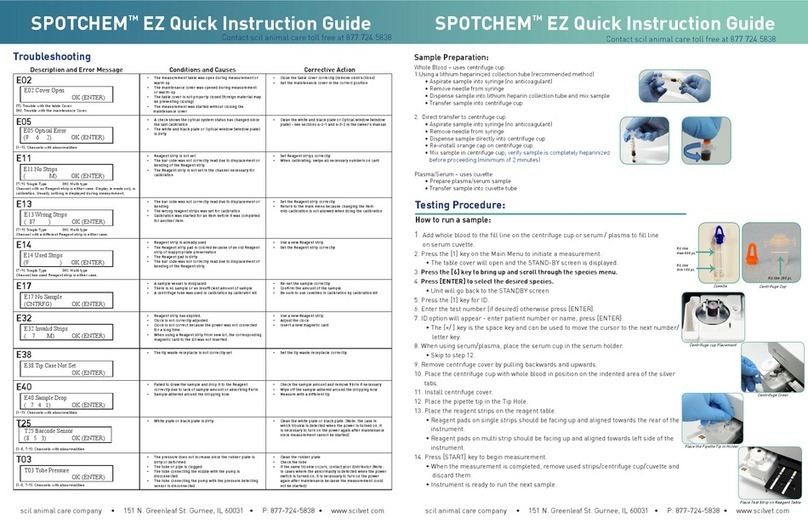
Arkray SPOTCHEM EZ Mounting instructions

Arkray
Arkray SPOTCHEM EZ SP-4430 User manual

Arkray
Arkray SPOTCHEM EL User manual

Arkray
Arkray Lab 004 User manual