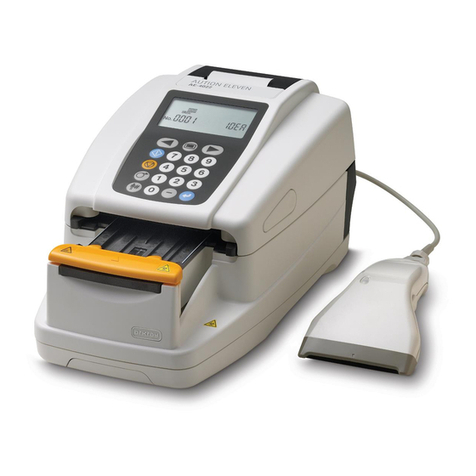
Arkray SPOTCHEM EZ SP-4430 User manual

b
SPOTCHEM EZ
SP-4430
Operating Manual

E01 ● SP-4430
Premise
This manual contains important information on the functions of the
SPOTCHEM EZ SP-4430.
supplied by : ARKRAY, Inc.
This manual is issued by: ARKRAY, Inc.
Read carefully prior to starting up the unit.
It is recommended to retain this manual for future use.
This product conforms to Directive 89/336/EEC, as amended by
Directive 92/31/EEC, and to Directive 73/23/EEC. 89/392/EEC.

bSP-4430 ● 02
Introduction
The SP-4430 is an automated biochemical analyzer using a dry
chemistry system.
This manual contains outlines, instructions for the operation,
maintenance and troubleshooting for the SPOTCHEM SP-4430.
Before operating the SP-4430, read this manual carefully.
It is recommended to retain this manual for future use.
Always be careful when handling blood samples or waste reagent
strips. Incorrect or imprecise procedures may result in exposure
to pathogenic microbes.
This analyzer must only be operated by those trained in proper
procedures for clinical testing and handling of hazardous waste.
Anyone who operates the analyzer for the first time must be
assisted by a trained person.
Never touch the Reagent Table, Centrifuge-equipped Multi Rack,
or other places where sample residue may collect with bare
hands. When performing maintenance, always wear protective
gloves to prevent exposure to pathogenic microbes.
Separate used samples, tips and protective gloves from general
waste and discard them according to local regulation on
biohazardous waste.
●
●
●
●
WARNING
・All rights reserved. Reproduction of this manual is forbidden.
・The contents of this manual are subject to change without further notice.
・Although we take all possible measures to ensure the contents of this manual, please notify your distributor
・when you have questions, or find errors or omission.

b
Caution Marks
Pay careful attention to these caution marks in this Operating Manual.
■Regarding accident resulting in injury or death.
To prevent infection of yourself or others from
pathogenic microbes, follow the instructions given
herein.
WARNING
CAUTION
To prevent injuries to yourself or others, or material
damages, follow the instructions described.
■Regarding damage and performance of products.
Failure to follow the instructions may lead to incorrect
results.
To prevent damage to the unit and assist you in making
best use of the capabilities of the analyzer, additional
explanations and notes are provided herein.
IMPORTANT
NOTE
▲
Reference information on operation, additional
explanations and related functions are provided herein.
03 ● SP-4430

CSP-4430 ● 04
1
2
3
1Biohazard cautions.
Wear protective gloves to prevent exposure to pathogenic microbes.
Caution Stickers are adhered to the SP-4430 to
prevent accidents as below.
The descriptions are given on the following pages.
2The centrifuge turn round at high speed.
Keep your hands off when mesurement is in process.
Biohazard cautions.
Wear protective gloves to prevent exposure to pathogenic microbes.
3Biohazard cautions.
Wear protective gloves to prevent exposure to pathogenic microbes.
CautionLabels

C05 ● SP-4430
Chapter 1
INTRODUCTION
Chapter 2
MEASUREMENT
Automated biochemical analyzer, SP-4430
Contents
Premise……………………………………………………………………………………
Introduction……………………………………………………………………………
Caution Marks………………………………………………………………………
Caution Labels……………………………………………………………………
Contents………………………………………………………………………………
1-1 Outline……………………………………………………………………………
1-1-1 Features…………………………………………………………………
1-1-2 Measurement principles…………………………………………
1-1-3 Specifications………………………………………………………
1-2 Shipping Carton…………………………………………………………
1-2-1 Analyzer…………………………………………………………………
1-2-2 Accessories……………………………………………………………
1-3 Parts Description and Function……………………………
1-3-1 Front of the analyzer………………………………………………
1-3-2 Operator panel………………………………………………………
1-3-3 Rear of the analyzer………………………………………………
1-4 Setting up the Analyzer…………………………………………
1-4-1 Cautions…………………………………………………………………
1-4-2 Setting up the analyzer…………………………………………
1-4-3 First operation after setting up………………………………
1-4-4 Notes at transportation…………………………………………
2-1 Outline of Measurement…………………………………………
2-1-1 SPOTCHEMⅡReagent Strips…………………………………
2-1-2 Normal measurement……………………………………………
2-1-3 Calibration……………………………………………………………
2-2 Cautions………………………………………………………………………
2-2-1 Cautions…………………………………………………………………
2-2-2 Handling samples…………………………………………………
2-2-3 Handling Reagent Strips………………………………………
2-2-4 Handling magnetic cards………………………………………
2-2-5 Handling tips…………………………………………………………
2-2-6 Handling centrifuges……………………………………………
2-3 Preparation for Measurement………………………………
2-3-1 Preparation……………………………………………………………
2-3-2 Startup…………………………………………………………………
2-3-3 Checks before measurement………………………………
2-3-4 Preparation of samples…………………………………………
2-4 Measurement……………………………………………………………
2-4-1 Normal measurement……………………………………………
01
02
03
04
05
1-02
1-02
1-03
1-04
1-05
1-05
1-06
1-07
1-07
1-08
1-09
1-10
1-10
1-12
1-13
1-15
2-02
2-02
2-03
2-04
2-06
2-06
2-07
2-07
2-08
2-08
2-09
2-10
2-10
2-11
2-12
2-13
2-18
2-18
C
Chapter 3
SUB MENU
Chapter 4
MAINTENANCE
Chapter 5
TROUBLESHOOTING
Chapter 6
APPENDIX
2-5 Calibration……………………………………………………………………
2-5-1 Overview of calibration…………………………………………
2-5-2 Calibration by magnetic card…………………………………
2-5-3 Calibration by calibrator kit…………………………………
2-6 Interpreting measurement results………………………
2-6-1 Printing normal measurement results……………………
2-6-2 Printing calibration results……………………………………
3-1 Overview of SUB MENU…………………………………………
3-1-1 Composition of SUB MENU…………………………………
3-2 Measurement Results Menu…………………………………
3-2-1 Print measurement results……………………………………
3-2-2 Transmit measurement results……………………………
3-2-3 Delete measurement results…………………………………
3-3 Parameter Menu………………………………………………………
3-3-1 Print parameters……………………………………………………
3-3-2 Enter parameters……………………………………………………
3-3-3 Initialize parameters………………………………………………
3-3-4 Enter sample type…………………………………………………
3-3-5 Copy standard range setting…………………………………
3-4 Maintenance………………………………………………………………
3-5 Mode Menu…………………………………………………………………
3-6 Built-in Clock Adjustment……………………………………
4-1 Outline of Maintenance…………………………………………
4-1-1 Frequency of Maintenance……………………………………
4-2 Daily Maintenance……………………………………………………
4-2-1 Cleaning the Reagent Table…………………………………
4-2-2
Cleaning the Tip Waste Case and Protective Cover
…
4-3 Periodic Maintenance………………………………………………
4-3-1 Replacement of Thermal Printer Paper…………………
4-3-2 Cleaning the Optical Window…………………………………
4-3-3 Cleaning the Nozzle………………………………………………
4-3-4 Replacement of Nozzle…………………………………………
5-1 Error Messages…………………………………………………………
5-2 Trouble Messages……………………………………………………
5-3 After sales service……………………………………………………
6-1 Transmission Specifications…………………………………
6-1-1 Protocol…………………………………………………………………
6-1-2 Format……………………………………………………………………
6-1-3 Format for measurement results (format 1)……………
6-1-4 Format for measurement results (format 2)…………
2-28
2-28
2-29
2-31
2-39
2-39
2-42
3-02
3-02
3-04
3-04
3-06
3-08
3-10
3-10
3-13
3-17
3-19
3-21
3-23
3-24
3-25
4-02
4-02
4-03
4-03
4-06
4-08
4-08
4-10
4-13
4-16
5-02
5-07
5-11
6-02
6-02
6-03
6-04
6-08
SP-4430 ● 06

C07 ● SP-4430

b

C
The SP-4430 is an automated biochemical analyzer using a dry
chemistry system. This chapter contains the information on the
functions and measurement principles of the SP-4430.
Chapter 1
INTRODUCTION
1-1 Outline
1-1-1 Features
1-1-2 Measurement principles
1-1-3 Specifications
1-2 Shipping Carton
1-2-1 Analyzer
1-2-2 Accessories
1-3 Parts Description and Function
1-3-1 Front of the analyzer
1-3-2 Operator panel
1-3-3 Rear of the analyzer
1-4 Setting up the Analyzer
1-4-1 Cautions
1-4-2 Setting up the analyzer
1-4-3 First operation after setting up
1-4-4 Notes at transportation
SP-4430 ● 1-01

e
1-1 Outline Chapter 1 INTRODUCTION
■Compact and lightweight
design
■Energy-saving design
■Automatic Sampling
■Built-in centrifuge for
1 sample
■Simple calibration using
magnetic cards
■Sample Control by Bar
code
■Online Network through
two-way Transmission
1-1-1 Features
The footprint of the SP-4430 is as small as that of a
notebook computer. It weighs only 5 kg and can be
easily carried by one person. The small unit contains
various components such as a display, printer, 1-
sample centrifuge and automatic tip disposal
mechanism. No water supply or drainage system is
required, therefore it is suitable for examinations in
schools or bedside in hospitals. Power consumption
is greatly reduced.
Power consumption per 1 hour is approximately 50 W
on average (AC 100V, 60Hz when continuous
measurements are conducted).
The analyzer automatically absorbs samples set on the
Centrifuge-equipped Multi Rack and drops them on
reagent strips. Manual operation is not necessary, so
that the sampling amount becomes constant and
stable measurement results can be obtained.
The analyzer has a built-in centrifuge for 1 sample. By
placing the whole blood sample in the centrifuge tube
and setting it on the Centrifuge-equipped Multi Rack,
the operation, centrifugation→suction→sampling is
conducted automatically. This saves centrifugation of
whole blood samples before measurement.
Calibration using magnetic cards(Reagent Card are
provided with the Reagent Strips)is possible, without
using the SPOTCHEM Calibrator Kit. By inserting
magnetic cards into the magnetic card reader,
differences between reagent strip lot number and daily
deviations are automatically calibrated.
Optional Hand-held Bar Code Reader is available. By
reading the bar code of each sample, the bar code is
automatically allocated as patient ID.
With the optional Data Management Software and
external devices, remote control of measurement
results and remote update of parameter settings are
possible.
1-02 ● SP-4430

b
The light emitted from LED becomes monochromatic light of a certain wavelength after
passing through an optical fiber (Five different types of optical filters are provided, and the
optimum wavelength is selected for each test item). Monochromatic light is separated and
transmitted to the photometry section of each channel by ten optical fibers.
In each photometry section, the monochromatic light transmitted by the optical fibers is
irradiated on the reagent fields, which has a color reaction after sampling. Its reflected light
is read with 2 photodiodes, and the system calculates measurement results by end-point
assay (EPA) or reaction-rate assay (RRA).
SP-4430 ● 1-03
1-1 SP-4430の概要 Chapter 1 INTRODUCTION
1-1-2 Measurement principles
channel 1
channel 2
channel 3
channel 4
channel 5
channel 6
channel 7
channel 8
channel 9
Photometry section
Reference
Optical filters
(5 types)
Optical
Fiber
Monochromatic light of
a certain wavelength
Light source
LED
Reagent field
Photodiode
Optical fiber

C1-04 ● SP-4430
1-1 SP-4430の概要 Chapter 1 INTRODUCTION
1-1-3 Specifications
Sample
Measurement item
Measurement wavelength
Measurement principle
Measurement Range
Reagent Strip
Processing speed
Minimum sample volume
Sample consumption
Sample container
Simultaneous measurement
Reagent reaction temperature
Light source
Calibration method
Data storage volume
Display
Built-in Printer
External Output
Transmission Method
Transmission Rate
Measurement conditions
Power supply
Power input
Dimensions
Weight
Serum, Plasma, Whole blood (Only Hb)
General biochemical measurement items, 22 items
5 wavelengths (405, 550, 575, 610 and 820 nm)
Optical measurement of reflection intensity of
reagent color reaction
Set for sach measurement item
SPOTCHEMⅡReagent Strip
63 samples per hour
6 ×the number of measurement items + 38μL:
serum, plasma
4 〜6μL(per 1 measurement item): serum, plasma
Whole blood: exclusive whole blood sample tube
(Orange cap)
Centrifuge tube
Serum, plasma: exclusive serum sample tube
(Blue cap)
3 Single Reagent Strips or 1 Multi Reagent Strip
Maximum of 9 test items of continuous
measurement using Single Reagent Strips and a
Multi Reagent Strip is available.
37 ℃
LED and Interference filter
Calibration by magnetic card (Reagent Card)
Calibration by Calibrator Kit
100 tests
20 digits×2 lines LCD
36-character thermal printer (58 mm width)
RS-232C interface
Single or Two-way Transmission
300, 600, 1200, 2400, 4800, 9600bps
Temperature: 10〜30℃
Humidity: 20〜80 % (Non-condensing)
AC100〜120V, 220〜240V
50/60Hz(AC adapter method)
Max. 100VA
338 mm(W)×203 mm(D)×167 mm(H)
Approximately 5.4 kg

dSP-4430 ● 1-05
1-2 Shipping Carton Chapter 1 INTRODUCTION
1-2-1 Analyzer
Open the package and confirm that all items are included.
4・Accessory case
5・Operating
manual 6・Warranty card with case,
Delivery label
1・Analyzer (S-4430)
3・AC adapter
2・Power cord
Description
SP-4430
This book
Warranty card with case, Delivery label
NO.
1
2
3
4
5
6
Item
Analyzer
Power cord
AC adapter
Accessory case
Operating manual
Warranty card
Qty.
1
1
1
1
1
1set

d1-06 ● SP-4430
1-2 梱包品の確認 Chapter 1 INTRODUCTION
1-2-2 Accessories
5・Wrench set for nozzle replacement 6・Centrifuge tube
8・Protective cover
7・Tip waste case
2・Cleaning wire
1・Tip
4・Nozzle set3・Cleaner set
9・Thermal printer paper
Description
10 tips
Nozzle cleaning
Brush, Cotton swab
Nozzle with O-ring
2 Wrench, Adapter
10 pieces
2 pieces
2 pieces
width 58 mm
NO.
1
2
3
4
5
6
7
8
9
Item
Tip
Cleaning wire
Cleaner set
Nozzle set (EZ)
Wrench set for nozzle replacement
Centrifuge tube
Tip waste case
Protective cover
Thermal printer papaer
Qty.
1 Set
1 Set
1 Set
1 Set
1 Set
1 Set
1 Set
1 Set
1 Set
Open the package and confirm that all items are included.

eSP-4430 ● 1-07
Chapter 1 INTRODUCTION
11・Magnetic card reader
10・Display
9・Operator panel
7・Black & white plates
1・Reagent table
5・Tip hole
4・Centrifuge
8・Table cover
12・Built-in printer
13・Maintenance cover
3・Port
6・Tip waste case
14・Protective cover
2・Centrifuge-equipped Multi Rack
1-3 Parts Description and Function
1-3-1 Front of the analyzer
Function
For setting the Reagent Strip. The temperature is kept at 37℃for the
reaction conditions of Reagent.
For setting the samples and tips. The centrifuge for 1 sample is built in.
For setting the samples.
For setting the whole blood samples that have not been centrifuged.
For setting tips.
The container for used tips automatically discarded after sampling.
Filled with 5 measurements.
The standard reflection plates used for measurement of reflectivity.
Prevents entering the external light.
Slide forward the Reagent Table and Centrifuge-equipped Multi Rack to
open.
For starting or stopping measurement and entering IDs.
Displays information such as operating state of the unit and error messages.
For inserting magnetic cards: Reagent Card and Calibration Cards
.
Thermal-type printer. Prints out measurement results and setting conditions.
Protects the Nozzle Driving Units. Also prevents the operator from contacting
the nozzle during measurement. There are top and side covers.
Prevents the operator from contacting the Centrifuge Tube.
Also protects spilling of samples.
NO.
1
2
3
4
5
6
7
8
9
10
11
12
13
14
Item
Reagent table
Centrifuge-equipped Multi Rack
Port
Centrifuge
Tip hole
Tip waste case
Black & white plates
Table cover
Operator panel
Display
Magnetic card reader
Built-in printer
Maintenance cover
Protective cover

C1-08 ● SP-4430
1-3 各部の名称とはたらき Chapter 1 INTRODUCTION
1-3-2 Operator panel
Function
Starts measurement. SelectYesfrom the Yes/No option.
Stops measurement. SelectNofrom the Yes/No option.
Cancels entry.
Feeds the built-in printer with paper while pressed.
Switches the page on each menu display.
Selects the menu number. Enter numerical values and ID.
Selects item, move cursor , switch the page on the display,
and enter minus sign and decimal point.
Determines the entry.
Check message to proceed to the operation.
Item
START
STOP
FEED
MENU
0~9 (ten key)
-/.(hyphen/period)
ENTER

CSP-4430 ● 1-09
1-1 SP-4430の概要 Chapter 1 INTRODUCTION
1-3-3 Rear of the analyzer
1・Power switch 3・Cooling Fan 5・B.C.R. 7・Paper holder
2・Power input terminal 4・COM. 6・CONT.
Function
For turning on and off the power supply to the analyzer.
For the supplied AC adapter.
For Ventilating heated air in the unit to prevent overheating.
For the cable of the optional external device.
Jack for the bar-code reader (option).
For adjusting screen contrast. Turning clockwise to make
the screen darker, counterclockwise makes it brighter.
For setting thermal printer paper.
Item
Power switch
Power input terminal
Cooling Fan
COM.
B.C.R.
CONT.
Paper holder
NO.
1
2
3
4
5
6
7

C1-10 ● SP-4430
1-4 Setting up the Analyzer Chapter 1 INTRODUCTION
1-4-1 Cautions
Before setting up the
analyzer, read the
following notes and
always take proper
safety precautions.
CAUTION
10cm or more
Allow a space of 10 cm or more between
the rear of the analyzer and the wall.
Failure to do so may cause overheating.
Excessive load on the cable connection
may cause fire or incorrect measurement
results.
●
AC100-120V
AC220-240V
50 / 60Hz
Operate the analyzer with power of the
correct voltage and frequency.
Otherwise fire or damage may result.
●
Do NOT unnecessarily disassemble or
modify the analyzer. Such actions may
invite danger of exposure to pathogenic
microbes, and cause fire or damage.
●Place the analyzer on a stable and level
surface free of vibration. Failure to do so
may damage the analyzer, correct
measurement results may not be obtained,
and injury may result. Do NOT place the
analyzer where there is a risk of falling.
●
To avoid electric shock and/or fire, use
the attached power cord to connect with
a power outlet. For details, contact your
distributer.
●Connect the power plug directly to an
outlet, not via an extension cord or
power tap. The power supply for the
analyzer is 100 VA. Before turning on the
power switch, make sure that the total
input of devices connected to a
receptacle of the same circuit doesn’t
exceed 1500 VA (100V, 15A).
●

CSP-4430 ● 1-11
1-1 SP-4430の概要 Chapter 1 INTRODUCTION
Before setting up the
analyzer, read the
following notes and
always take proper
safety precautions.
CAUTION
Do NOT set up the analyzer where
chemicals are stored nearby, or where
corrosive gases or electrical noise are
generated. They may damage the analyzer,
and malfunctions and/or injury may occur.
Correct measurement results may not be
obtained.
●Avoid exposing the analyzer to direct
sunlight, condensation and wind.
Otherwise, correct measurement results
may not be obtained, and may cause
deformation or malfunction of the
analyzer.
●
To connect the analyzer to external
devices, be sure to use proper cables to
avoid electric shock and/or fire. For
details, contact your distributor.
●
temperature
10 〜30℃humidity
20 〜80%
Place the analyzer in a room at
temperatures between 10℃and 30℃
with humidity between 20% and 80%.
Otherwise, correct measurement results
may not be obtained.
●
Make sure that the room is well ventilated when a large
amount of carbon dioxide is generated (when gas
stoves, oil heaters and instantaneous water heaters are
used in the room). This is because the pH of the
Reagent Strips, which use an alkaline reaction reagent,
decreases under the influence of carbon dioxide and
correct measurement data may not be obtained.
●Be careful not to be put hands under the
analyzer.
●
Table of contents
Other Arkray Measuring Instrument manuals

Arkray
Arkray AUTION ELEVEN AE-4022 User manual

Arkray
Arkray SPOTCHEM EL User manual

Arkray
Arkray SPOTCHEM EZ Mounting instructions

Arkray
Arkray PocketChem UA User manual

Arkray
Arkray AUTION MAX AX-4030 User manual

Arkray
Arkray Lab 004 User manual

Arkray
Arkray Lab 004 User manual

Arkray
Arkray AUTION ELEVEN AE-4022 User manual